
Small workshops demand smart choices, and you’ll find that vertical storage beats floor clutter every time. Mount pegboards and magnetic strips on walls to keep your most-used tools visible and within arm’s reach. Use French cleats for heavy shelves, label everything clearly, and organize by tool type rather than random storage spots. Rolling carts with locking drawers add mobility when you need it. These strategies transform cramped spaces into efficient workstations where you’ll actually find what you’re looking for, discover even more specific solutions that’ll revolutionize your setup.
Why Vertical Storage Beats Floor Space in Small Workshops
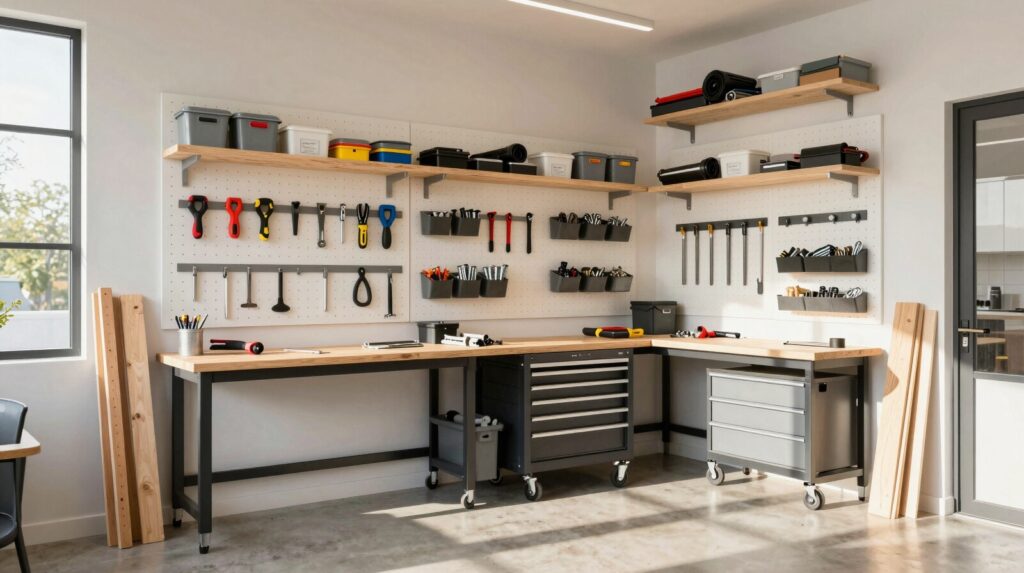
When you’re working in a cramped workshop, every square foot of floor space matters, so going vertical becomes your secret weapon. Wall-mounted shelves and pegboards transform blank walls into storage goldmines, keeping your tools visible and within arm’s reach. You’ll discover that vertical space benefits your workflow immediately, no more shuffling through cluttered drawers or tripping over equipment.
Label Everything First: The Key to Staying Organized
Before you organize a single tool, grab your label maker or a permanent marker, because here’s the truth: you’ll forget where everything is, even if you think you won’t.
Your labeling strategies should match your workshop style. Use clear, large letters so you’re not squinting at tiny labels. Color coding works wonderfully too, assign different colors to tool categories, like red for fasteners and blue for measuring instruments.
Label every drawer, bin, and shelf systematically. Include what’s inside and quantities when helpful. You’ll save countless minutes hunting for that one wrench. Plus, it makes returning tools so much easier when you know exactly where they belong.
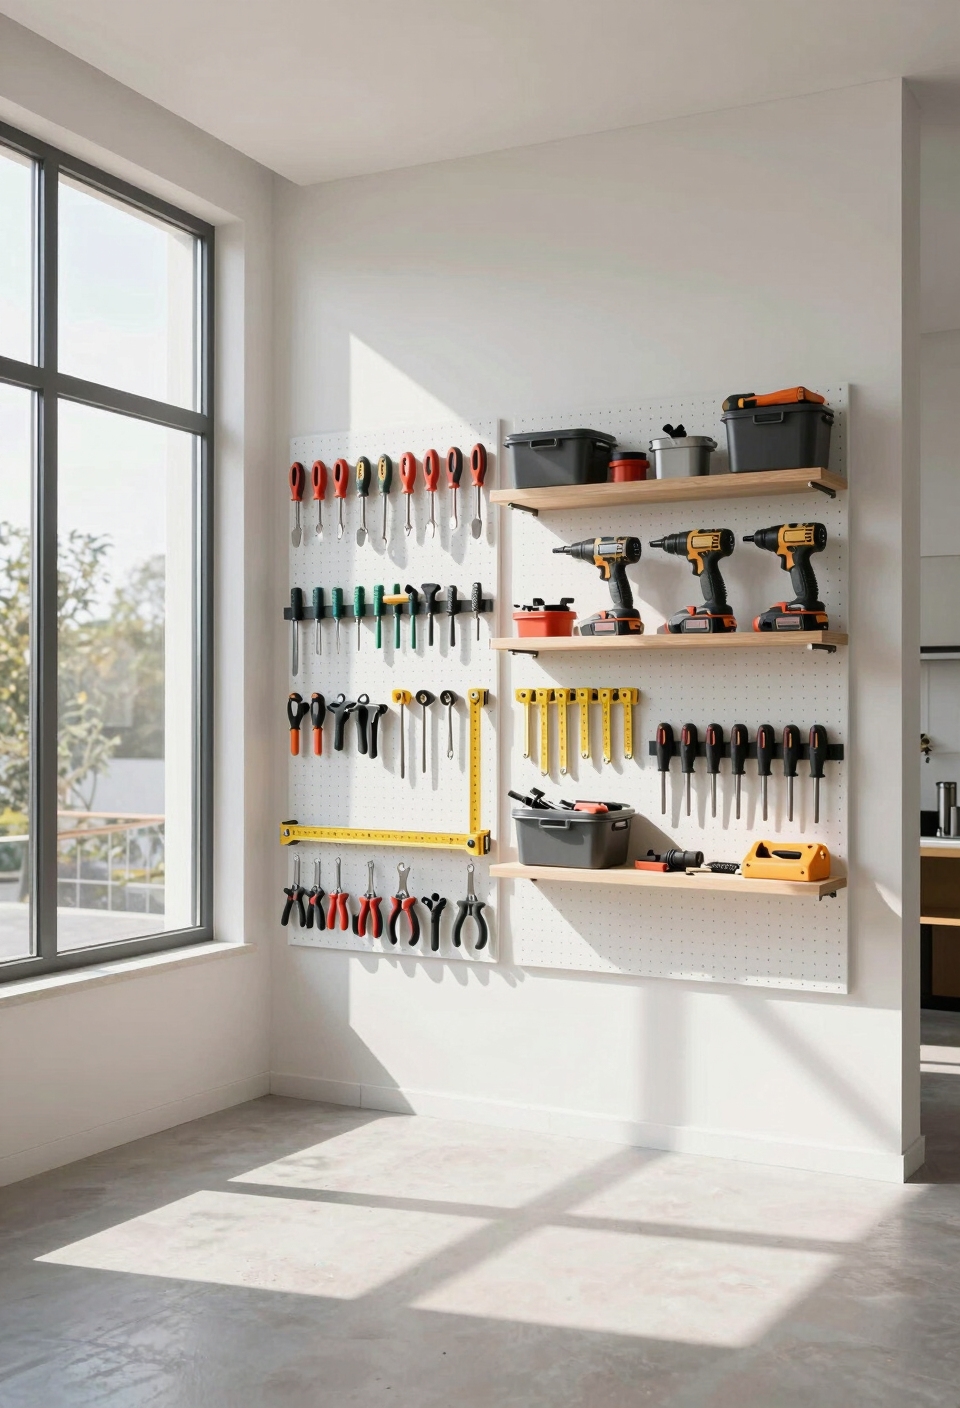
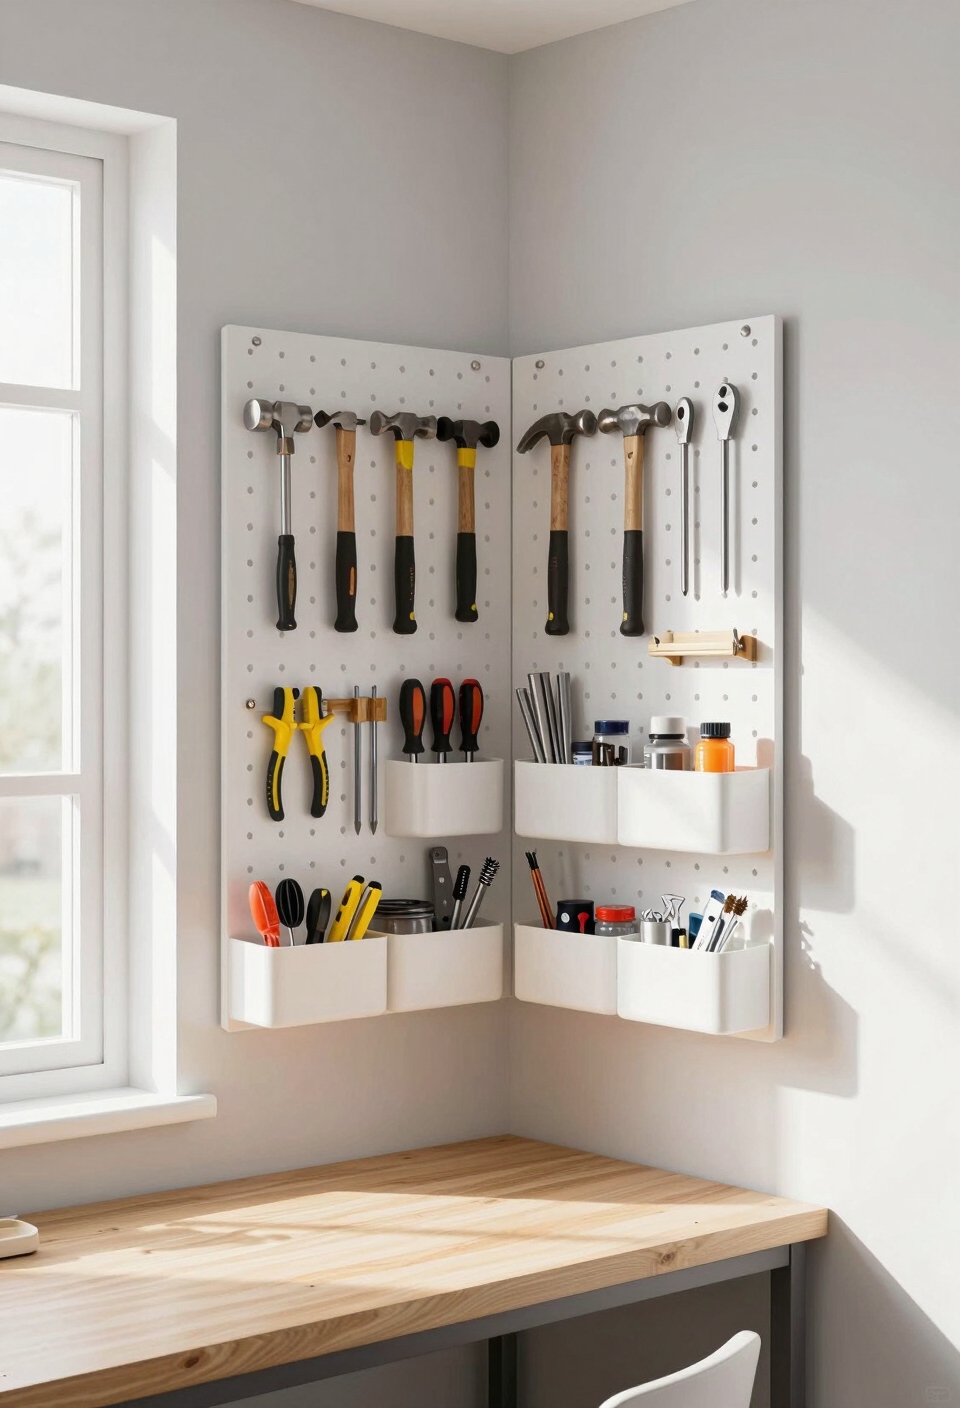
Wall-Mounted Pegboards for Instant Tool Access
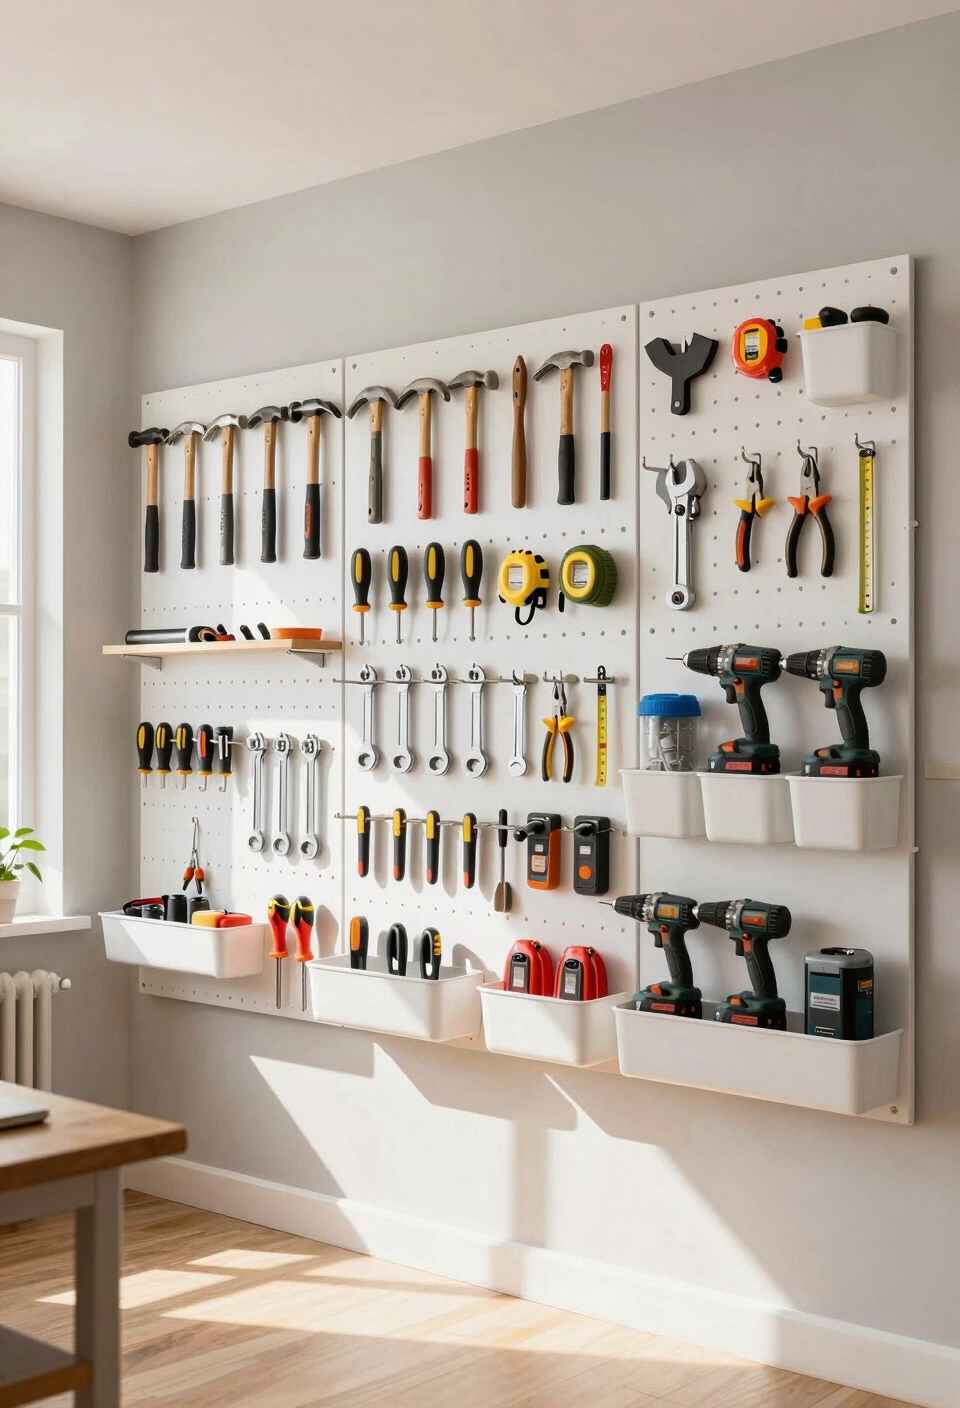
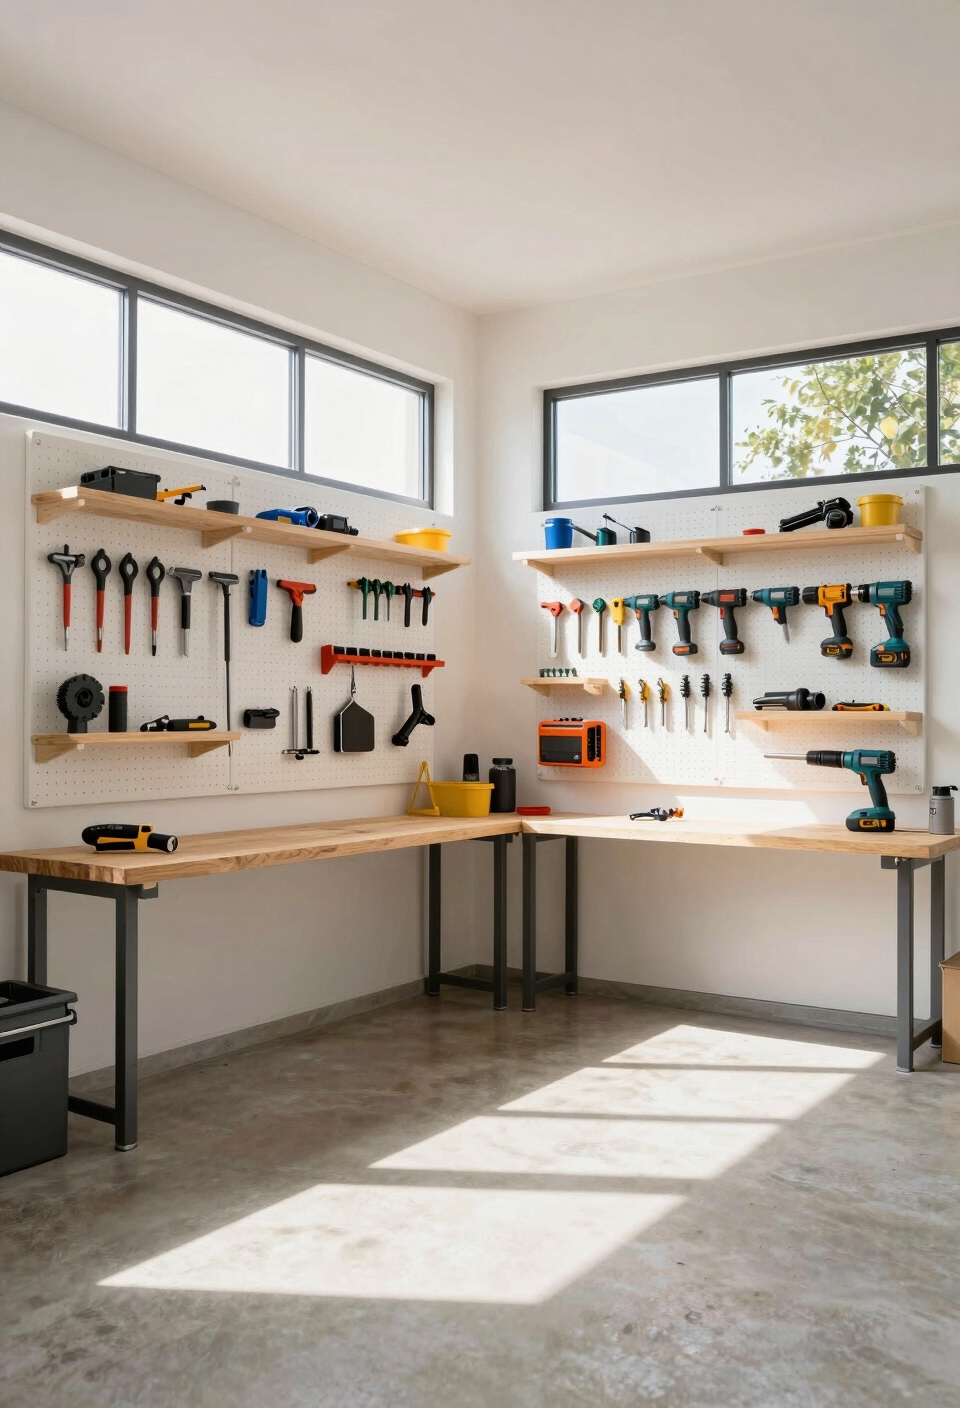
A pegboard, that simple wall panel with holes, might just be your small space’s best friend. You’ll free up valuable floor and bench space by mounting tools vertically instead of stuffing them in drawers. Pegboard customization ideas are endless: you can add hooks, shelves, and baskets tailored to your specific needs. Group similar items together using tool category organization, so your hammer hangs near nails, and your screwdrivers cluster nearby. A standard 4-by-8-foot pegboard fits most workshop walls nicely. Paint it a bright color to match your space, then arrange everything within arm’s reach. You’ll spend less time hunting for tools and more time actually building things.
Magnetic Strips for Metal Tools and Power Bits
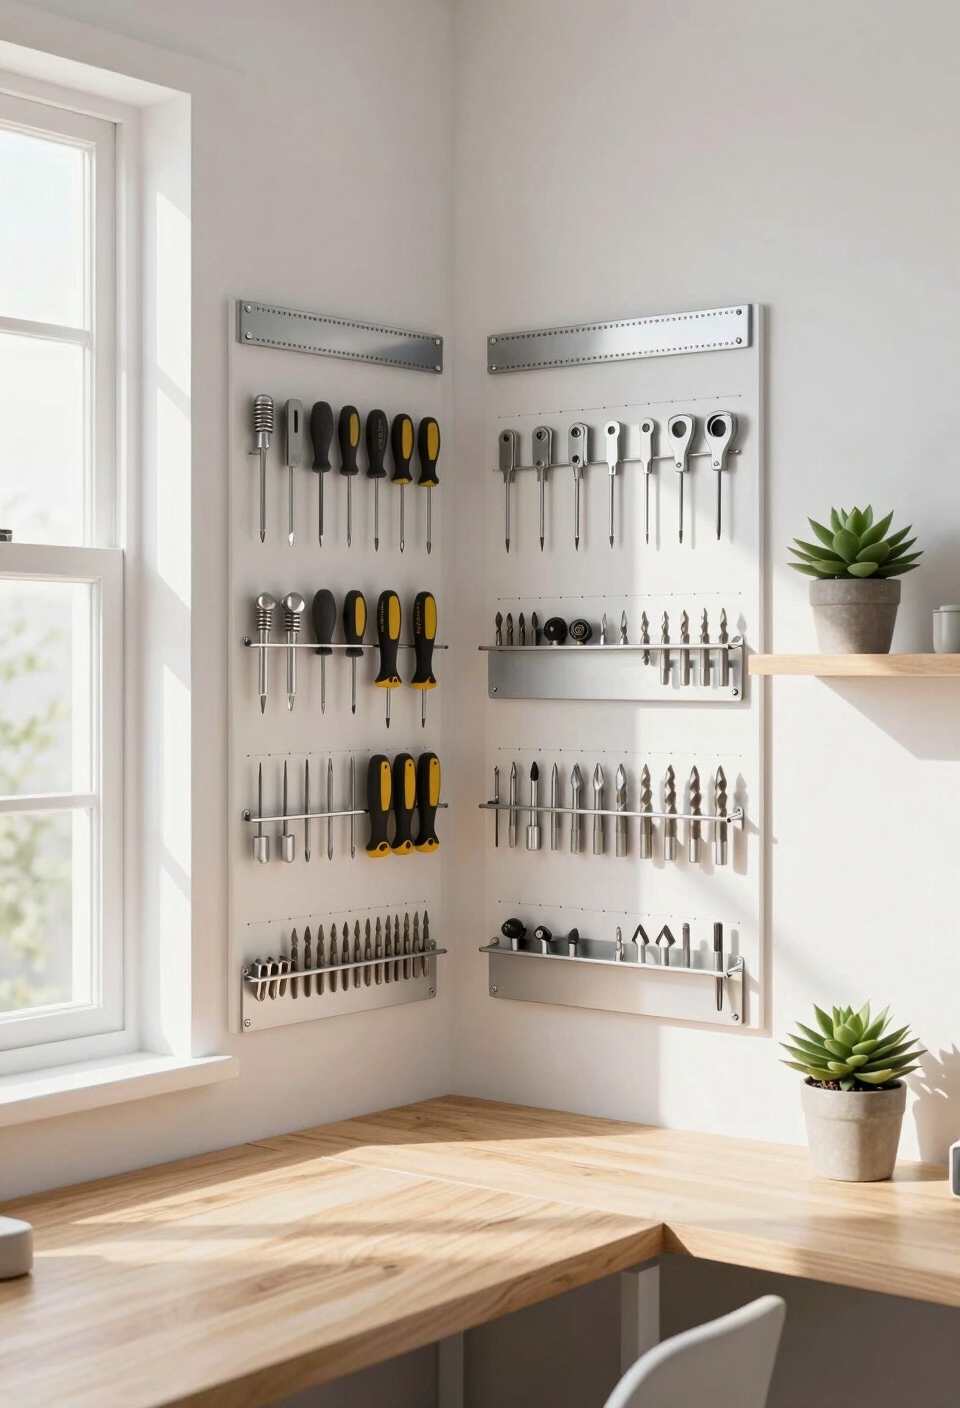
While pegboards excel at organizing hand tools and keeping them visible, magnetic strips offer a sleek alternative for storing metal tools and power bits that you’ll reach for constantly. These magnetic storage solutions stick to your walls, saving precious drawer and shelf space in cramped workshops. Mount strips at eye level, typically 12-18 inches long, so you can grab drill bits, screwdrivers, and metal tools instantly. Your tool visibility techniques improve dramatically since everything displays openly. You’ll appreciate how magnets hold items securely without hooks or clips. Installation’s straightforward, just use wall anchors if you’re avoiding studs, then stick on your metal tools.
Secure Heavy Shelves With French Cleat Systems
If you’ve filled those magnetic strips with tools and they’re pulling down your wall, it’s time for something stronger, French cleats. This system uses two interlocking wooden pieces, creating serious support for heavy shelving. You’ll attach one piece to your wall studs and the other to your shelf’s back. The angled design distributes weight evenly, handling pounds of tools without breaking a sweat. Cut 2×4 lumber at 45-degree angles, secure with lag bolts into studs, and you’re golden. French cleats work brilliantly in tight spaces, keeping your shelves rock-solid and your walls intact.
Mount Magnetic Strips Inside Cabinet Doors
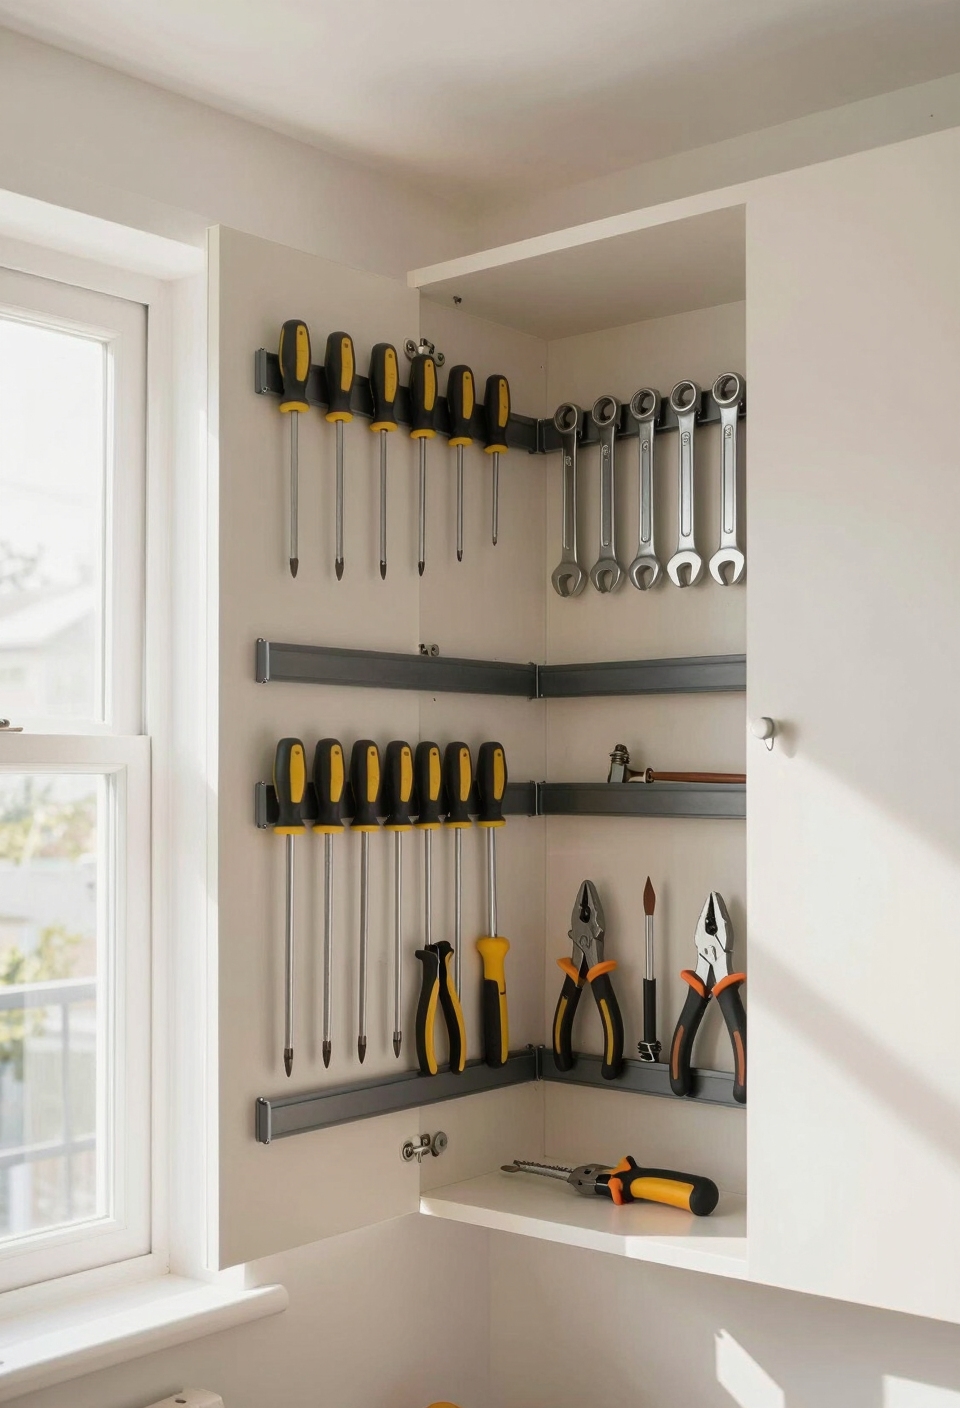
One of the smartest moves you can make is tucking magnetic strips inside your cabinet doors, turning dead space into a tool-holding powerhouse. You’ll free up shelf real estate while keeping magnetic tools within arm’s reach, making these cabinet enhancements incredibly practical.
Installation’s straightforward: measure your door’s interior width, then mount adhesive-backed strips securely. Steel rulers, scissors, and small wrenches stick perfectly, staying organized without cluttering your workspace.
This method works especially well in tight workshops where every inch counts. Your tools stay visible and accessible, so you’ll actually remember what you’ve got. It’s a simple fix that makes a real difference.
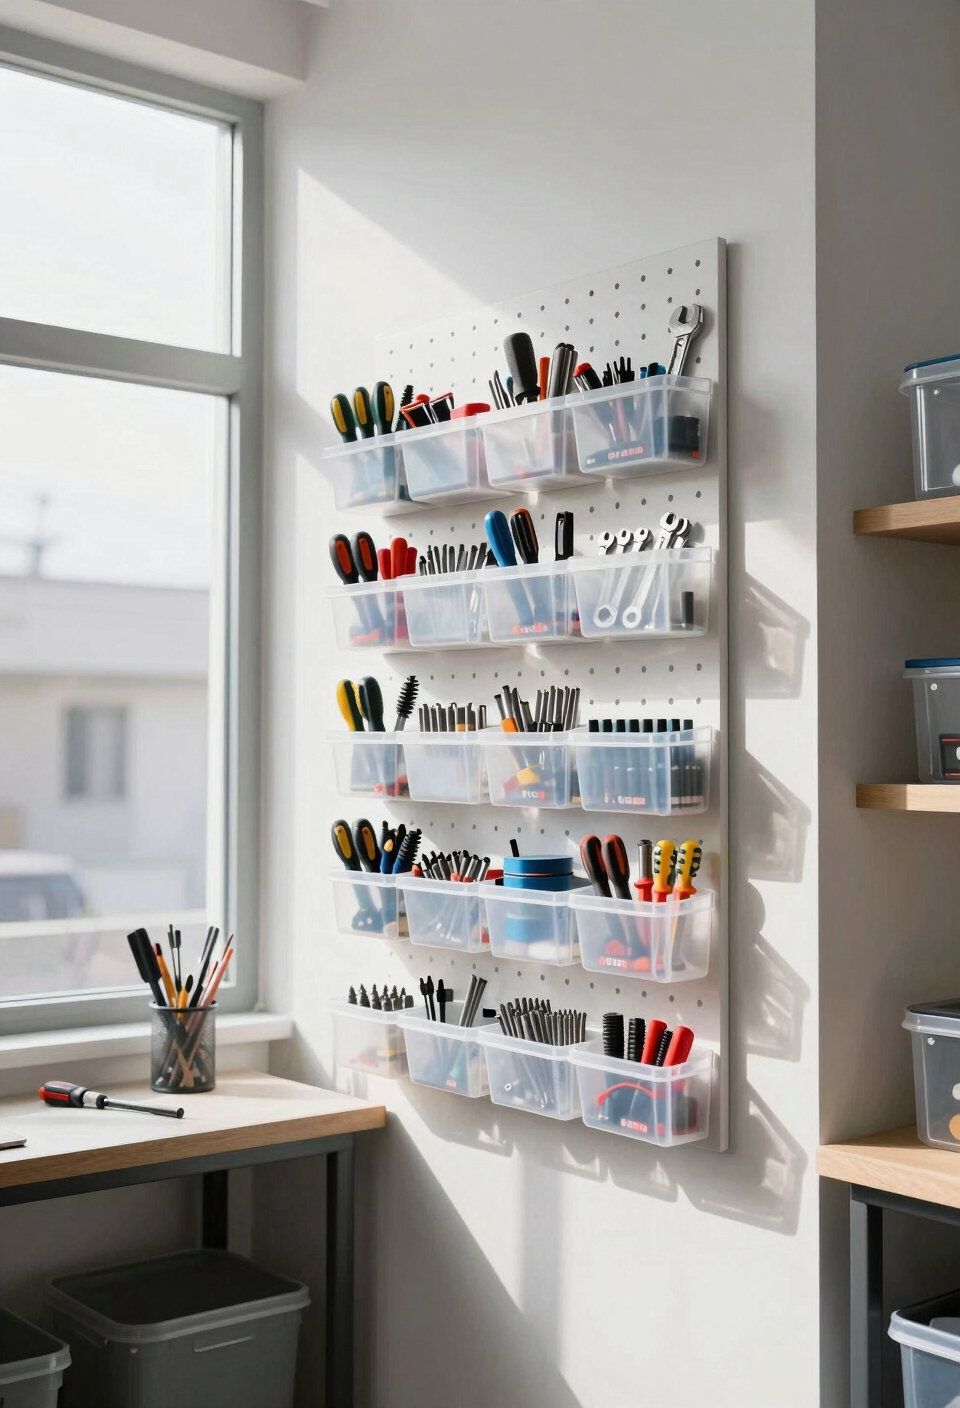
Install Wire Baskets on Walls
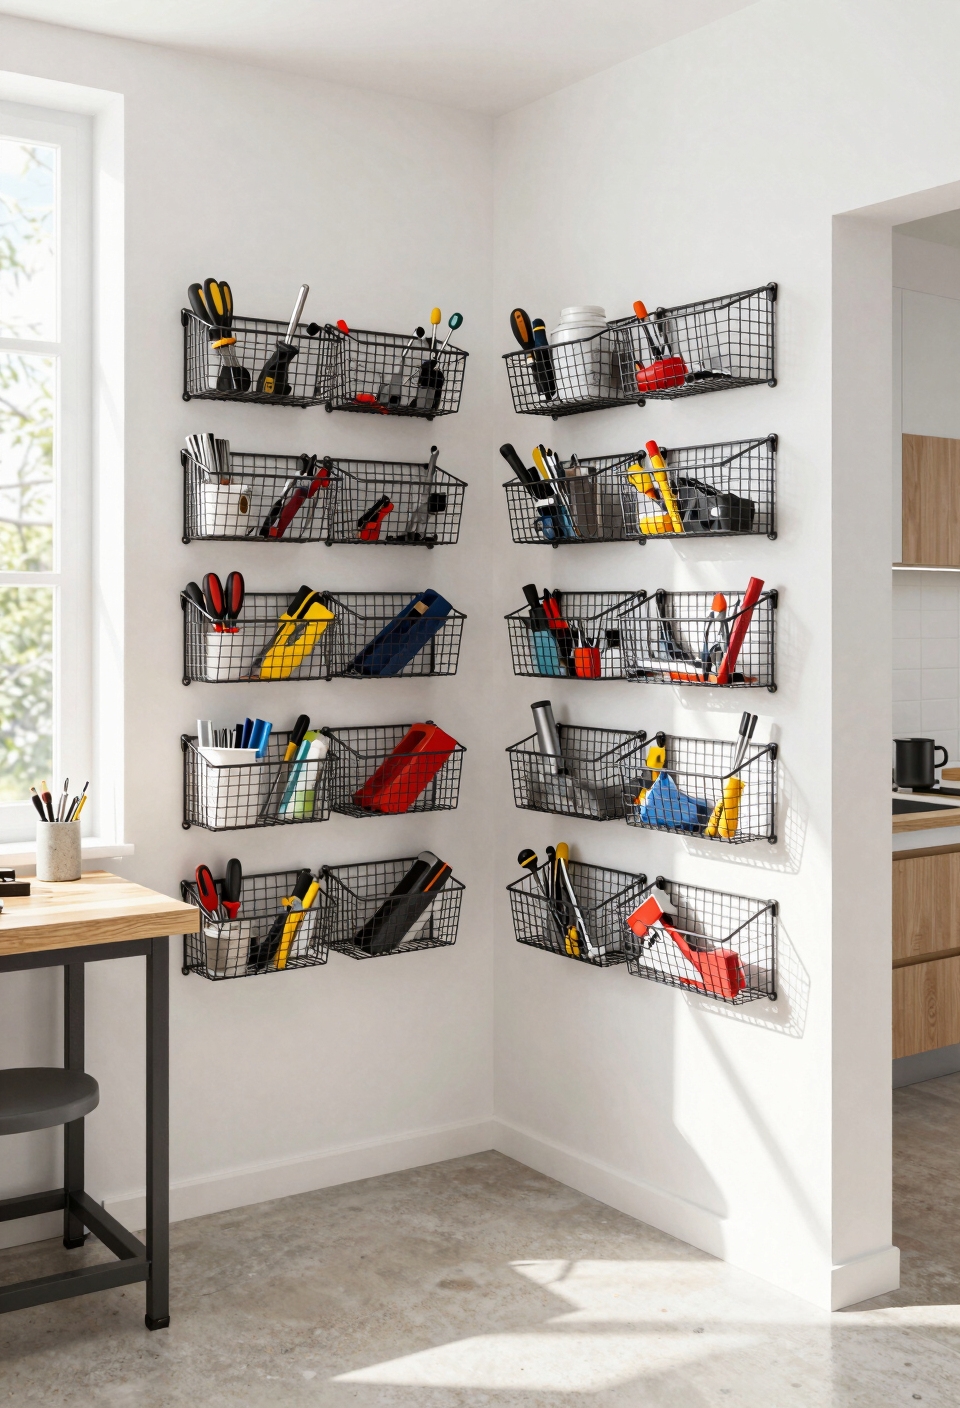
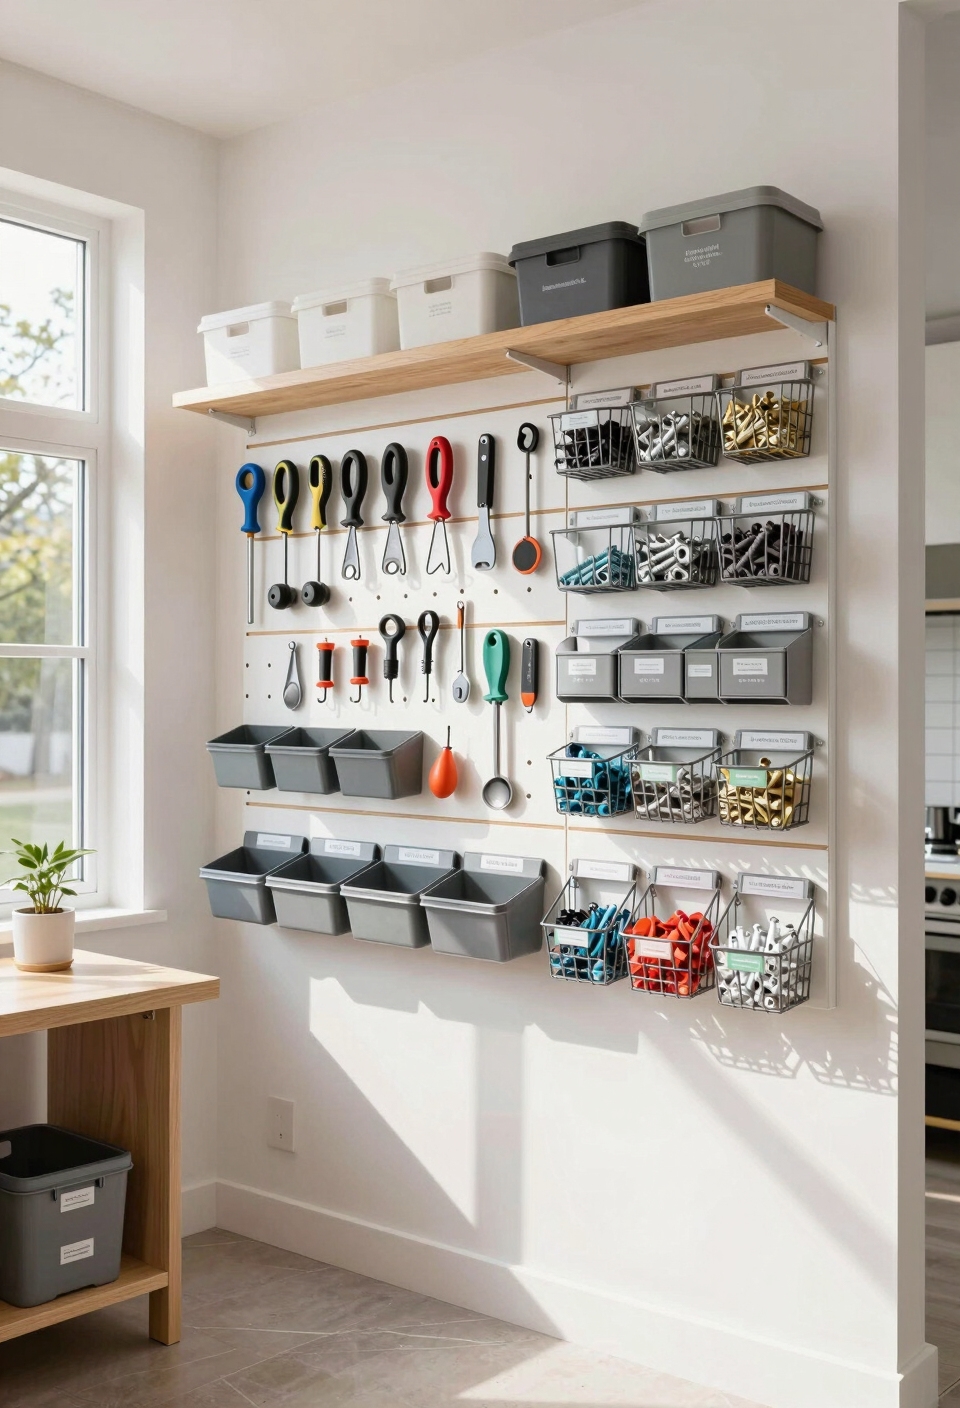
Wire baskets are a revolutionary solution when you’re running out of floor and shelf space, giving you visible storage that doesn’t eat up your workspace. You’ll love the wire basket benefits: they’re affordable, lightweight, and super easy to install on any wall.
Consider creative wall ideas above your workbench or beside your pegboard. Mount baskets at varying heights to maximize your vertical real estate. Small baskets work great for screws and fasteners, while larger ones hold power tools and supplies.
The open design means you’ll actually use what’s inside, no more forgotten items hiding in dark corners.
Lift Heavy Tools off the Floor With Ceiling Racks
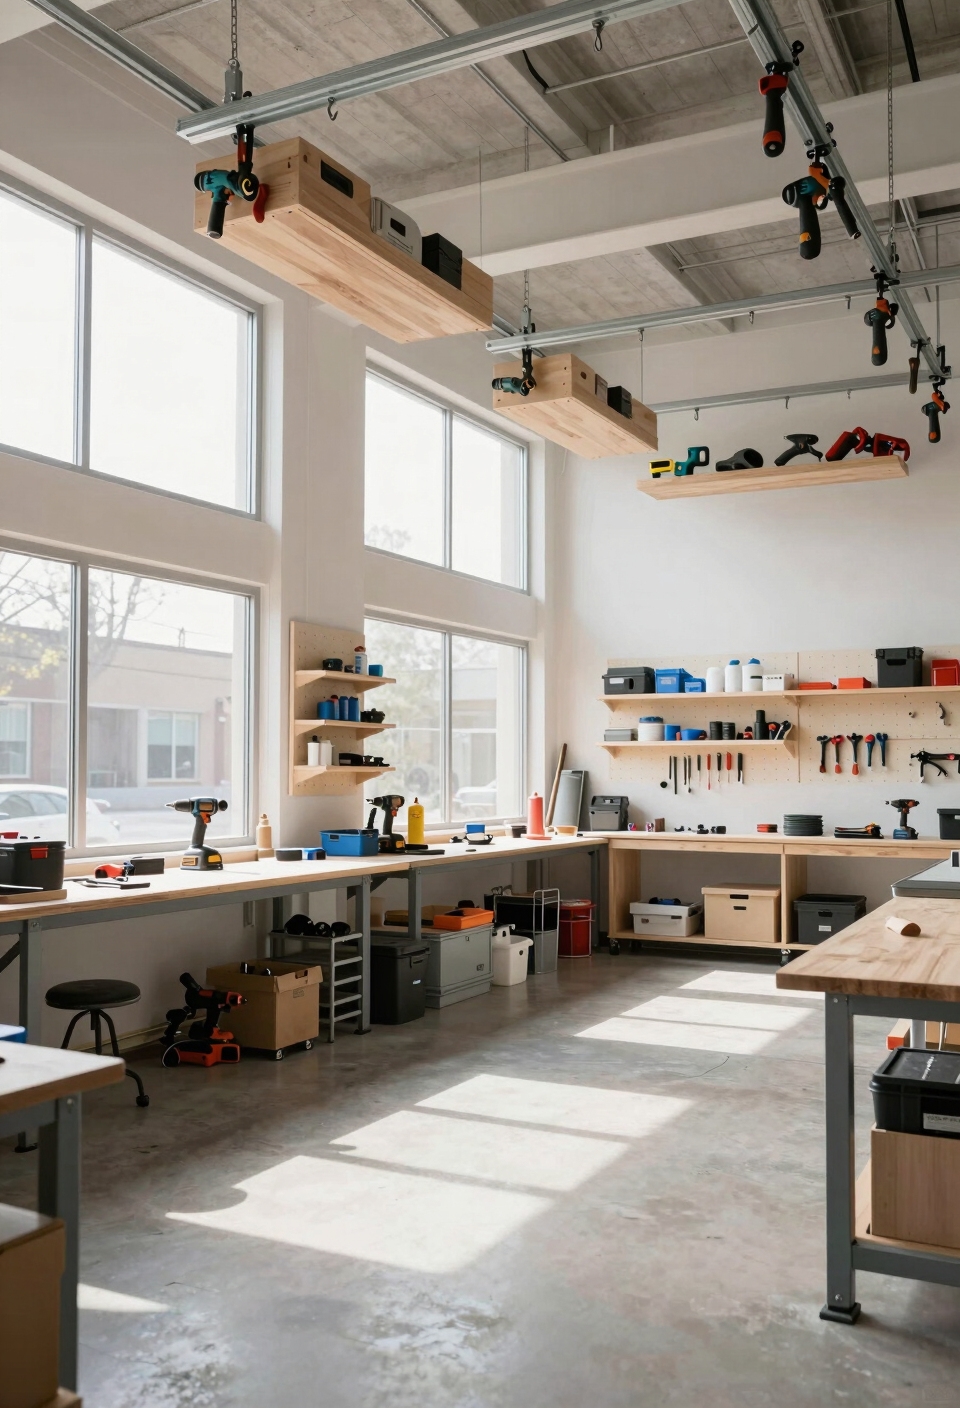
When you’ve maxed out your wall space with baskets and pegboards, your ceiling becomes prime real estate for storage. Heavy tools like circular saws and sanders take up valuable floor space, so why not move them up? Install ceiling hooks directly into your joists, then add overhead pulleys for easy access. You can hoist larger items up and out of the way, lowering them when needed. This setup keeps your workspace clear and your tools protected from accidental damage. Just make sure your ceiling can handle the weight before installing anything heavy.
Use Overhead Hoists for Equipment You Rarely Grab
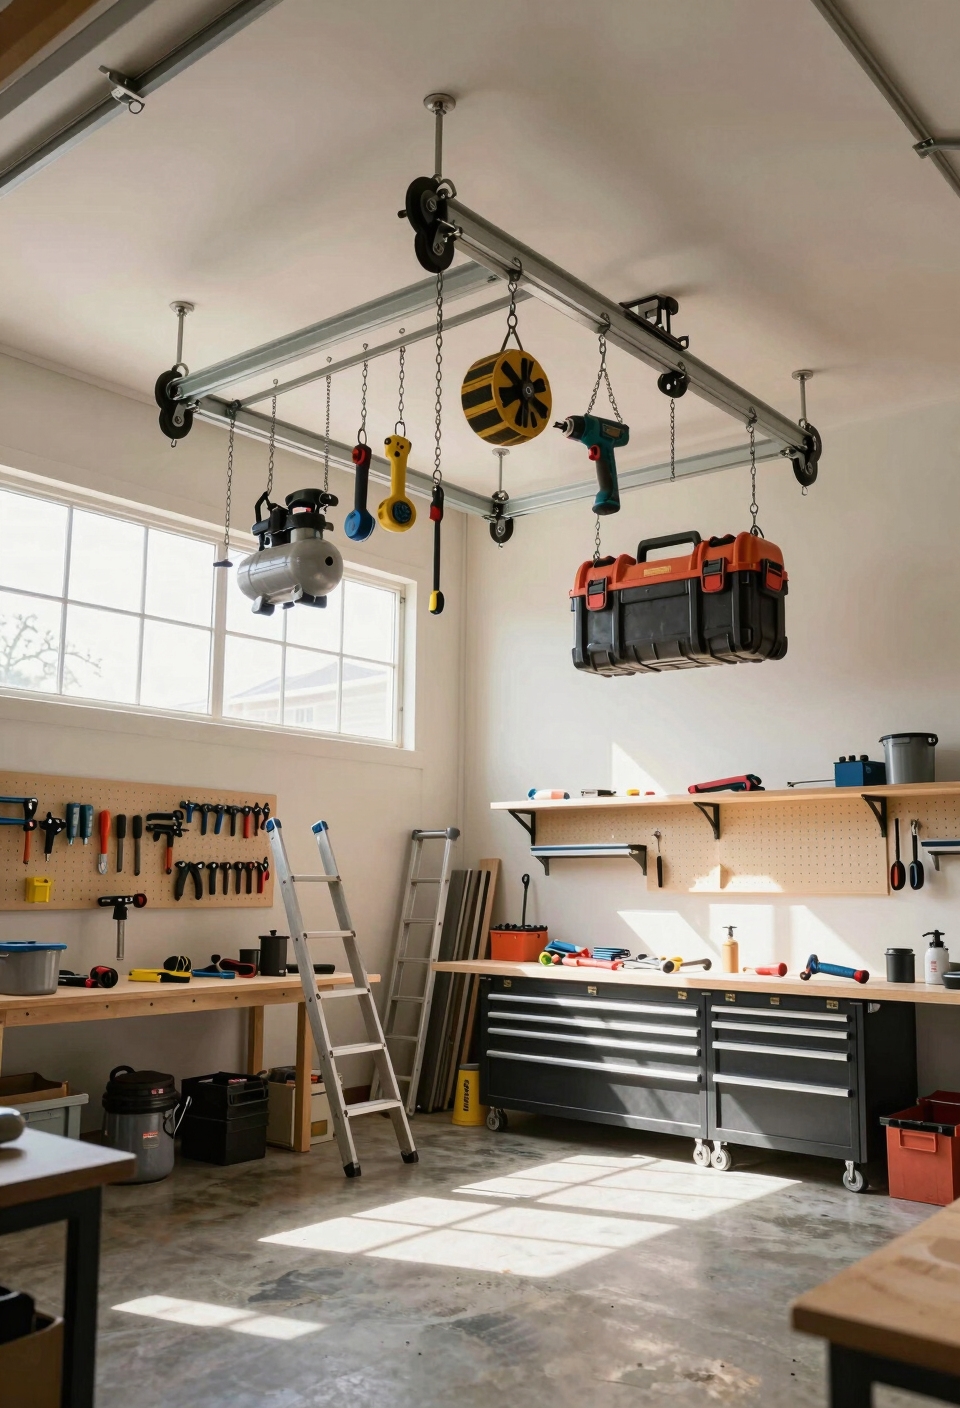
While ceiling racks work great for your go-to tools, equipment you rarely use deserves its own smart storage solution. Overhead hoists are perfect for this job, lifting rarely used equipment high above your workspace.
You’ll free up valuable floor and wall space by using overhead storage for seasonal items, specialty tools, or bulky gear you grab maybe once a year. Install a pulley system or electric hoist that lets you safely raise and lower equipment without strain.
This approach keeps your small workshop uncluttered and functional, making daily work easier while protecting rarely used equipment from damage.
Hang Tool Bags and Aprons on Your Walls

Tool bags and aprons are the stuff that clutters your workspace, so why not hang them up instead? Wall-mounted storage dramatically improves tool accessibility while freeing up valuable floor and bench space. Consider installing pegboards, hooks, or fabric organizers at comfortable heights for ergonomic design that keeps frequently used tools within arm’s reach.
You’ll appreciate how hanging aprons and bags reduces clutter immediately. Choose sturdy hooks rated for your bags’ weight, spacing them about 12-16 inches apart. Label each hook’s purpose so you grab exactly what you need quickly. This simple solution transforms chaotic corners into functional zones that actually work for you.
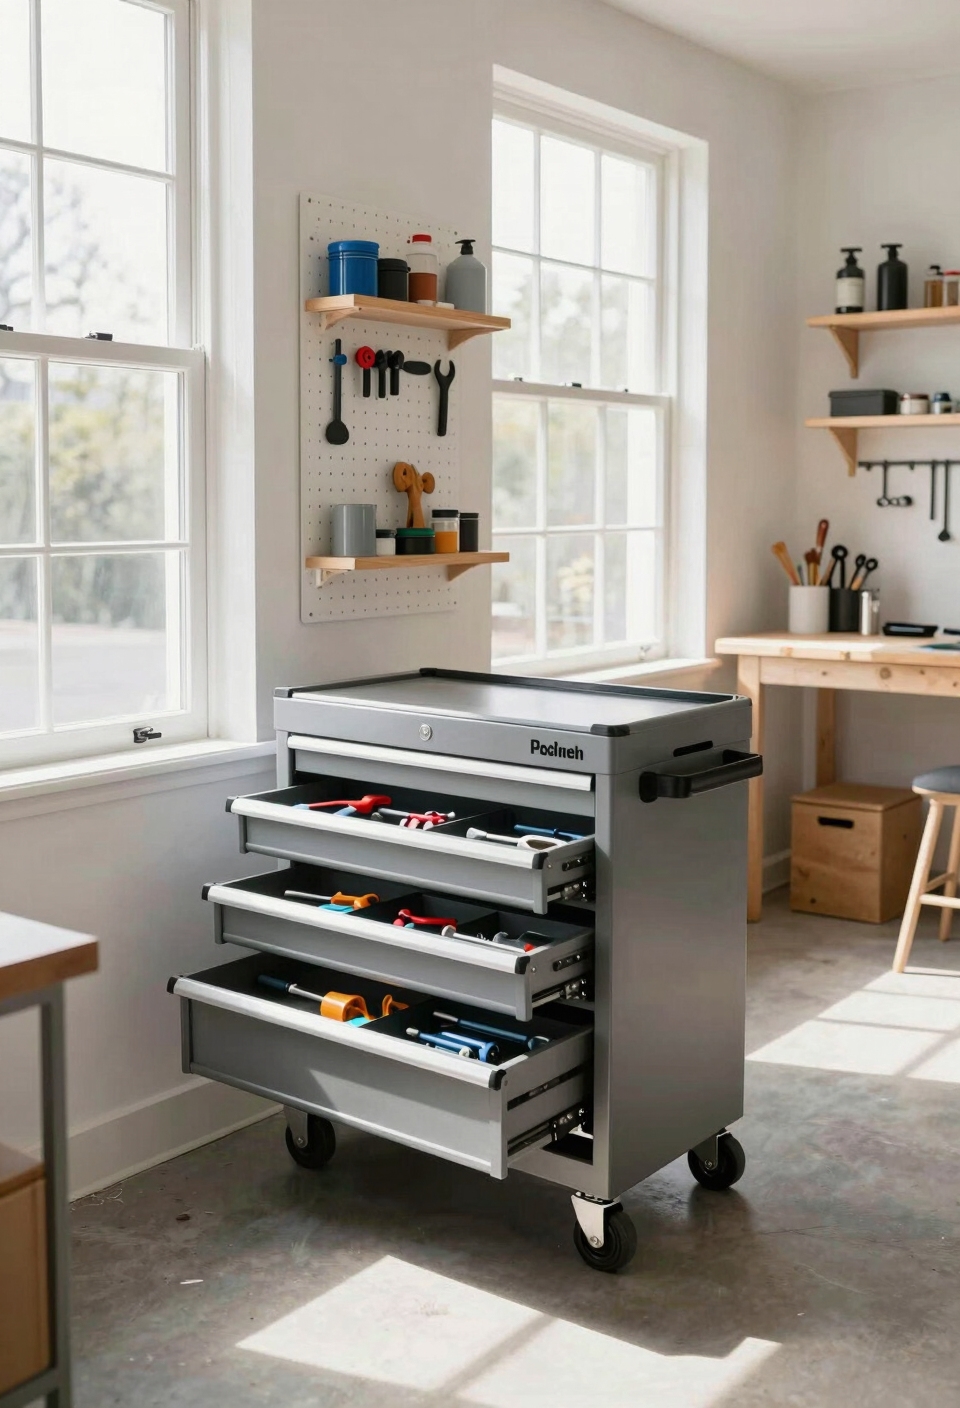
Rolling Tool Carts With Locking Drawers

Mobility meets storage when you add a rolling tool cart to your workspace, giving you flexibility that wall-mounted solutions simply can’t match. These mobile workstation advantages let you move your tools wherever you need them, whether you’re tackling projects in different rooms or repositioning your setup.
Look for tool cart features like locking drawers that keep your equipment secure and organized. You’ll appreciate having multiple tiers for sorting items by type or project. The wheels should lock firmly, preventing frustrating shifts during work. Choose carts sized appropriately for your space, typically 24 to 36 inches wide works well for compact workshops.
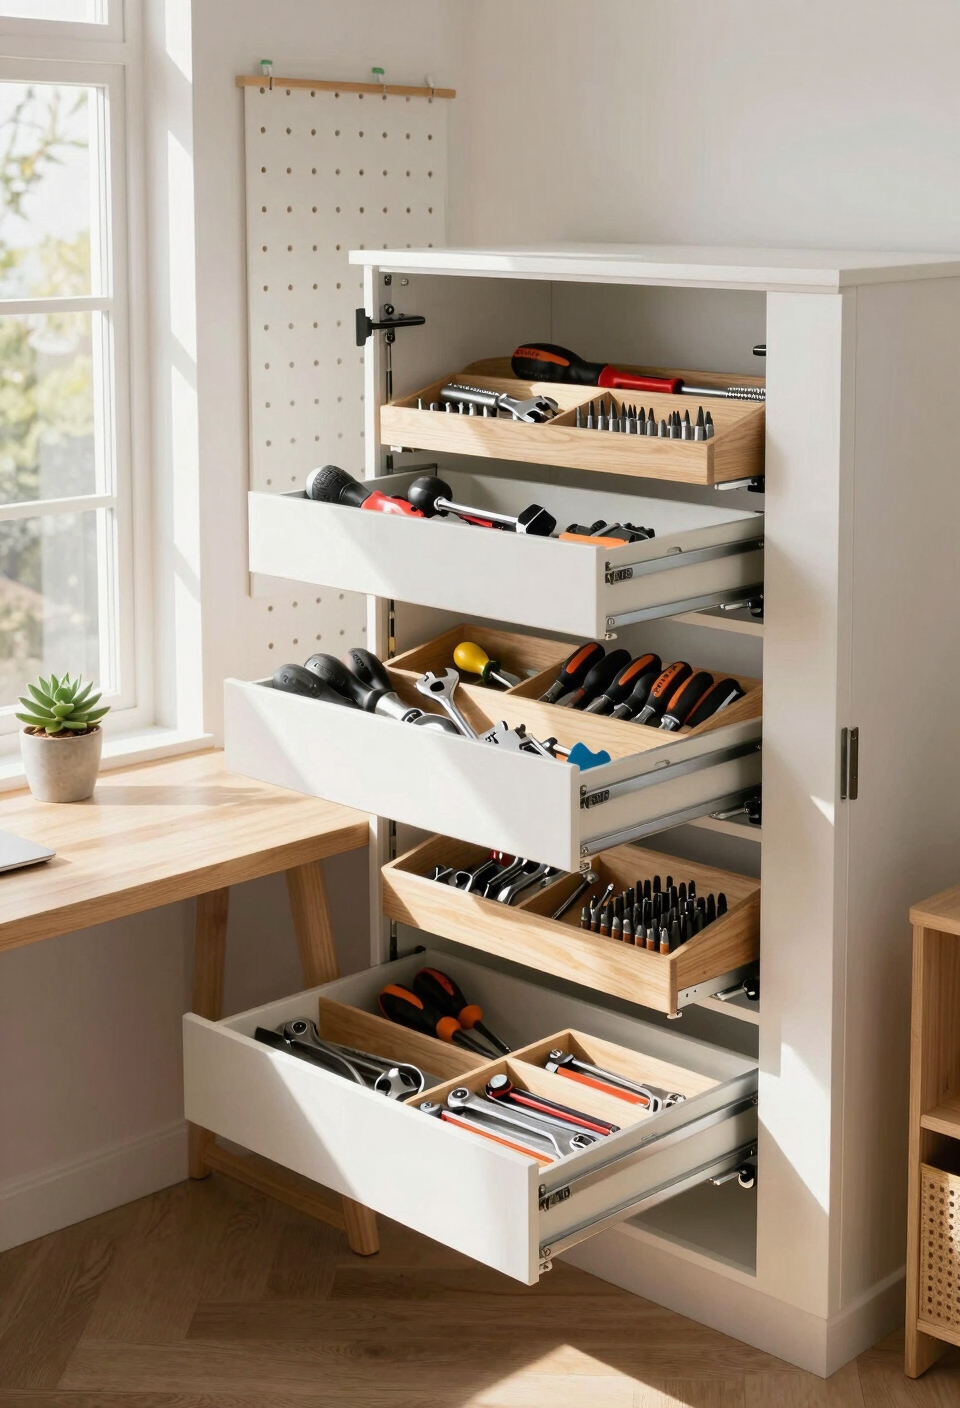
Sliding Drawers Under Your Workbench
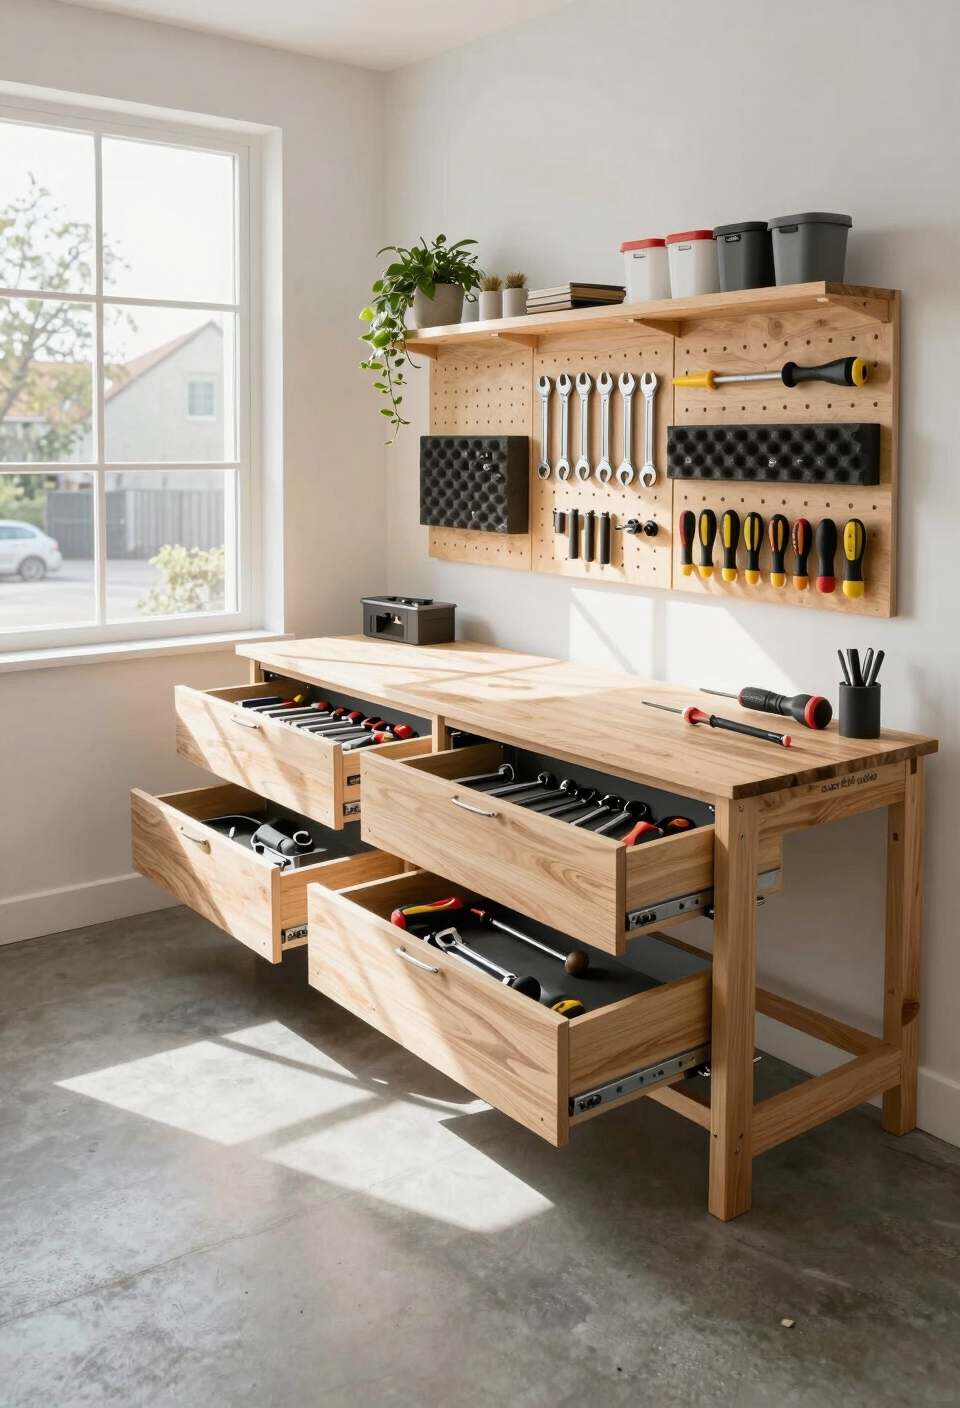
Under your workbench sits some seriously valuable real estate that most people completely overlook. You’ve got perfect space for sliding drawers that’ll keep your tools accessible without eating up floor room.
Different workbench designs work with various drawer materials, plywood holds up great, while plastic containers slide smoothly on metal rails. You’re looking at maybe 12 to 18 inches deep, depending on your setup.
Install heavy-duty drawer slides underneath, and you’ll maximize storage instantly. No bending down awkwardly or digging through piles. Your most-used tools stay right where you need them, hidden neatly away yet ready to grab whenever inspiration strikes your next project. These sliding drawer solutions are part of comprehensive garage organization strategies that transform cluttered spaces into efficient workshops.
Stackable Plastic Bins for Easy Reorganizing
While sliding drawers pack a ton of storage power underneath your bench, you’ll want something that works just as well for tools you grab constantly or swap around between projects. Stackable storage using clear plastic organizers solves this problem perfectly. You can see exactly what’s inside without opening each container, saving you time and frustration. These plastic organizers come in various sizes, from small six-inch boxes to larger eighteen-inch options, letting you customize your setup. Stack them however you need, then rearrange when your projects change. They’re affordable, durable, and honestly, they make organizing feel less like a chore.
Nesting Boxes: Tuck Tools Away in Layers
Nesting boxes offer another smart solution when you’re running out of room, basically giving you multiple storage containers that collapse into one compact stack. You’ll love how they shrink down when empty, saving precious floor space in your workshop.
Your stacking strategies improve dramatically with nesting boxes. Arrange them by size, placing smaller boxes inside larger ones, then pull out only what you need for each project.
This tiered organization system works perfectly for small spaces. Store fasteners in one box, bits in another, and hand tools in a third, all tucked neatly together. You’re basically getting three storage solutions occupying one box’s footprint.
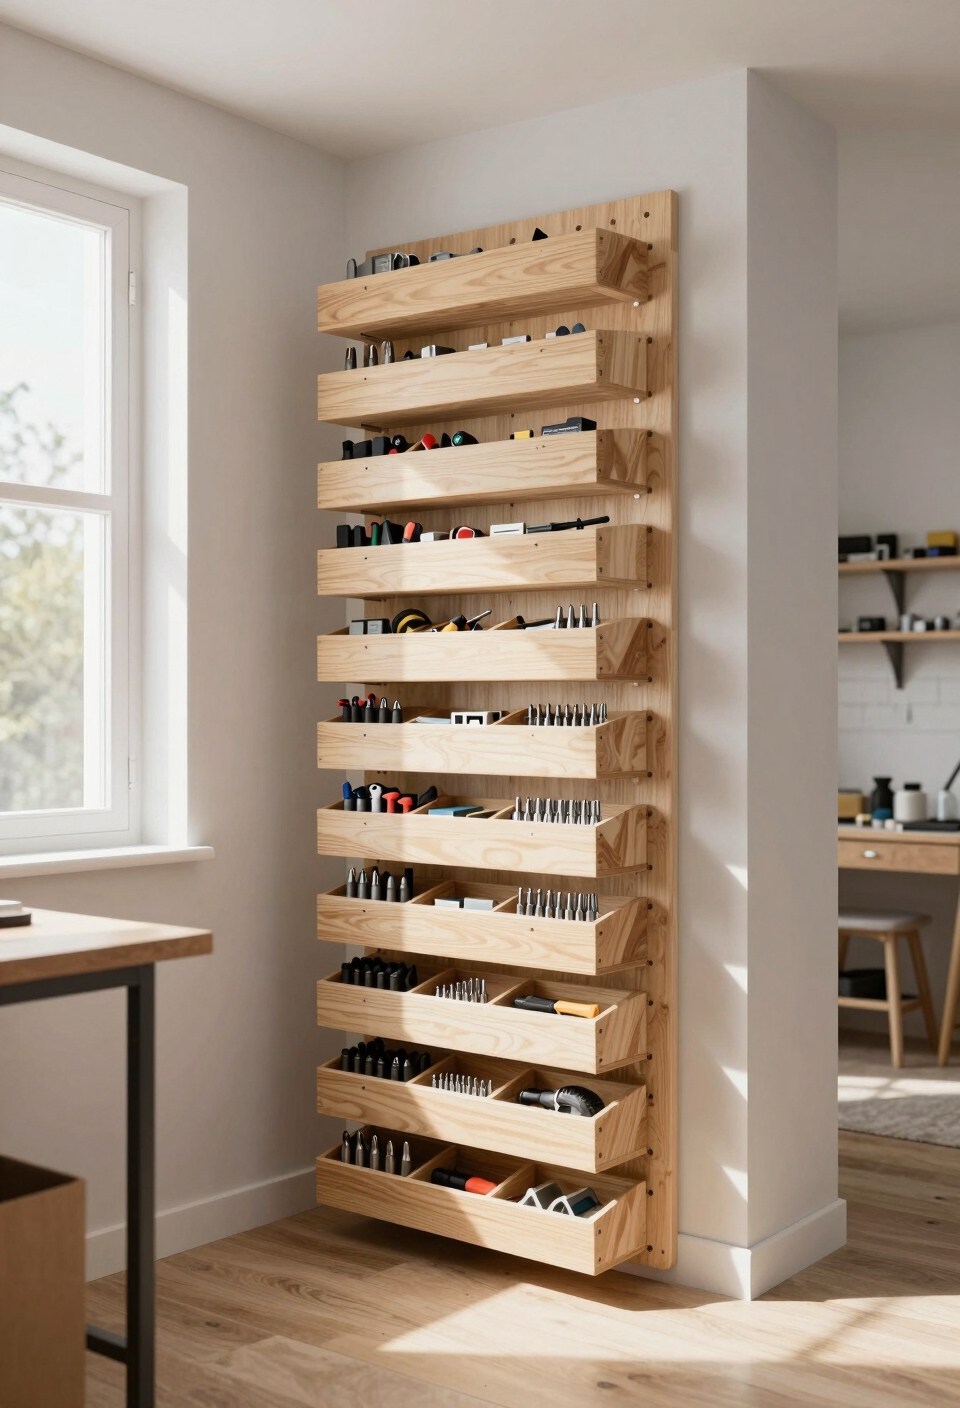
Corner Shelving Units: Use Every Inch
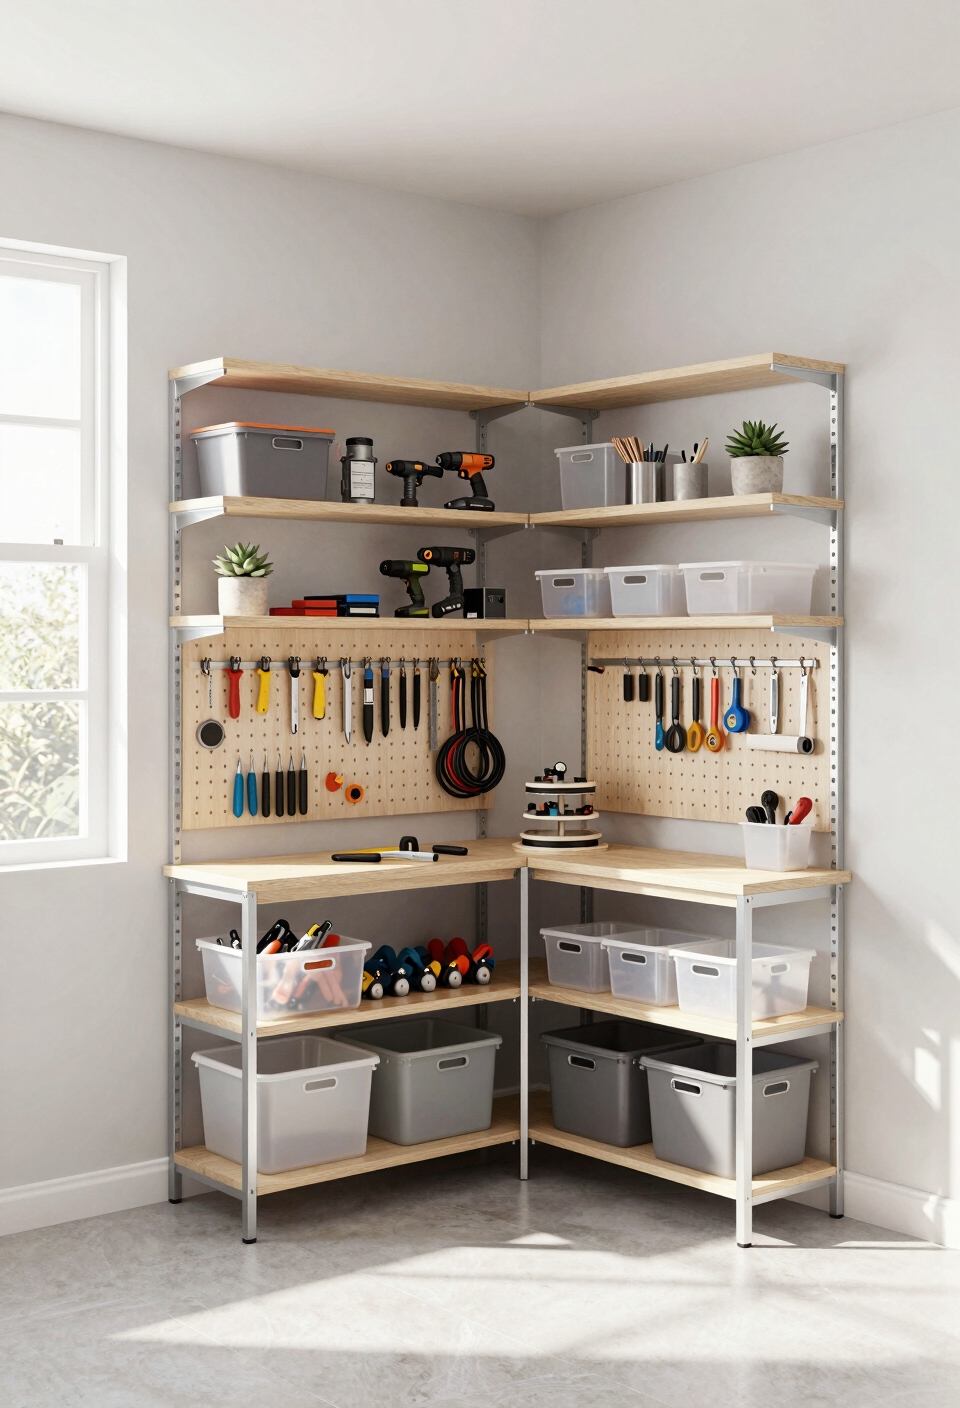
Corner shelving units tackle the storage problem that nesting boxes can’t quite solve: you’ve got vertical space that’s just sitting there, unused. Corner unit designs are innovative solutions for maximizing corner space, especially when you’re working with limited square footage.
You’ll find triangular or L-shaped shelves fit snugly into those awkward corners you’ve been ignoring. Install them about 12 inches apart, and you’ve suddenly got room for power tools, fasteners, and supplies without eating into your workspace.
The best part? You’re using real estate that would otherwise gather dust and cobwebs. Your tools stay accessible, organized, and honestly, you’ll finally stop knocking things over in tight corners.
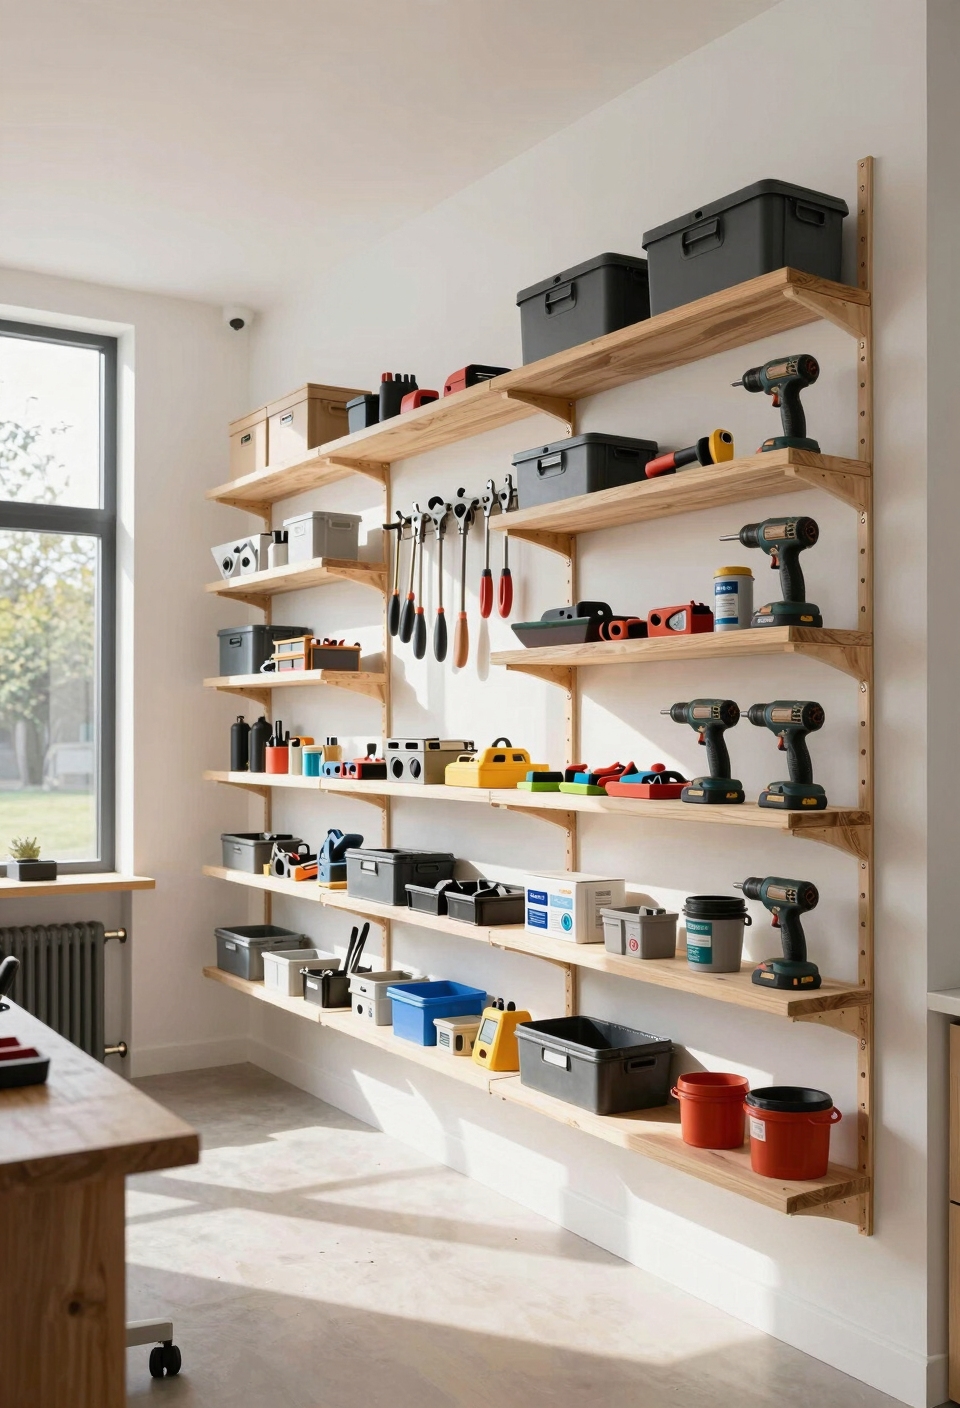
Tiered Shelves to Stack More Stuff Higher

Once you’ve tackled your corners, it’s time to think vertical, because the real magic happens when you stack smarter, not just wider. Tiered designs let you organize tools at different heights, giving everything its own spot without wasting precious floor space.
You’ve got options with shelf materials: sturdy wood, metal brackets, or adjustable plastic shelving all work great. Pick whatever fits your budget and style. The key is staggering your shelves at varying heights, maybe 8, 12, and 16 inches apart, so taller tools don’t block smaller ones.
This approach transforms blank walls into productive storage, keeping your workspace functional and accessible. Much like vertical storage solutions maximize tight spaces in bedrooms, tiered shelving in workshops eliminates wasted wall real estate and makes every inch count.
Heavy-Duty Hooks for Power Tools and Equipment
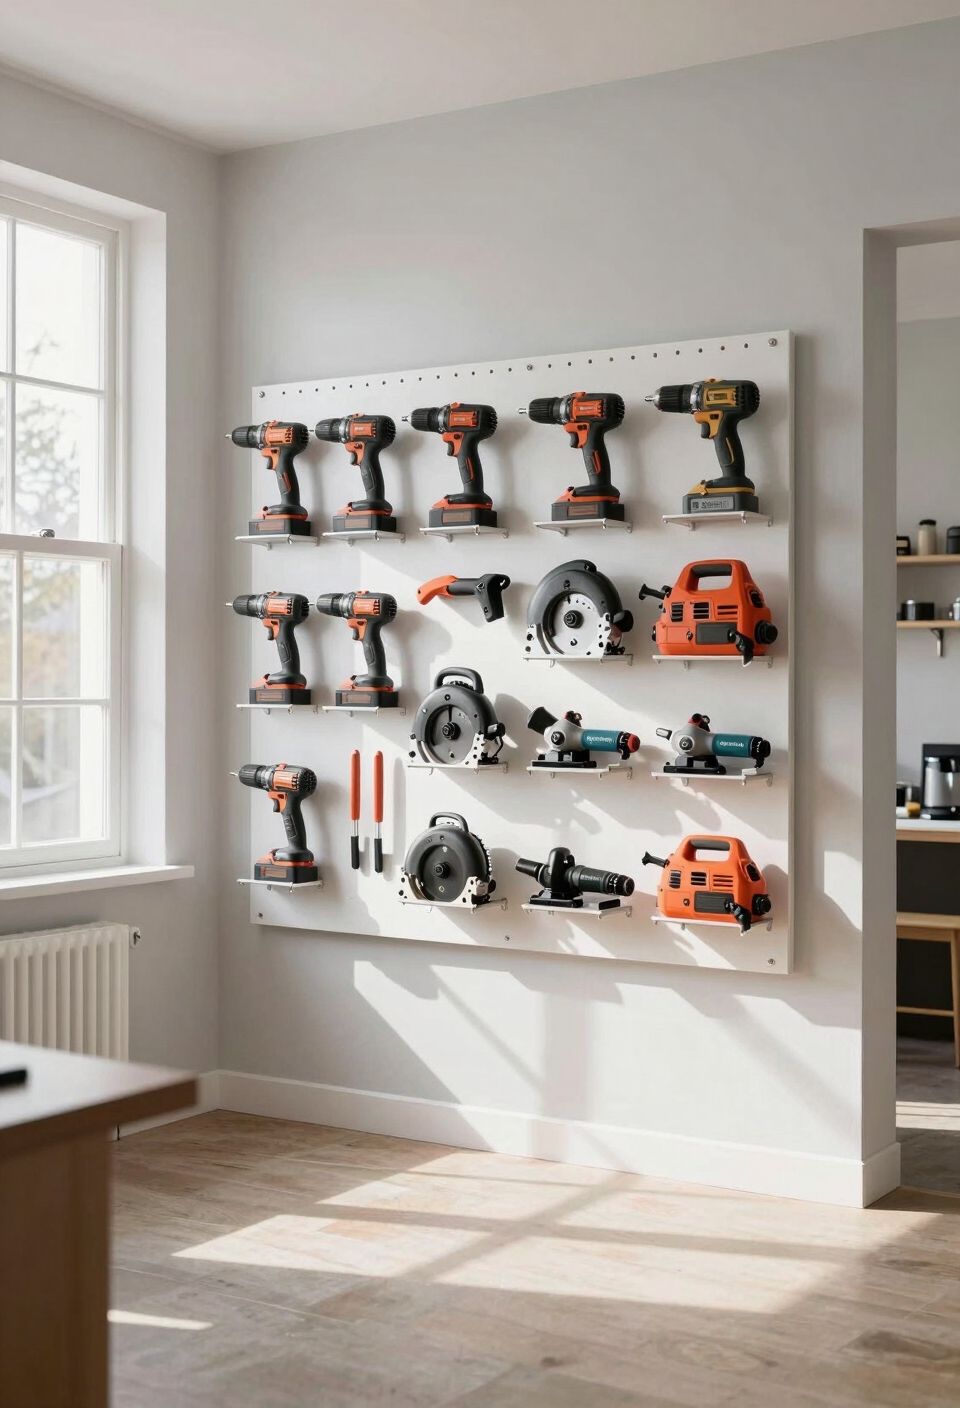
While shelves handle your smaller hand tools, heavy-duty hooks become your best friend for the bigger stuff, think drills, sanders, and other power tools that’d take up major real estate on a shelf. You’ll want to install these hooks on your tool wall, spacing them 12-18 inches apart for balanced weight distribution. Choose hooks rated for at least 25 pounds each, securing them into studs with appropriate fasteners. Arrange your power tools by frequency of use, keeping daily essentials at eye level. Heavy-duty hooks save floor space, reduce clutter, and keep your most-used equipment within arm’s reach. Your workshop suddenly feels bigger and more functional.
Portable Tool Chests for Moving Between Projects
If you’re constantly moving between different projects around your home or job site, a portable tool chest might be exactly what you need. These mobile workstations let you grab everything and go, eliminating that frustrating hunt for scattered tools. Look for chests with sturdy handles, comfortable grips, and compartments sized for your most-used items. Many options feature rolling bases or lightweight designs, making portable tool organization surprisingly manageable. You’ll save time and energy by keeping your essentials organized in one place, ready to follow you wherever your next project takes you.
Pull-Out Shelf Organizers for Cabinet Interiors
Deep cabinets can be frustrating, you stuff tools in the back, then can’t reach them without pulling everything out. Pull out drawer solutions fix this problem by bringing your tools forward. These cabinet interior enhancements slide smoothly, letting you access everything easily.
You’ll find various options: wire baskets, wooden shelves, or plastic organizers. Choose ones matching your cabinet width, typically 12 to 36 inches. Install them using simple brackets or rails, most don’t require permanent changes.
These organizers work best for smaller items: screws, bits, brushes, and fasteners. Group similar tools together on each shelf. You’ll spend less time hunting and more time working. That’s efficiency worth having. Consider using adjustable shelving for flexibility to accommodate different tool sizes and storage needs.
Fold-Down Workbench With Built-In Storage
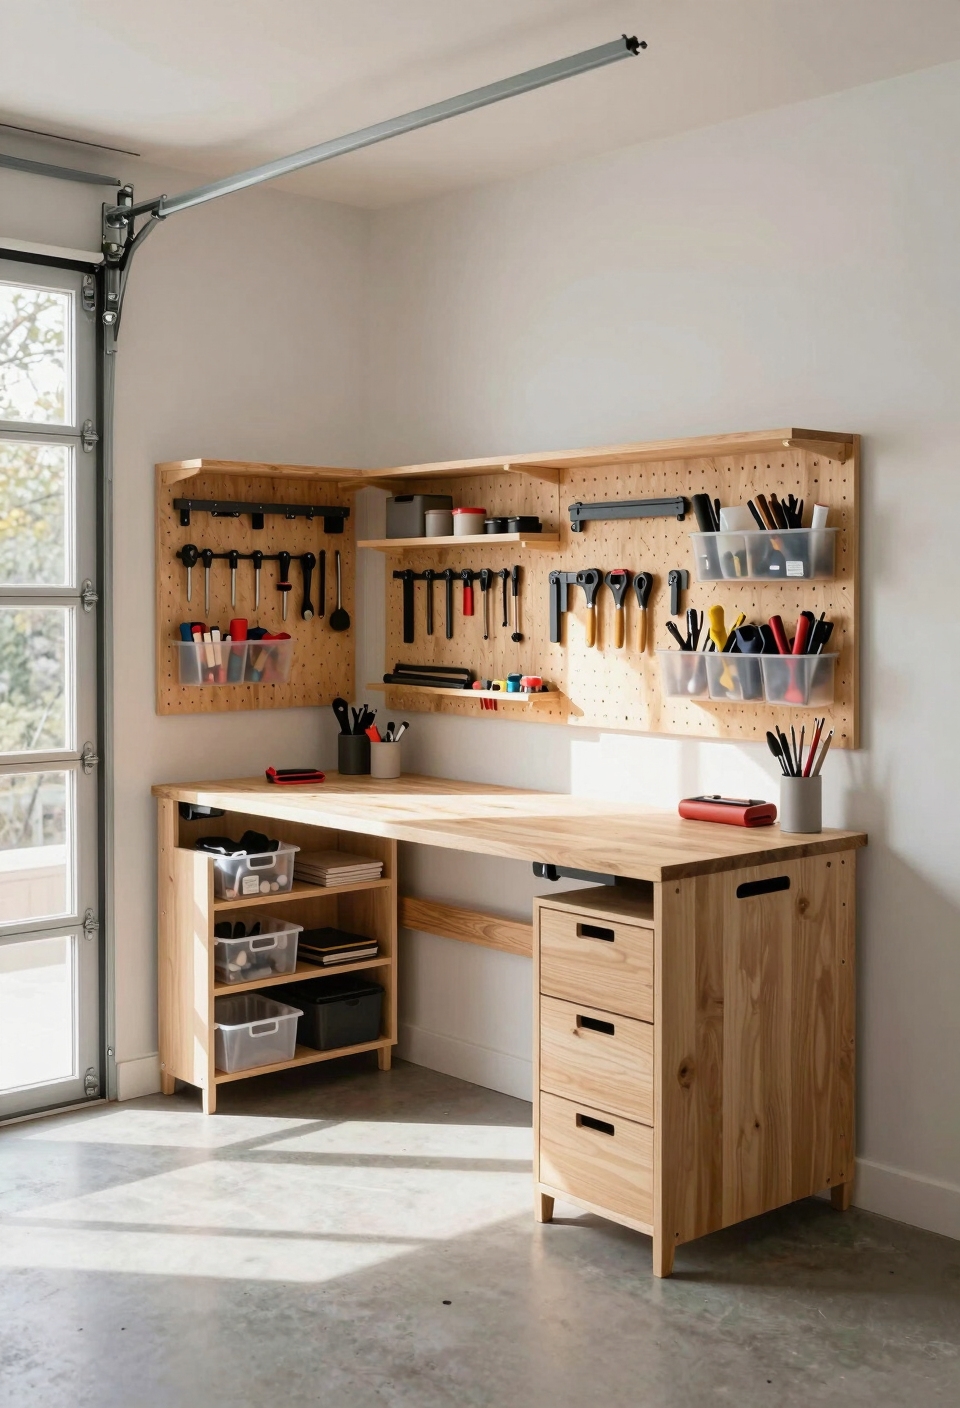
A fold-down workbench is basically your secret weapon for cramped spaces, you get a full work surface when you need it, then it vanishes when you don’t. You’ll mount it to your wall, and the fold down functionality means you’re reclaiming floor space instantly. Look for models with built in shelves underneath, so you’re storing tools while working. When you’re finished, everything folds up neatly into your wall. Most standard versions run about 36 inches wide, perfect for basic projects. You can find options in wood or metal, depending on your needs and budget.
Open Shelving With Clear Container Labels
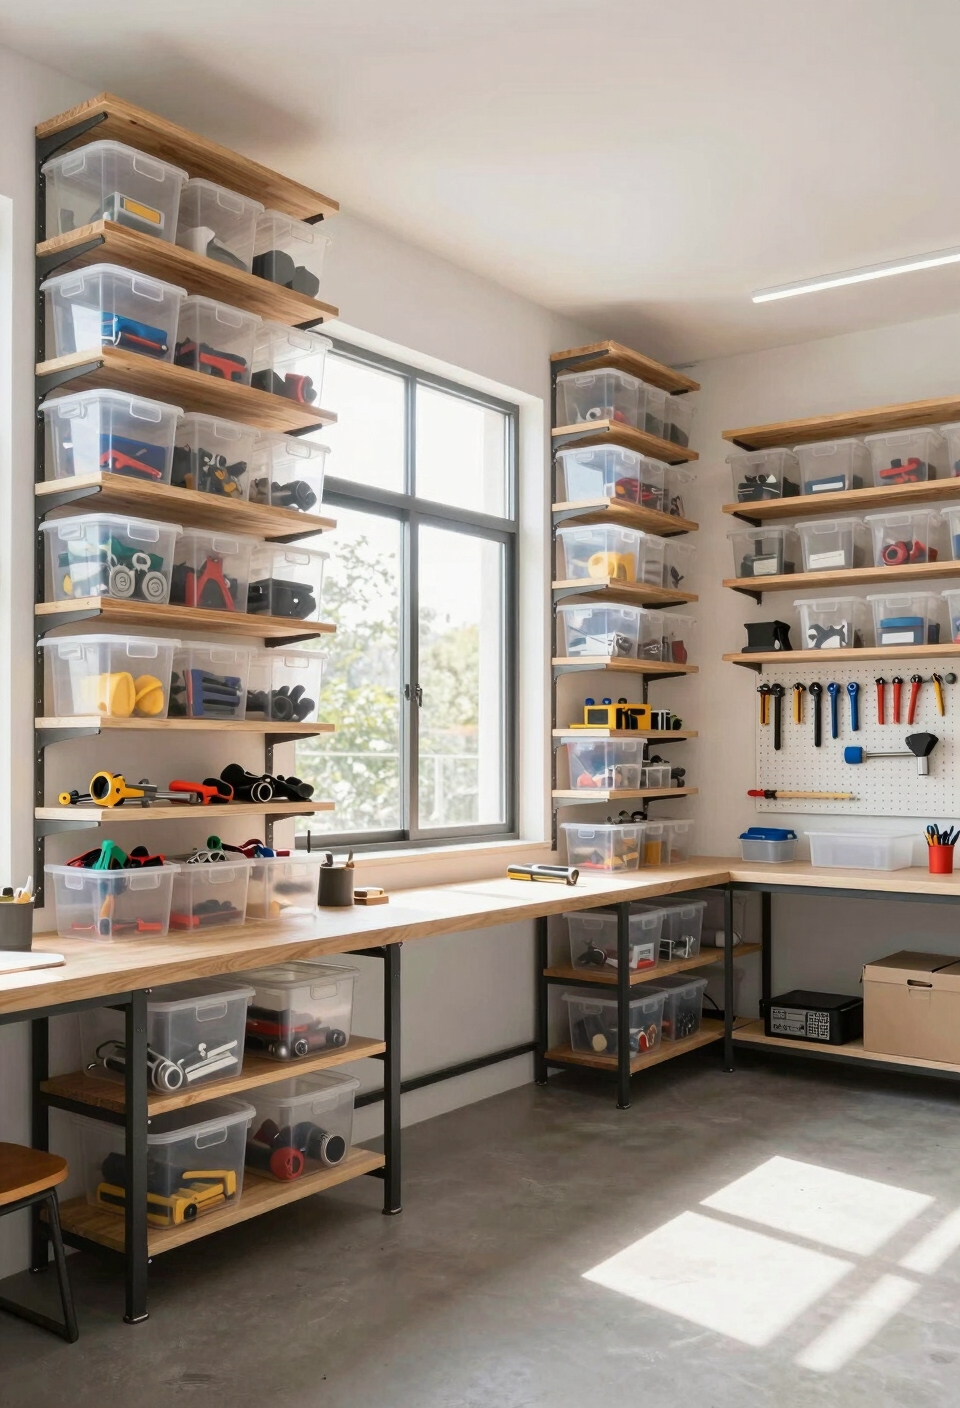
While fold-down workbenches handle the heavy lifting for workspace, you’ll want a system that keeps your most-used tools visible and within arm’s reach. Open shelving does exactly that, it gives you quick access without hunting through drawers. Install a few simple shelves on your wall, then grab clear containers for organizing screws, bolts, and small items. Clear labeling is your best friend here; write what’s inside each container with a permanent marker. You’ll instantly know where everything lives, saving you frustration during projects. This setup works great for tight quarters because it uses vertical space efficiently, much like the approach of utilizing wall height for folded clothes storage in compact closets. This setup works great for tight quarters because it uses vertical space efficiently.
Spring-Loaded Holders for Chisels and Bits
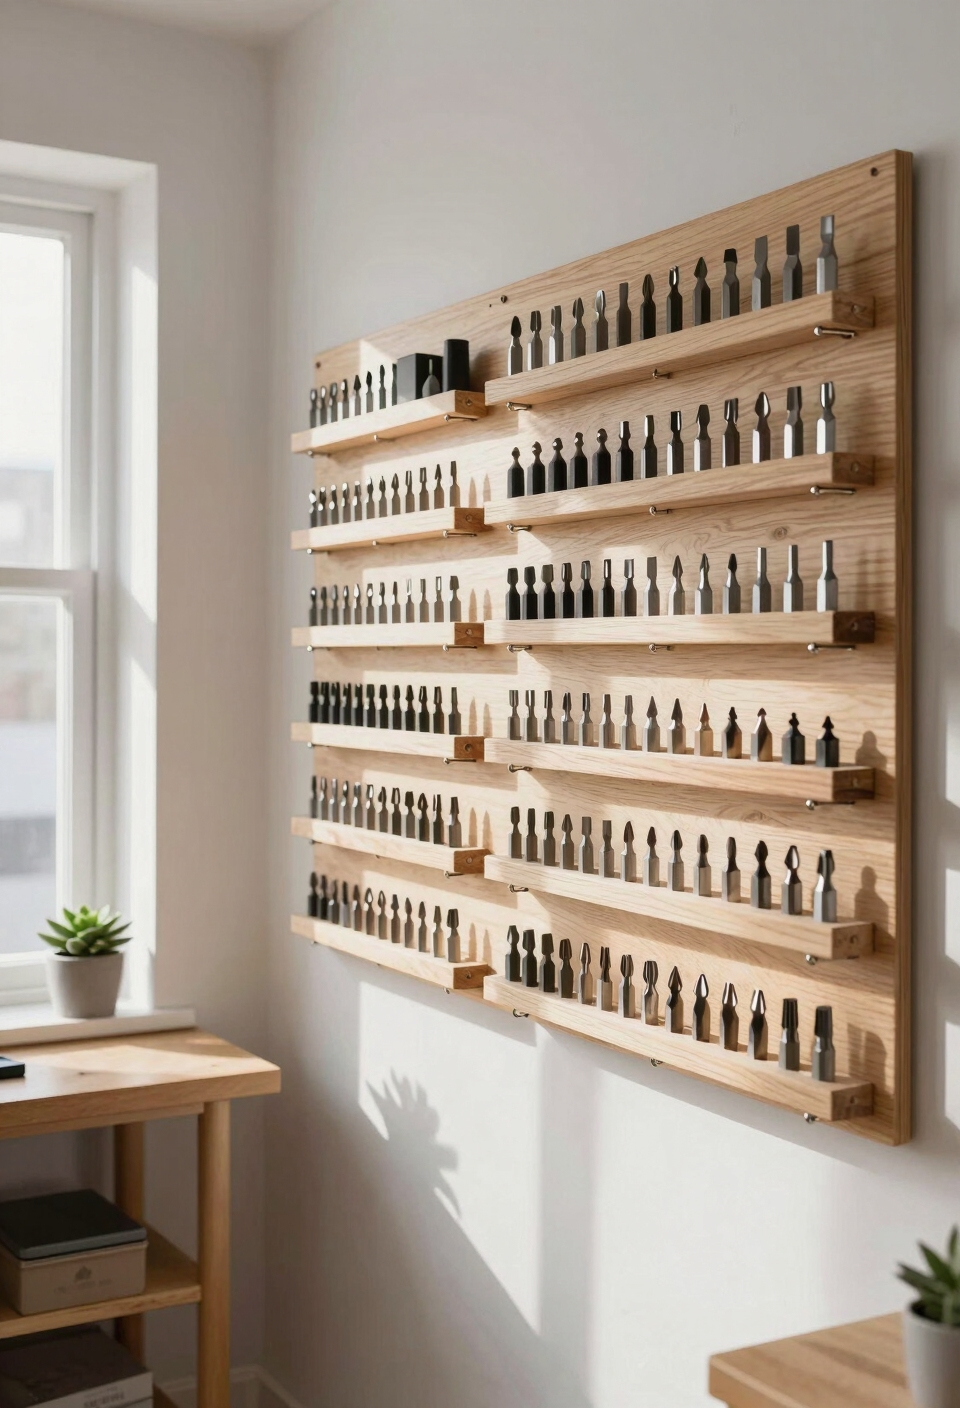
Your chisels and bits deserve better than getting lost in a jumbled drawer, and spring-loaded holders give you the perfect solution. These handy organizers grip your tools securely while keeping them visible and accessible. You’ll find your chisel storage takes up minimal wall or bench space, making them ideal for cramped workshops.
Spring-loaded bit organization systems come in various sizes, typically ranging from compact six-inch models to larger eighteen-inch versions. They’re usually made from plastic or metal with adjustable slots that accommodate different tool diameters. Installation’s straightforward, just mount them on pegboards or walls, and you’re done. Your tools stay protected, organized, and ready whenever you need them. Like space saving organizers for shoes, these spring-loaded systems maximize vertical storage and keep your workshop clutter-free.
Screw, Fastener, and Bit Storage With Drawer Dividers
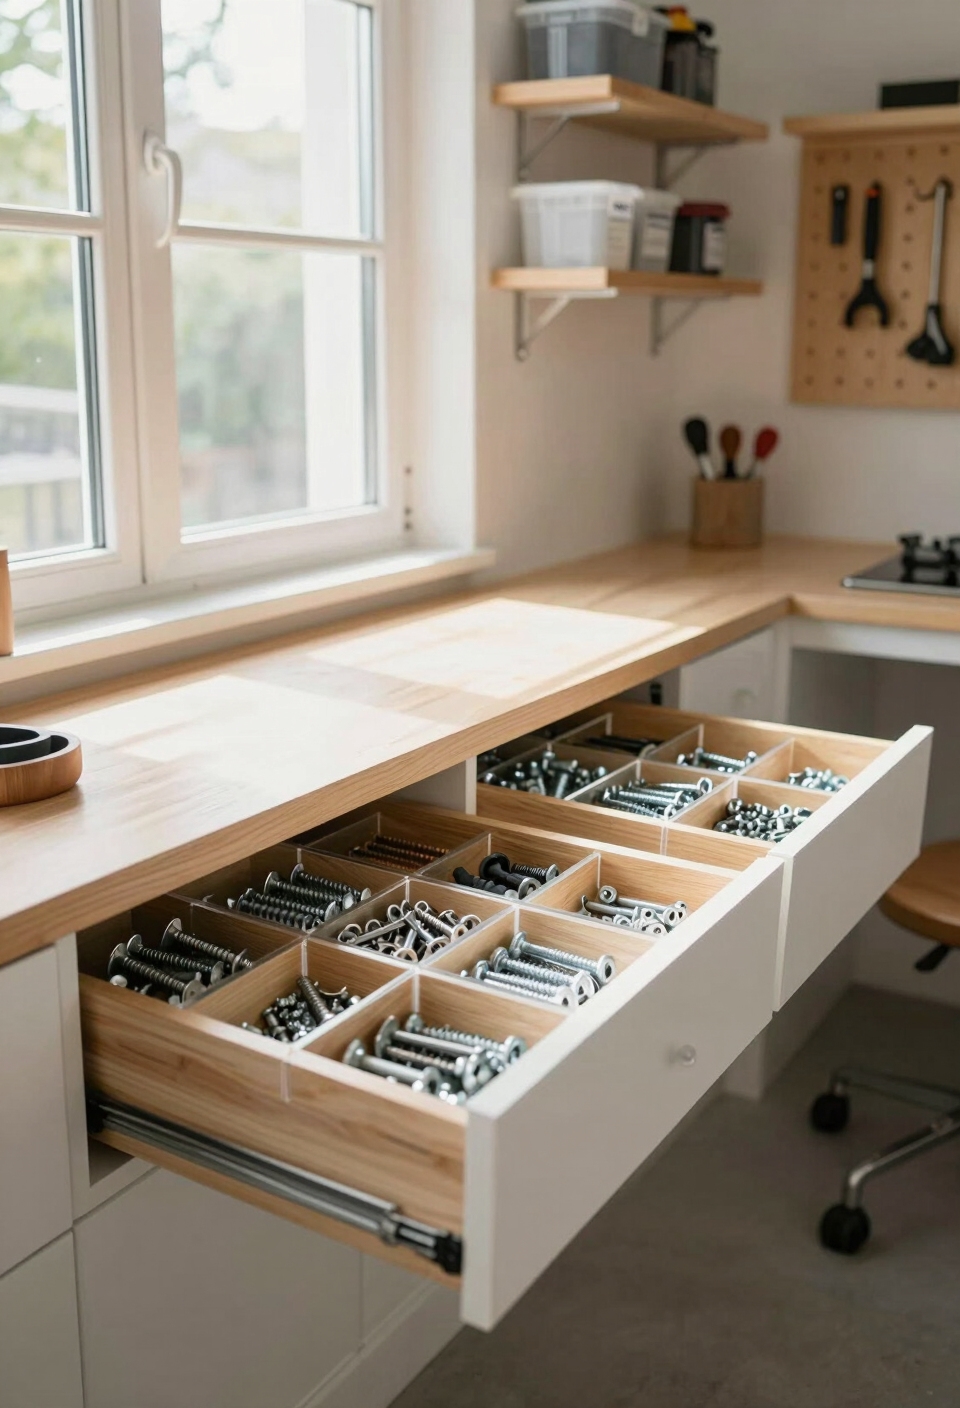
Drawer dividers transform chaotic collections of screws, fasteners, and bits into organized systems you can actually navigate. You’ll find that adjustable dividers work best for small spaces, letting you customize compartment sizes as your needs change. For screw storage, try using clear plastic organizers with labeled sections, you’ll spot what you need instantly without dumping everything out. Bit organization becomes simple when you sort by size and type across shallow drawers. Small magnetic strips also work great for metal bits, keeping them visible and accessible. You’ll save time on projects when your materials stay sorted rather than scattered everywhere.
Organize by Tool Type, Not by Storage Type
Once you’ve sorted your screws and bits into neat compartments, it’s time to step back and think bigger about how you’re actually organizing everything. Instead of stuffing tools wherever storage space exists, group them by tool functionality. Keep all your drilling tools together, bits, chucks, depth gauges. Store measuring instruments in one spot. This approach gives you storage flexibility because you can rearrange containers as your needs change. You’ll spend less time hunting for what you need and more time actually building. Your small workshop becomes genuinely usable, not just packed.
Create a Quick-Grab Station Near Your Workspace
Now that you’ve got your tools grouped logically, here’s the thing, even the best organization doesn’t help if you’ve got to trek across your workshop every time you need a hammer. Create a quick-grab station right where you work most. Use a small cart, wall-mounted pegboard, or shallow bin to hold your most-used quick access tools. Keep only your daily essentials here: screwdrivers, pliers, measuring tape. This space-saving idea cuts down wasted time searching and keeps you focused on projects. Position it within arm’s reach of your main workbench for maximum efficiency.
Frequently Asked Questions
How Do I Organize Tools When My Workshop Space Is Under 100 Square Feet?
You’ll maximize your tiny workshop by installing pegboard storage on walls for easy access and hanging magnetic strips for metal tools. This vertical approach keeps everything visible and organized without consuming floor space.
What’s the Best Way to Prevent Rust on Metal Tools in Humid Workshop Environments?
You’ll want to coat your tools in actual bubble wrap and pray nightly, just kidding! Seriously, you’re applying rust prevention techniques like oil coatings and silica gel while running humidity control solutions: dehumidifiers and moisture absorbers work wonders.
How Often Should I Reorganize My Workshop Storage System for Maximum Efficiency?
You’ll maximize workshop efficiency by reorganizing quarterly or when you notice items aren’t in logical locations. Establish an organization schedule that fits your workflow, adjusting storage as your projects evolve and tool usage patterns change.
Which Tools Should I Prioritize Keeping Within Arm’s Reach During Projects?
You’ll boost efficiency by positioning essential tools within arm’s reach that match your project workflow. Keep frequently used items, hammers, screwdrivers, measuring tape, closest. You’ll reduce reaching time and maintain momentum throughout your work.
What Budget Should I Allocate for Organizing a Small Workshop on a Limited Income?
You’ll maximize your limited income by exploring budget friendly options like repurposing household containers, installing wall-mounted pegboards, and investing gradually in cost effective solutions that serve multiple purposes simultaneously.
Final Takeaways
You’ve got the blueprint now, take these ideas and build your dream workshop. Start small, maybe grab some pegboards this weekend like your grandpa’d do with a catalog, then layer in magnetic strips and drawer dividers as you go. Your tools’ll thank you, your projects’ll move faster, and you’ll actually find what you need. That’s worth the effort.

- 22 Small Space Vanity Ideas Bedroom Setup Hacks - March 10, 2026
- 23 Small Space Coffee Table Ideas With Soft Curves - March 9, 2026
- 21 Small Space Fireplace Ideas in Tactile Stone - March 8, 2026