
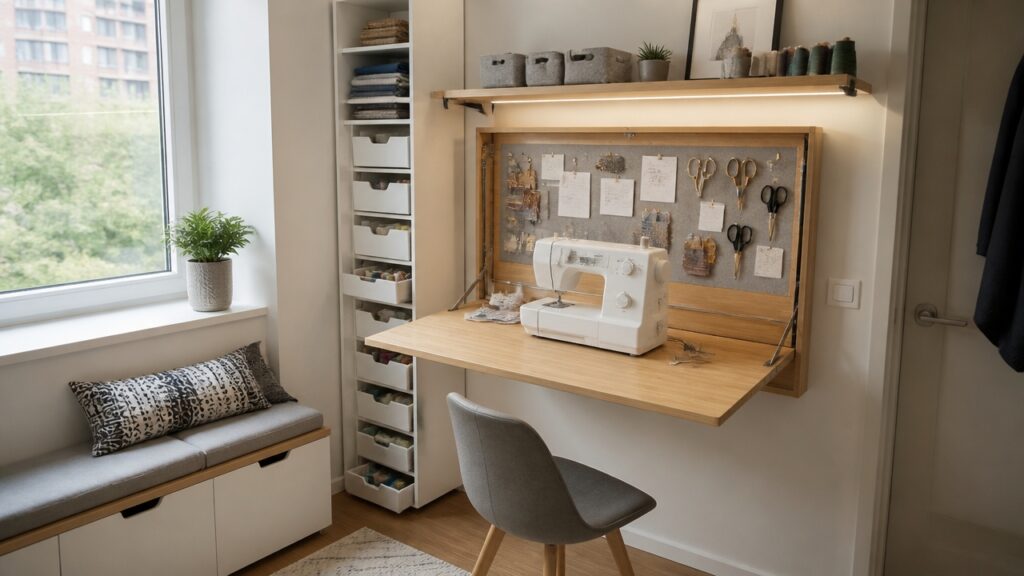
In a cozy nook where your cherished fabrics and patterns, perhaps a floral Liberty of London print or pale “Sea Salt” walls from Farrow & Ball, rearrange themselves into a bijou sanctuary, you start to notice that every inch of space demands strategic joinery; vertical surfaces adorned with dove-gray IKEA Ekby wall shelves hold spools, Bolts of quilting cotton, and vintage crochet hooks that almost whisper of mid-century modern sensibilities, while multi-purpose furniture, like a fold-out table with drawers from the Container Store, invites cocooning, yet the challenge remains: how to maximize function without sacrificing style, and which space-saving solutions truly work in the long run?
Evaluate Your Sewing Space’s Layout and Usage Needs
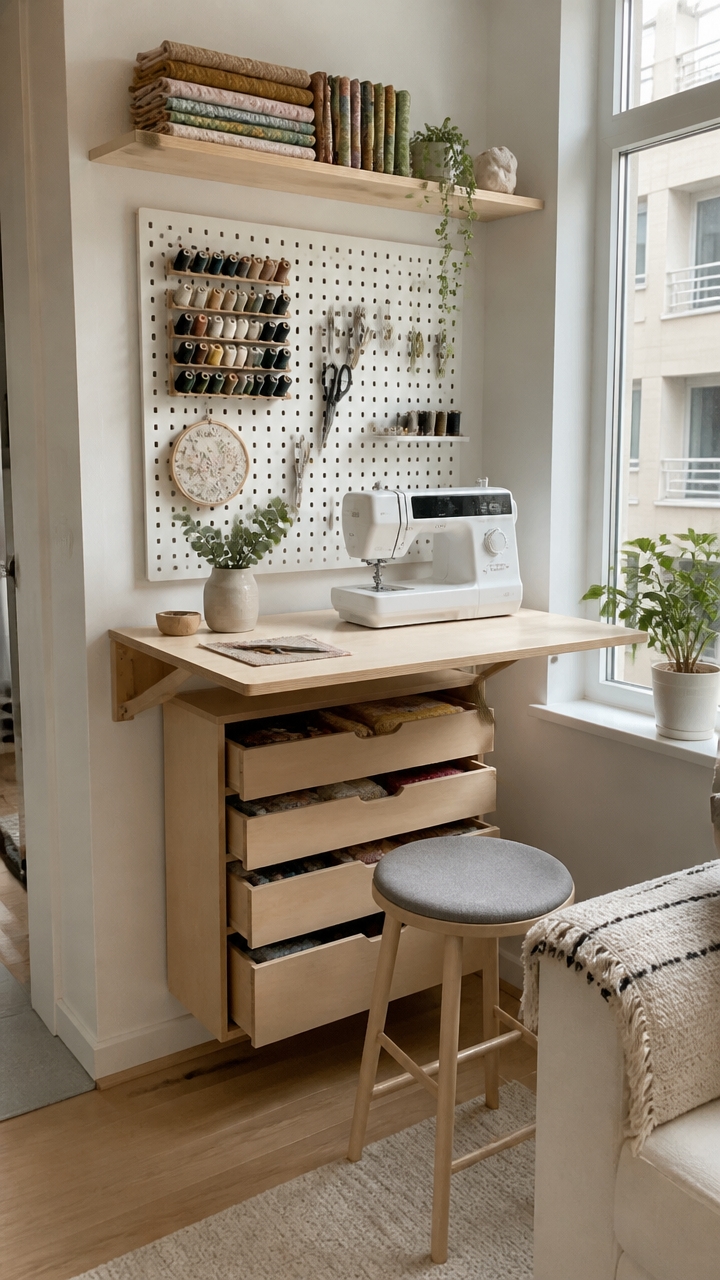
Evaluating your sewing space’s layout and how you use it is essential for creating an efficient and comfortable environment. Start by measuring the current size of your room and comparing it to your planned activities. This helps determine whether the space is sufficient or if it risks becoming overcrowded. Prioritize storage for frequently used tools and supplies by identifying which items you access most often. Keeping these within easy reach minimizes clutter and enhances workflow. Incorporating space-saving strategies can further optimize your layout and make your sewing room more functional. Create designated zones within the room for different tasks such as sewing, pressing, cutting, and storage. Clearly defined areas help streamline your process and reduce the need to move around excessively. Take note of natural light sources to ensure your workspace is well-lit during sewing sessions, and position electrical outlets for easy access to sewing machines and lighting. In conclusion, evaluate the room’s furniture layout, ensuring it allows for comfortable movement while maximizing floor space. Thoughtful planning here helps prevent clutter and makes your sewing area more functional and inviting.
Maximize Vertical Storage to Save Floor Space
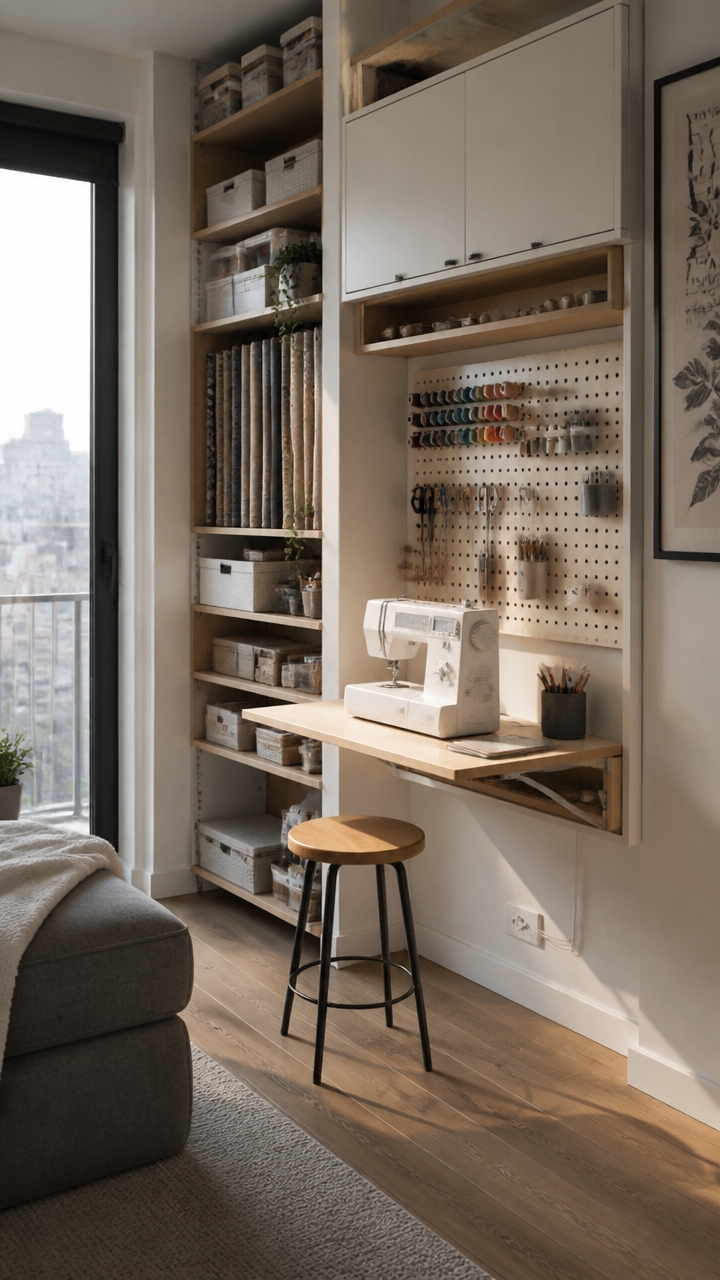
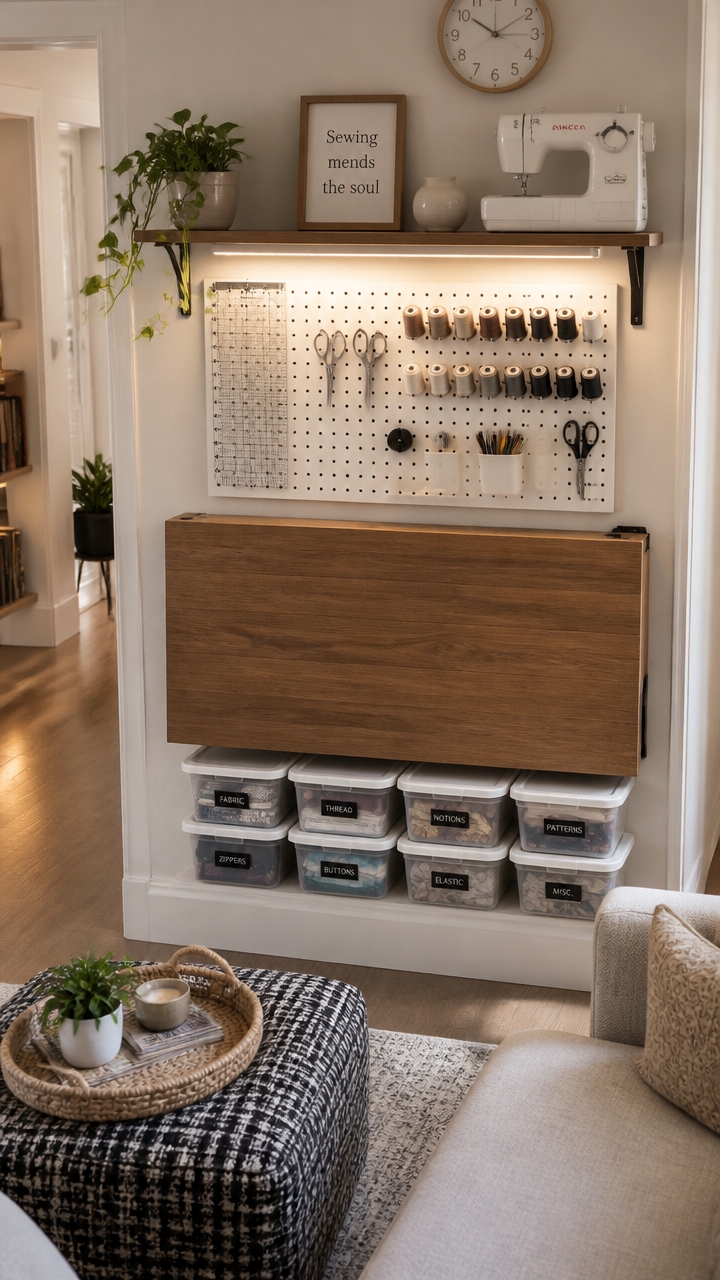
Utilizing vertical storage solutions is a highly effective way to maximize space in a small sewing room. Installing wall-mounted pegboards and tall shelving units allows you to keep tools, fabric, and supplies off the surfaces and floors, freeing up valuable room for movement and workspace. Pegboards are versatile; they can hold scissors, rulers, and small organizers, while adjustable hooks make it easy to customize your setup as your needs change. Tall shelving units or narrow cabinets can store bolts of fabric, sewing patterns, and bulky supplies vertically, preventing clutter and making everything easy to find. Hang hanging baskets or fabric pots from the ceiling to keep frequently used items accessible without taking up table or floor space. Incorporating these vertical solutions not only increases storage capacity but also creates a more open and organized sewing environment, making your small space feel less crowded and more functional. Additionally, vertical storage solutions can be customized to fit any small space, tailoring the organization to your specific needs.
Use Multi-Purpose Furniture for Flexibility
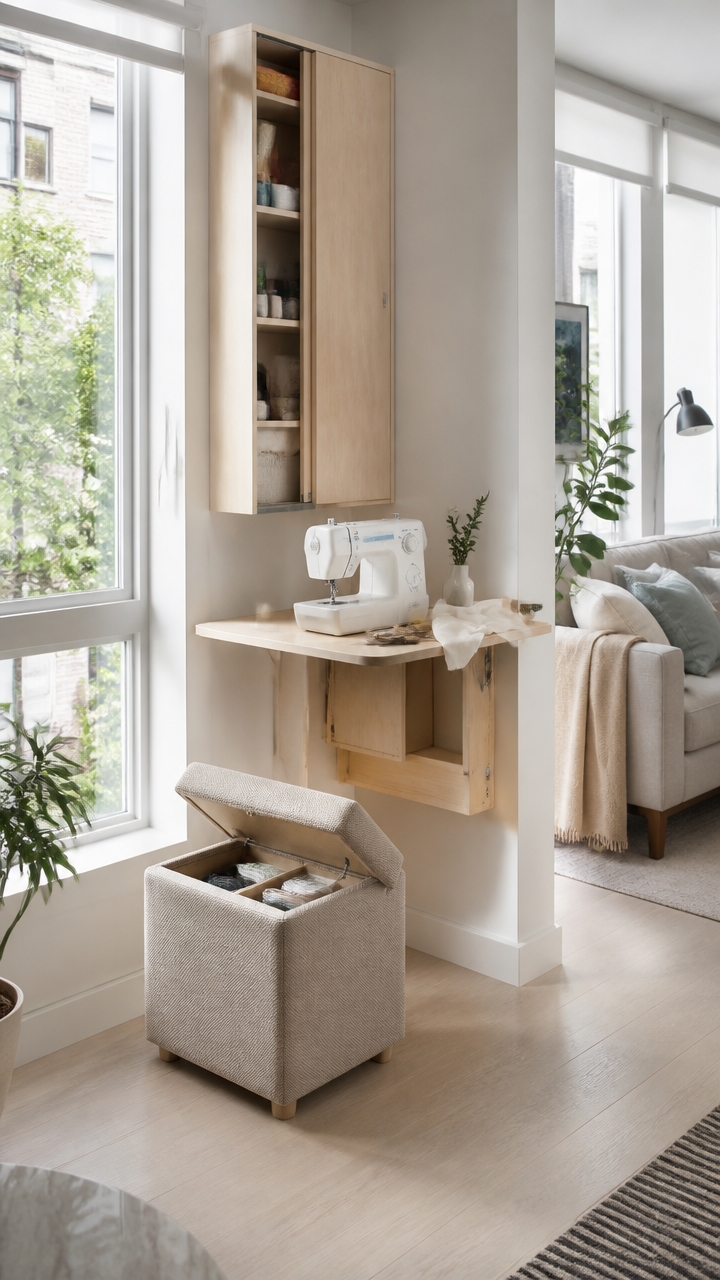
Multi-purpose furniture is a game-changer in a small sewing room, as it maximizes functionality and saves space. Items like fold-out sofa beds or storage ottomans serve dual roles, providing comfortable seating or a place to relax during breaks, while also offering hidden storage for supplies, fabrics, or tools. A fold-out sofa bed, for instance, can double as a guest bed, making your small room versatile without sacrificing valuable square footage. Storage ottomans can be used as footrests, extra seating, or surfaces for cutting or arranging projects, with the added benefit of keeping supplies out of sight when not in use. Incorporating convertible furniture allows you to adapt the space for different activities, from sewing to relaxing, without cluttering your environment. When choosing multi-purpose pieces, consider their size, storage capacity, and style to seamlessly integrate them into your workspace without overwhelming it. Space-saving strategies are essential to optimize small room layouts effectively.
Repurpose Existing Household Items for Storage and Work Surfaces
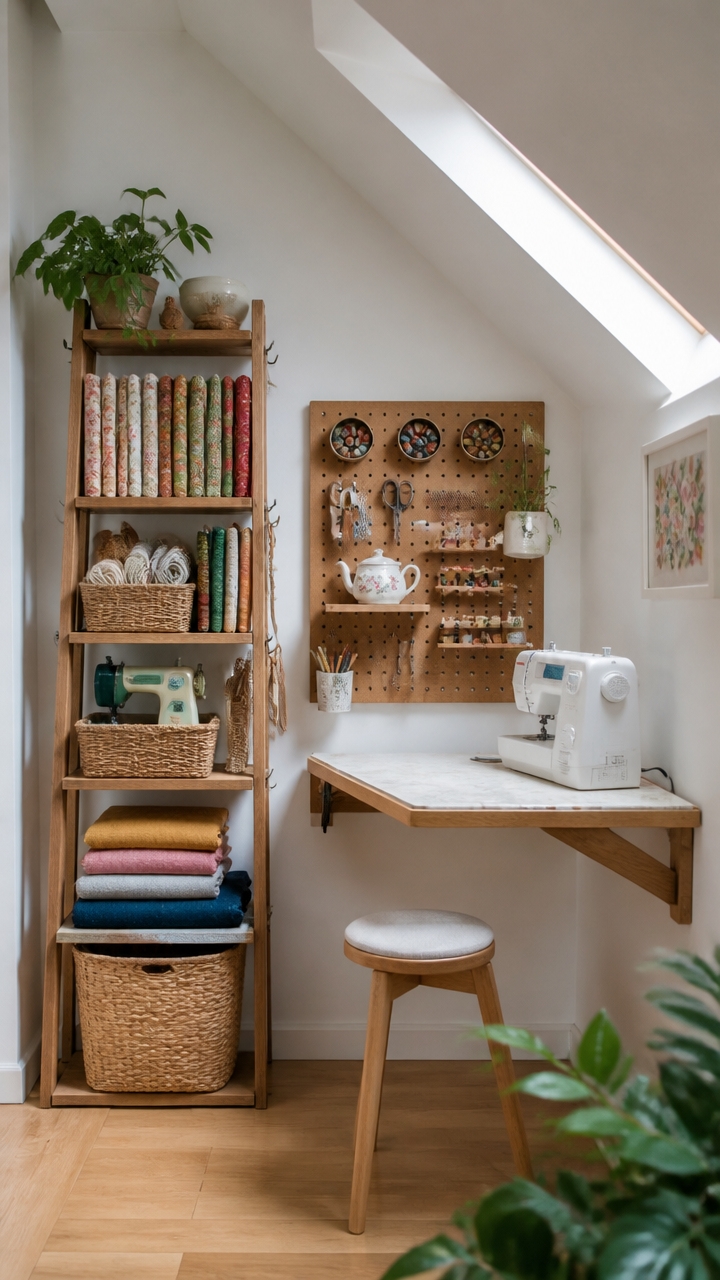
Using existing household items for storage and work surfaces is an effective way to maximize space in a small sewing room. Old kitchen cabinets or dressers can be repurposed to organize fabric, tools, and sewing notions, transforming them into functional storage units. These pieces can be positioned against walls to keep the floor clear, and their varied compartments help categorize supplies for easy access. Similarly, hallway or closet drawers can be converted into dedicated sewing storage by inserting dividers or labeled containers for threads, patterns, and small tools, making organization straightforward and accessible. Placing a sturdy household table or desk in a corner provides a versatile, spacious work surface that supports sewing projects and can double as a craft station. Additionally, under-bed storage bins are perfect for storing infrequently used fabrics and supplies, keeping clutter out of sight and freeing up valuable space. Wall-mounted or hanging household items, such as ironing boards or shelves, optimize vertical space, keeping essential tools within reach without occupying floorspace. Utilizing these existing household items not only saves money but also creates a practical, organized sewing environment tailored to small spaces. Incorporating space-saving strategies like modular storage options can further enhance your small sewing room’s efficiency and functionality.
Designate Zones for Sewing, Cutting, Supplies, and Relaxation
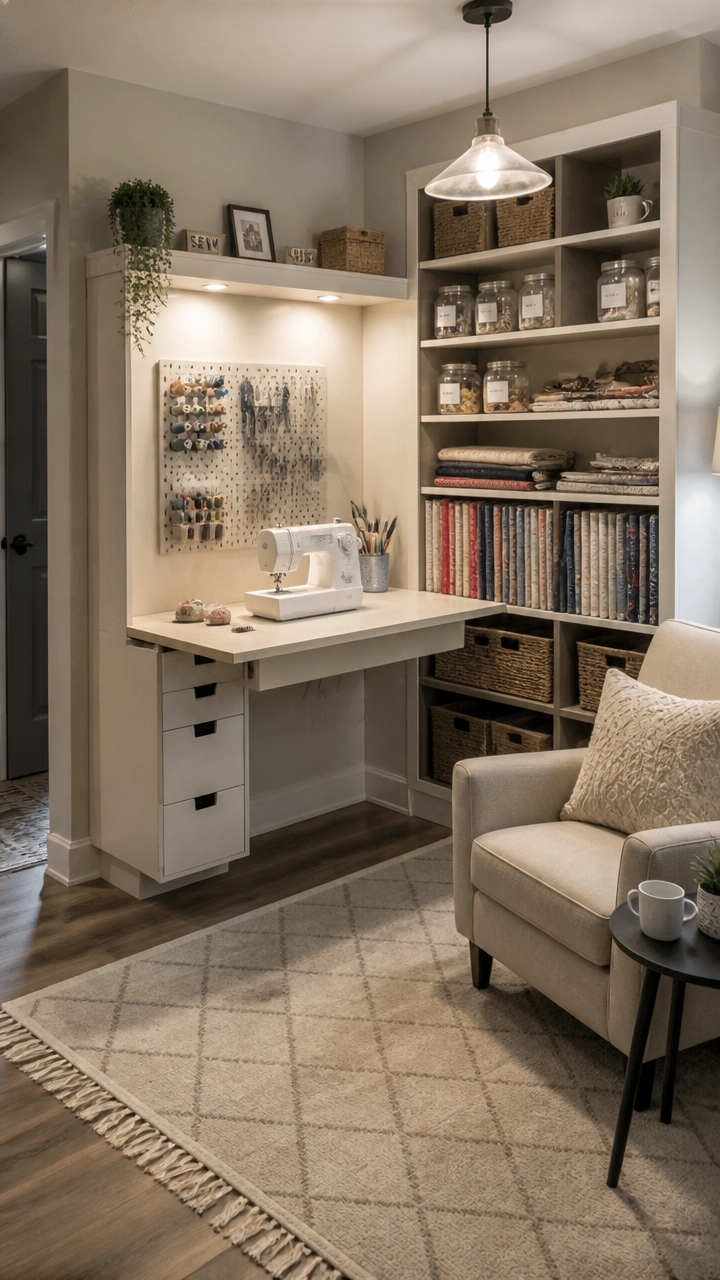
Creating distinct zones within your small sewing room helps improve workflow and keeps clutter at bay. Allocate specific areas for sewing, cutting, storage, and relaxation to make your space more functional and inviting. Position the cutting table near your fabric storage, allowing quick access to materials without unnecessary movement. Use area rugs or different lighting to visually demarcate each zone, enhancing clarity and reducing visual clutter. Make certain each zone has dedicated storage solutions, like rolling carts for sewing machines and sturdy surfaces or storage bins for cutting mats and tools. Arranging furniture thoughtfully so each area is accessible and free of obstructions will help you move seamlessly between tasks and maintain a comfortable, efficient workspace. Incorporating space-saving strategies can further optimize your small sewing room.
Choose Space-Efficient Sewing Tables and Workstations
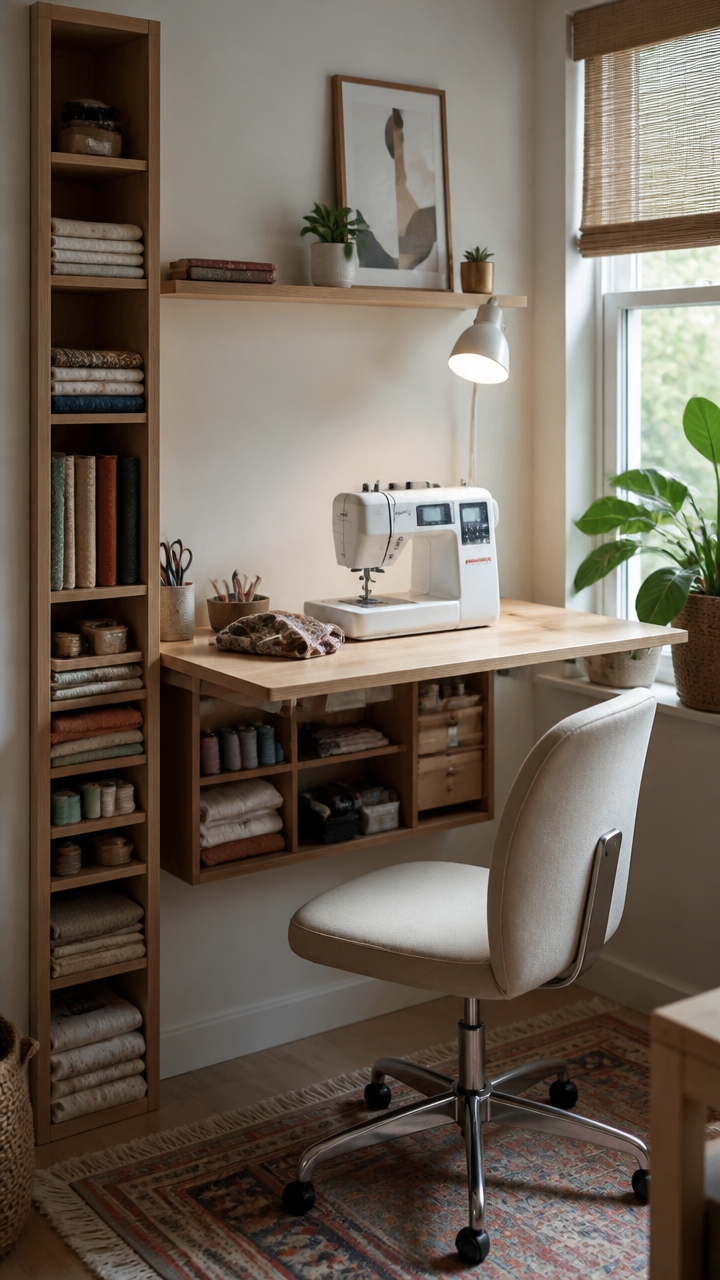
Opting for space-efficient sewing tables and workstations is essential for maximizing a small sewing room. Foldable or collapsible tables are excellent choices because they can be easily tucked away when not in use, freeing up valuable floor space for other activities or movement. These tables often come with sturdy surfaces designed to support sewing projects while maintaining a slim profile when folded.
Height-adjustable workstations or desks with built-in storage are versatile options that serve multiple functions. They allow you to set your workspace to a comfortable height and often feature drawers or compartments to keep tools, notions, and fabric organized and within reach. This eliminates the need for additional storage furniture, reducing clutter in a tight space.
Multi-purpose furniture, such as a sewing station with integrated shelving or drawers, further helps to conserve space. By combining work surface, storage, and sometimes even seating into one piece, you streamline the room’s layout and reduce the number of separate units needed. Be mindful of proportion and choose pieces that fit well without overwhelming the room.
Portable work surfaces add flexibility, letting you reconfigure your workspace based on current projects. Lightweight, compact tables or carts can be moved easily and even used as temporary cutting stations or extra work surfaces when needed. This mobility ensures that your sewing space adapts to your workflow without sacrificing floor space.
Lastly, consider corner or wall-mounted workbenches. These installations free up the central area of the room while maintaining ample workspace. Wall-mounted options often include additional storage like pegboards, hooks, or shelves, making them a highly functional choice for limited space. Proper placement and thoughtful organization of these units can dramatically improve efficiency and comfort in a small sewing room.
Install Overhead Shelves and Wall-Mounted Organizers
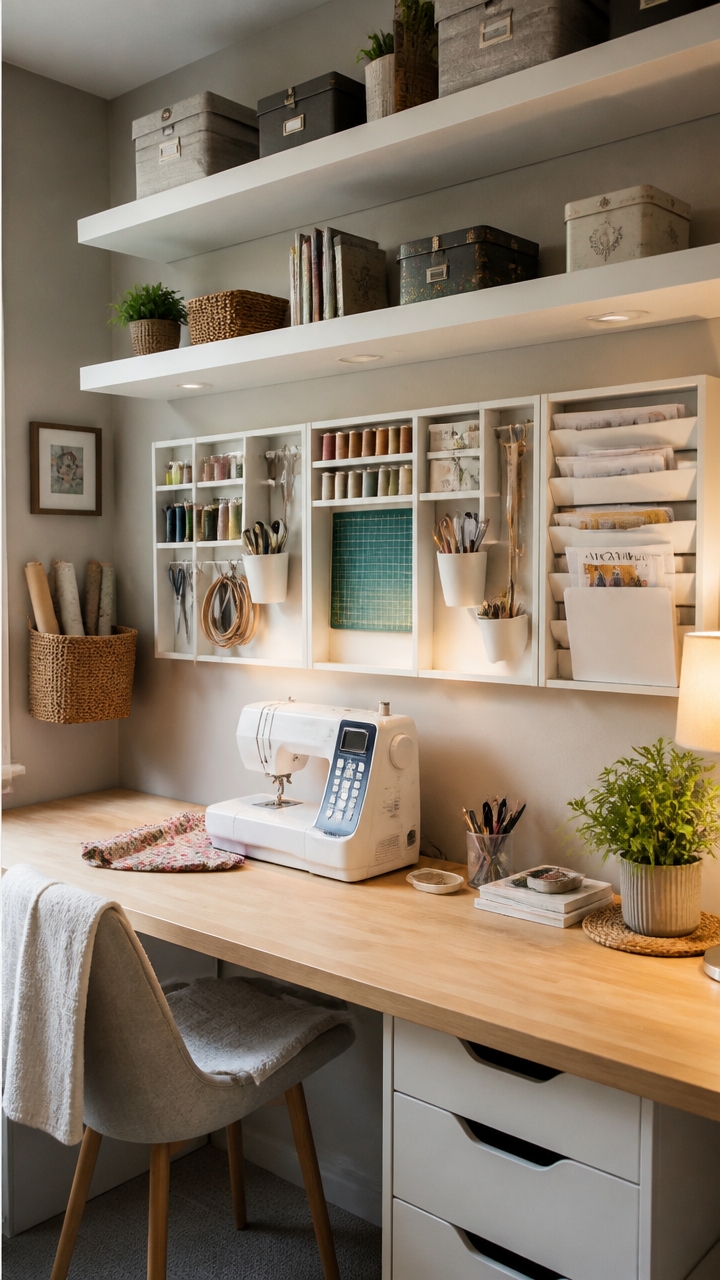
Installing overhead shelves and wall-mounted organizers is an effective way to maximize the limited space in a small sewing room. Overhead shelves utilize vertical space above your workspace, providing accessible storage for fabric bins, project supplies, or even bulkier items like fabric bolts and sewing machines. Choose sturdy materials such as wood or metal brackets to guarantee they can support the weight safely. Position them above your sewing table or in corners to keep frequently used items within easy reach while keeping your work surface clear.
Wall-mounted organizers, like pegboards or slatwall systems, are versatile tools that help keep your tools and supplies organized and visible. Arrange these organizers near your work area to streamline your workflow, storing items such as scissors, rulers, threads, and small accessories. Group similar items together, like spools of thread or sewing notions, to quickly locate what you need. Use clear labels on shelves and compartments to maintain organization over time, making your sewing sessions more efficient and less cluttered.
Maximize Hidden Corners and Nooks for Clever Storage
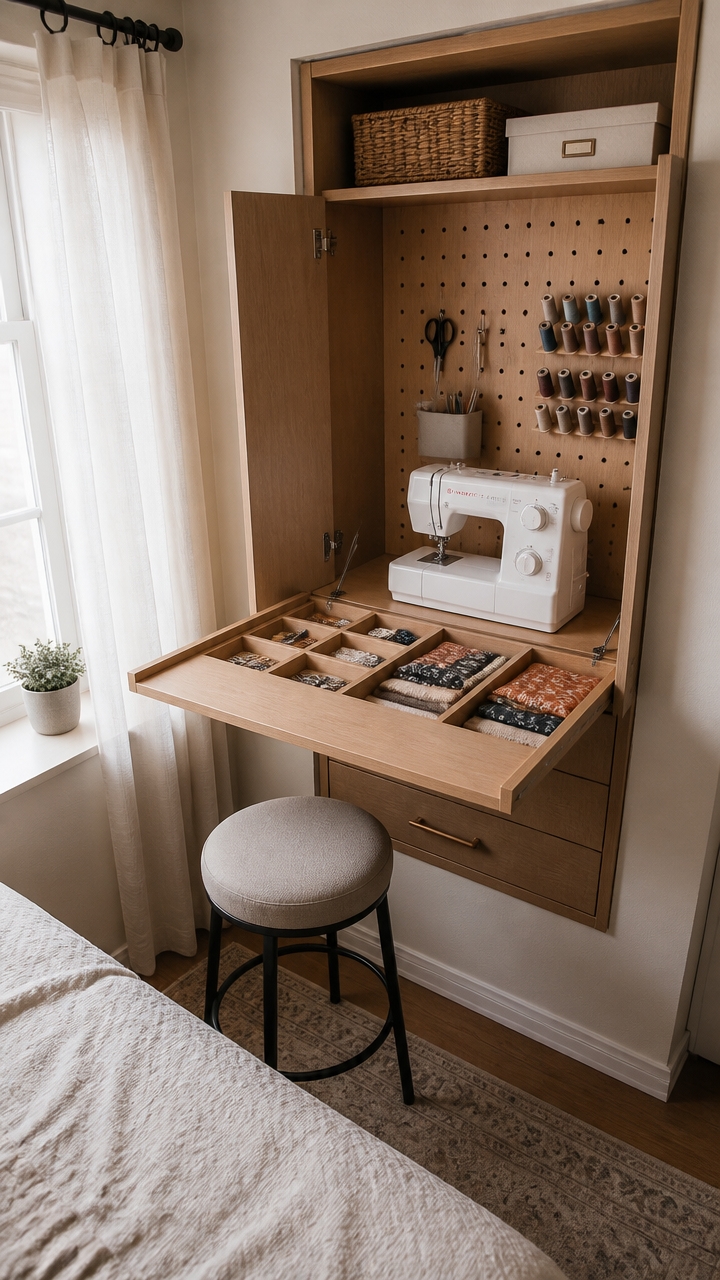
Corners and small nooks often become overlooked storage spots in a sewing room, but they hold great potential for maximizing space. Installing corner shelving units or lazy Susans transforms awkward spaces into organized zones for fabric, patterns, or sewing tools. Corner shelving provides accessible open storage, while lazy Susans make it easy to rotate and access items without rummaging through stacks. For smaller gaps, over-the-door baskets or hidden corner cabinets discreetly keep supplies out of sight but within reach. Narrow rolling carts or stackable bins can be squeezed into tight nooks, offering flexible storage for notions, trims, or smaller fabrics. When planning, consider the proportion and placement of these units to keep pathways clear and work surfaces uncluttered, ensuring your small sewing room remains functional and inviting.
Keep Surfaces Clear With Under-Table Storage Bins
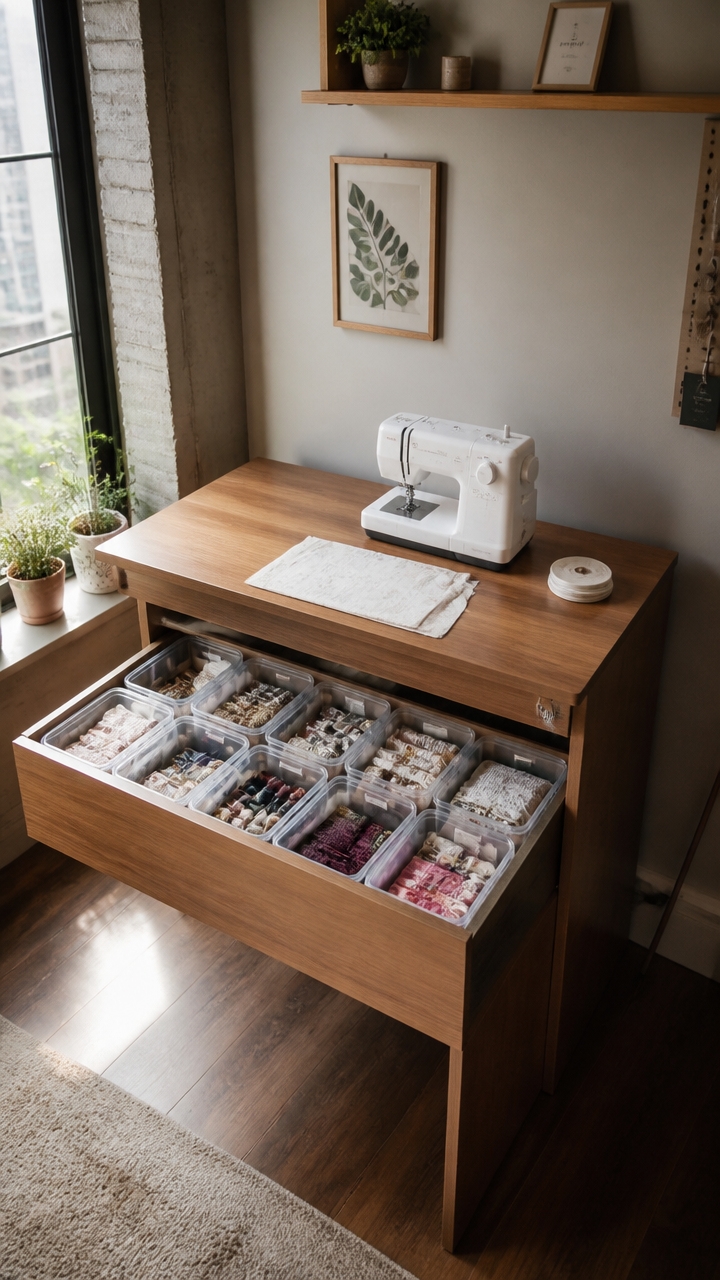
Utilizing under-table storage bins is an effective way to keep your sewing workspace tidy and maximize the limited space available in a small sewing room. These bins fit snugly beneath work surfaces, providing a designated spot for supplies without encroaching on your work area. Clear plastic bins are particularly useful, as they allow you to quickly see the contents at a glance, reducing time spent searching for tools, fabric, or notions. Choosing shallow bins ensures they sit flush against the underside of tables or workbenches, maintaining easy movement and accessibility. Labeling each bin helps you stay organized and prevents clutter from building up over time. Regularly rotating and reorganizing the bins keeps your workspace fresh and efficient, making sewing projects smoother and more enjoyable.
Use Stackable Bins and Drawer Units for Small Supplies
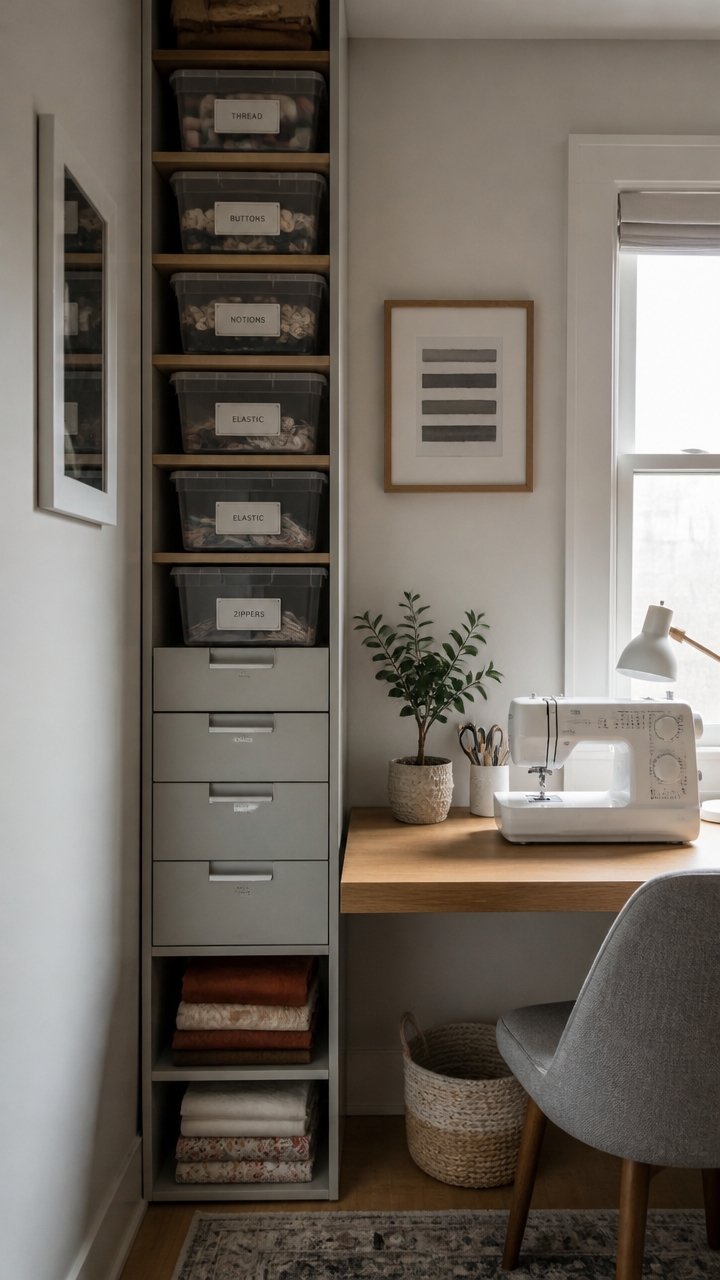
Using stackable bins and drawer units for small supplies helps maximize vertical storage in your sewing room. These units allow you to efficiently utilize limited floor space, keeping your workspace open and uncluttered. Stackable bins are perfect for categorizing small items like beads, buttons, or thread spools, making it easy to access what you need without rummaging through clutter. Drawer units, especially modular ones, can be grouped together or separated to suit your specific craft needs, providing customizable organization. Clear plastic containers within these units enable quick visual identification of supplies, saving time during projects. Label each bin or drawer to further streamline your workflow and maintain tidiness. When choosing units, consider size proportions to ensure they fit your space comfortably, and opt for materials that complement your room’s style to create a cohesive, functional sewing environment.
Store Fabrics and Materials Using Space-Saving Techniques
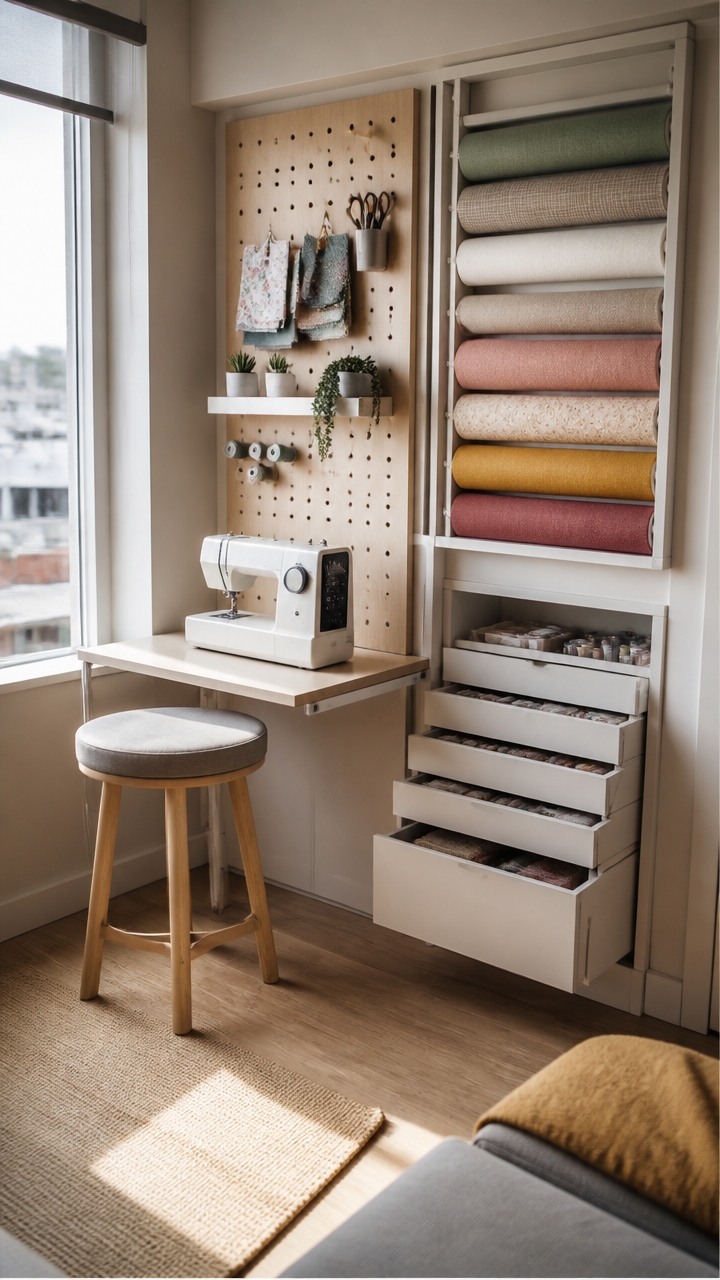
Organizing fabrics efficiently is key to maximizing a small sewing room. Using clear, stackable drawer bins sorted by color or type allows for quick visual access, making it easy to locate what you need without rummaging through clutter. These bins can be stacked vertically, taking full advantage of available wall or shelf height, which helps conserve valuable floor space. Label each container clearly with printed or handwritten tags to streamline the selection process and prevent unnecessary digging. For larger fabric pieces, folding them uniformly with cardboard or foam core creates neat stacks that are easy to store and access, further reducing clutter. Hanging fabric bolts or pieced fabrics on wall-mounted tension rods or garment racks frees up shelf space and keeps your fabrics wrinkle-free and visible. Small scraps and jelly roll strips can be stored in small jars, bins, or labeled containers, which keep them accessible yet contained, preventing messes. Combining these methods creates a tidy, organized workspace that makes working efficiently in a small sewing room possible.
Label and Use Clear Containers for Easy Access
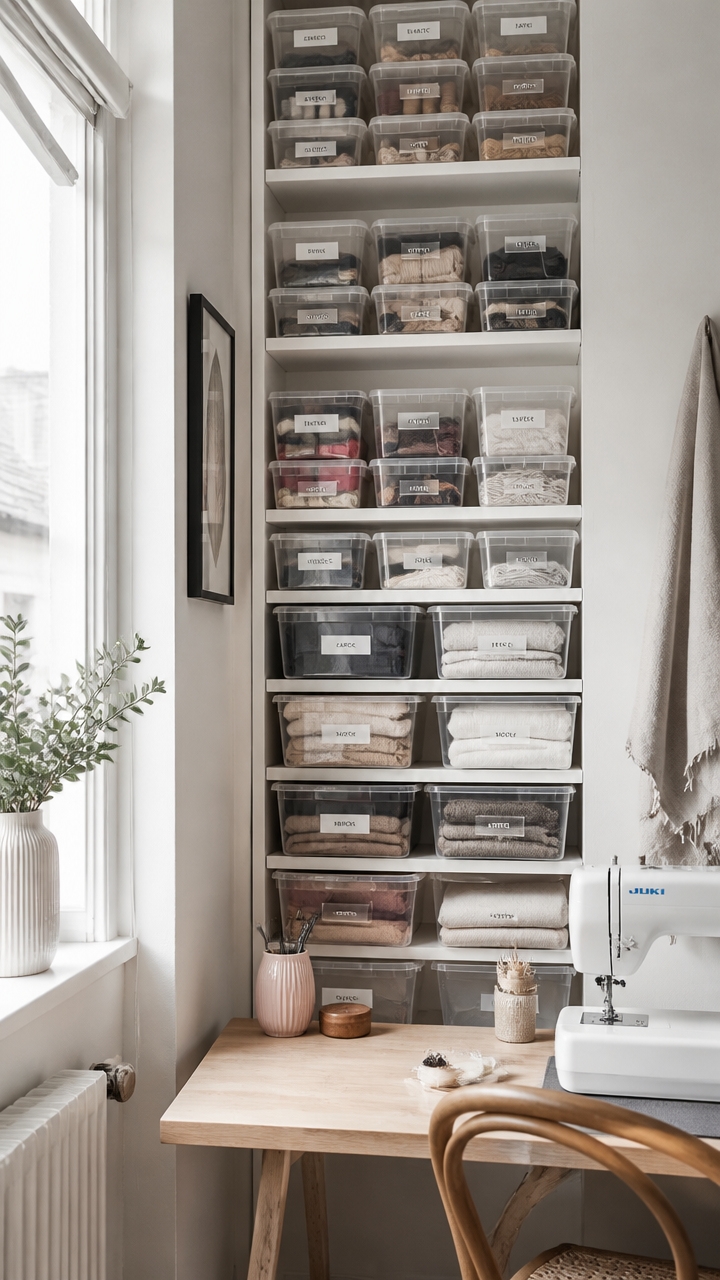
Labeling containers with printed or handwritten tags allows you to quickly identify their contents, saving time when searching for supplies. Place labels on the front of each container so that you can see at a glance what’s inside without having to open or move them around. Use a consistent labeling system, such as printed labels, chalkboard tags, or washi tape with written descriptions, to keep things uniform and organized.
Clear containers are especially helpful because they let you see exactly what’s stored inside at a glance, reducing the need to open each one. This visual accessibility speeds up your workflow and helps you maintain an organized space. When choosing containers, opt for those with a size that fits your storage needs without wasting space, and consider stacking them to maximize vertical storage.
Grouping similar items, like zippers, threads, or trims, in labeled clear bins keeps your supplies consolidated and easy to locate. Make it a habit to review and relabel containers periodically to guarantee everything stays accurate and your space remains tidy. Proper labeling and clear containers create an efficient, clutter-free sewing room where every supply has a designated place.
Declutter Regularly to Keep Your Space Organized
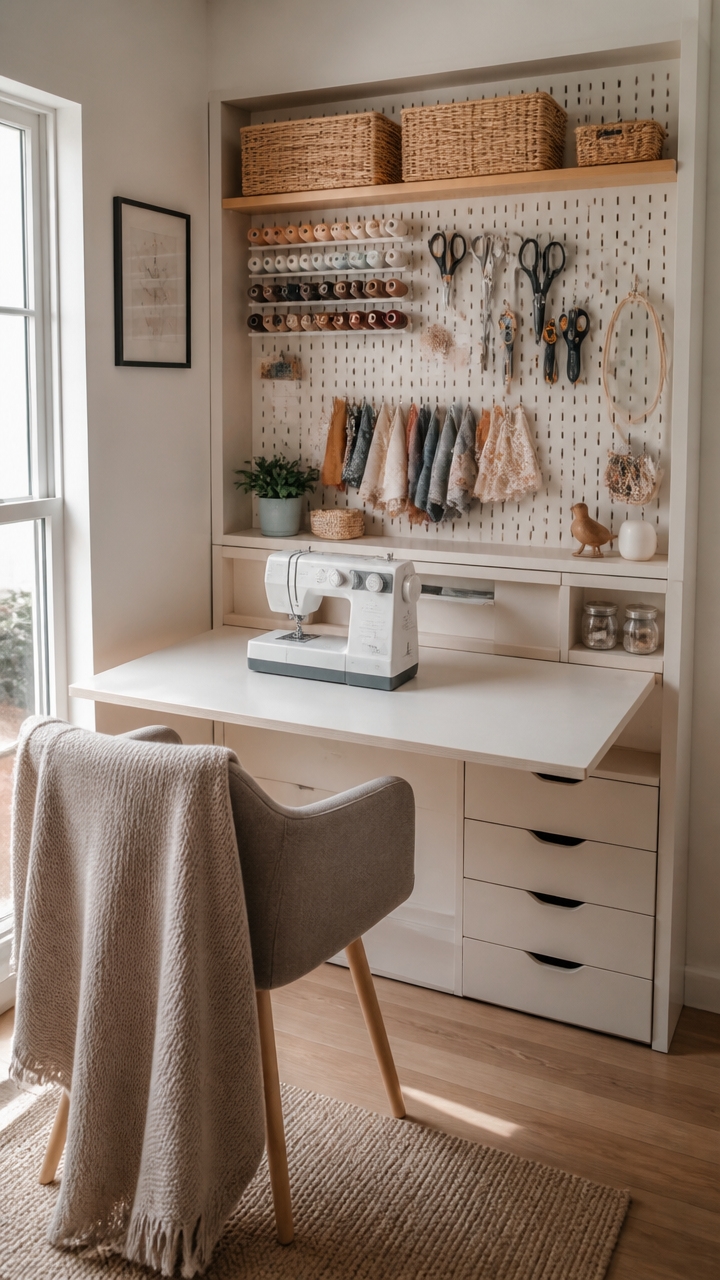
Regular decluttering is vital to maintaining an organized and efficient sewing space, especially in a small room. Setting aside dedicated time weekly or monthly to review your fabric stash, tools, and supplies helps you identify what is genuinely needed and what can be discarded or donated. This routine prevents clutter from accumulating over time, making it easier to access your essential materials and keep your workspace tidy. Remove items that are rarely used or no longer serve your projects, freeing up valuable space for active sewing tasks. Implement a simple system for quick disposal or donation of unused materials to keep clutter from creeping back in. Consistently organizing and tidying your workspace after each project ensures a clean environment, reduces chaos, and encourages more enjoyable, stress-free sewing sessions.
Add Quick-Access Storage for Frequently Used Tools
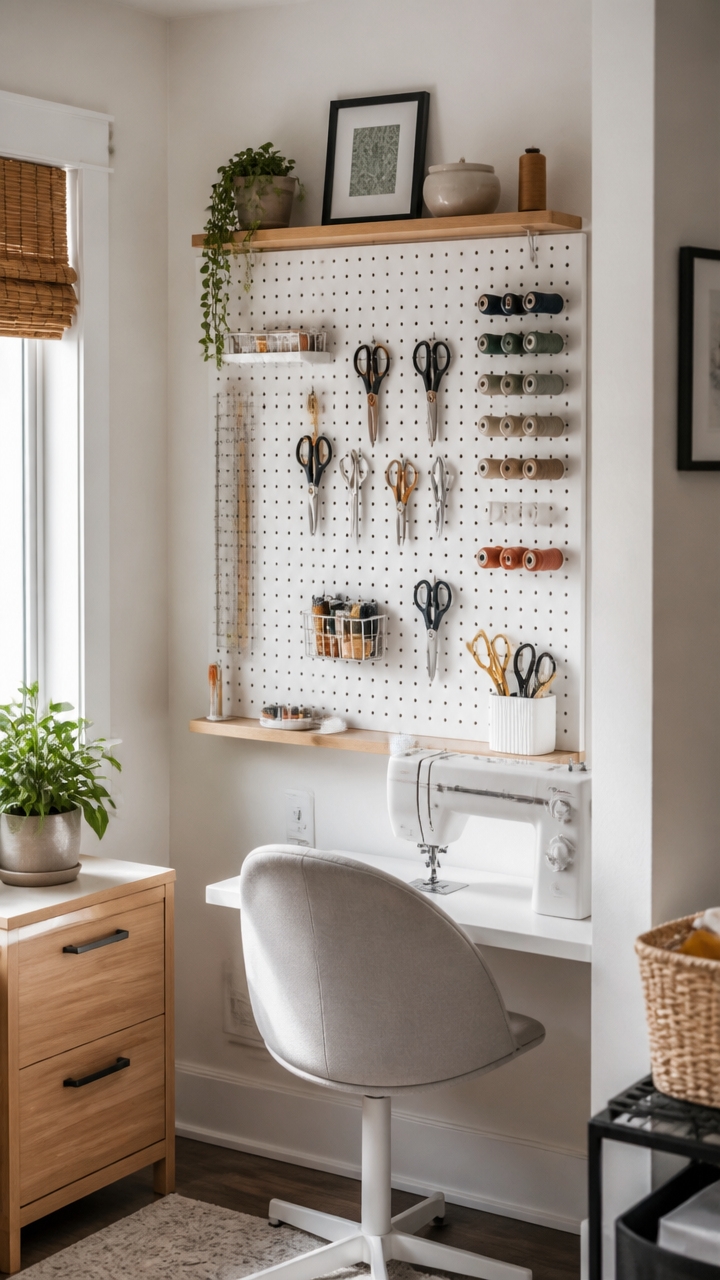
In a small sewing room, staying efficient means having your most-used tools within easy reach. Installing wall-mounted pegboards is a practical solution that transforms an empty wall space into an organized tool station. By hanging essential items like scissors, rotary cutters, and rulers on the pegs, you can grab what you need instantly without cluttering your work surface. This setup keeps your tools visible, accessible, and neatly arranged, freeing up valuable desk space for your projects. To keep things tidy, consider using different pegboard hooks or small containers directly on the board to separate tools or hold small notions. Position the pegboard close to your sewing table so your favorite tools are always at your fingertips, making your sewing experience smoother and more enjoyable.
Organize Patterns and Projects With Wall Pockets or Magazine Holders
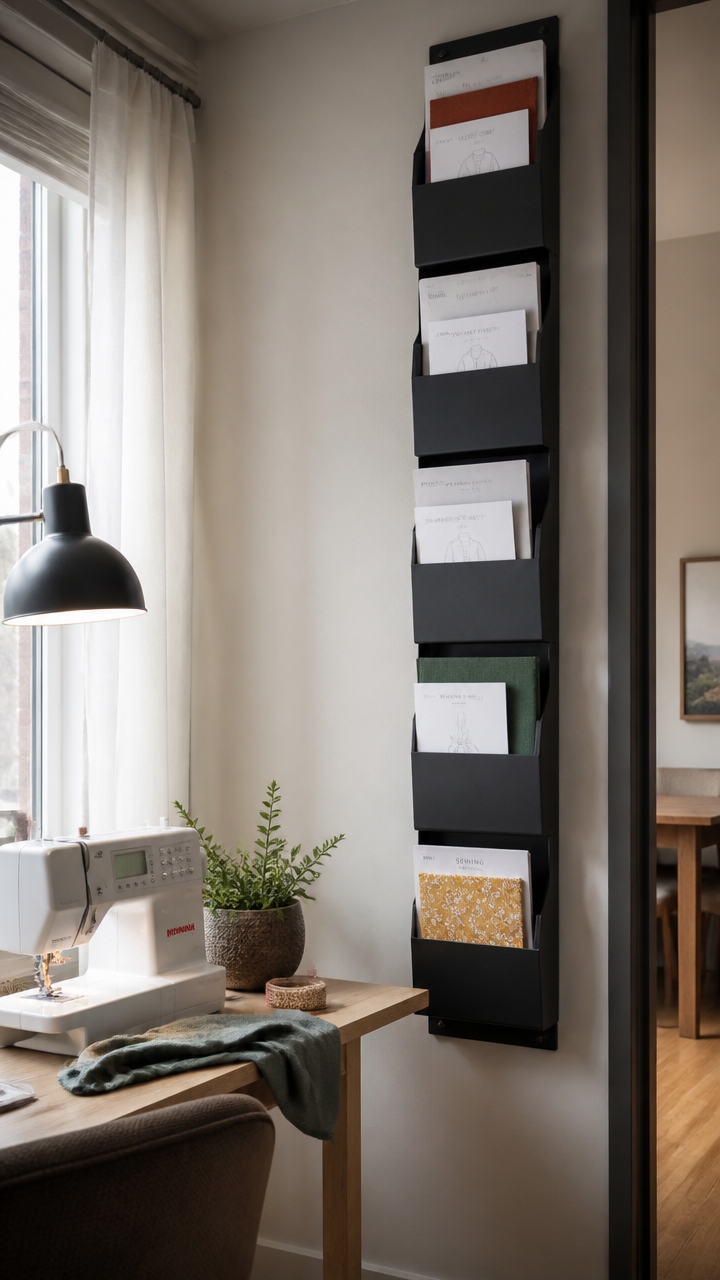
Organizing patterns and ongoing projects with wall pockets or magazine holders is an efficient way to keep your small sewing room tidy and accessible. These storage solutions allow you to display your patterns and projects openly, making it easy to grab the one you need without rummaging through piles. Wall-mounted magazine holders come in various styles, including clear plastic pockets or fabric-covered versions, enabling you to categorize your materials by project type, pattern, or fabric colour. Position them on an available wall near your workspace to keep everything within arm’s reach while freeing up valuable table space. When choosing their placement, consider height and accessibility, ensuring you can quickly glance at the storage pockets without bending or reaching excessively. Properly labeled and organized, these wall pockets prevent clutter, promote regular sewing sessions, and enhance your workspace’s overall efficiency.
Display Inspiration With Pinboards and Wall Art
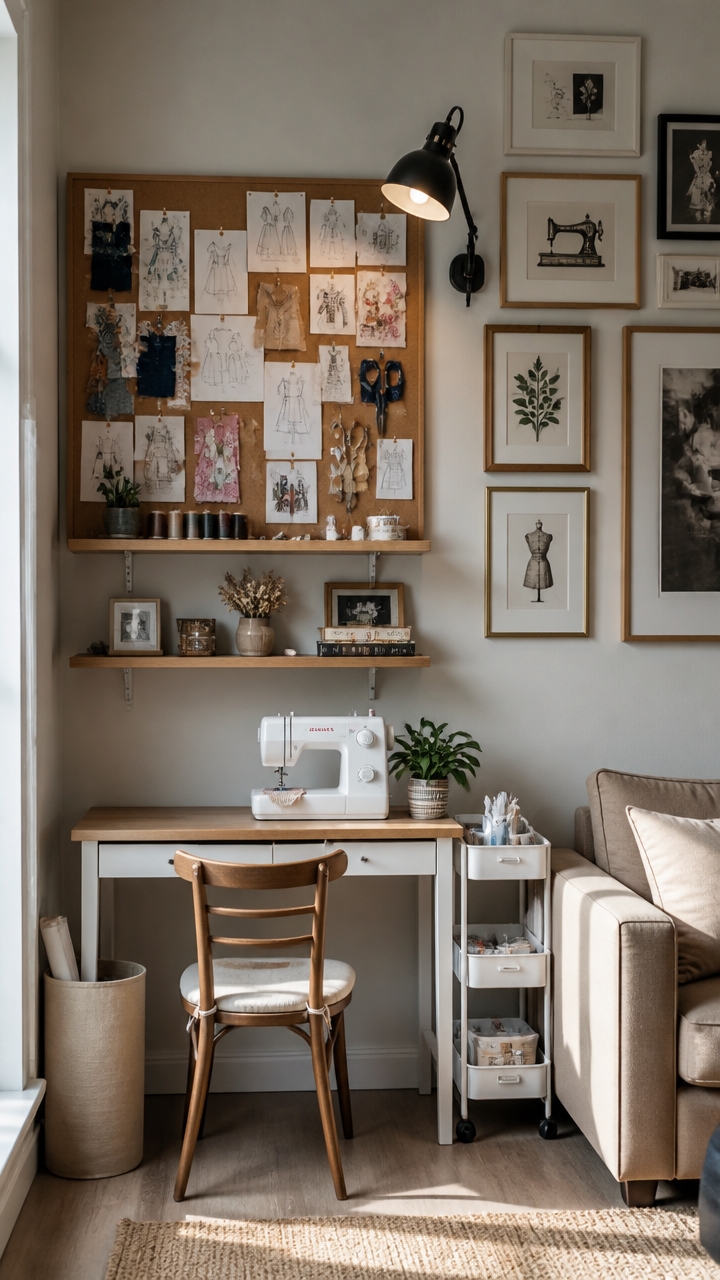
In a small sewing room, maximizing wall space for organization and inspiration is key. Pinboards made from cork or foam boards are an excellent way to keep fabric swatches, inspiring quotes, or project ideas visible and easily accessible. Mounting these boards at eye level allows you to quickly reference materials without cluttering your work surface. Fabric-covered pinboards not only add a soft, cohesive look to your space but also serve as a stylish backdrop for organizing essential tools like scissors, pins, and thimbles, keeping them within arm’s reach.
Decorative wall art, such as vintage sewing prints or motivational posters, personalizes your sewing space without sacrificing valuable surface area. These pieces create visual interest and inspiration while taking up minimal space. Consider arranging a gallery wall with a mix of frames and sizes for a curated look that reflects your sewing personality. Additionally, using clipboards or magnetic boards on the wall offers flexible and easy-to-change displays for patterns, notes, or small tools, helping you stay organized and motivated. Incorporating these wall solutions transforms your sewing room into an inspiring and efficient workspace.
Utilize Under-Bed and Under-Desk Storage for Less-Used Items
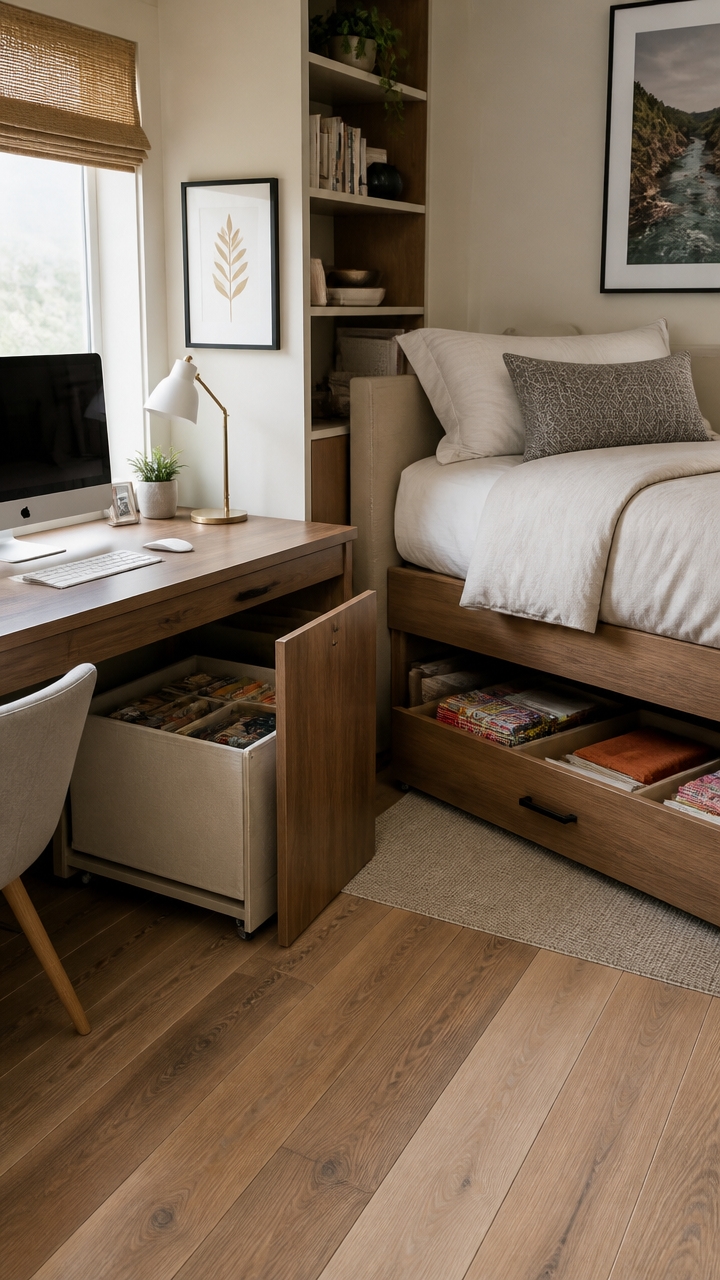
Maximizing hidden space is essential in a small sewing room, and under-bed or under-desk storage offers a smart solution for organizing less-frequently used supplies. Shallow storage bins designed specifically for under-bed use can hold fabric bundles, pattern packets, or seasonal tools without taking up valuable surface area. These bins should be clear or semi-transparent to allow quick identification of contents and reduce the time spent searching for materials. Labeling each container ensures everything remains organized, making it easy to find supplies when needed and return them afterward. To keep clutter at bay, rotate items regularly, storing only what you currently need in your workspace and shifting out unused materials. When selecting storage, consider size and accessibility, choosing containers that easily slide in and out without obstructing other items. Pairing under-desk drawers with existing furniture can also provide discreet storage for small tools and notions, keeping your work surface clear. Incorporating these under-storage solutions helps create a tidy, efficient sewing space without sacrificing precious room or style.
Incorporate Fold-Down or Roll-Up Storage for Flexible Use
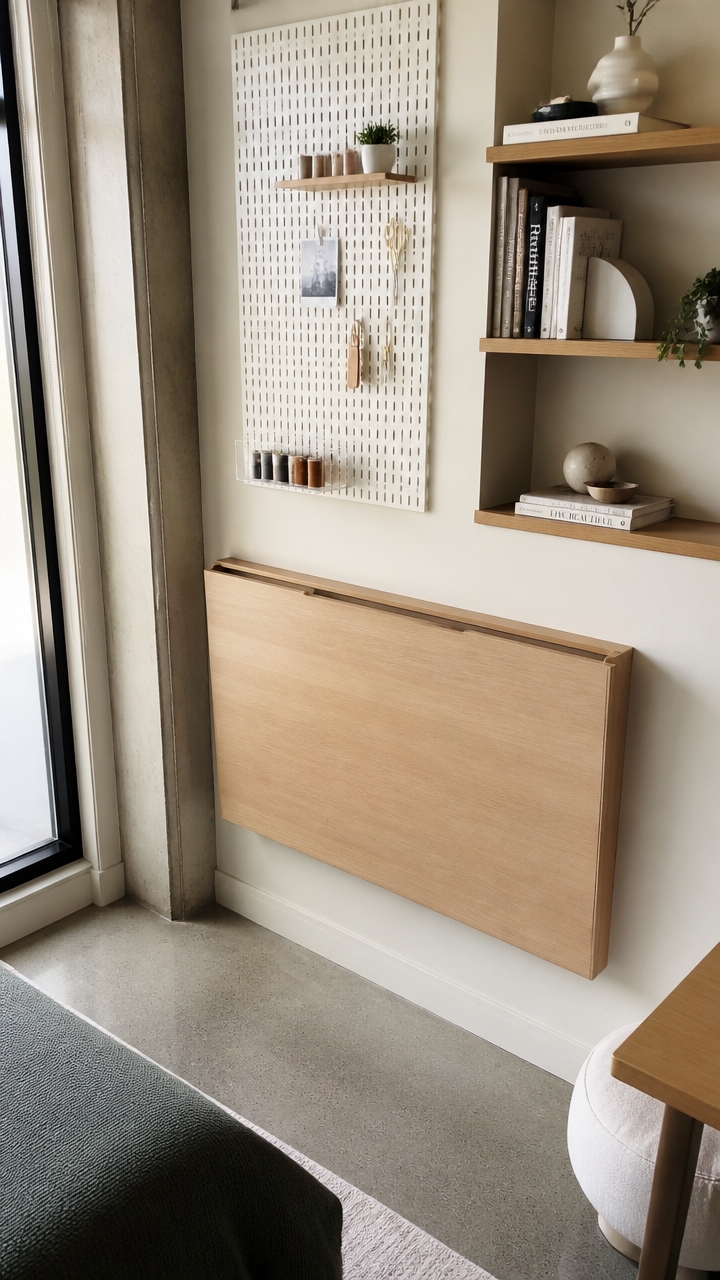
In a small sewing room, maximizing functionality while conserving space is essential. Incorporating fold-down or roll-up storage solutions provides versatile options that adapt to your needs. Fold-down work surfaces, like Murphy tables, can be tucked away when not in use, freeing up valuable floor space for movement or other activities. These tables are particularly useful during non-sewing times, transforming a dedicated work area into open space quickly and easily.
Roll-up storage units, such as collapsible fabric baskets or wall-mounted roll-up tool organizers, offer flexible and compact storage options. When not in use, they can be rolled up and stored out of sight, yet they readily expand and unfold to organize supplies, fabrics, or tools when needed. Attach them to walls or behind doors for discreet, accessible storage that doesn’t clutter your workspace.
Using these foldable and roll-up storage solutions helps keep your sewing room organized without sacrificing functionality or style. They allow for quick transformation of the layout, accommodating various projects or tasks, and are particularly beneficial in small spaces where every inch counts. With thoughtful placement and durable materials, these ideas can make your sewing area more efficient and enjoyable to use.
Focus on Lighting to Brighten Small Sewing Rooms
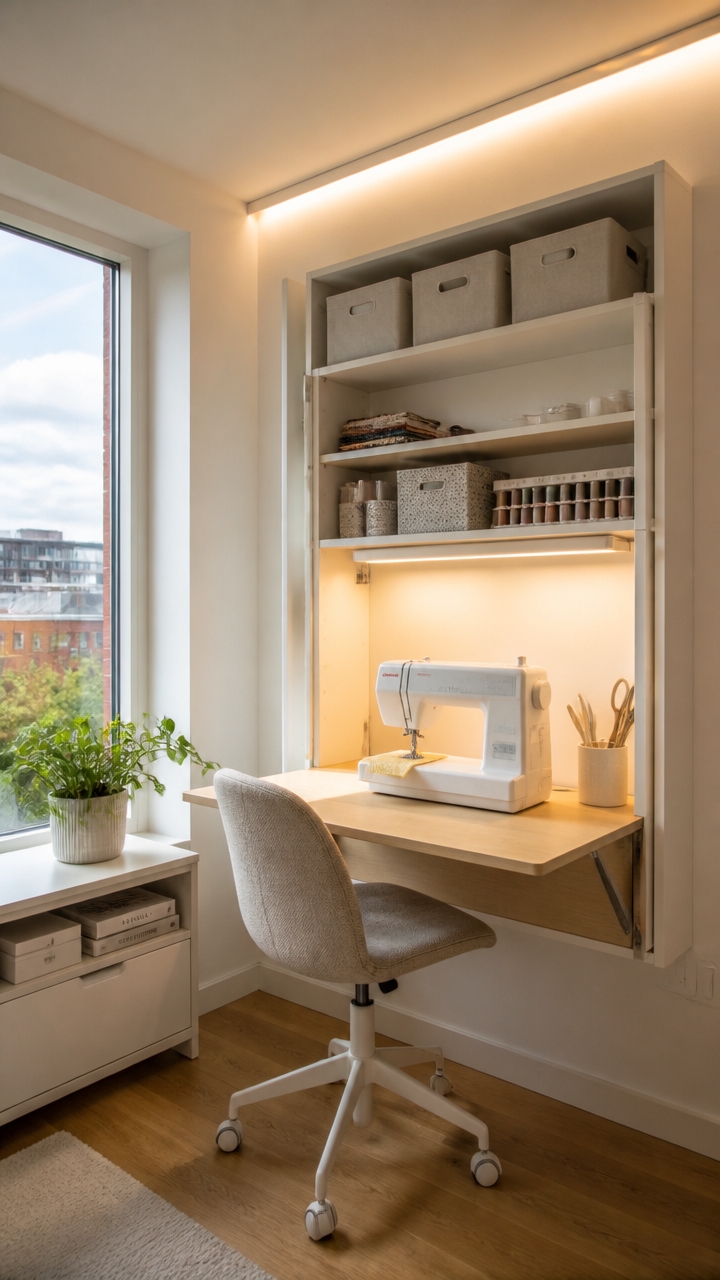
Using multiple light sources is key to creating a well-lit sewing space that feels larger and more inviting. OttLite lamps are an excellent choice because they mimic natural daylight, reducing eye strain and providing focused illumination on detailed work. Overhead lighting should be bright but soft enough to eliminate shadows, making sure the entire room is evenly lit. Task lights, such as clip-on or adjustable wall-mounted fixtures, are perfect for directing focused light directly onto your sewing area, ensuring you have clear visibility for intricate sewing tasks.
Maximize natural light by keeping windows unobstructed and choosing sheer or light-filtering curtains that let in daylight without glare. Reflective surfaces like light-colored walls, glossy cabinets, or even a strategically placed mirror can bounce light around the room, enhancing brightness and creating a sense of openness. When planning your lighting setup, consider electrical outlets and the placement of each light to avoid clutter and maximize efficiency. Together, these lighting strategies will make your small sewing room brighter, more functional, and more comfortable to work in.
Maintain Your Space Regularly for Long-Term Functionality
Regularly declutter and discard unused fabric, patterns, and supplies to maintain a functional and organized space. Set aside time weekly or monthly to review your materials, identifying items that are no longer needed or haven’t been used in recent projects. Releasing clutter not only frees up storage but also helps you stay focused on active projects, preventing overwhelm. Use clear containers or labeled bins to keep supplies visible and accessible during decluttering sessions, making it easier to assess what you truly need. Incorporating this habit guarantees your small sewing room remains a practical, inspiring space where creativity flows without being hindered by unnecessary clutter.
Final Takeaways
In your sewing sanctuary, envision each organizational decision as a delicate yet enduring stitch, each added shelf or clever repurposing thread weaving a cocoon of inspiration that cradles your creative spirit. When you negotiate space with the quiet confidence of a skilled joiner, balancing practicalities with aesthetic whispers, you create a manifest space that invites both serendipity and craftsmanship, transforming clutter into curated calm, where every corner breathes the assurance that your atelier is both a haven and a affirmation to your artistry.

- 21 Creative Small Space Ideas You Need to Try - September 23, 2026
- 22 Small Space Computer Desk Ideas That Transform Any Space - September 23, 2026
- 20 Small Sewing Room Ideas Space Saving That Actually Work - September 22, 2026