
I know you’re cramped for space, I know you’re frustrated with clutter, and I know you want your studio to actually work for you instead of against you. The truth is, organizing a small art studio doesn’t require fancy systems or expensive solutions, it requires strategy. I’ve discovered that mapping your space and understanding how you actually work can transform even the tiniest studio into a functional creative zone. Want to learn the specific tactics that’ll change everything?
Map Your Space and Work Routine
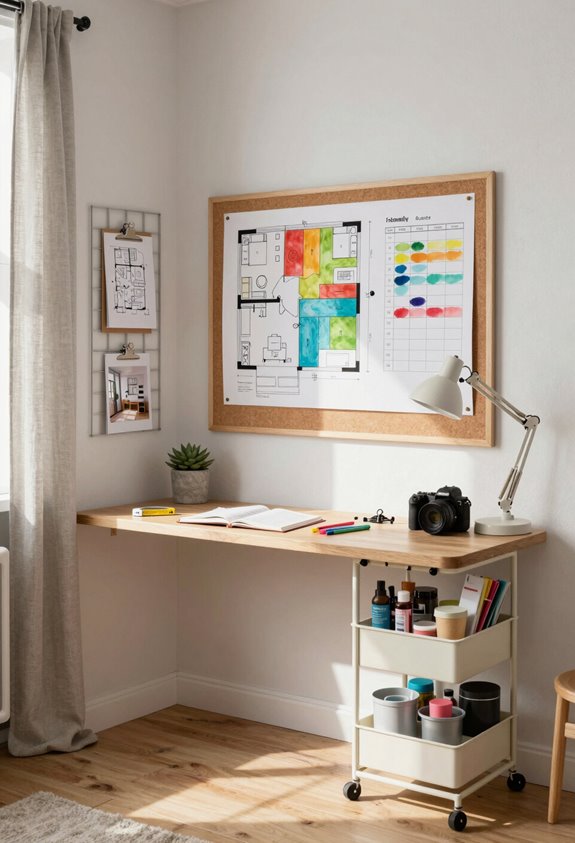
Two things’ll make organizing your art space way easier: knowing exactly what you’re working with and understanding how you actually create. Start by sketching your studio layout, marking where you sit, stand, and move most. Notice your workspace flow, does paint travel far from supplies? Where do finished pieces land? This map becomes your organizing blueprint.
Prioritize By Frequency of Use
Now that you’ve mapped where everything goes, it’s time to figure out what actually matters most, and honestly, not every supply deserves prime real estate in your studio. Your frequency assessment determines your usage hierarchy: daily essentials like brushes and paint go front and center. Weekly supplies get secondary spots. Monthly items? They’re fine tucked away. This approach maximizes your workflow efficiency.
Choose Your Storage Categories
Once you’ve figured out what you use most, it’s time to group your supplies into logical categories that actually make sense for how you work. Try color coding your paintbrushes by size, or material sorting, keeping all papers together, pastels separate, and acrylics grouped. Smart categories shrink decision time, so you’ll spend less energy hunting and more time creating what matters. Establish labeling systems for bins and containers to maintain your organization system over time.
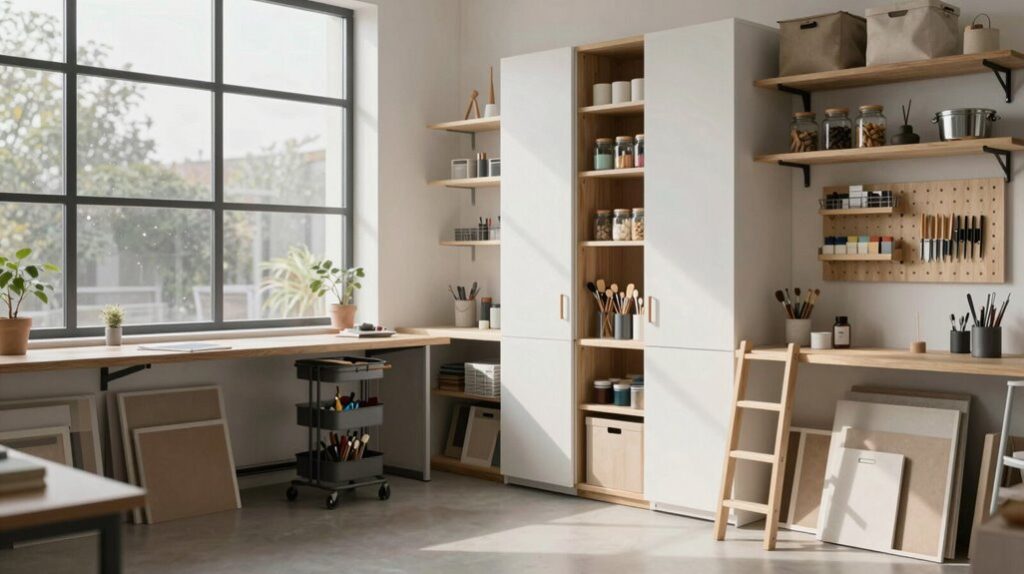
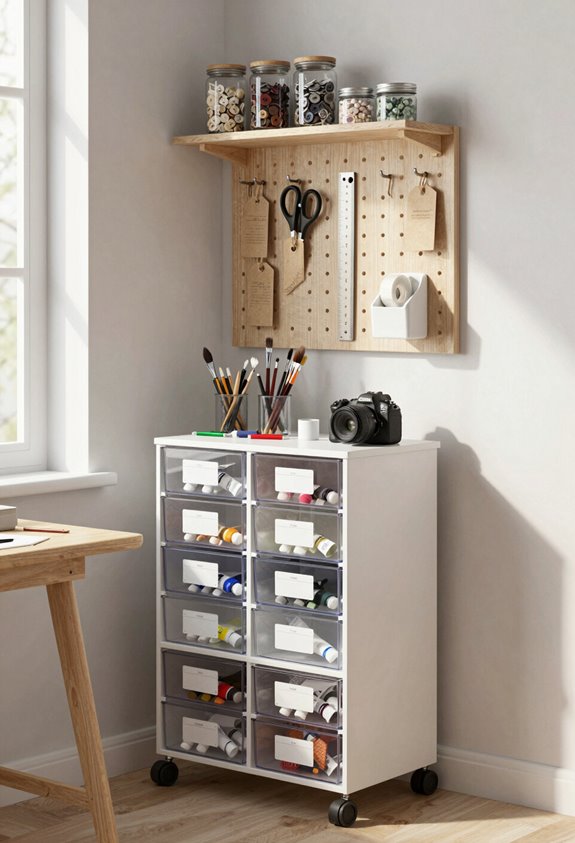
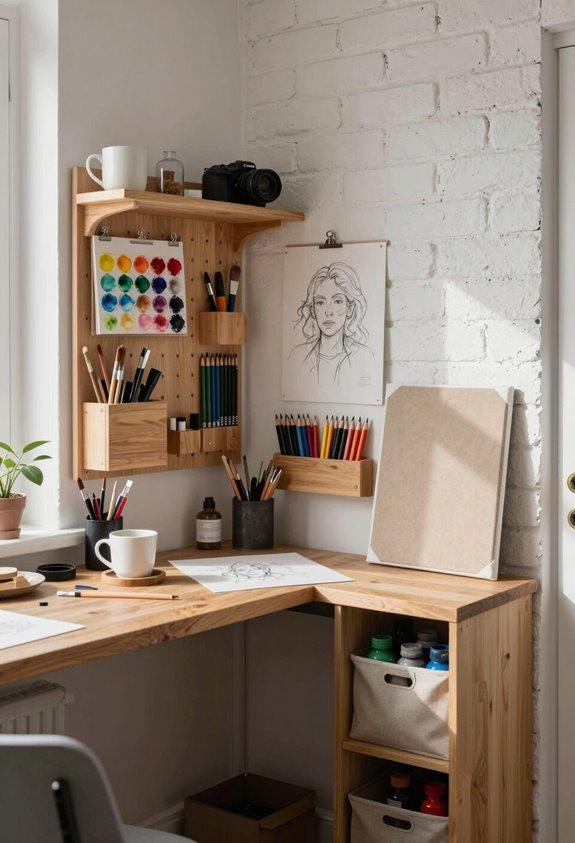
Install Pegboards for Easy Tool Access
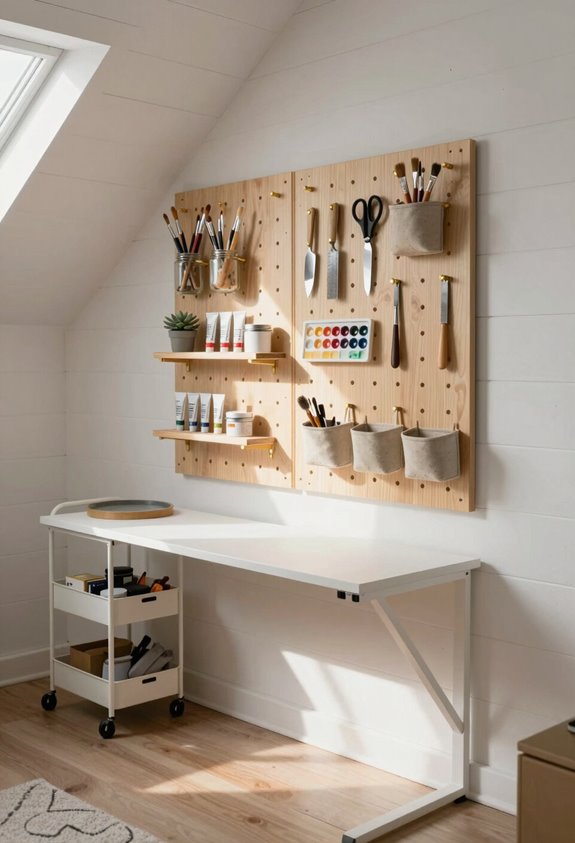
Pegboards are one of the smartest moves you can make when you’re working with limited wall space, since they let you hang nearly everything you need right where you can see it. Through pegboard customization with hooks and shelves, you’ll boost tool accessibility dramatically. I’ve found that mounting one above my workspace transformed my studio’s efficiency. You can easily adjust, rearrange, and find exactly what you need instantly. Implementing efficient tool organization strategies ensures your pegboard system maximizes every inch of your compact studio.
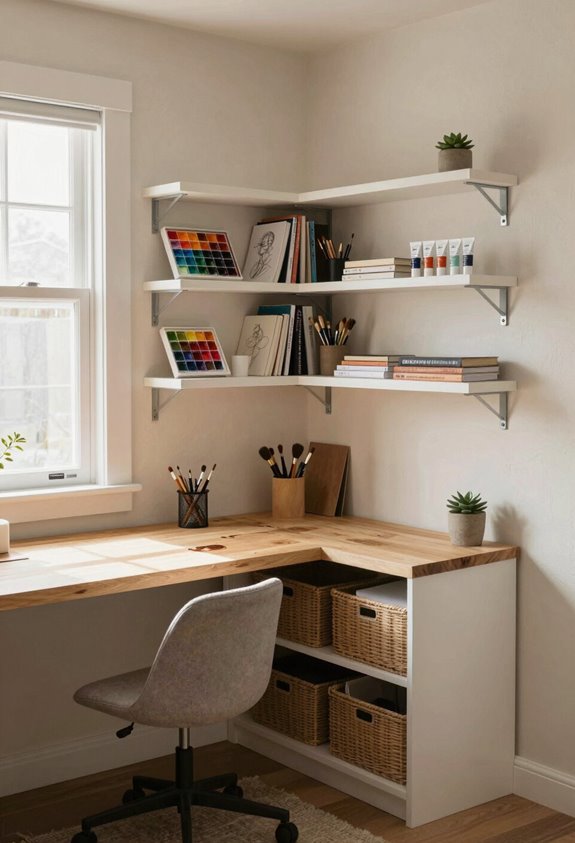
Add Floating Shelves Above Work Surfaces
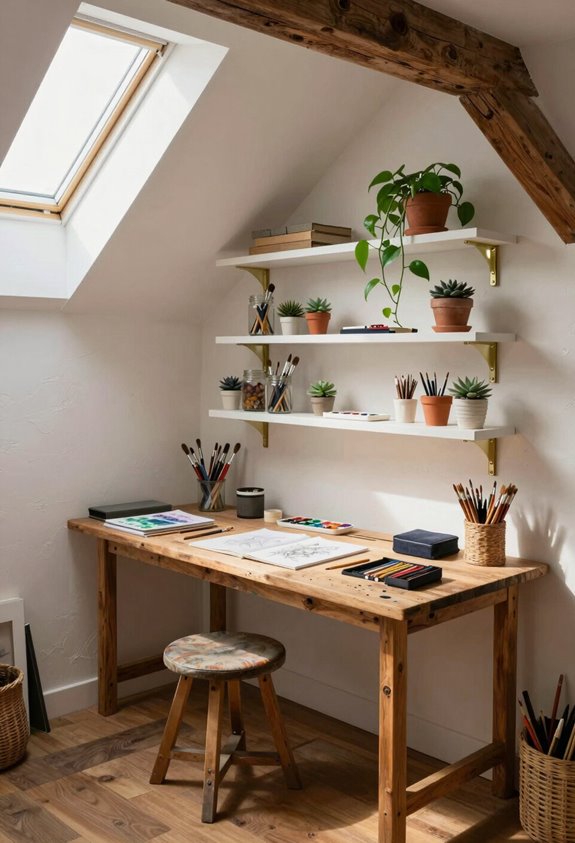
While pegboards handle your everyday tools beautifully, floating shelves above your work surface give you extra storage that doesn’t eat up valuable desk space. I’ve found that shelf placement matters, aim for 12-18 inches above your surface. Choose floating shelf materials like wood or metal that match your studio’s vibe. They’re perfect for displaying supplies you use regularly while keeping everything within arm’s reach. Floating shelves are among the most effective space saving storage ideas that maximize vertical space in compact creative studios.
Mount Magnetic Strips for Metal Supplies

If you’ve got scissors, rulers, or other metal tools scattered around your workspace, magnetic strips are your new best friend. I’ve found that installing these strips on walls or inside cabinet doors transforms metal organization instantly. You’ll reclaim drawer space while keeping supplies visible and accessible. It’s an innovative magnetic storage solution that maximizes every inch of your small studio. Similar to how drawer dividers maintain organization in compact spaces, magnetic strips keep your frequently used tools within arm’s reach and prevent clutter from accumulating.
Hang Organizers on Cabinet Doors
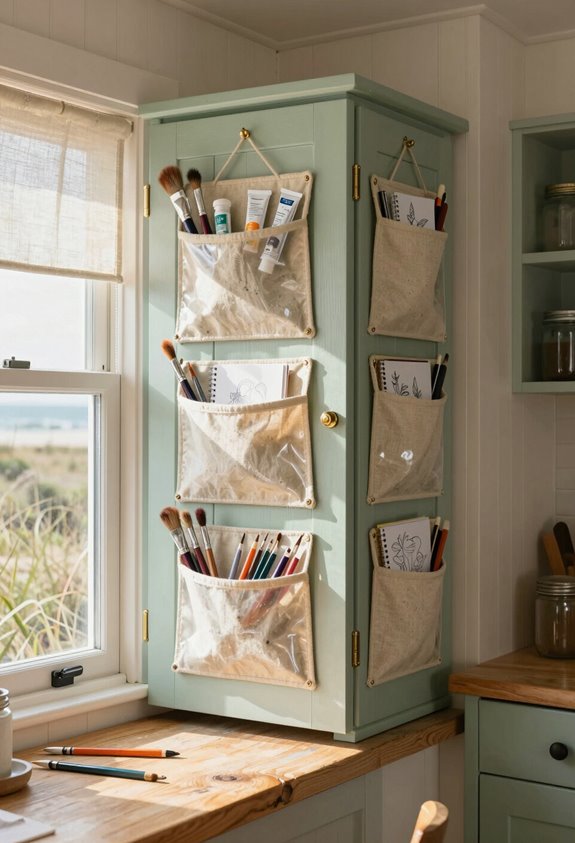
Cabinet doors are basically untapped real estate in small spaces, and hanging organizers on them is one of the smartest moves you can make. I’ve found that door pockets hold brushes, pencils, and small supplies perfectly. Cabinet clips work great for securing larger items without taking up shelf room. You’re maximizing every inch, which honestly transforms how functional your studio feels. These smart storage ideas can be applied across different room types to create a cohesive organizational system throughout your space.
Use Tension Rods to Corral Paper and Fabric
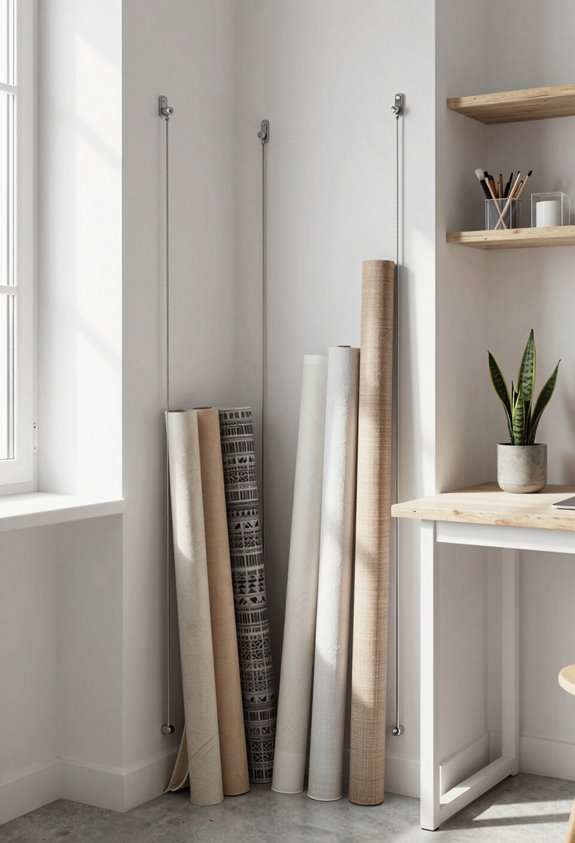
Tension rods aren’t just for hanging curtains, they’re actually revolutionizers for organizing paper and fabric in tight spaces. You can install them vertically inside narrow cabinets or drawers to create dividers, keeping sketchpads and fabric rolls separated and accessible. This tension rod usage maximizes your paper organization without taking up valuable floor or wall space, making small studios feel less cramped.
Install Corner Shelving for Dead Space
Every corner in your small art space is real estate you’re probably wasting right now. Corner shelving transforms those awkward angles into functional storage, maximizing vertical space without eating floor room. You’ll stack supplies, display finished pieces, and keep everything within arm’s reach. The corner shelving benefits? You’re reclaiming hidden storage while maintaining an organized, creative workspace.
Display Work in Progress With Wall-Mounted Easels
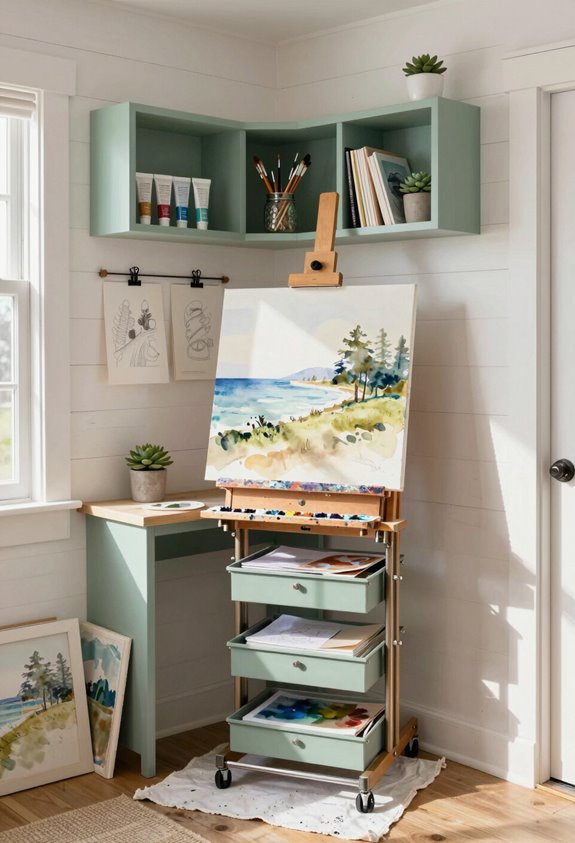
While corner shelving handles your storage needs, wall-mounted easels solve a different problem: keeping your active projects visible and accessible. These wall mounted displays let you rotate your progress showcase without cluttering floor space. I’ve found that tilted easels, typically 18-24 inches wide, work perfectly for small studios. You’ll stay inspired seeing your work-in-progress pieces daily, plus you’ve got instant access whenever creativity strikes.
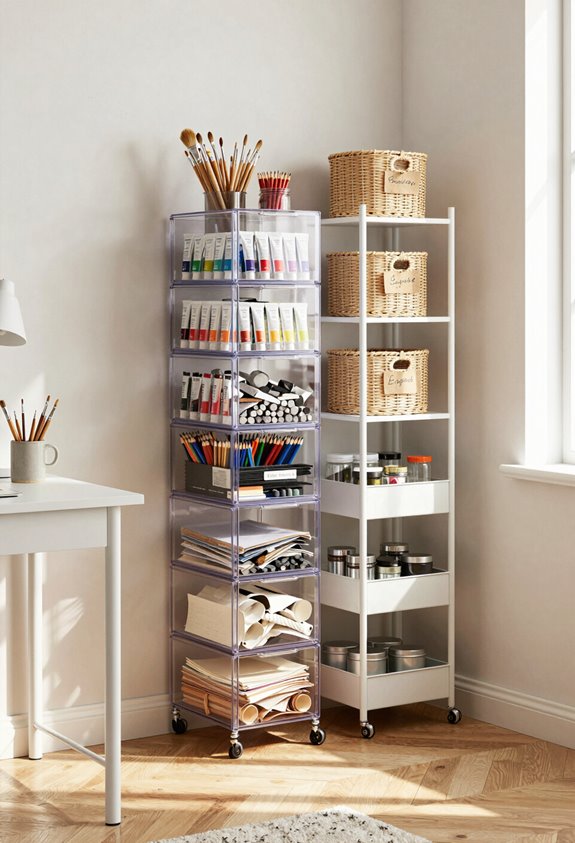
Store Supplies in Clear, Labeled Containers
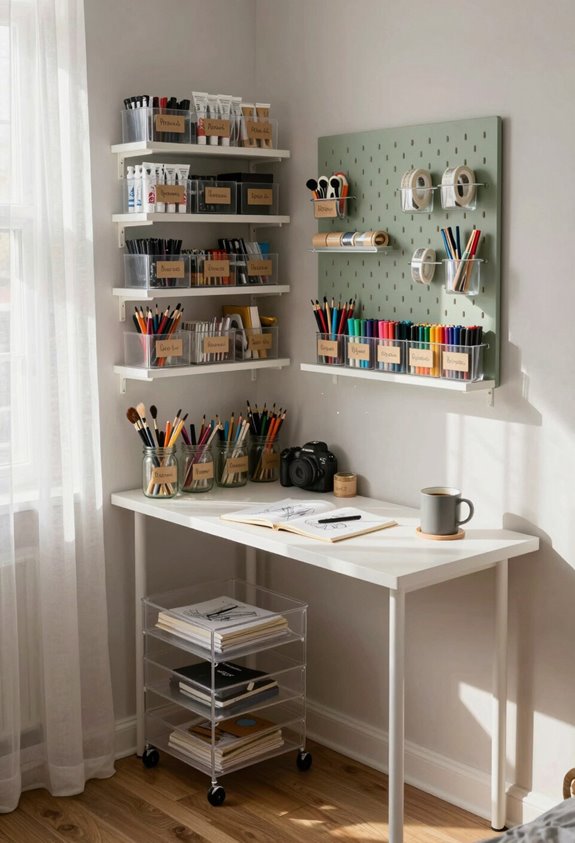
Three simple things, visibility, accessibility, and organization, transform how you manage your art supplies in a tight space. I’ve found that clear containers give you instant clear visibility of what you’ve got, cutting down on duplicates. You’ll discover organized creativity flows naturally when everything’s labeled and within arm’s reach. Grab some transparent bins, grab a label maker, and watch your studio suddenly feel spacious and efficient.
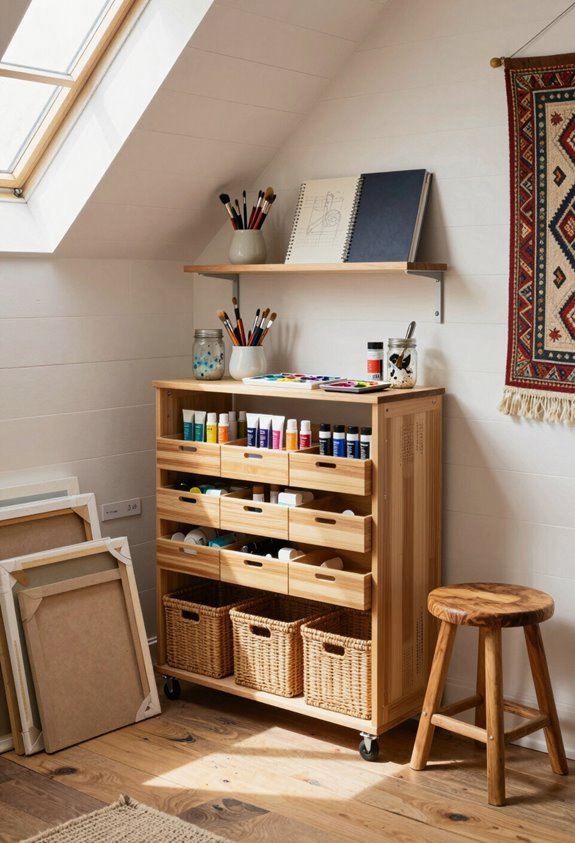
Organize Small Items With Drawer Dividers

Small drawers become treasure troves of chaos when you’re storing pencils, erasers, buttons, beads, and all those tiny art essentials, and drawer dividers are honestly your best friend here. I’ve found that compartmentalizing with adjustable dividers transforms my drawer organization and small item storage instantly. You’ll quickly locate supplies without dumping everything out, keeping your creative space functional and frustration-free.
Repurpose Containers for Brushes and Pencils
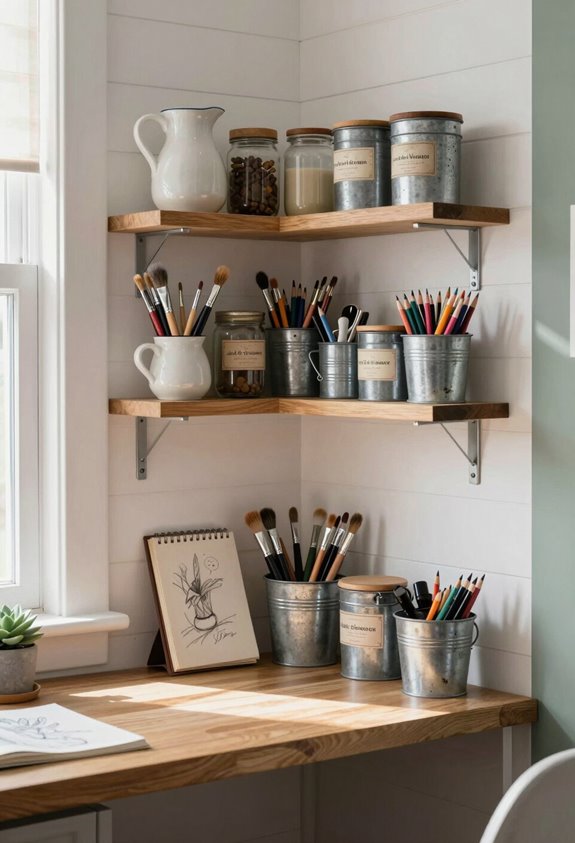
Before you toss those empty containers, consider giving them new life as brush and pencil holders. Mason jars, tin cans, and ceramic mugs work brilliantly for organizing your supplies. I’ve found that repurposed brush containers save space while keeping everything visible and accessible. You can even label them by color or size, making your studio more functional and inspiring.
Label Everything for Quick Restocking
Once you’ve got your containers sorted and filled with supplies, labeling them becomes your next best move. I’ve found that clear labeling supplies, using markers or printed labels, gives you quick access when inspiration strikes. You’ll waste less time hunting for that specific brush size or pencil shade. Trust me, your future self will appreciate the system.
Choose Multi-Functional Furniture Pieces
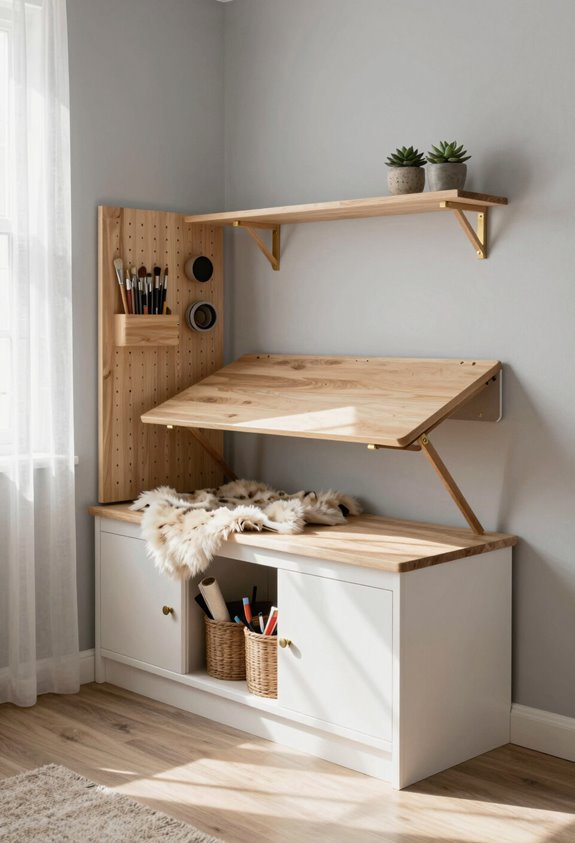
In a cramped art space, furniture that pulls double duty becomes your secret weapon. I’ve found that a convertible workbench transforms into storage, while nesting stools tuck away when you need floor space. A Murphy desk folds flat against walls, and modular furniture adapts as your studio evolves. You’ll appreciate how expandable shelving grows with your collection without consuming precious square footage.
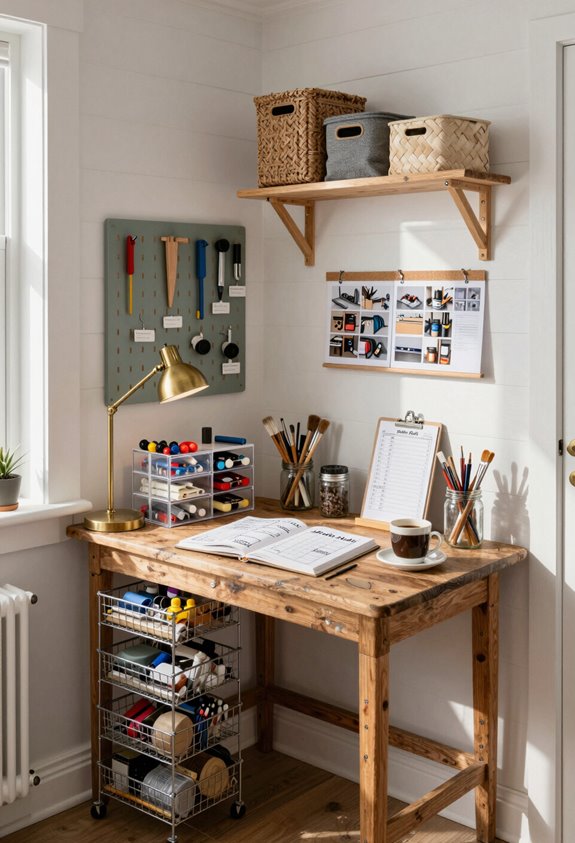
Create a Rolling Cart for Mobile Supplies
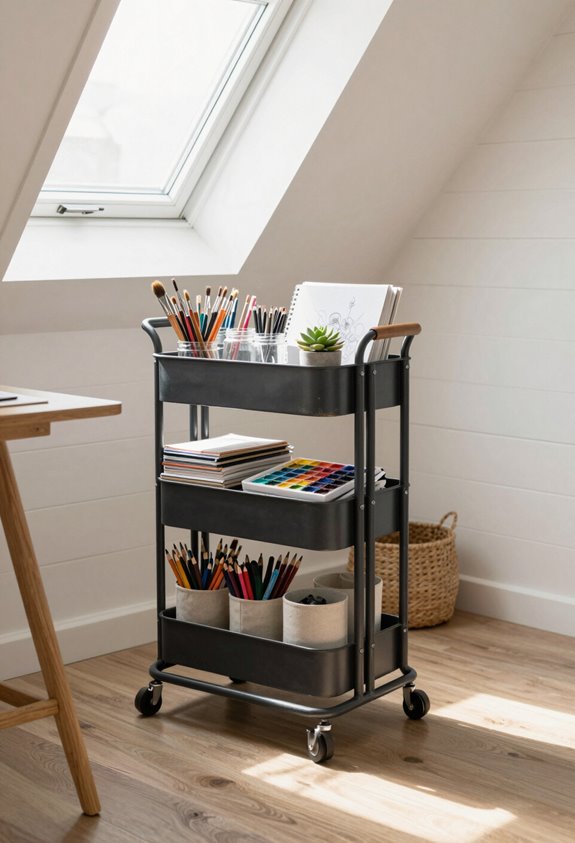
A rolling cart becomes your art studio’s best friend when space is tight. You’ll love how it stores supplies on wheels, letting you move everything easily. Try color coding your materials by medium or project type. Cart customization with bins, shelves, and dividers keeps brushes, paints, and papers organized. Simply roll it wherever you need it, problem solved.
Maximize Under-Desk and Under-Table Storage
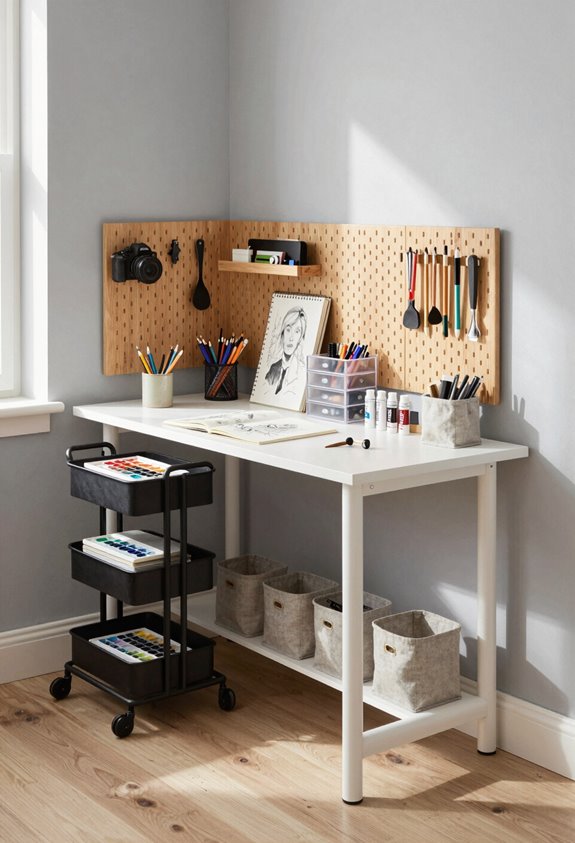
While your rolling cart handles mobility, the space underneath your desk and tables holds serious storage potential you’re probably overlooking. Smart drawer organization transforms hidden areas into functional zones. Use clear bins for space optimization, labeling supplies by category. Stackable containers maximize every inch, keeping your studio organized without eating up precious floor real estate where you actually create.
Mount a Supply Caddy on Your Studio Door
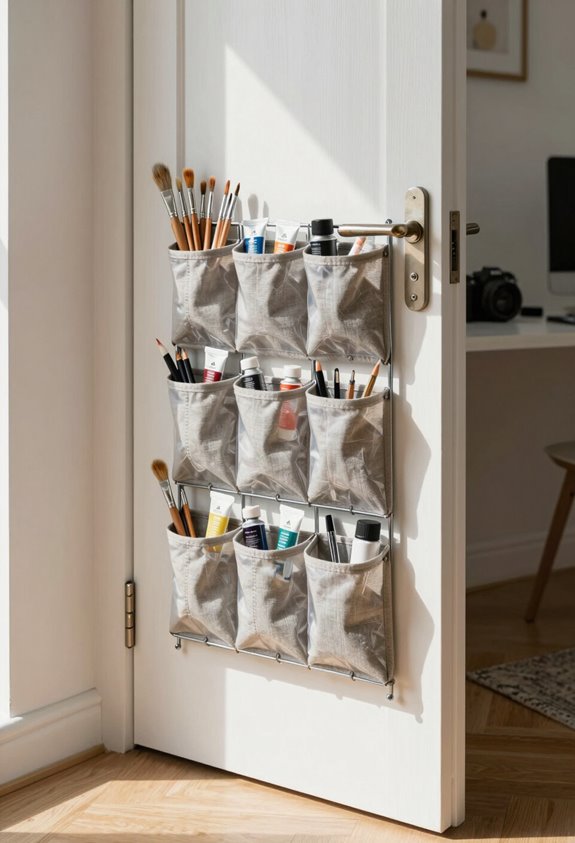
Your studio door’s a blank canvas that shouldn’t stay empty, it’s prime real estate for a supply caddy that keeps your essentials within arm’s reach. Door mounted storage transforms wasted vertical space into accessible organization. Grab a slim caddy, mount it at eye level, and arrange brushes, markers, and scissors inside. Supply accessibility means you’ll stop hunting for tools and start creating faster.
Divide Your Space Into Medium-Specific Zones
Once you’ve got your door caddy stocked and ready, it’s time to think bigger about how you’ll organize your whole space. Create distinct zones: a color zone for paints and markers, a function zone for specific tasks, an activity zone where you actually work, and an equipment zone for tools. This approach keeps everything accessible while maximizing your small studio’s potential.
Stack Canvases Vertically With Dividers
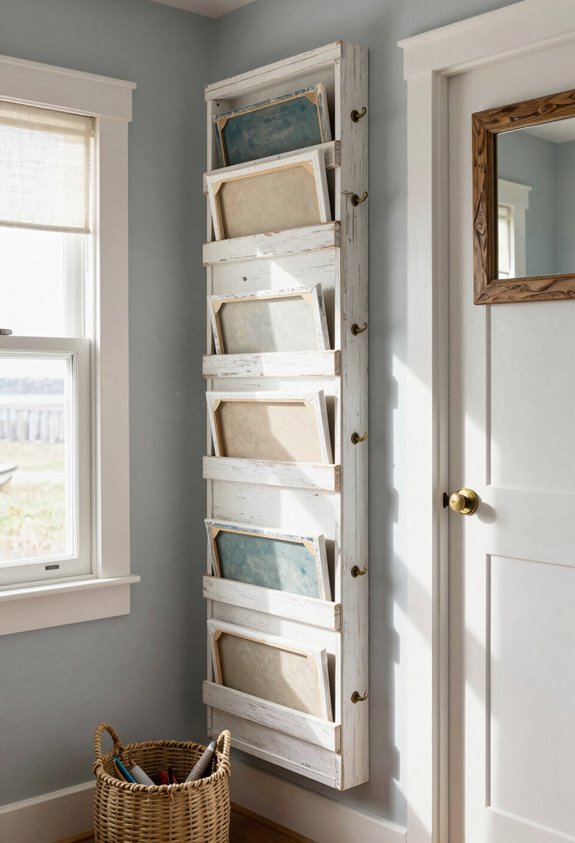
Now that you’ve mapped out your zones, it’s time to tackle one of the biggest space-stealers in any studio: canvases. Try vertical storage with dividers, it’s a revolutionary solution. Stack your canvases upright using sturdy cardboard or foam dividers between each piece. This canvas stacking method protects artwork while maximizing your floor space dramatically. You’ll access pieces easier too, without that frustrating pile-digging situation.
Schedule Monthly Organization Audits
Even the best organization systems can slip into chaos after a few weeks, so scheduling monthly audits keeps everything running smoothly. I set monthly reminders on my phone to review my studio space, checking what’s working and what isn’t. This team accountability approach, whether you’re solo or collaborating, prevents clutter from sneaking back in, keeping your creative zone fresh and functional long-term.
Frequently Asked Questions
How Do I Prevent Dust From Accumulating on Art Supplies in a Small Studio?
I’d recommend investing in airtight containers for supply storage, they’re breakthroughs for dust prevention. You’ll also want sealed shelving units and regular microfiber cloth cleanings. These innovative solutions keep your materials pristine in compact spaces.
What’s the Best Way to Organize Digital Files Alongside Physical Art Materials?
I’ll organize my digital filing through cloud storage, syncing project folders across devices so I’m accessing the same files whether I’m sketching physically or editing digitally. This creates a seamless workflow between my mediums.
How Can I Create Separate Zones Without Permanent Walls or Construction?
I’ll revolutionize your studio flow with strategically placed room dividers and portable screens, they’re practically magical barriers that’ll transform your cramped space into distinct creative zones without hammering a single nail into those precious walls.
What Temperature and Humidity Levels Should Small Studios Maintain for Supplies?
I’d recommend maintaining 65-75°F with 30-50% relative humidity for optimal supply preservation. You’ll achieve temperature control through programmable thermostats and humidity management via dehumidifiers or moisture-absorbing materials, protecting your creative investments innovatively.
How Do I Organize Artwork by Size When Storage Space Is Extremely Limited?
I’d recommend investing in a vertical art rack to maximize your wall space while organizing by size bins stacked efficiently underneath. This approach lets you categorize pieces innovatively without consuming precious floor real estate.
Final Takeaways
You’ve got this. Remember, as they say, “a place for everything and everything in its place”, that’s your golden rule. Start small, maybe organize one zone this weekend, then build from there. Your creative space doesn’t need to be perfect; it just needs to work for you. When you can find your supplies without hunting, you’ll spend more time creating and less time frustrated. That’s the real win.

- 22 Small Space Vanity Ideas Bedroom Setup Hacks - March 10, 2026
- 23 Small Space Coffee Table Ideas With Soft Curves - March 9, 2026
- 21 Small Space Fireplace Ideas in Tactile Stone - March 8, 2026