
January hits, and the tree has to go somewhere. In a small home, that somewhere is usually the middle of the floor. These holiday decoration storage ideas for small spaces give every piece a real home.
Here are 59 ways to pack ornaments, lights, wreaths and garlands into closets, corners and gaps. Most cost under $30, and many use boxes you already own. Start with the cheap wins, then claim the bigger spots.
1. Sort Decorations into One Bin Per Holiday
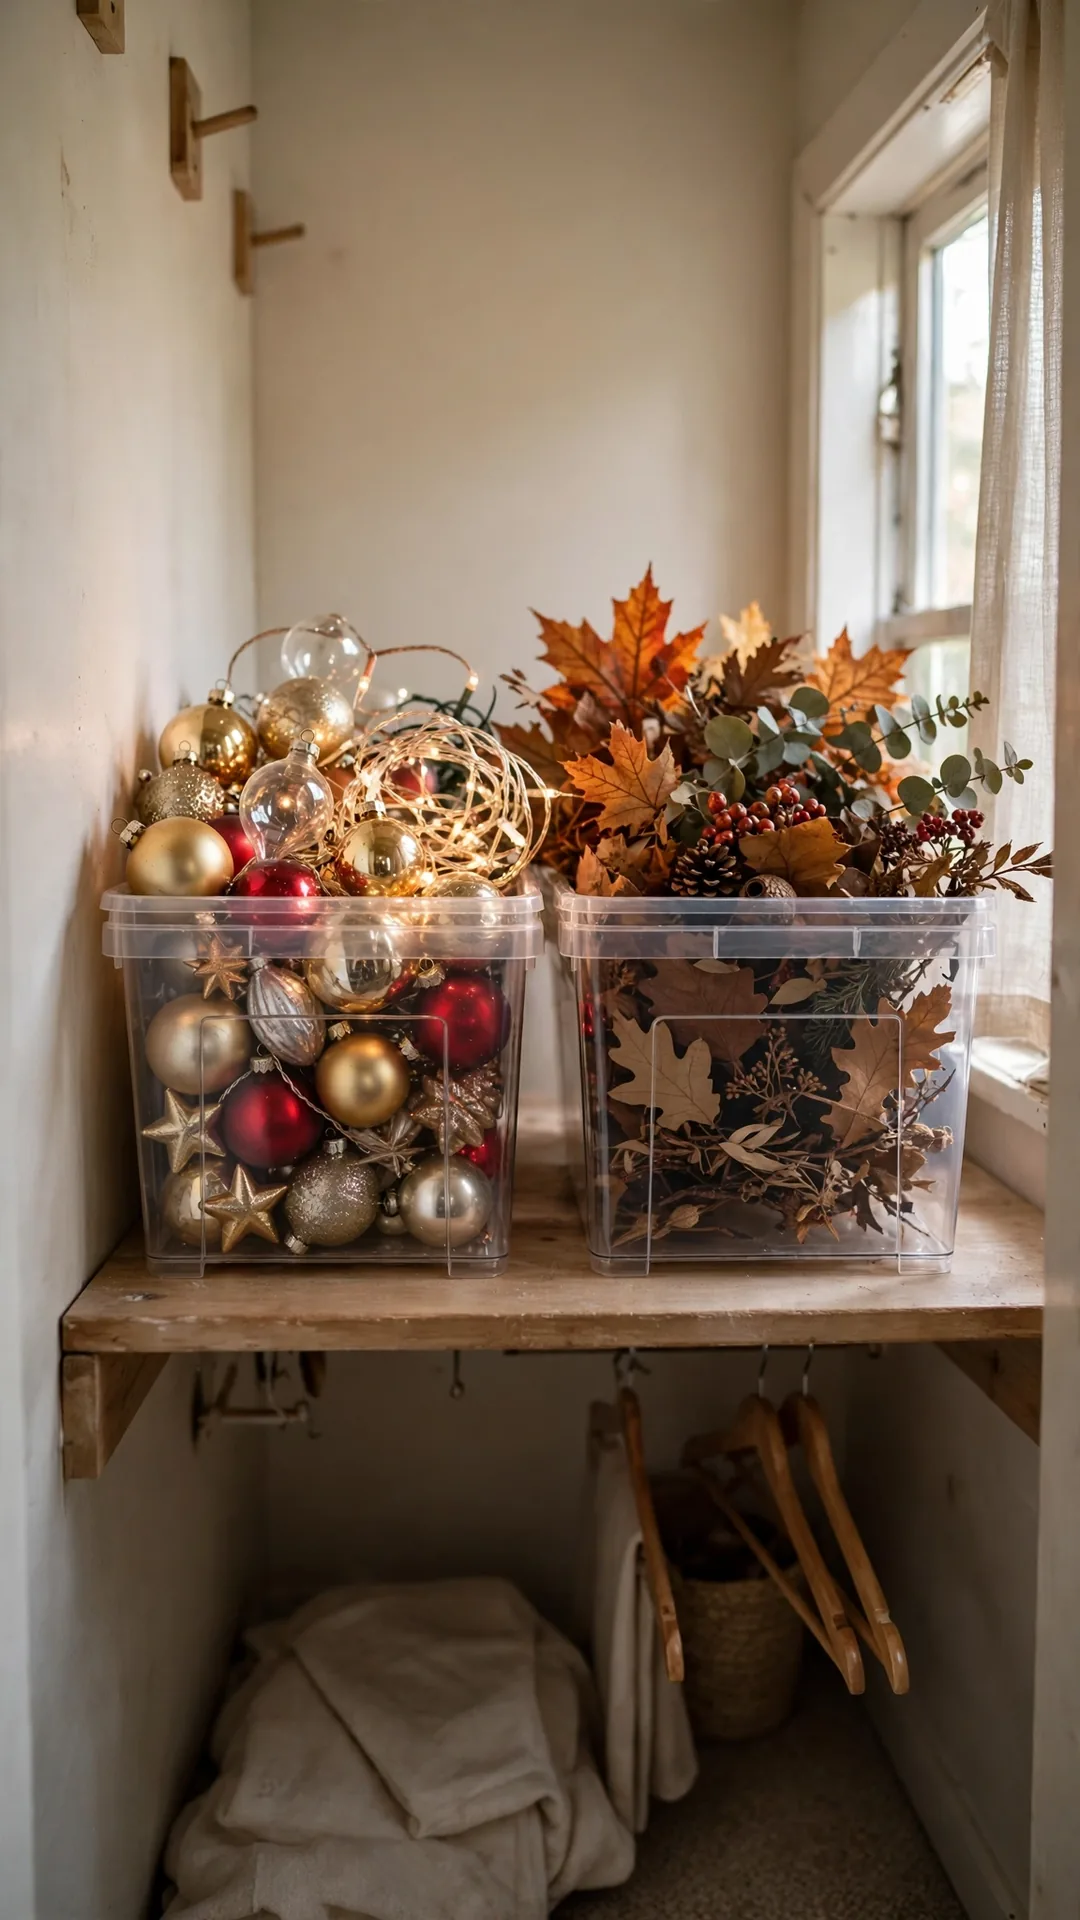
One bin per holiday ends the mixed box problem. You pull out one bin in December and leave the rest stacked. Simple holiday decoration storage ideas for small spaces start with this basic sort.
How to do it:
- Pick clear bins about 16 quarts for each holiday.
- Put Christmas in one, fall and Halloween in another.
- Stack the bins on one closet shelf or floor corner.
- Keep the current season at the front of the stack.
- Move a bin out only when its season starts.
Best for: Small closets that hold decor for several holidays.
Budget: $10 to $25 for two bins
Quick tip: Clear bins show the contents, so you skip labels at first.
2. Wrap Fragile Ornaments in Tissue in a Shoebox

A shoebox and tissue paper protect glass ornaments for free. Each wrap stops chips and scratches inside the box. The box then slides onto any shelf or into a bigger bin.
How to do it:
- Wrap each ornament in one sheet of plain tissue.
- Set wrapped pieces in rows, heaviest at the bottom.
- Fill gaps with crumpled tissue so nothing rolls.
- Close the lid and tape it shut for the season.
- Store the box flat, never on its side.
Best for: A handful of fragile ornaments on a tight budget.
Budget: Free to $5
Quick tip: Skip printed tissue, since ink can mark pale ornaments.
3. Store Tiny Ornaments Inside an Egg Carton
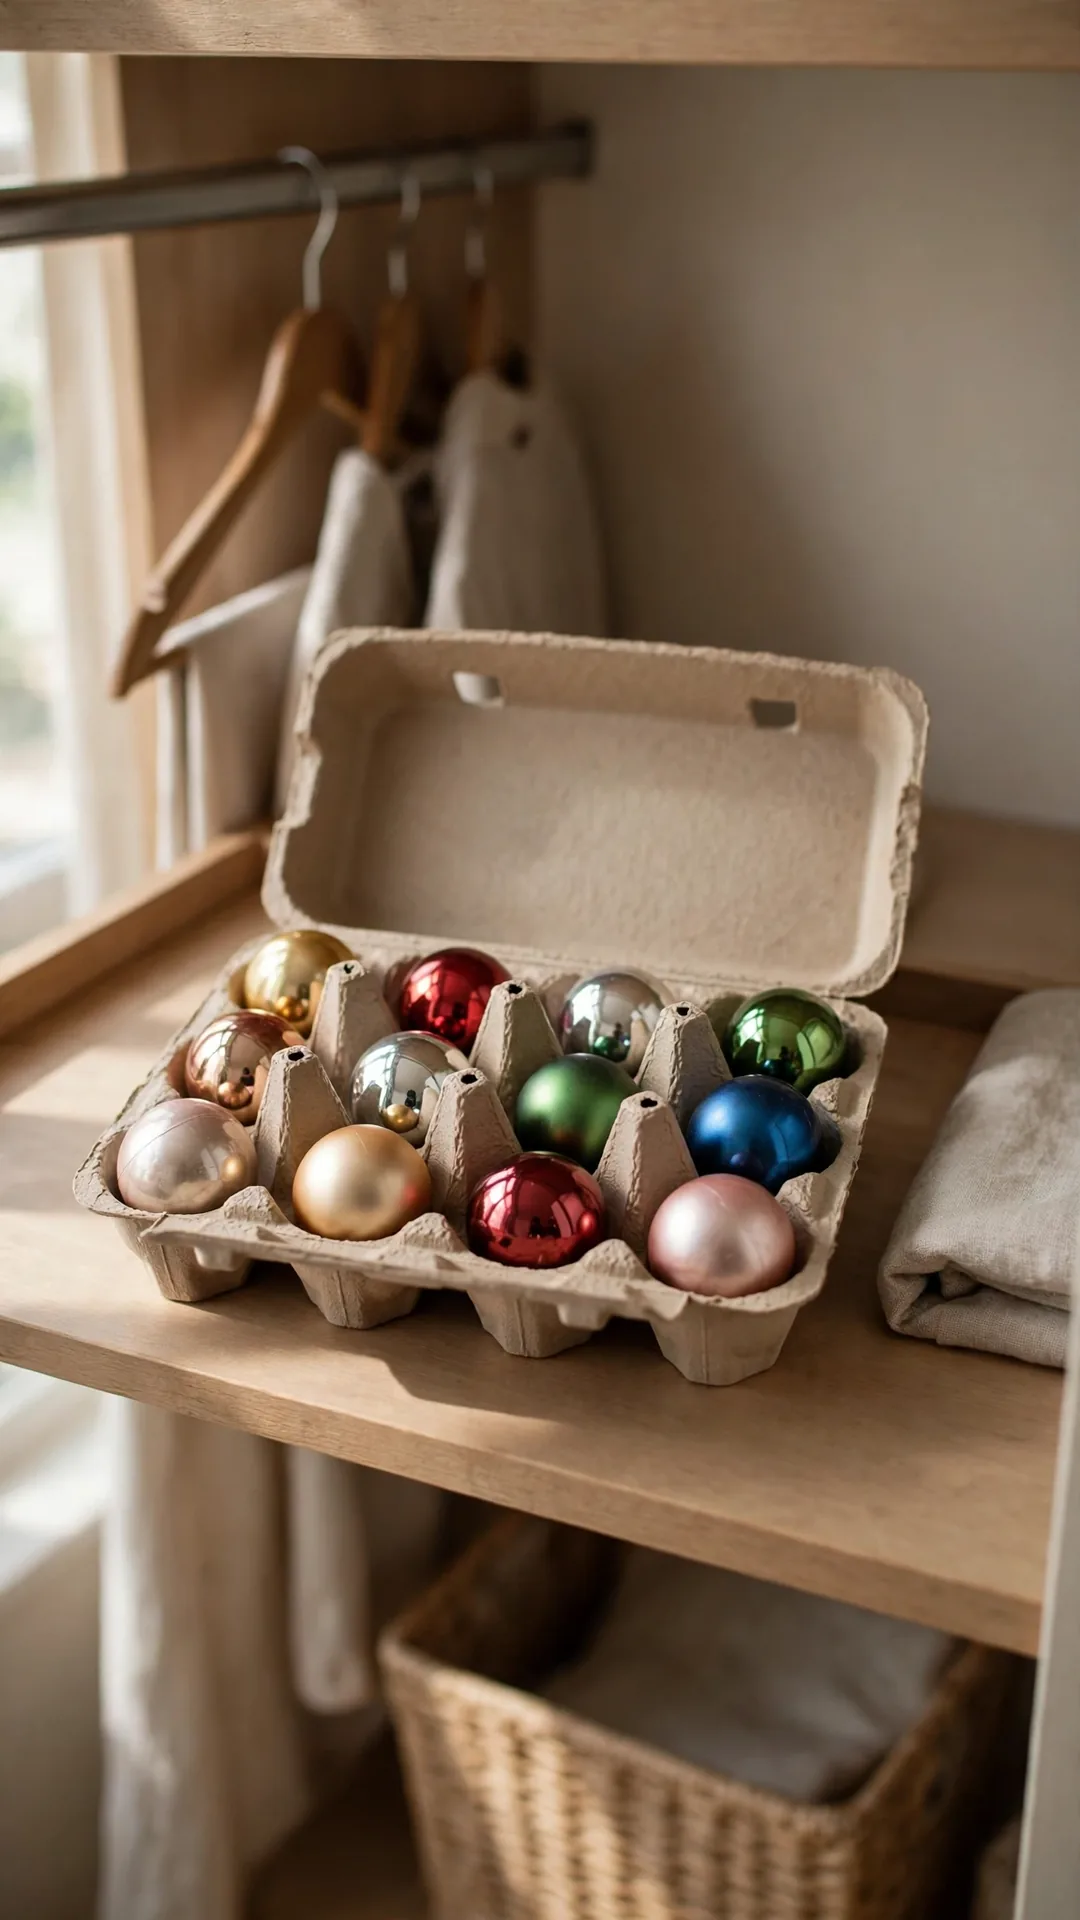
An egg carton fits mini ornaments like it was made for them. Each cup cradles one small ball or figure. Cartons stack flat, so two or three fit in one drawer.
How to do it:
- Use a clean cardboard carton with 12 or 18 cups.
- Set one tiny ornament in each cup.
- Close the lid and secure it with a rubber band.
- Stack cartons in a drawer or inside a bin.
- Keep glass pieces in the top carton only.
Best for: Mini tree ornaments and small figurines.
Budget: Free
Quick tip: Write the tree name on the lid with a plain marker.
4. Cradle Fragile Ornaments in Plastic Cups
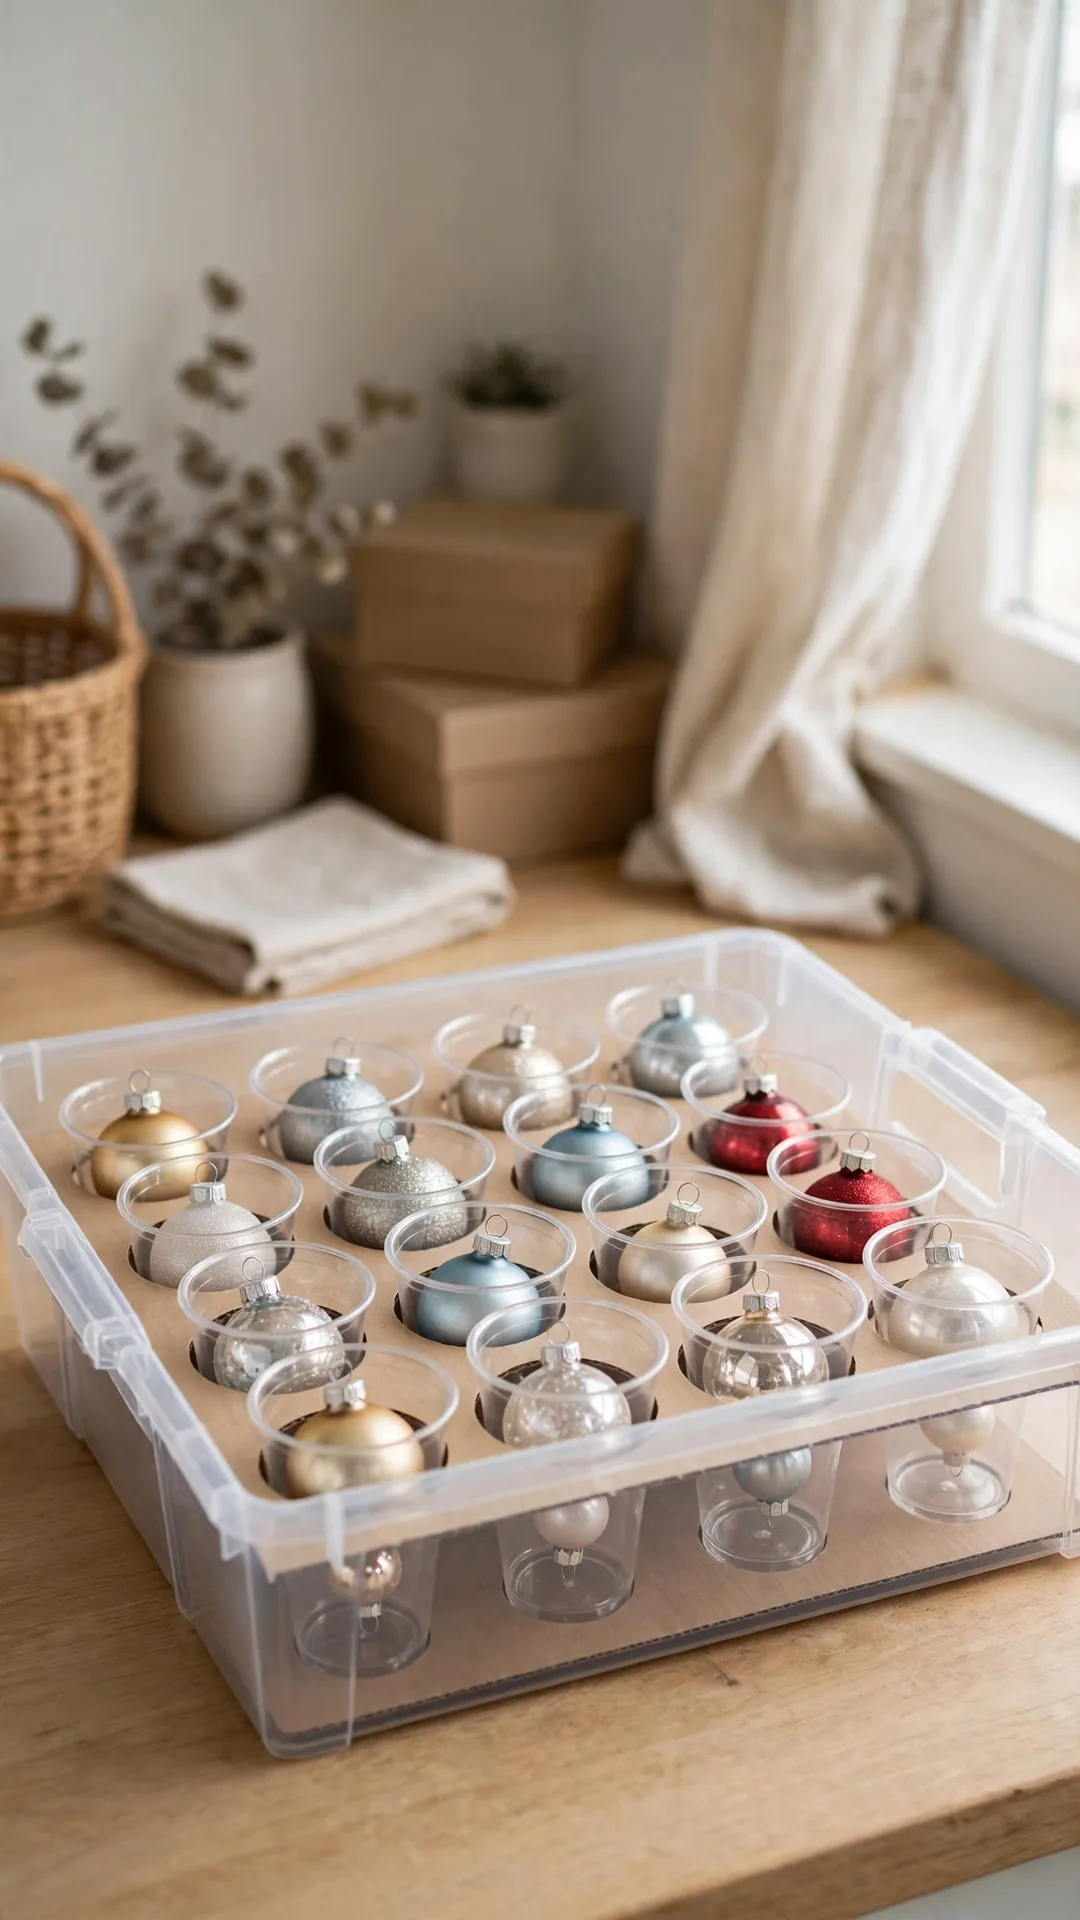
Plastic cups glued to cardboard make a cheap ornament tray. Each cup holds one fragile piece upright and apart. You can lift the whole tray out in one move.
How to do it:
- Cut a cardboard sheet to fit inside your bin.
- Glue 12 to 16 plastic cups in rows on the sheet.
- Set one wrapped ornament in each cup.
- Add a second tray on top for the next layer.
- Finish with the lid so dust stays out.
Best for: Round glass baubles that chip when they touch.
Budget: $5 to $12
Quick tip: Use short 9 ounce cups for standard 3 inch ornaments.
5. Zip Small Ornaments into Bags by Color
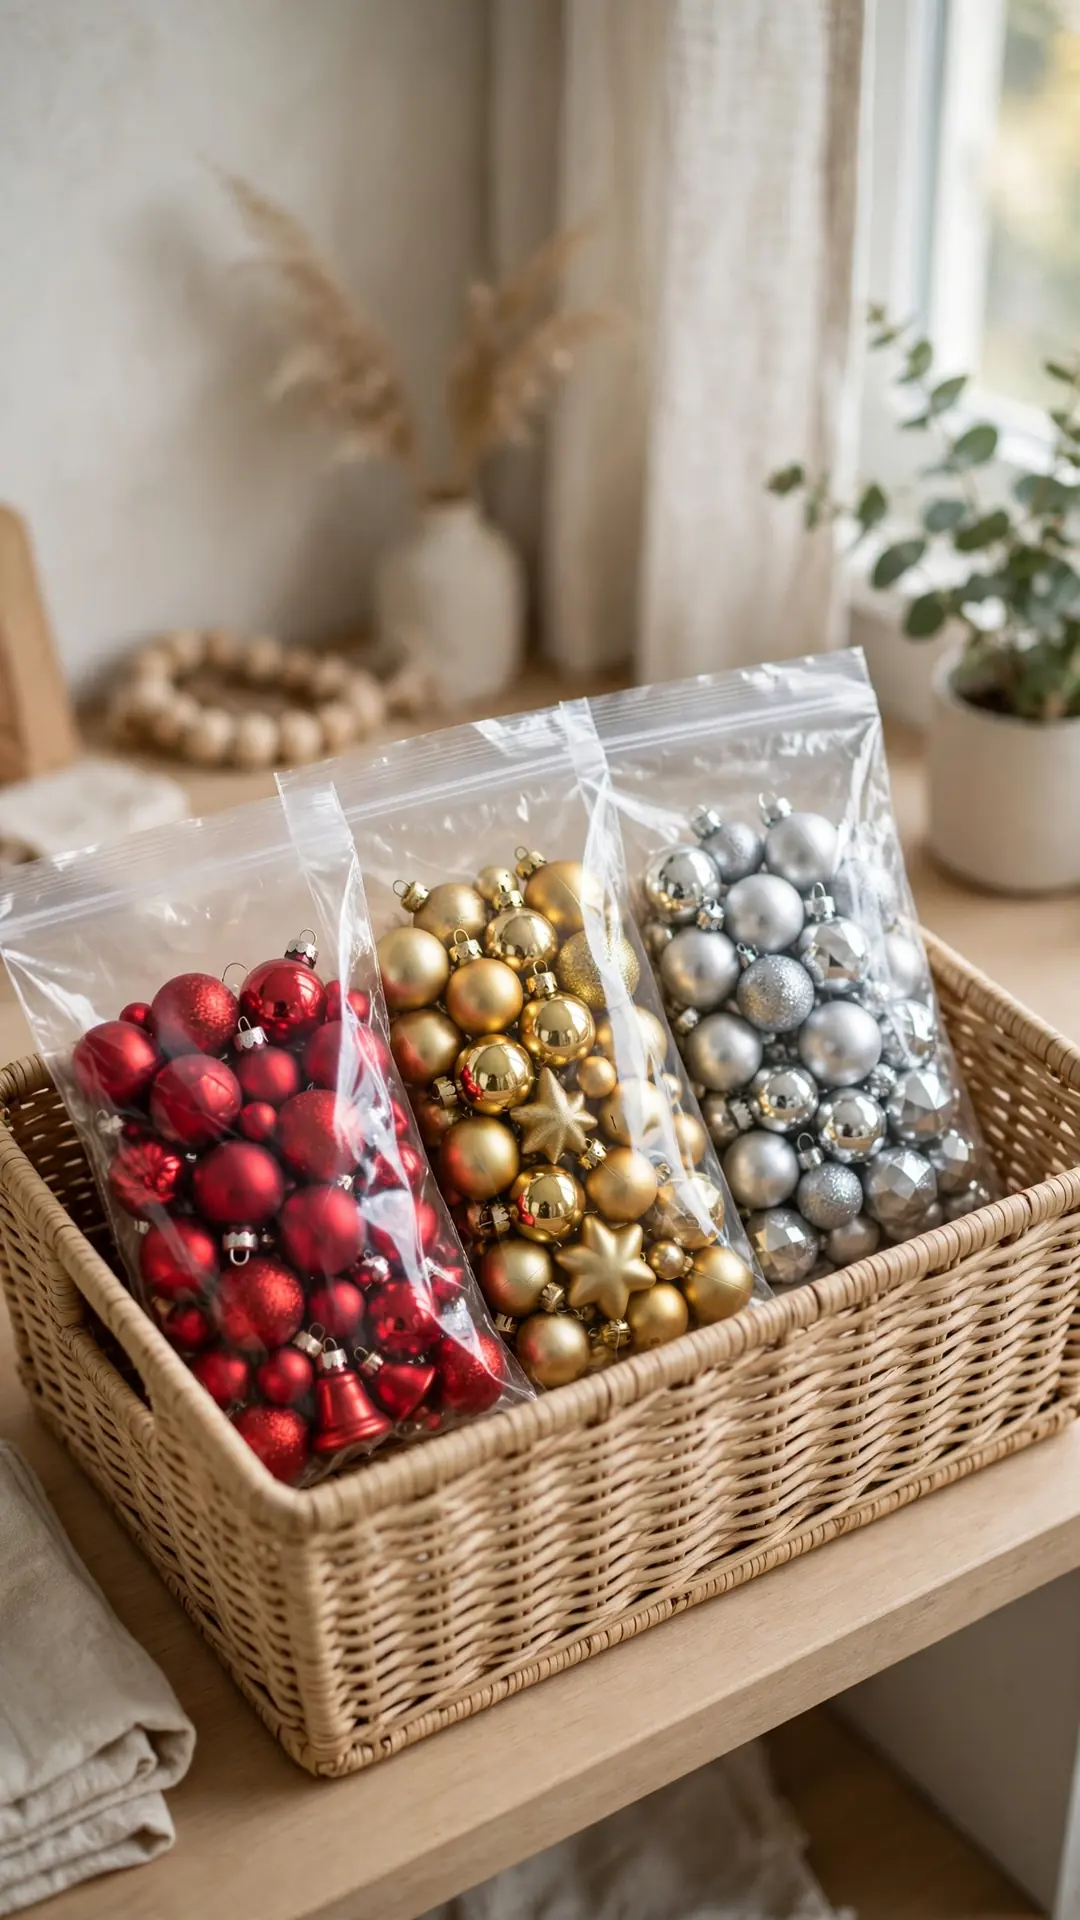
Sorting by color speeds up decorating next year. You grab the red bag and the gold bag and start. Small holiday decoration storage ideas for small spaces like this one cost almost nothing.
How to do it:
- Group ornaments by color or by tree zone.
- Fill one quart zip bag per group, air pressed out.
- Lay bags flat inside a bin so they stack.
- Keep one mixed bag for the kids tree or spare set.
- Put fragile pieces in a box instead of a bag.
Best for: Shatterproof ornaments in many colors.
Budget: $3 to $8 for bags
Quick tip: Flat bags stack like files, so the bin holds more.
6. Photograph Each Bin Before You Close It
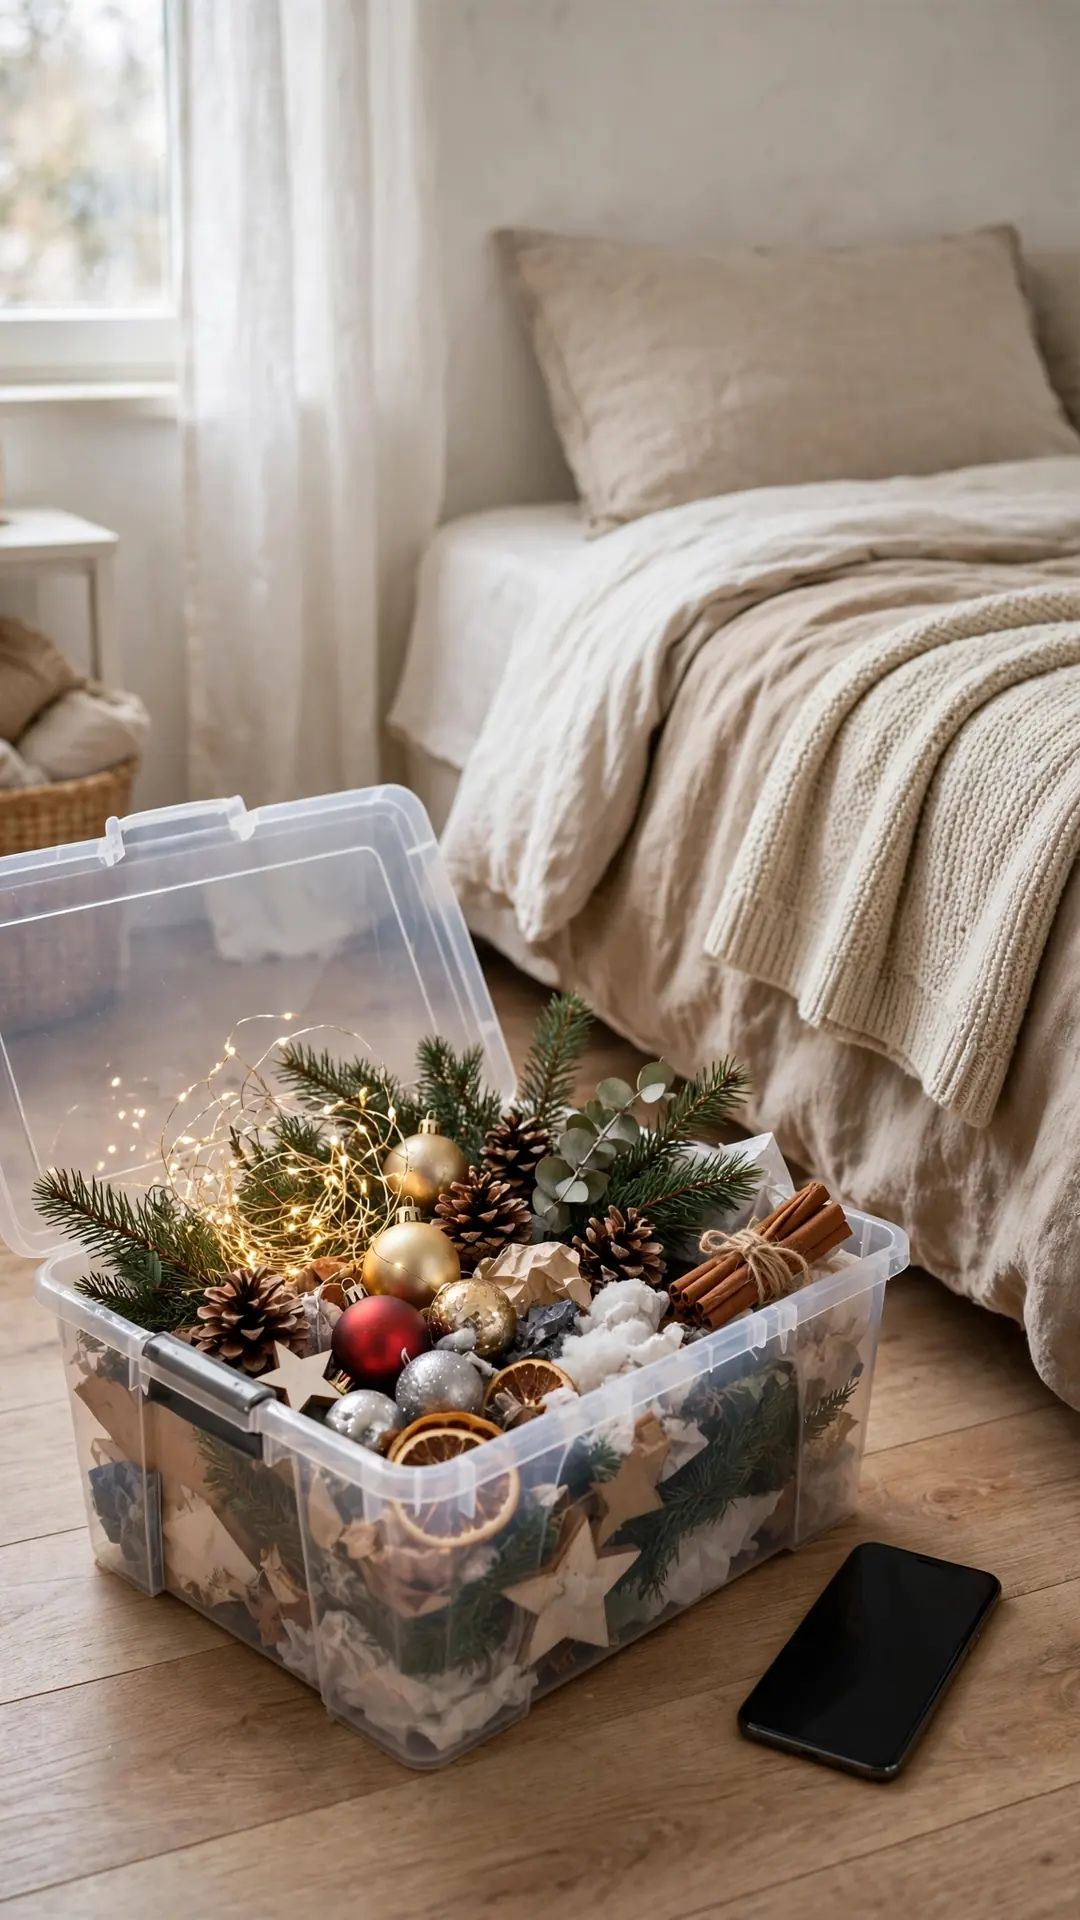
A quick photo of each open bin saves real digging later. You scroll your phone instead of opening every lid. It also helps after a move or a loan to family.
How to do it:
- Lay the bin contents out in one neat layer.
- Take one photo from above with your phone.
- Close the bin and note its spot in the photo album.
- Make one album named for the room or holiday.
- Update the photos each year as pieces change.
Best for: Homes with bins in three or more spots.
Budget: Free
Quick tip: Add the shelf or closet name to the album title.
7. Keep a Repair Kit with the Decorations
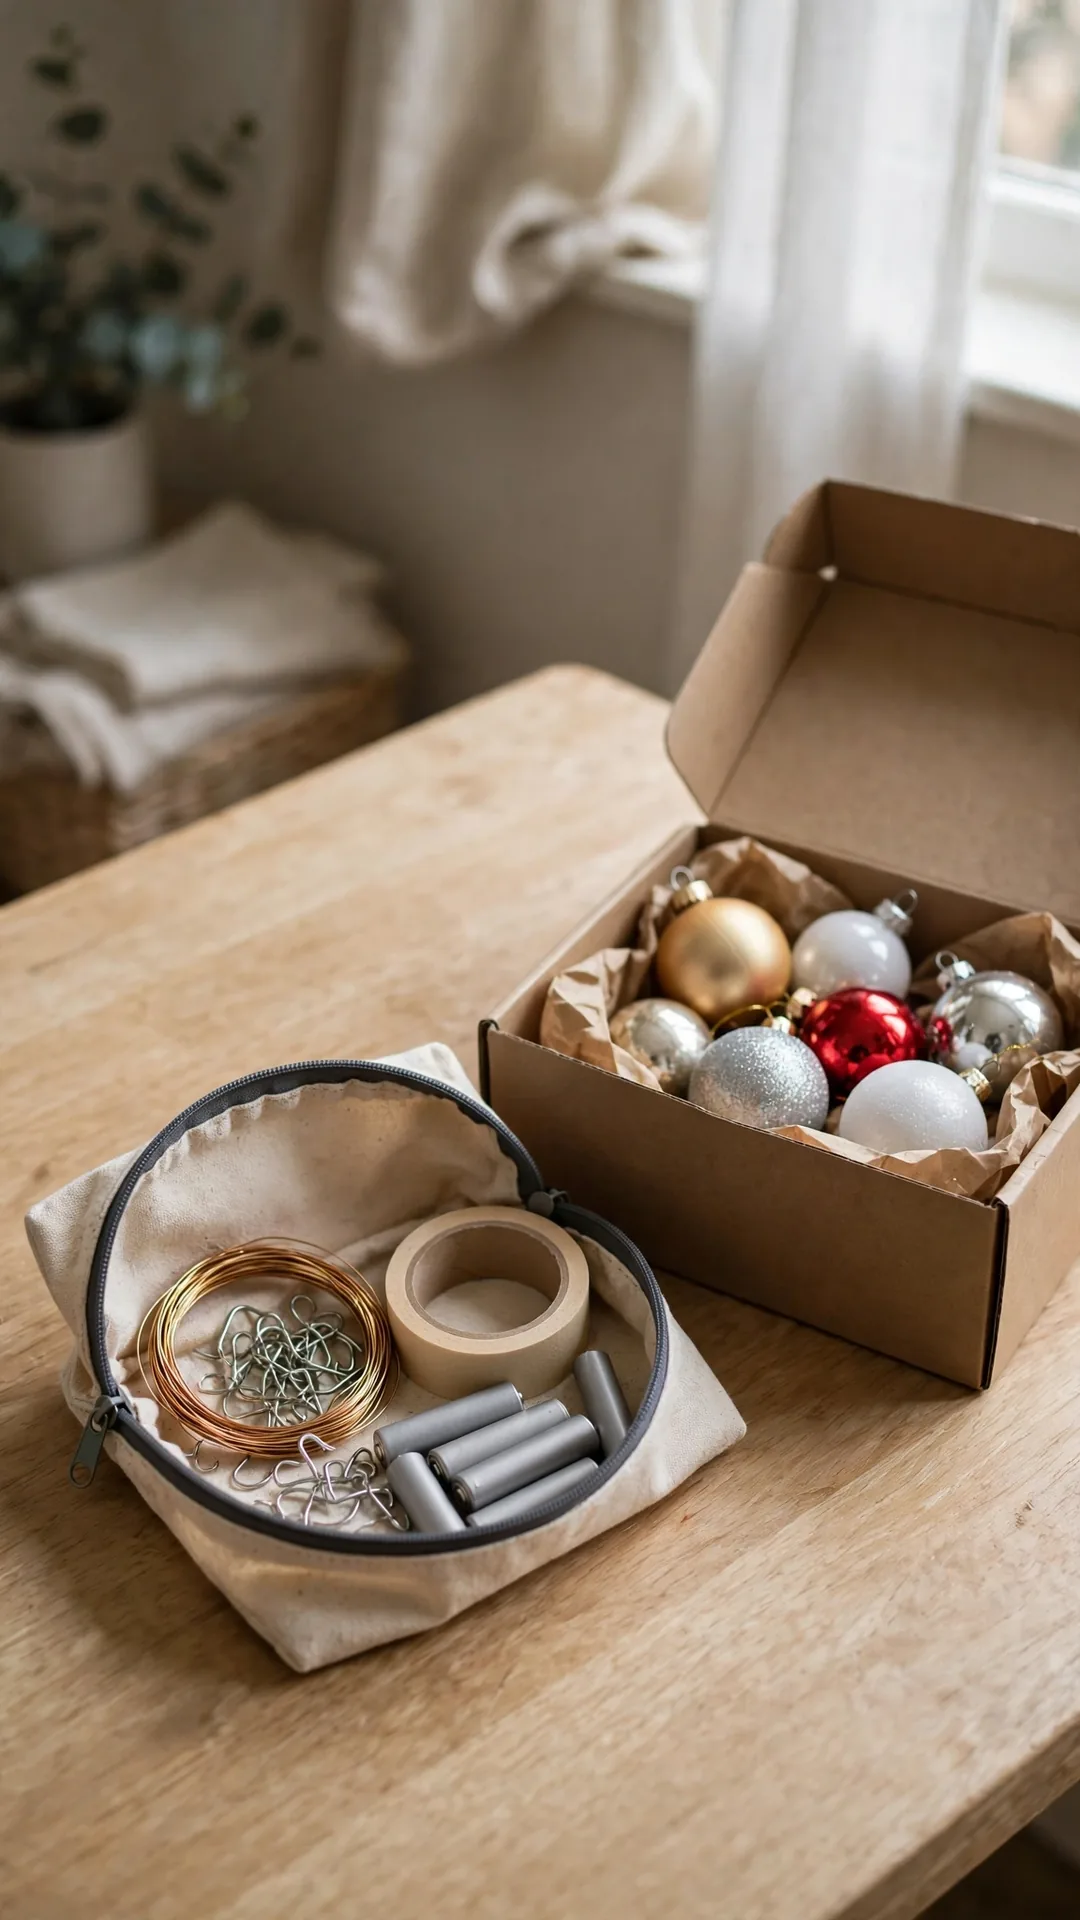
Hooks vanish and bulbs die at the worst moment. One small pouch with spares fixes most problems on the spot. Keep the pouch in the first bin you open each year.
How to do it:
- Use a zip pouch about 8 inches wide.
- Add spare hooks, floral wire and clear tape.
- Pack spare bulbs and one pack of batteries.
- Add a small screwdriver for battery covers.
- Restock the pouch before you pack up again.
Best for: Anyone who decorates in one long session.
Budget: $5 to $15
Quick tip: Put the pouch on top, so it comes out first.
8. Coil Lights Around a Cardboard Rectangle

Cardboard stops the famous light tangle before it starts. Each strand wraps around its own flat rectangle. The rectangles then stand in a bin like files.
How to do it:
- Cut rectangles about 12 by 8 inches from a sturdy box.
- Cut a small notch in one short edge.
- Wedge the plug in the notch and start wrapping.
- Wrap slowly so bulbs sit flat, not stacked.
- Stand finished rectangles upright in one bin.
Best for: Two to six strands of standard string lights.
Budget: Free
Quick tip: Write the strand length on the cardboard edge in pencil.
9. Use a Divided Ornament Box with a Lid
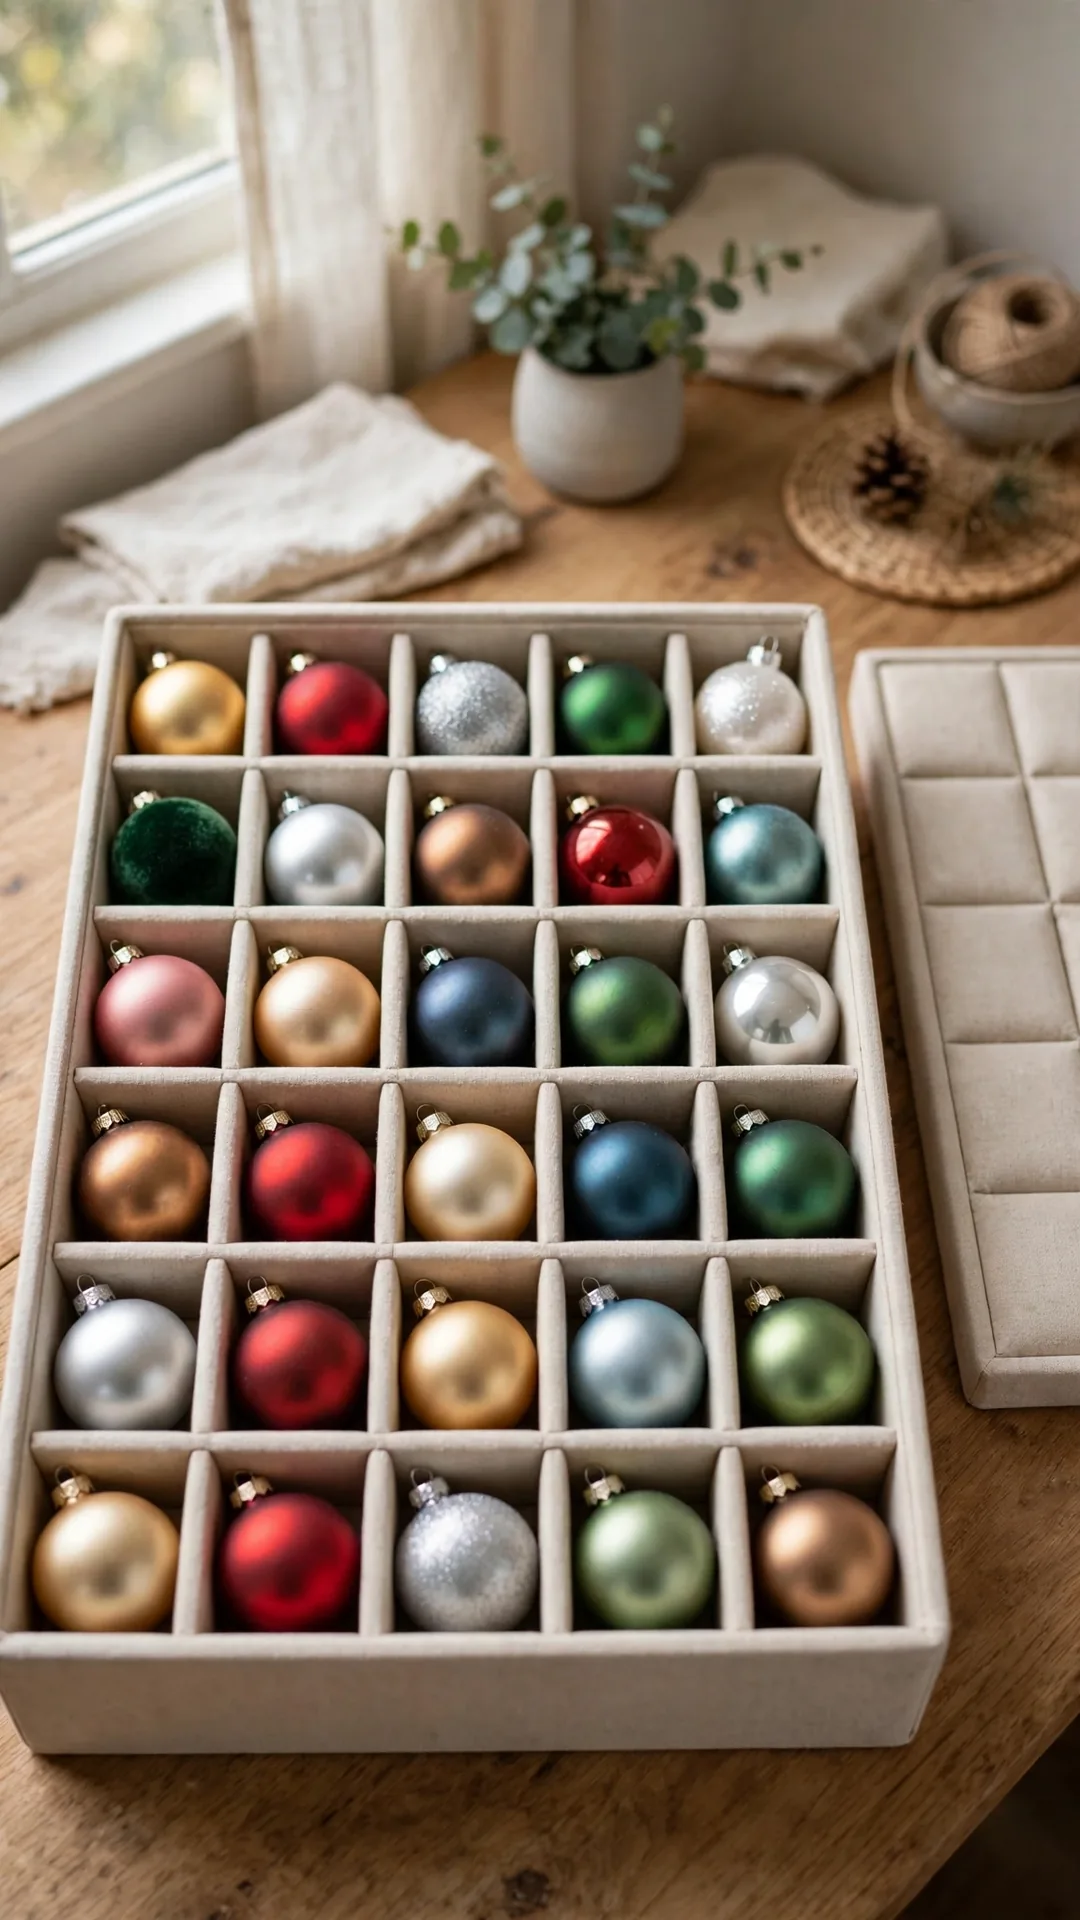
A divided box gives every ornament its own padded cell. The best holiday decoration storage ideas for small spaces give glass this kind of padding. The Spruce guide on how to store Christmas decorations backs this padded approach for fragile pieces.
How to do it:
- Pick a box with 64 cells for a standard tree set.
- Choose acid free dividers if you store heirlooms.
- Set one ornament per cell, hook side up.
- Lay a sheet of tissue over each full layer.
- Stack two boxes at most, to protect the lower one.
Best for: A full set of glass ornaments in one place.
Budget: $15 to $35
Quick tip: Keep the box on a shelf, not the floor, to dodge damp.
10. Stand Ornament Trays Upright Like Files
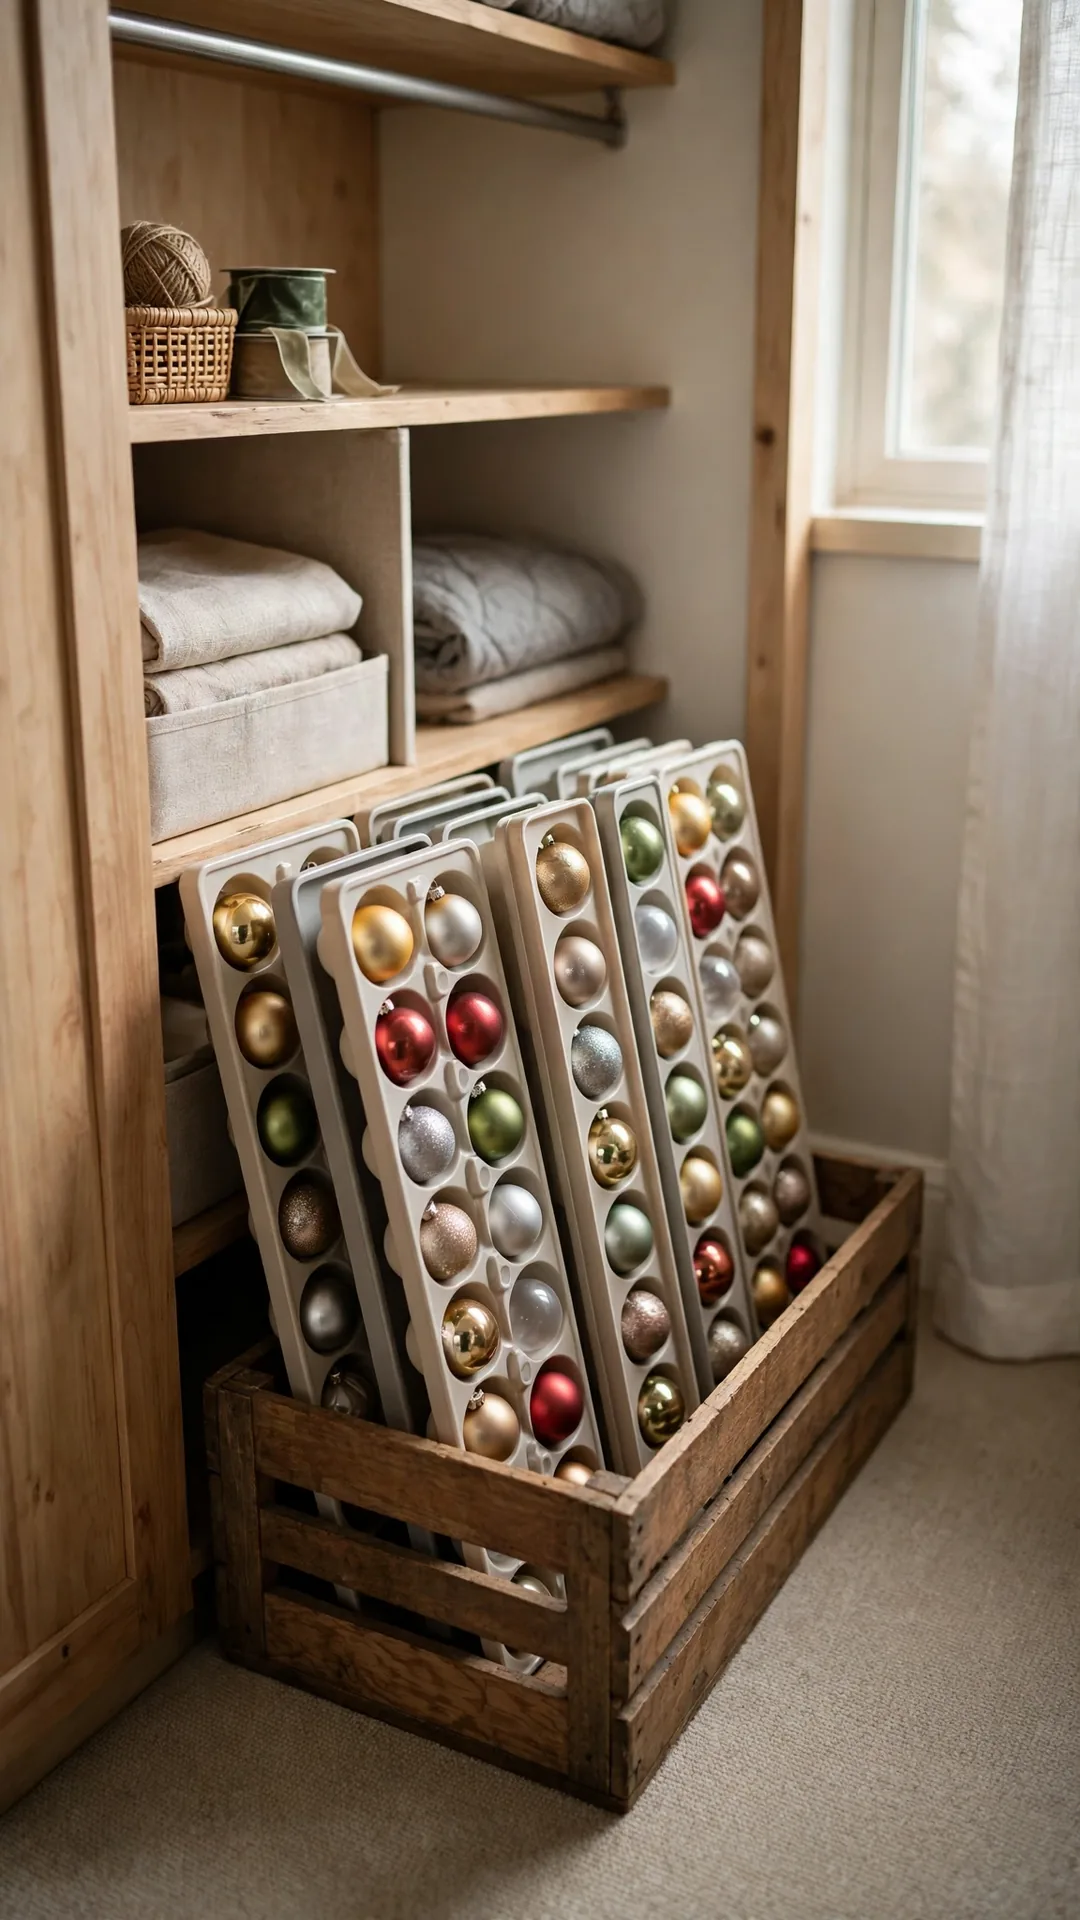
Flat trays can stand upright instead of stacking. A narrow crate or file box holds them on edge. You flip through trays like records and pull one out.
How to do it:
- Use trays with lids, so ornaments stay in place.
- Pick a crate just wider than the tray width.
- Stand trays on edge with a small gap between each.
- Face all lids the same way for a fast count.
- Slide the crate into a closet floor gap.
Best for: Shallow closets with a narrow floor gap.
Budget: $10 to $25
Quick tip: Add one empty tray at the front for new buys.
11. Pad a Drawer with Felt for Special Ornaments
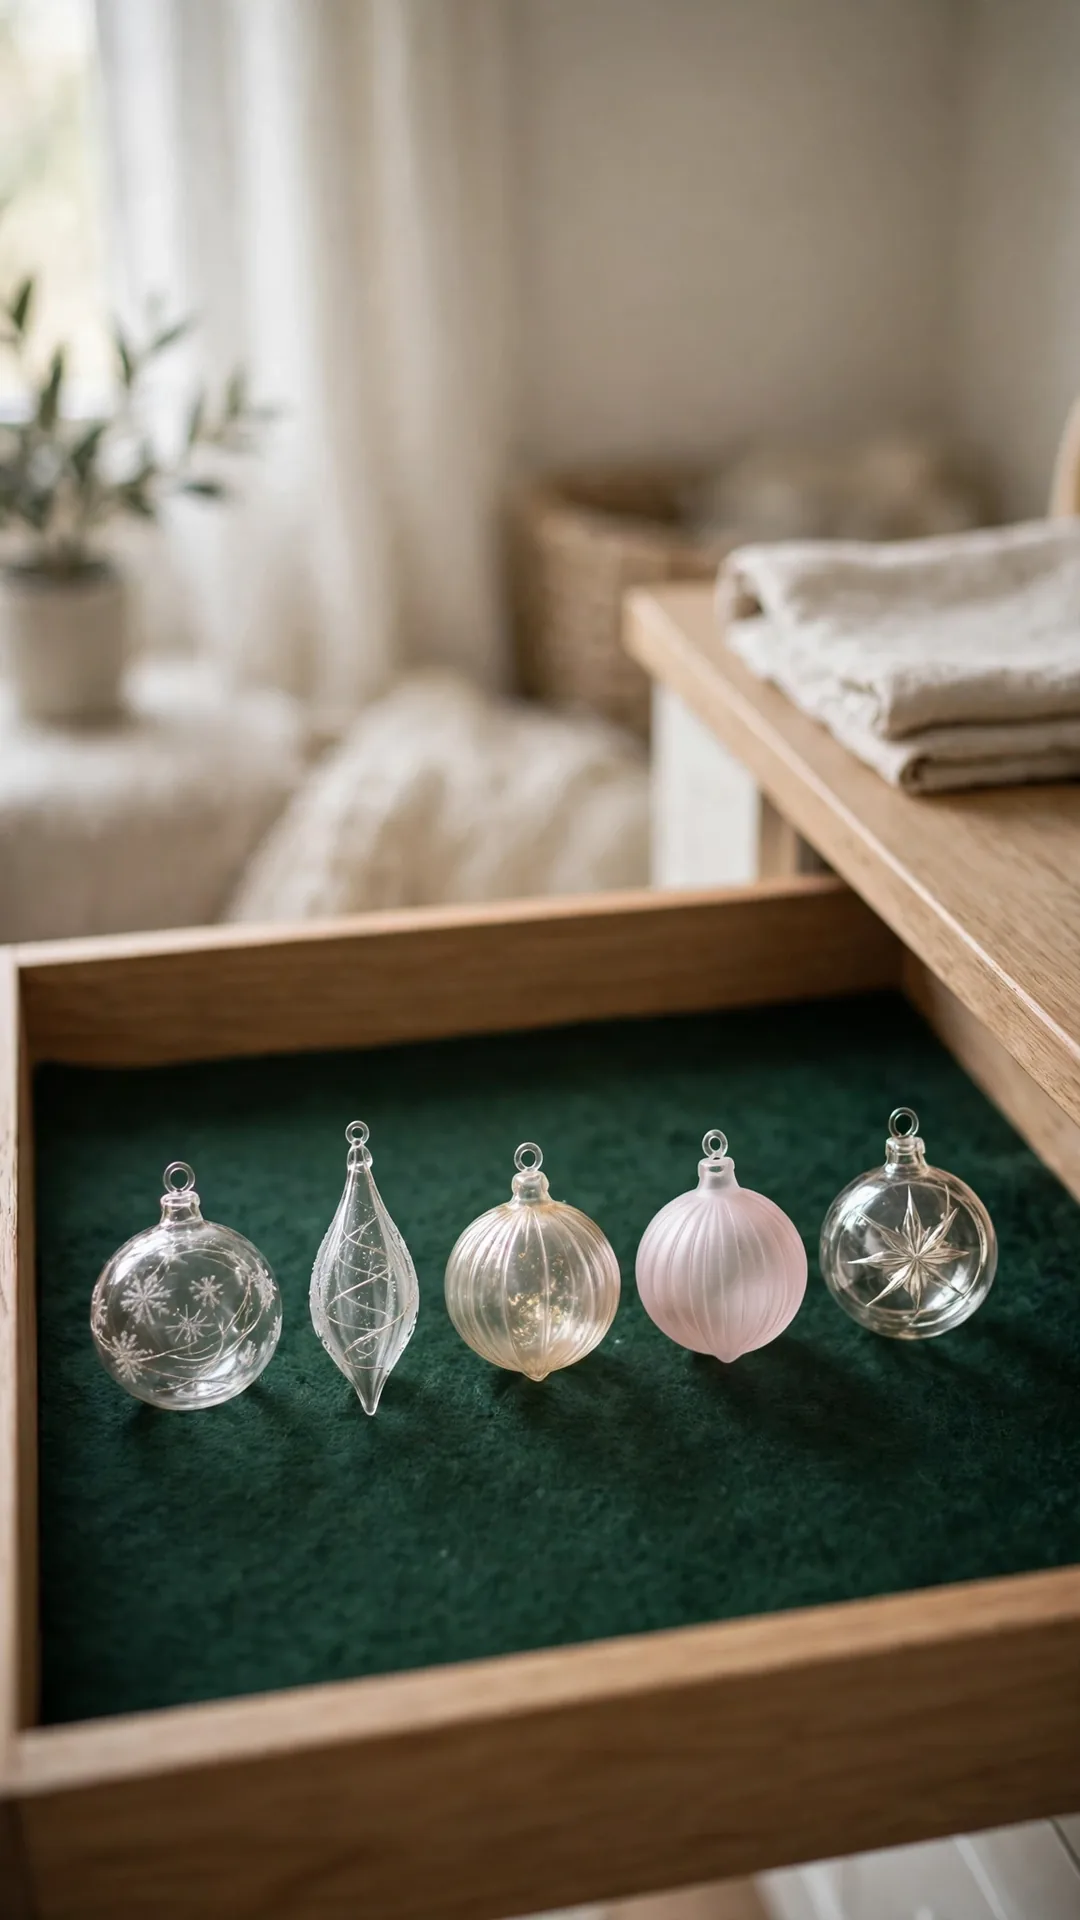
A spare drawer becomes a safe spot for your best ornaments. A felt liner stops rolling and cushions thin glass. The drawer also keeps dust and light off the finish.
How to do it:
- Pick a shallow drawer about 3 to 4 inches deep.
- Cut felt or a soft towel to fit the base.
- Lay ornaments in one layer with space between each.
- Roll tiny fabric scraps between pieces that touch.
- Close the drawer gently and skip daily use.
Best for: A few heirloom pieces in a bedroom dresser.
Budget: $5 to $12
Quick tip: One layer only, since stacking cracks thin glass fast.
12. Keep Heirloom Ornaments in a Padded Case
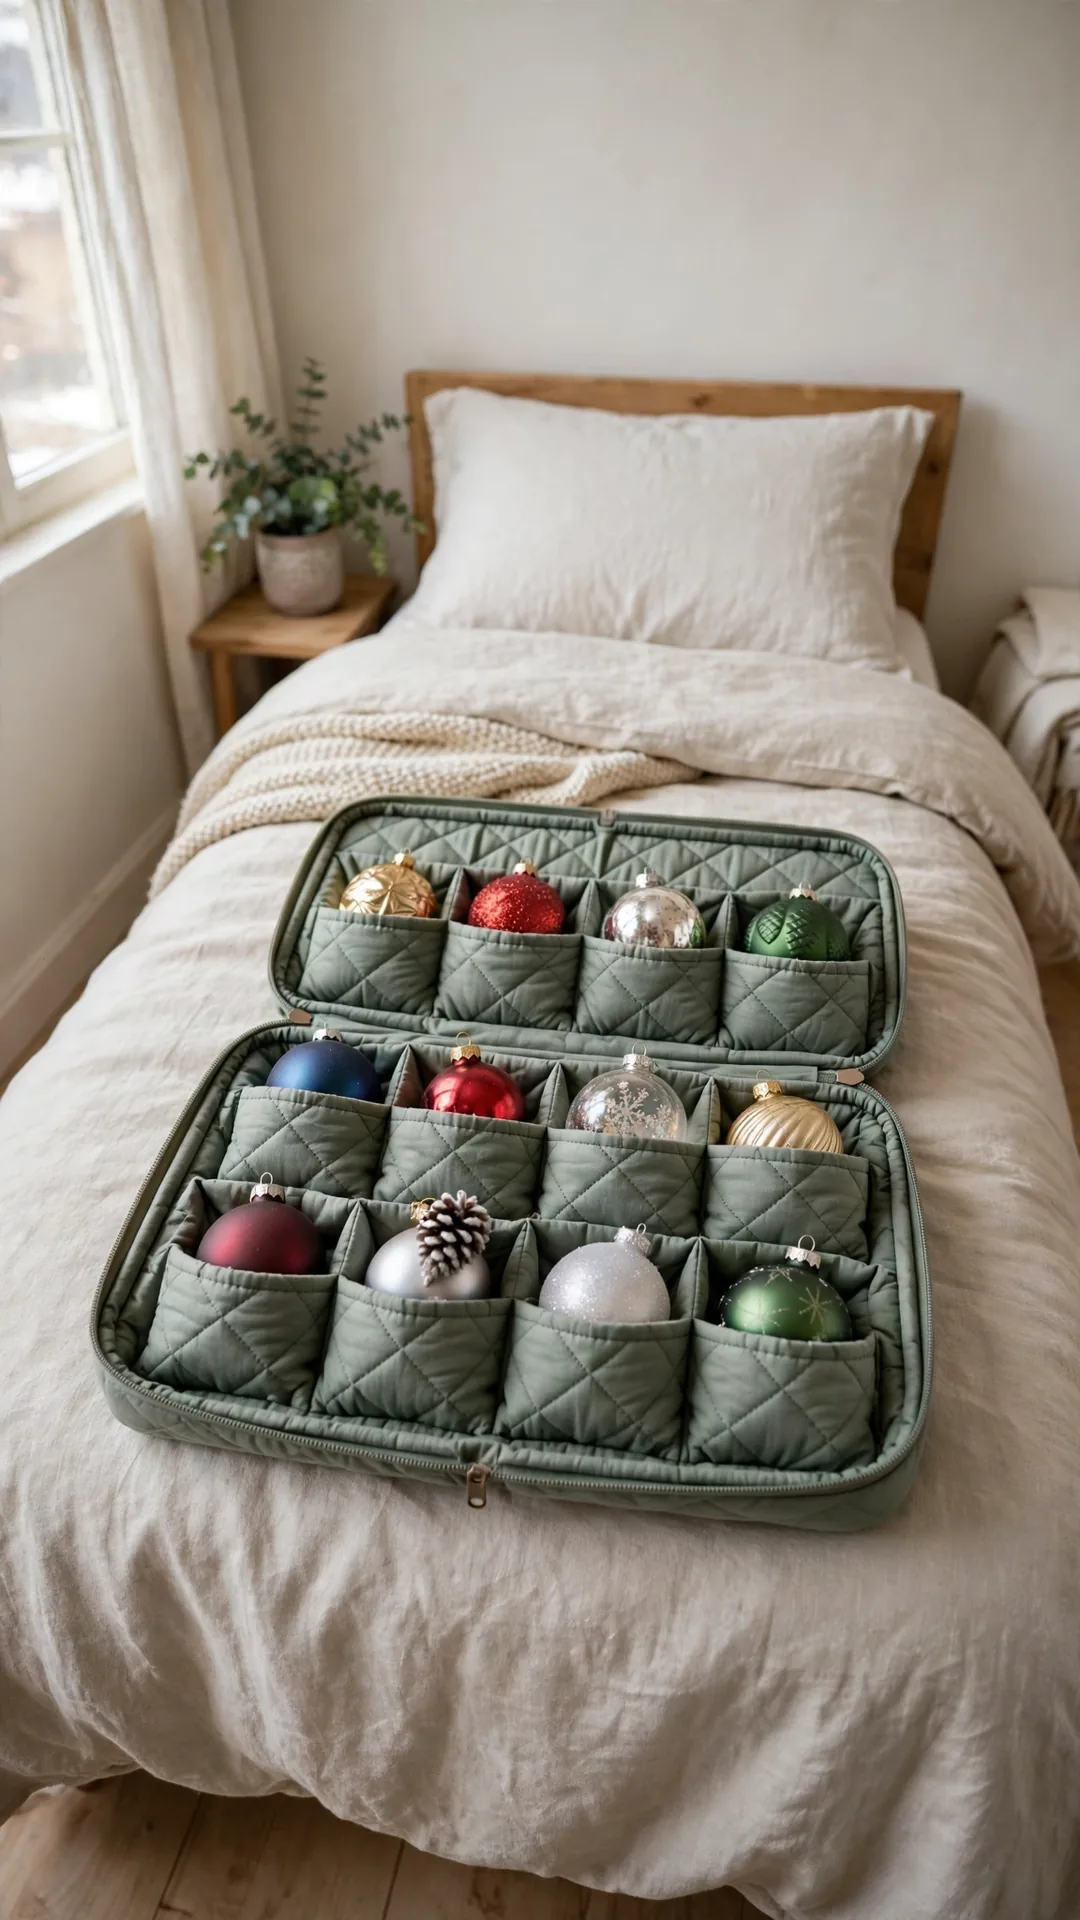
A padded zip case treats heirlooms like the valuables they are. Quilted pockets hold each piece apart from the rest. The slim case then slips into a drawer or under a bed.
How to do it:
- Choose a case with individual quilted pockets.
- Wrap each ornament in tissue before it goes in.
- Zip the case fully so nothing shifts in transit.
- Store the case flat in a cool, dry spot.
- Keep the case away from attic heat swings.
Best for: Family heirlooms and hand painted pieces.
Budget: $20 to $45
Quick tip: Slip a plain card in one pocket listing each piece.
13. Pack Baubles in Original Boxes Inside a Bin
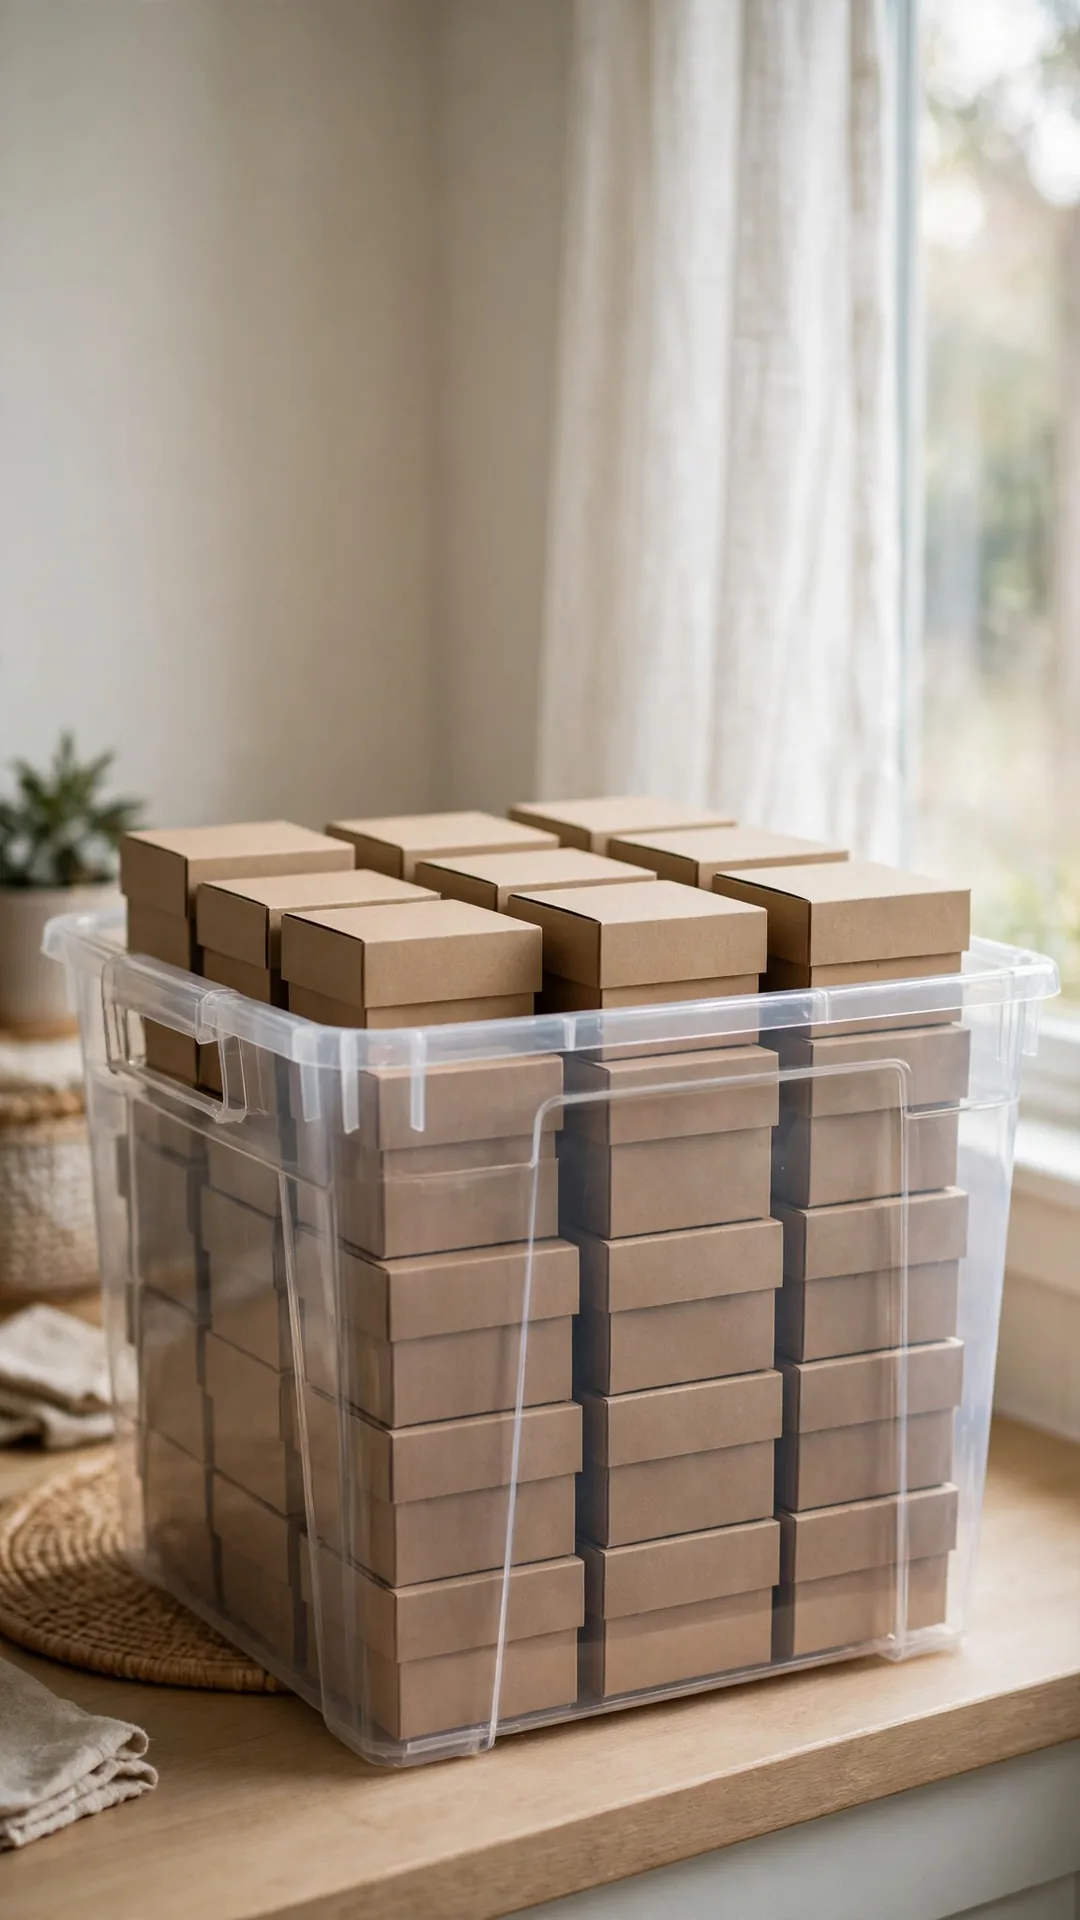
Retail boxes already fit their ornaments perfectly. Keeping them saves padding and guesswork at pack up time. Honest holiday decoration storage ideas for small spaces reuse what you own first.
How to do it:
- Keep the box each set came in when you buy it.
- Return each ornament to its molded slot in January.
- Stack the small boxes inside one large clear bin.
- Fill gaps with one bag of soft decor.
- Store the bin where you can reach it without climbing.
Best for: Matching sets bought in boxed packs.
Budget: Free to $10 for the outer bin
Quick tip: Tape one loose flap now, before it tears in storage.
14. Separate Breakables with Cardboard Layers
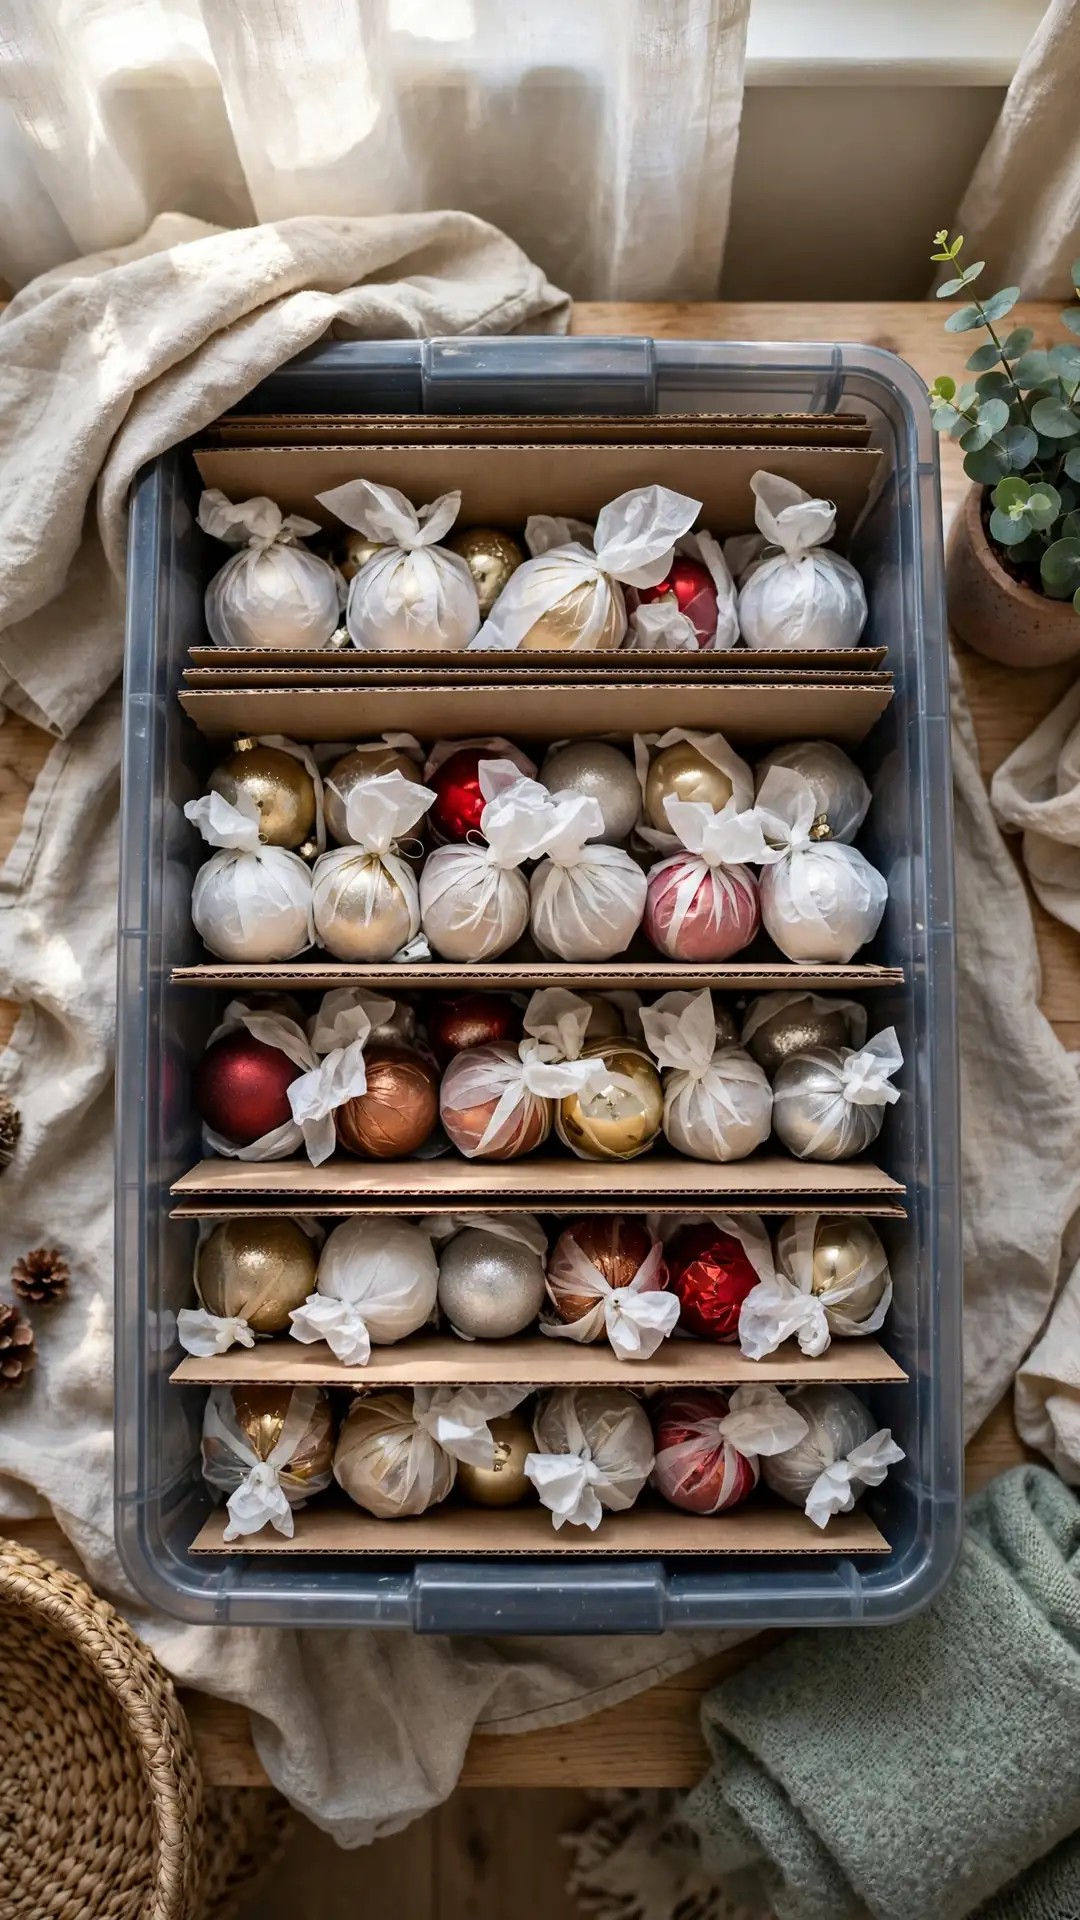
Plain cardboard sheets turn one deep bin into safe layers. Each layer holds a row of wrapped pieces. Nothing below gets crushed by the weight above.
How to do it:
- Cut cardboard to match the inside of your bin.
- Lay one row of wrapped ornaments on the base.
- Add a cardboard sheet, then the next row.
- Build three layers at most in a standard bin.
- Finish with soft decor on top, never glass.
Best for: Deep bins and mixed fragile sets.
Budget: Free to $5
Quick tip: Cereal boxes work well as thin, clean layer sheets.
15. Keep Tabletop Decor in a Lidded Basket
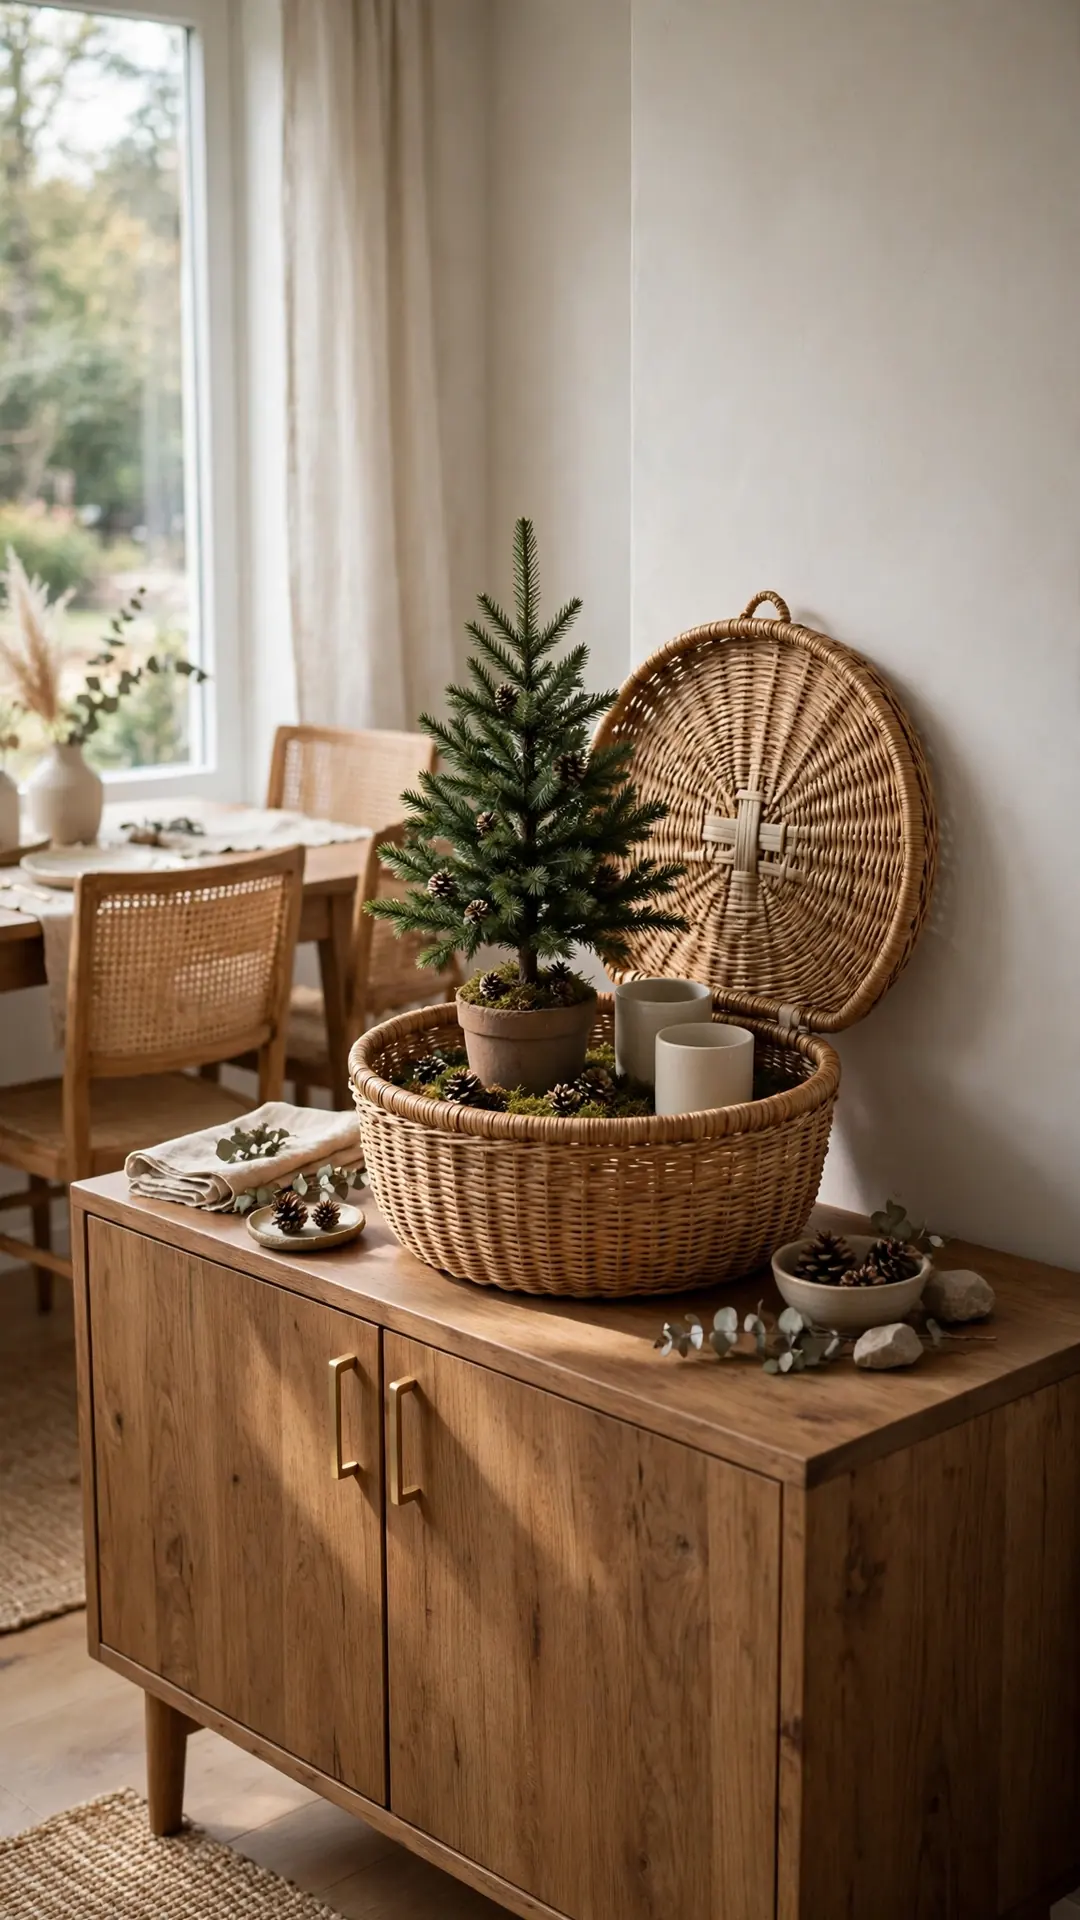
A lidded basket hides tabletop decor in plain sight. For the table itself, these small dining room storage ideas keep the surface clear all year. Your centerpiece pieces stay dust free and close to the table.
How to do it:
- Pick a basket about 16 inches long with a firm lid.
- Wrap candle holders and small trees in cloth.
- Stand tall pieces upright along the basket walls.
- Lay flat pieces, like rings, across the top.
- Keep the basket where you set the table most.
Best for: Dining table pieces in a small home.
Budget: $15 to $35
Quick tip: A basket near the table makes setup take minutes.
16. Roll Soft Decor in a Fabric Storage Cube
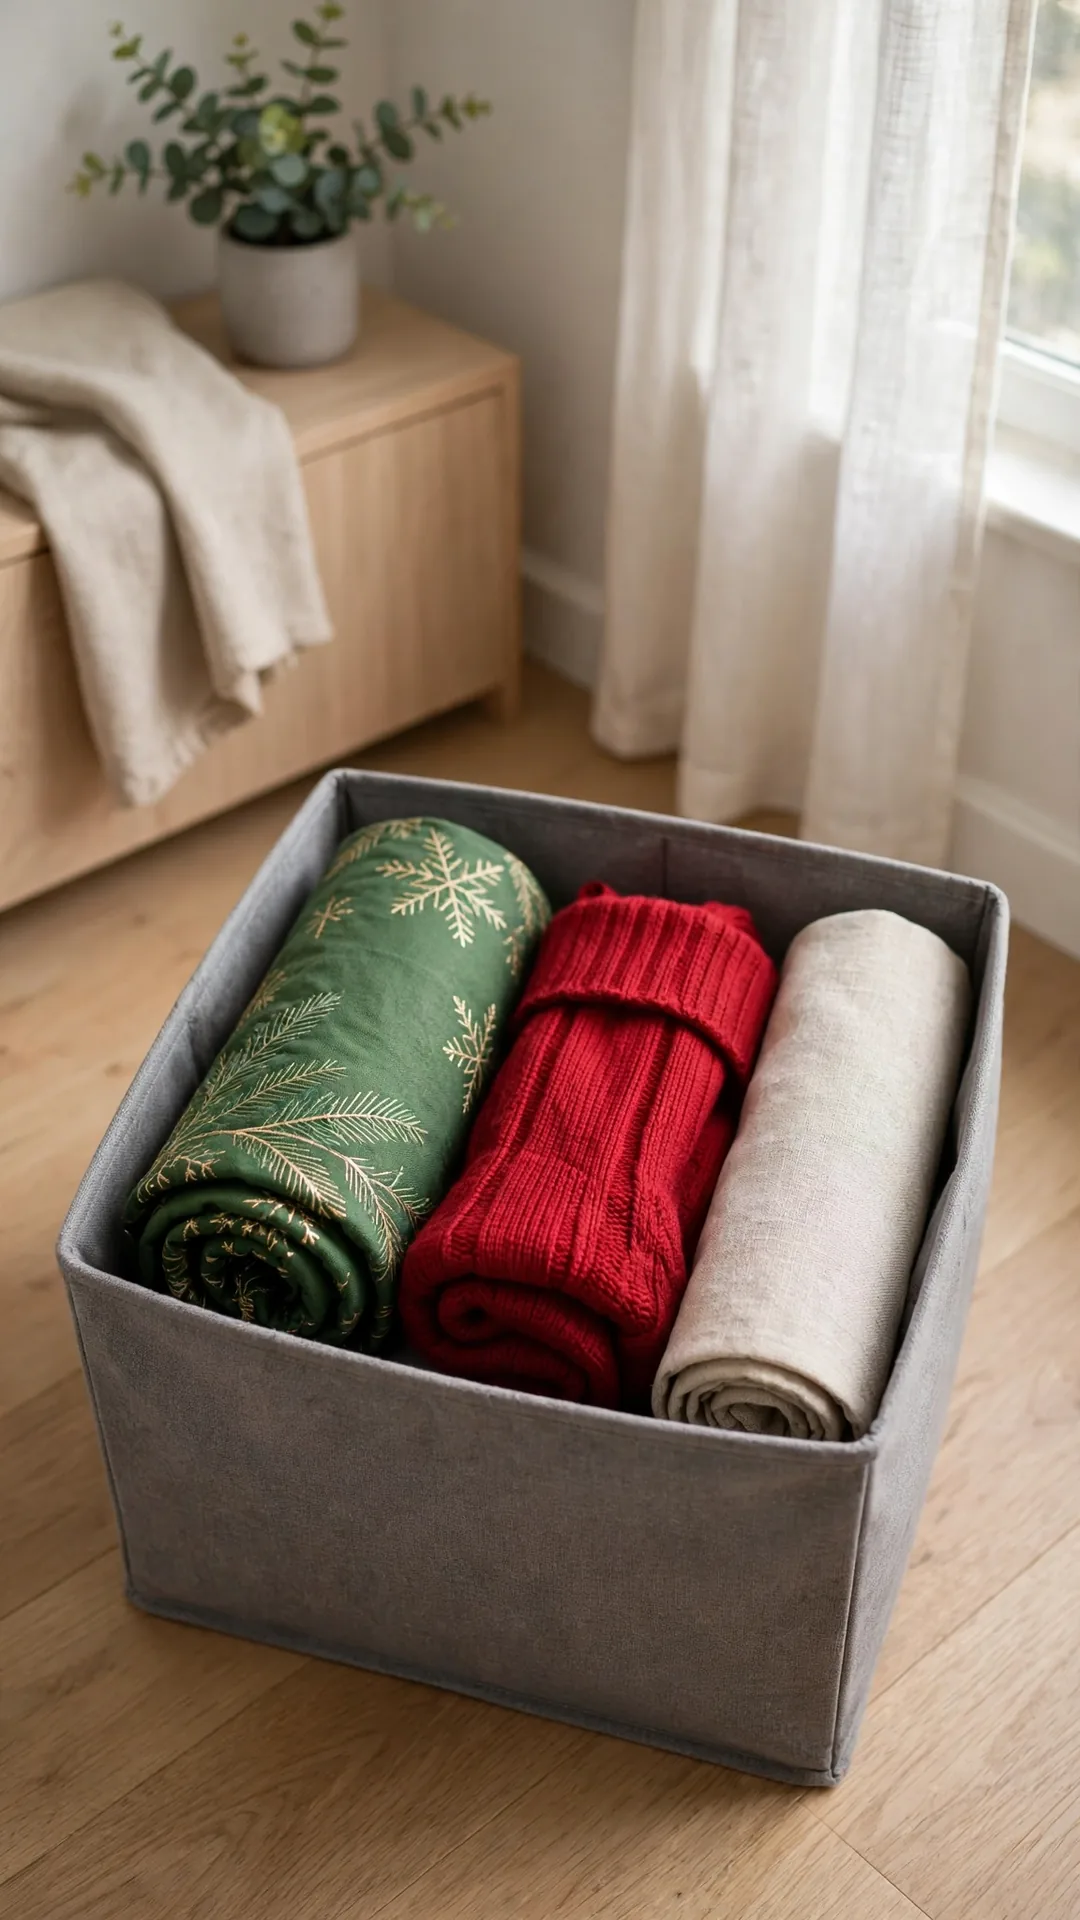
Soft decor needs no padding, just a tidy cube. Tree skirts, stockings and runners roll or fold flat. One cube on a closet shelf holds a whole table setting.
How to do it:
- Roll the tree skirt around a cardboard tube.
- Fold stockings flat in pairs to save space.
- Roll runners and cloth napkins into tight tubes.
- Pack the cube full so pieces hold each other.
- Set the cube on a shelf at eye level or below.
Best for: Fabric decor that creases in a crushed bin.
Budget: $8 to $18
Quick tip: Roll around a tube, and the skirt unrolls flat next year.
17. Hang Small Decor in a Clear Shoe Organizer
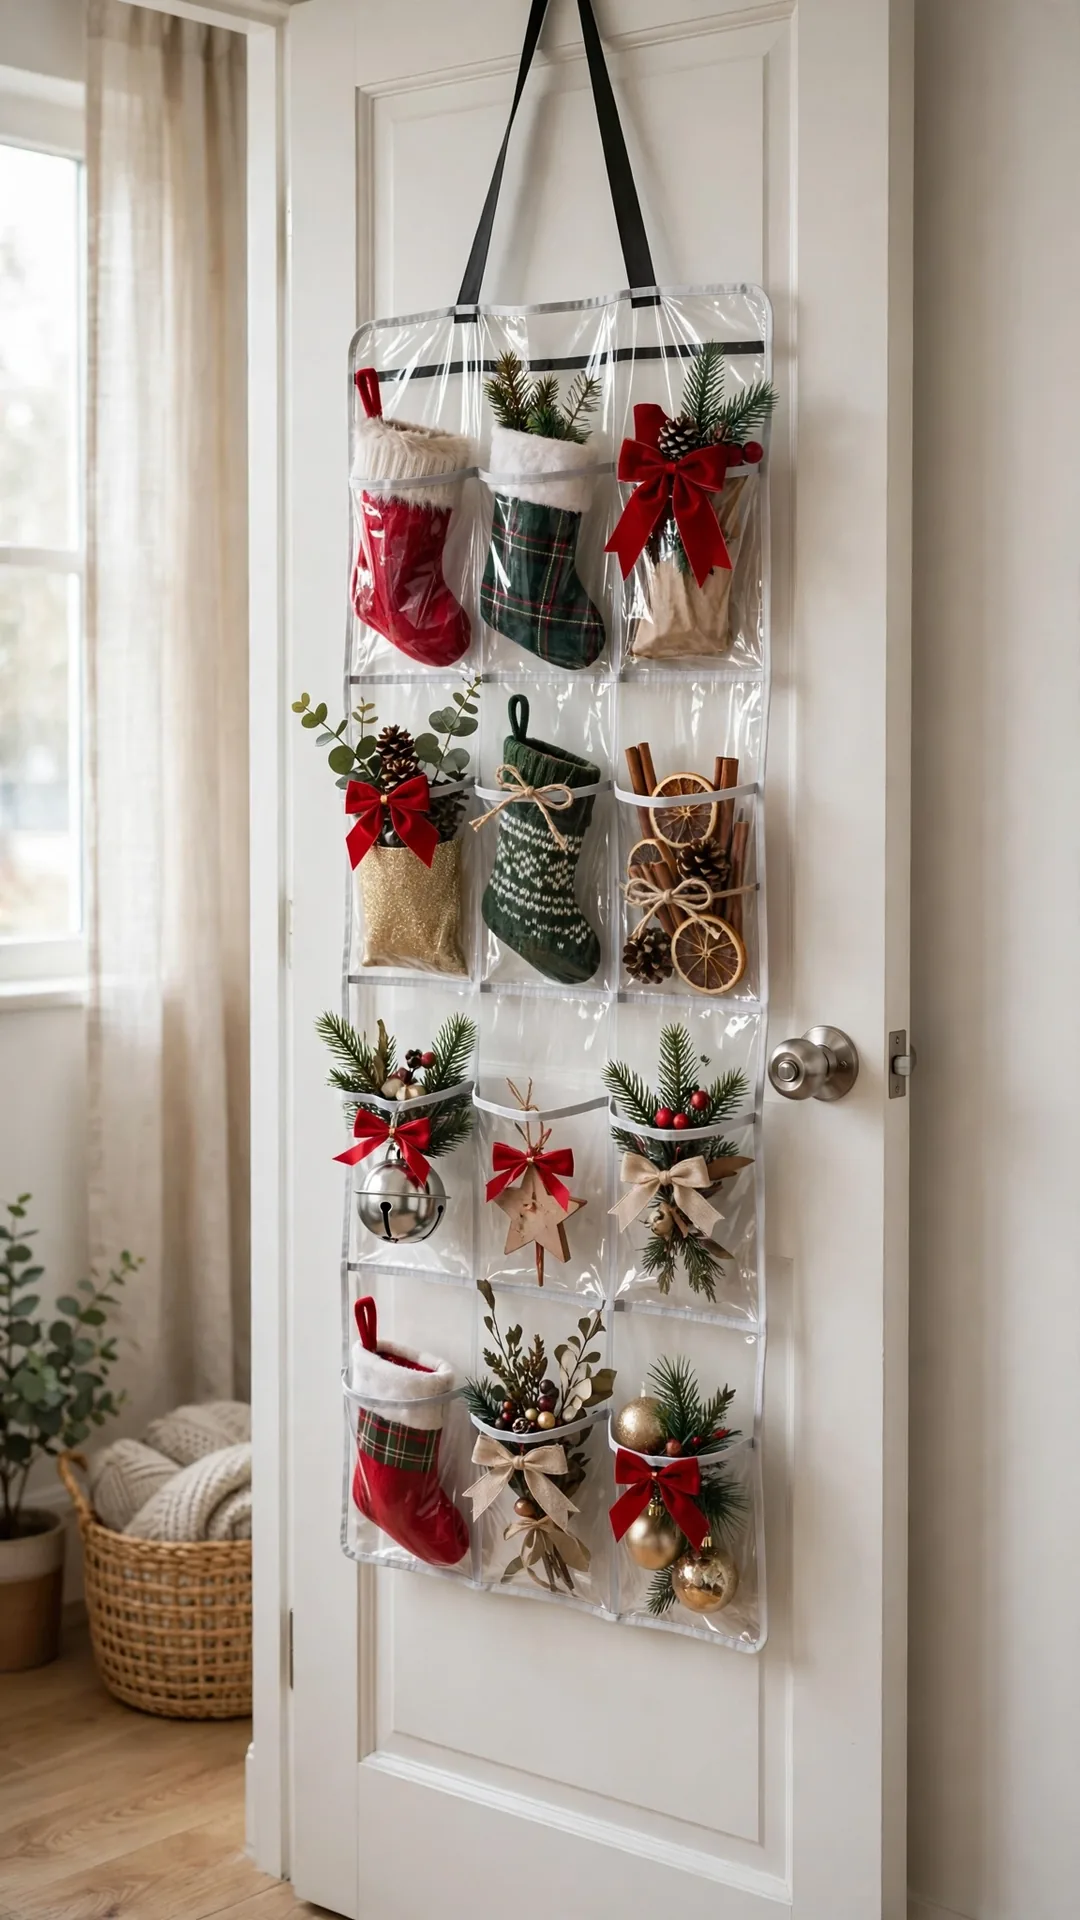
A clear shoe organizer turns a door into storage, a trick behind many holiday decoration storage ideas for small spaces. Each pocket holds one small item you can see. Stockings, bows and small signs stay flat and sorted.
How to do it:
- Hang a clear 24 pocket organizer inside a closet door.
- Put one type of item in each pocket.
- Keep heavy items in the bottom two rows.
- Roll stockings so the cuff shows for fast picks.
- Close the door slowly to check nothing bulges.
Best for: Renters with a spare closet door.
Budget: $10 to $20
Quick tip: Clear pockets beat labels, since you see everything at once.
18. Stand Tall Figures Upright in a Tall Bin

Tall figures break when they lie under heavy boxes. A tall, narrow bin keeps them upright and apart. Wrap each figure so paint never rubs paint.
How to do it:
- Pick a bin about 24 to 30 inches tall.
- Wrap each figure in a thin cloth or pillowcase.
- Stand figures upright with space between each one.
- Fill gaps with tissue so nothing tips over.
- Store the bin in a corner where it cannot fall.
Best for: Nutcrackers, tall Santas and bottle brush trees.
Budget: $12 to $25
Quick tip: Tallest figure sets the bin height, so measure it first.
19. Wrap Lights Around a Hanger on the Rod
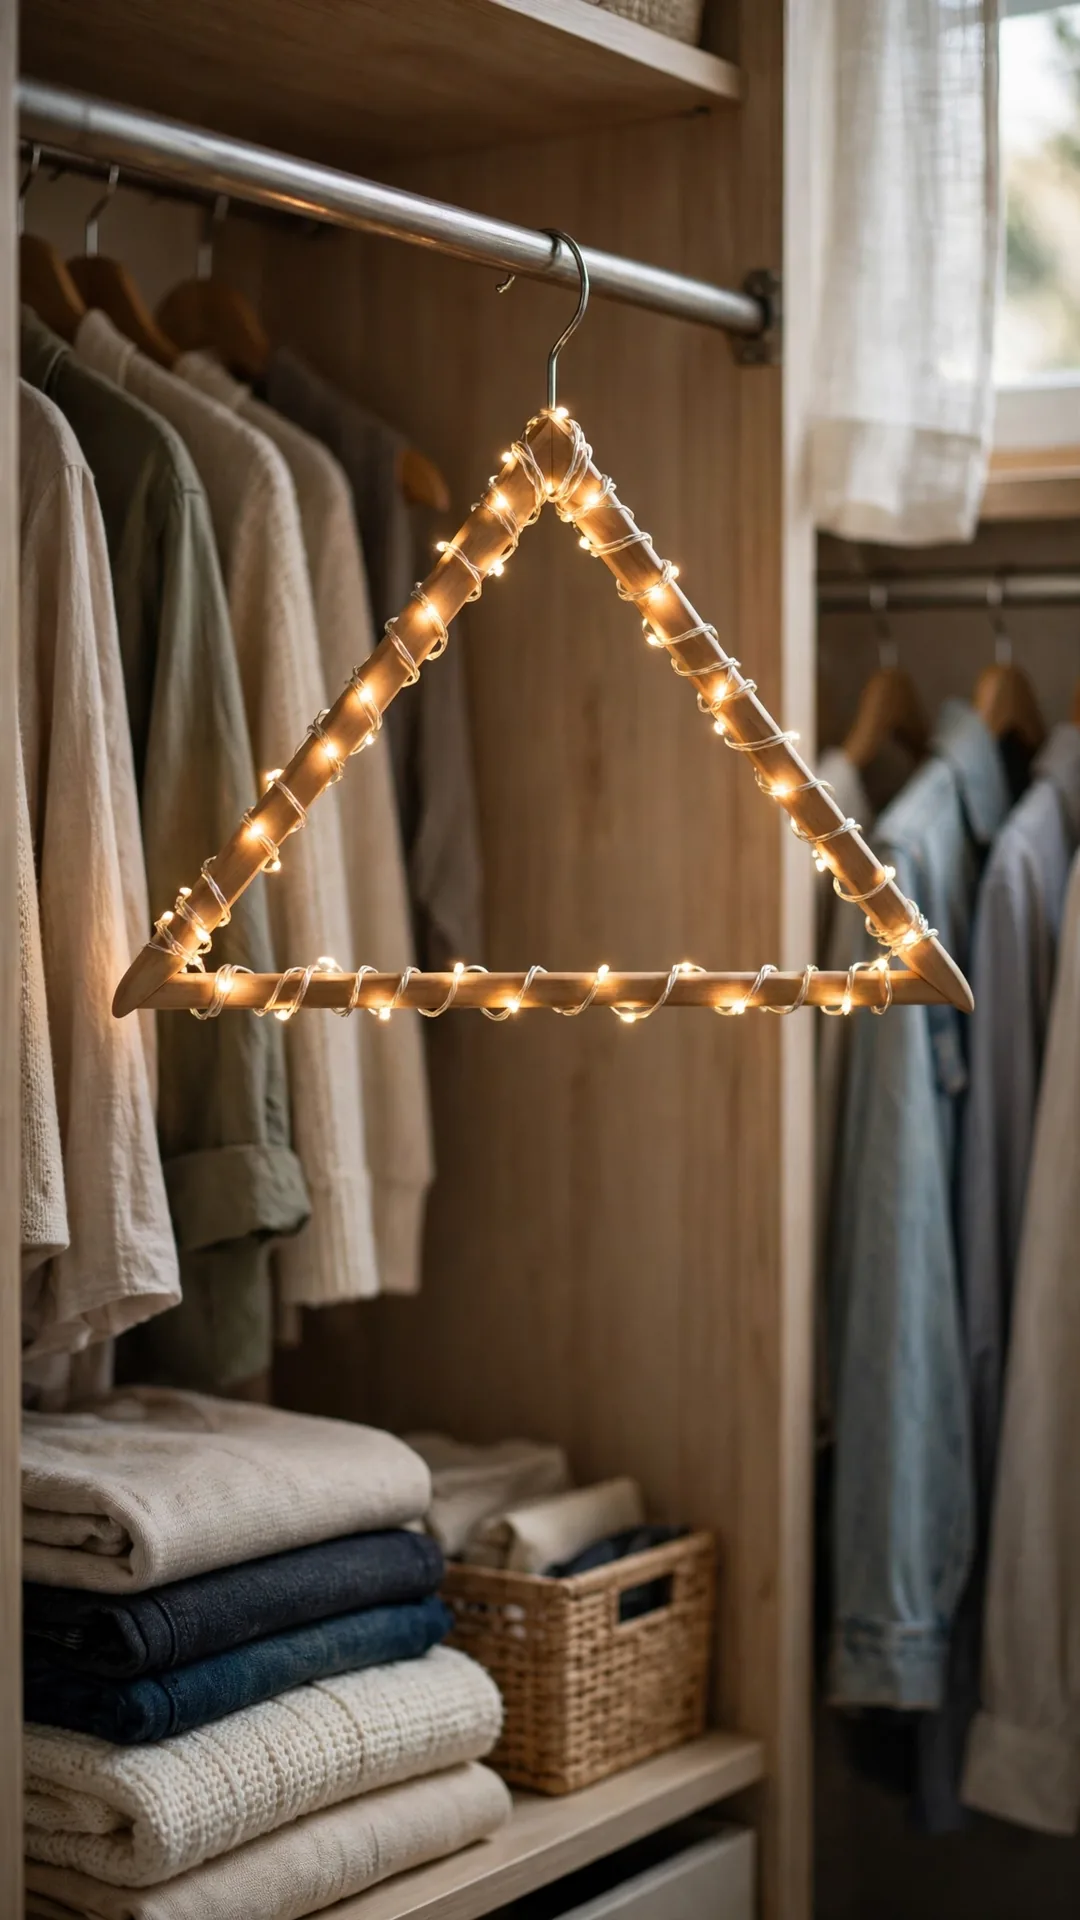
A sturdy hanger works like a light reel you already own. The strand wraps around the frame and hangs on the rod. Next year you lift it down and unwind as you hang.
How to do it:
- Use a strong wooden or thick plastic hanger.
- Clip the plug end to the hanger hook.
- Wrap the strand around the frame in even loops.
- Clip the loose end back onto the frame.
- Hang one strand per hanger on the closet rod.
Best for: One or two strands in a coat closet.
Budget: Free to $5
Quick tip: Keep the plug at the top for a fast reach next year.
20. Coil Each Light Strand in Its Own Bag
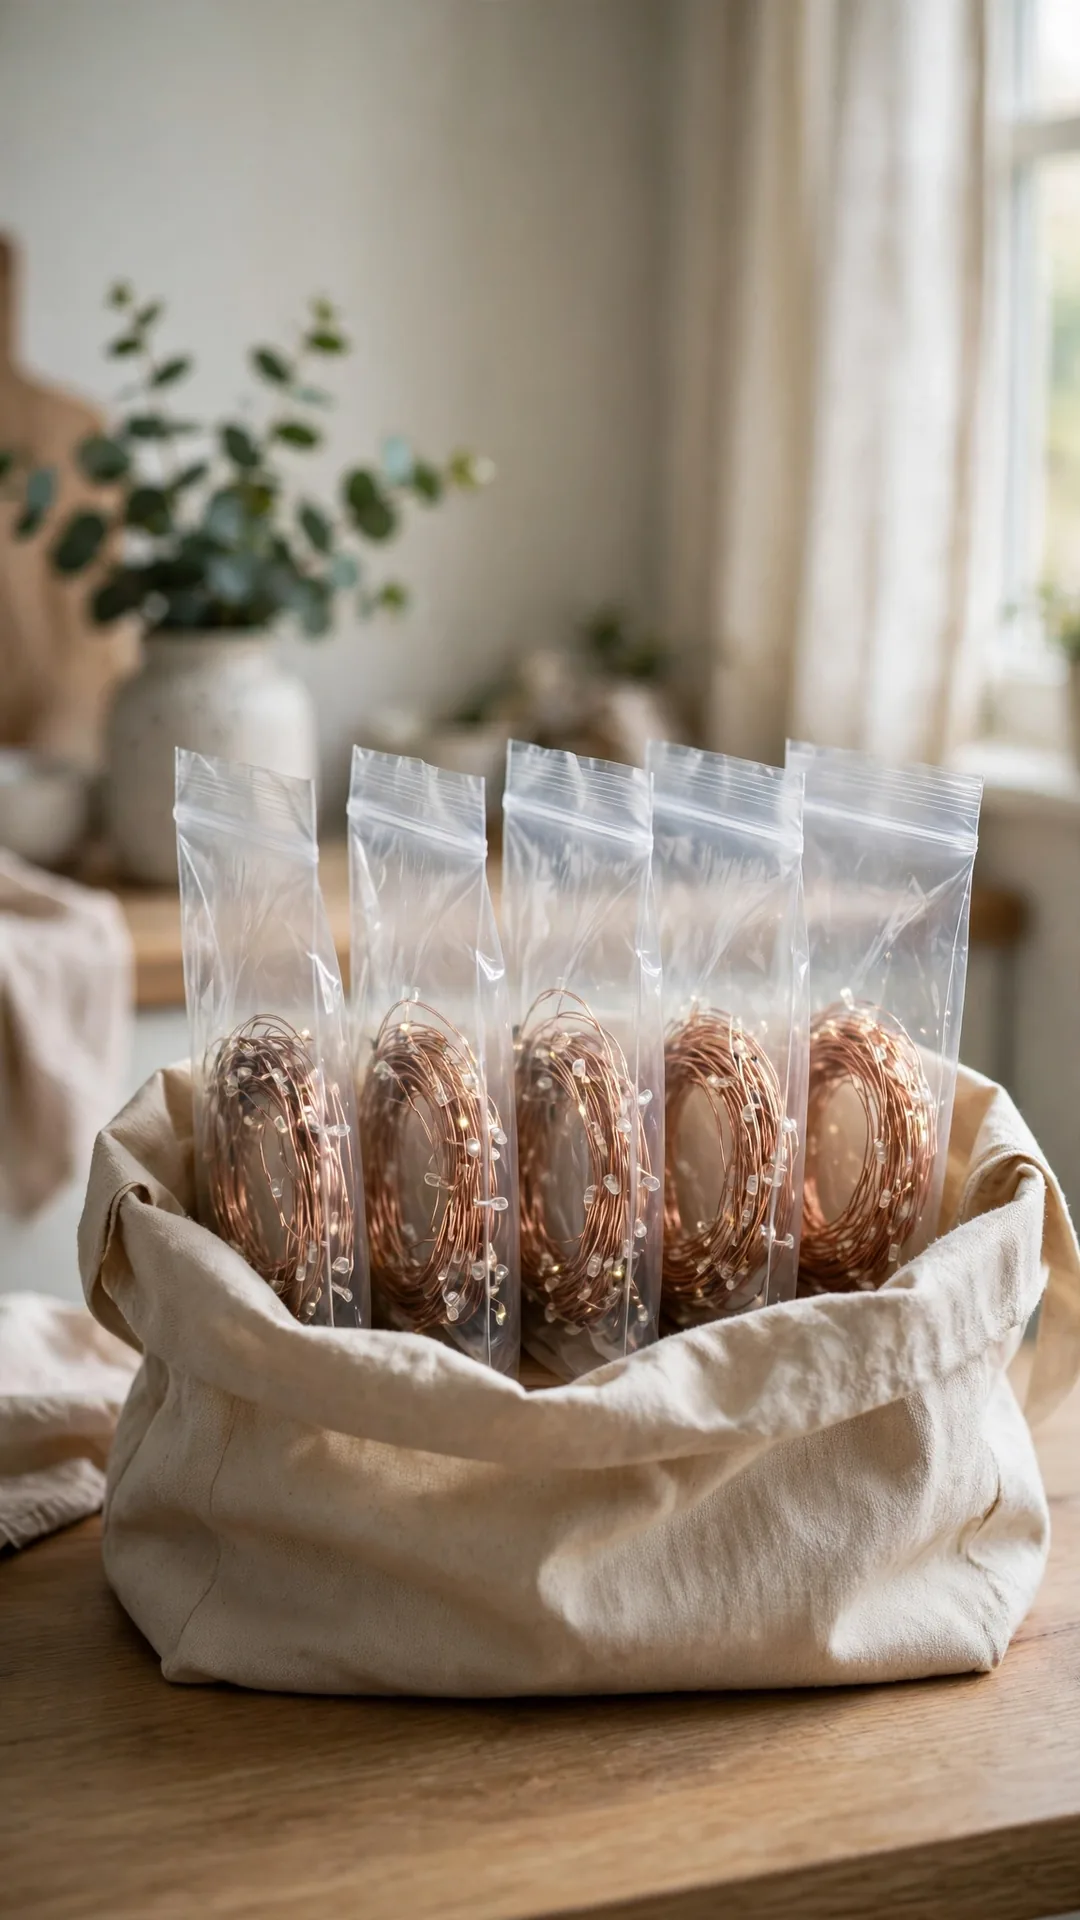
One bag per strand keeps lights separate for good. A dead strand stays in its bag, not tangled with three good ones. Bags then stack flat inside a small tote.
How to do it:
- Coil each strand into a loop about 10 inches wide.
- Slip the loop into a gallon zip bag.
- Press the air out and seal the bag flat.
- Add the strand clips for that run in the same bag.
- Stack bags in a tote on a closet shelf.
Best for: Homes with many short strands for windows and rails.
Budget: $4 to $10
Quick tip: One bag per strand also makes testing quick next year.
21. Store Extension Cords in a Small Bucket
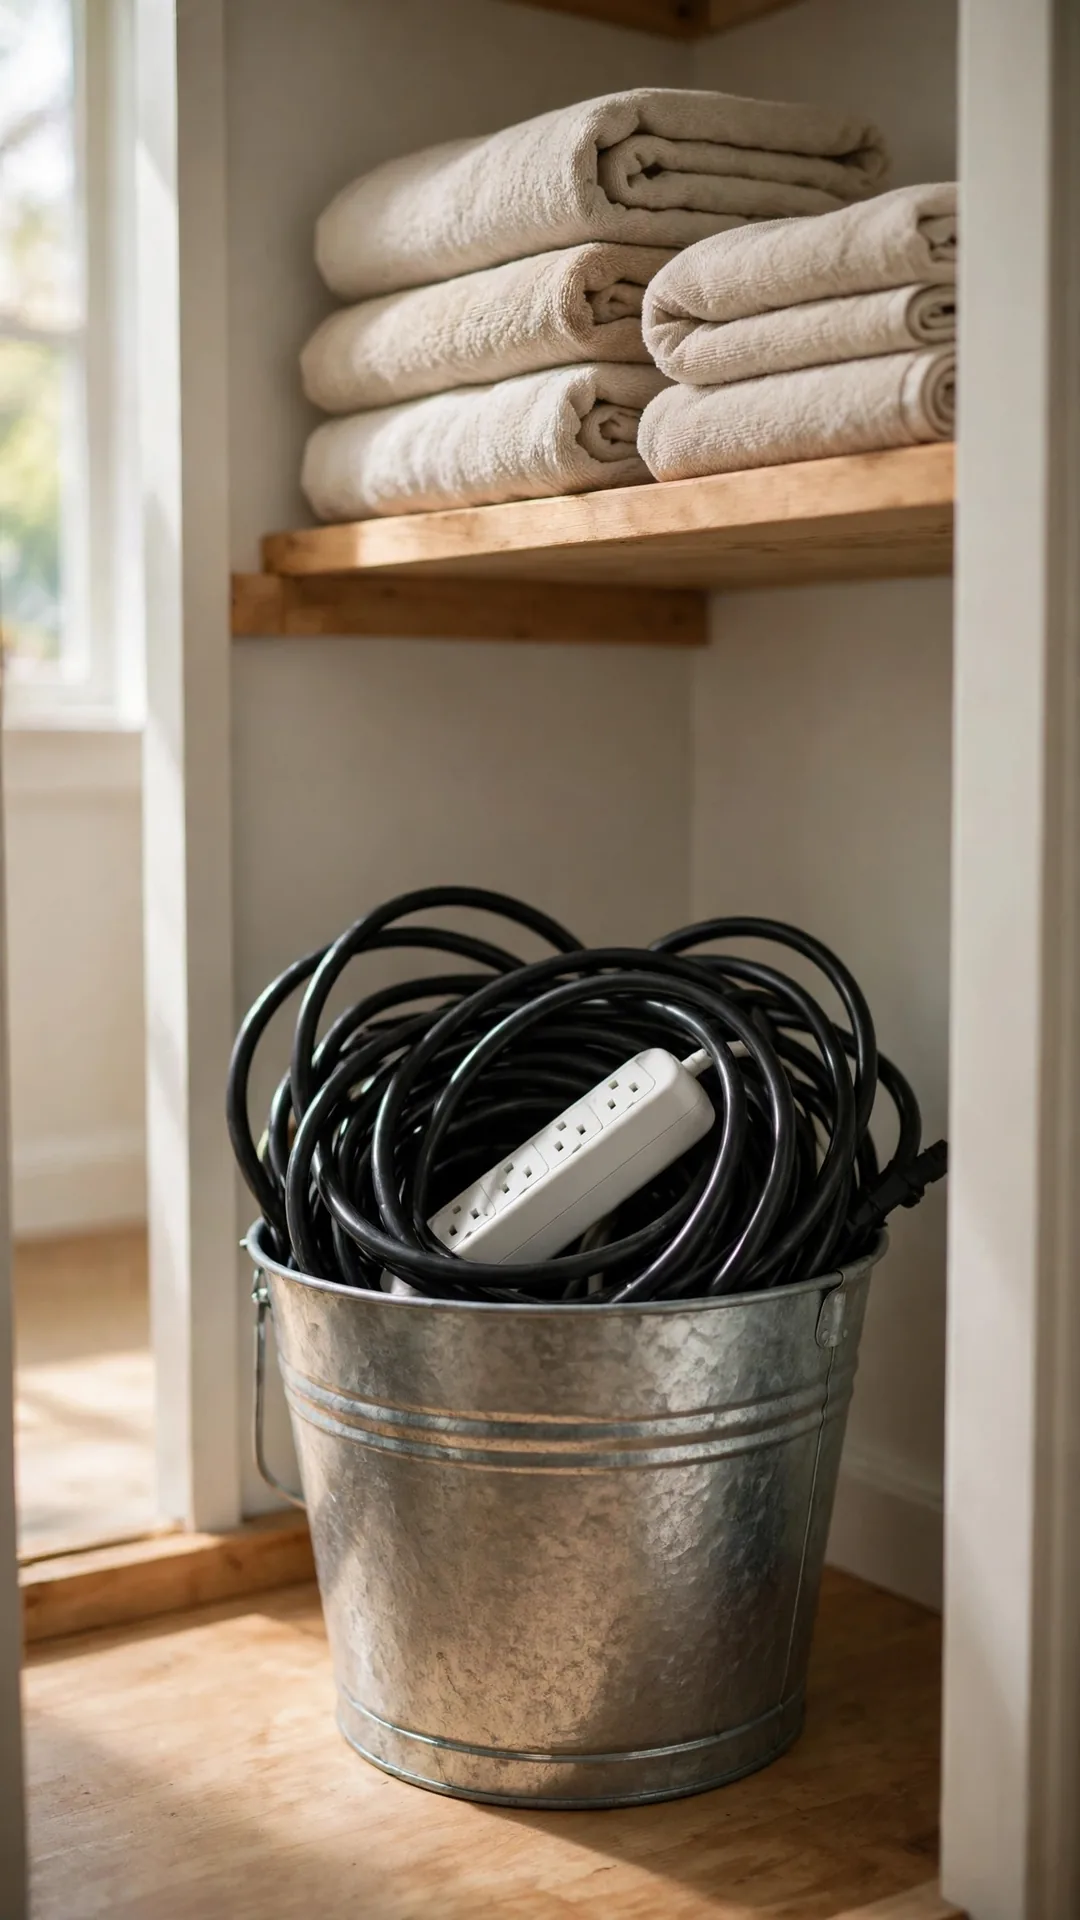
Cords and power strips tangle with everything they touch. A small bucket keeps them coiled and separate, a simple win among holiday decoration storage ideas for small spaces. The bucket slides under a shelf or into a closet corner.
How to do it:
- Pick a bucket or bin about 10 inches wide.
- Coil each cord in a loose loop before it goes in.
- Keep the power strip on top for fast access.
- Add the outdoor timer in the same bucket.
- Store the bucket near the bins it serves.
Best for: Outdoor cords, timers and power strips.
Budget: $5 to $12
Quick tip: Coil cords loosely, since tight bends wear the casing.
22. Coil Garland Inside a Clean Pillowcase
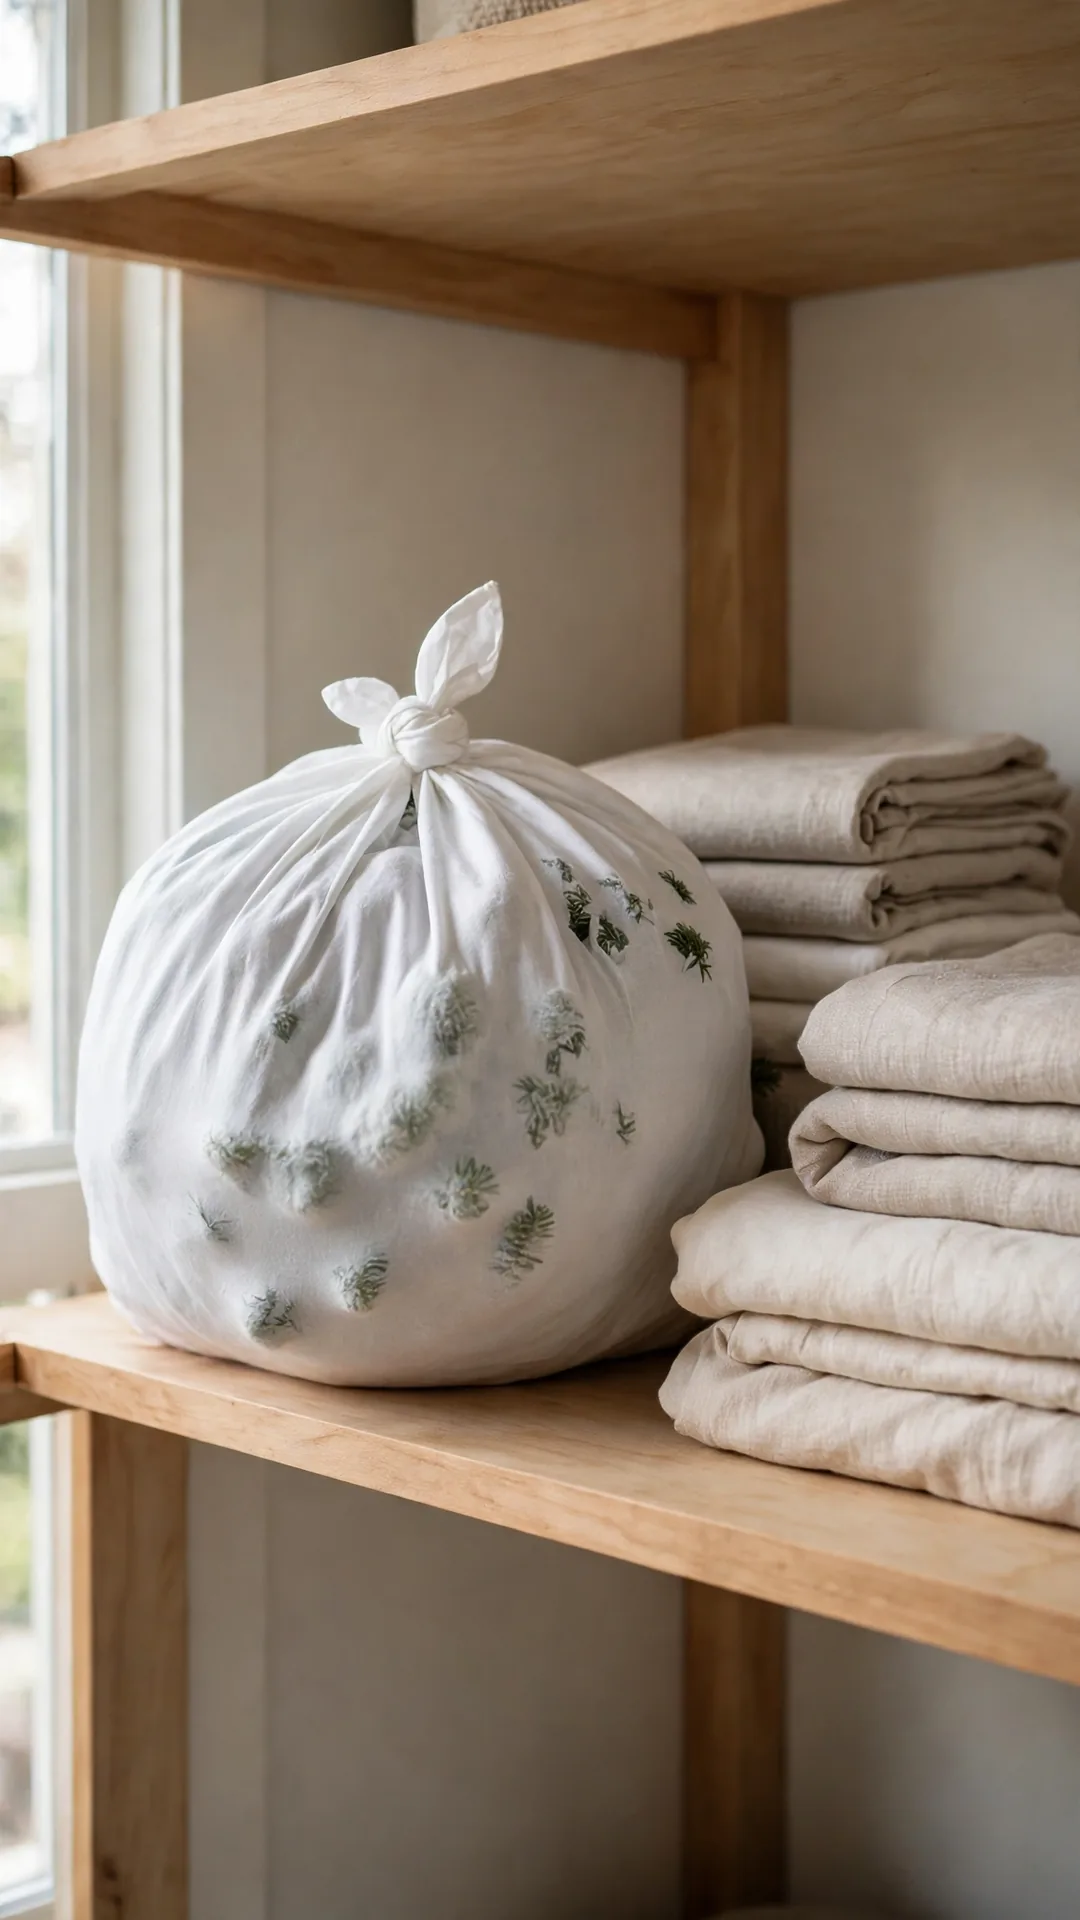
A pillowcase keeps garland dust free and tangle free. The soft case also protects walls and shelves from hooks. It takes the shape of whatever gap you have.
How to do it:
- Coil the garland into loops that fit the case.
- Slide the coil in and tie the open end.
- Use one case per garland so types stay apart.
- Lay cases flat on a shelf or in a bin.
- Wash the case before reuse if it stored outdoor decor.
Best for: Long green garlands and tinsel strands.
Budget: Free to $6
Quick tip: A light colored case shows dust, so you wash on time.
23. Hang Garland Loops on the Closet Rod
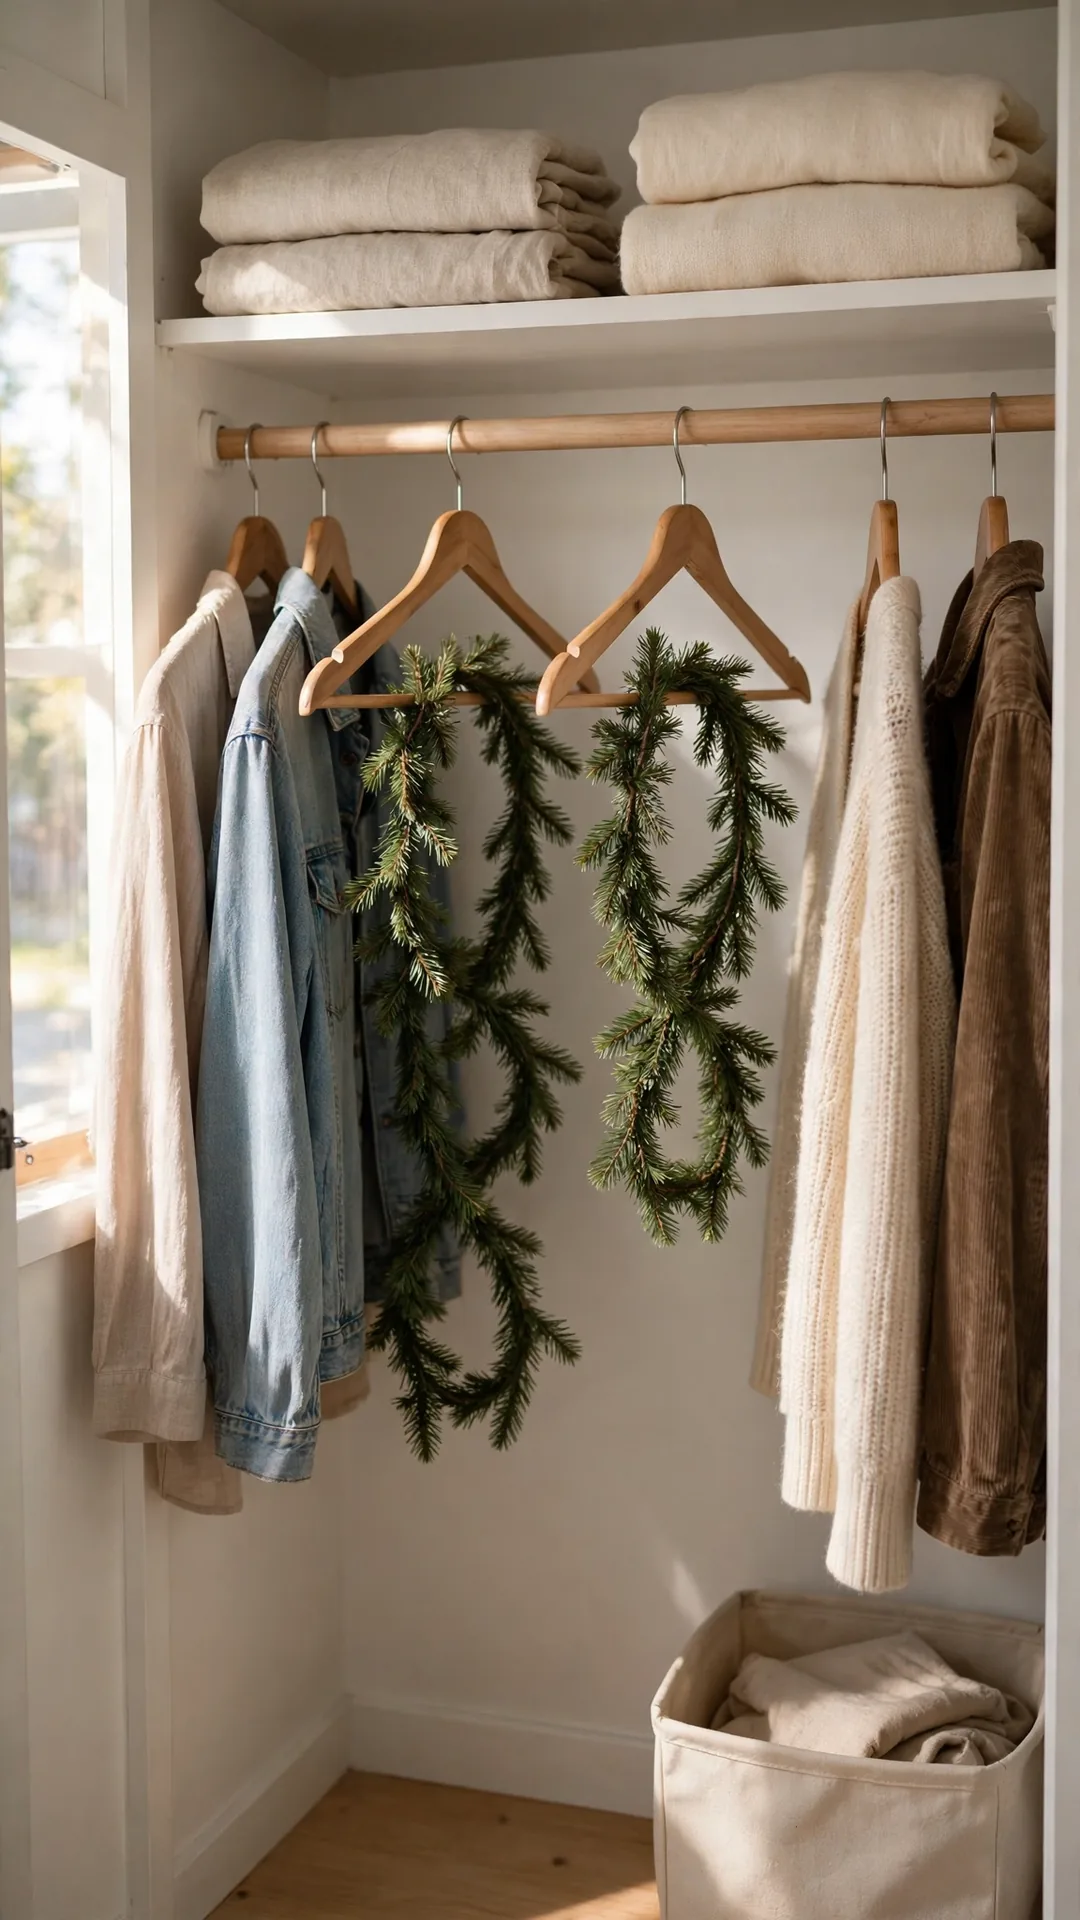
Garland can hang like clothes instead of crushing in bins. Loops on hangers keep the shape and the fullness. This is one of those holiday decoration storage ideas for small spaces that costs nothing.
How to do it:
- Fold each garland into even loops about 18 inches long.
- Drape the loops over a sturdy hanger.
- Clip the ends so loops stay in place.
- Hang garlands at one end of the closet rod.
- Keep heavy beaded garland in a bin instead.
Best for: Light faux greenery garlands.
Budget: Free
Quick tip: Hang the longest garland first, at the rod end.
24. Keep Bead Garlands in Jars on a Shelf
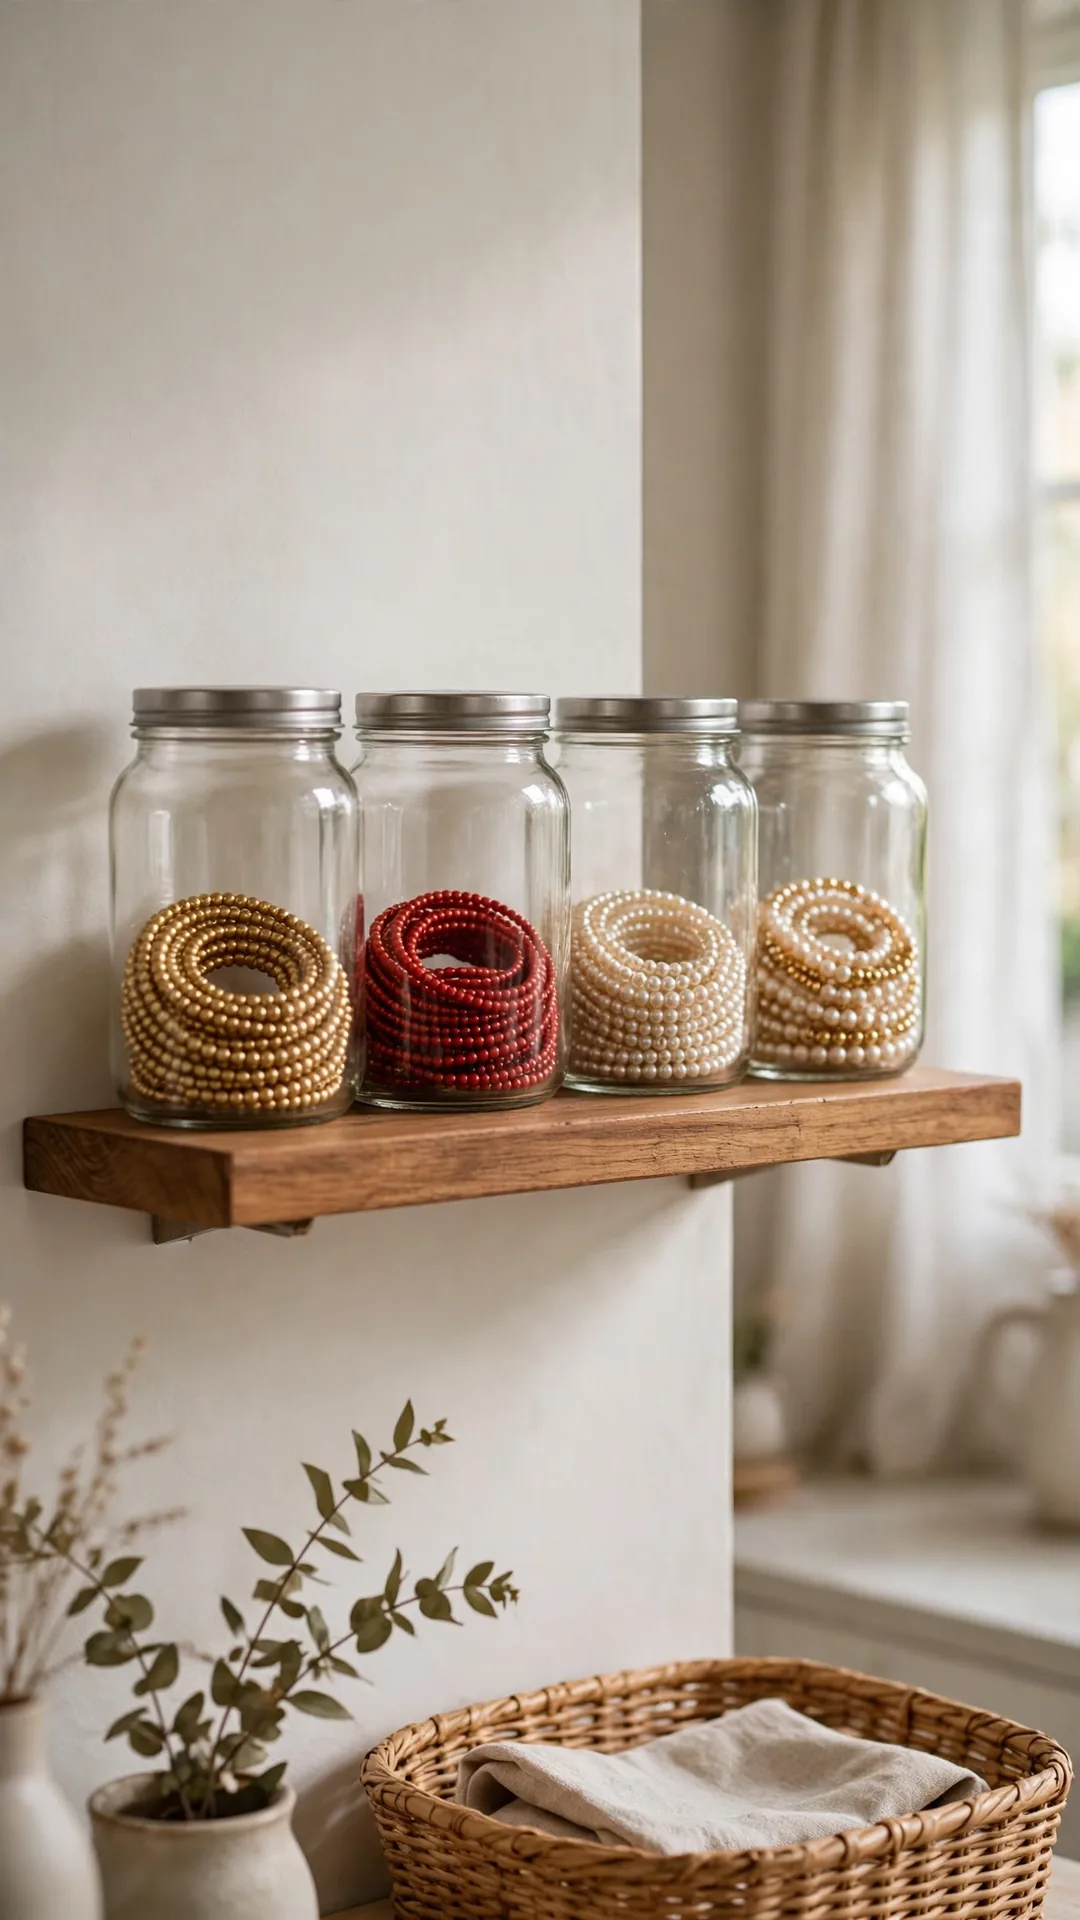
Bead garlands knot into one solid lump in a bin. Wide mouth jars keep each strand coiled and visible. The jars look tidy on a shelf the rest of the year.
How to do it:
- Pick jars with mouths at least 3 inches wide.
- Coil one strand per jar so colors stay apart.
- Screw lids on to keep dust and moisture out.
- Line jars on a high shelf or cabinet top.
- Keep glass jars away from the shelf edge.
Best for: Bead strands, small chains and loose ornaments.
Budget: $6 to $15
Quick tip: One strand per jar means zero untangling next season.
25. Clip Light Clips and Hooks in a Small Tin
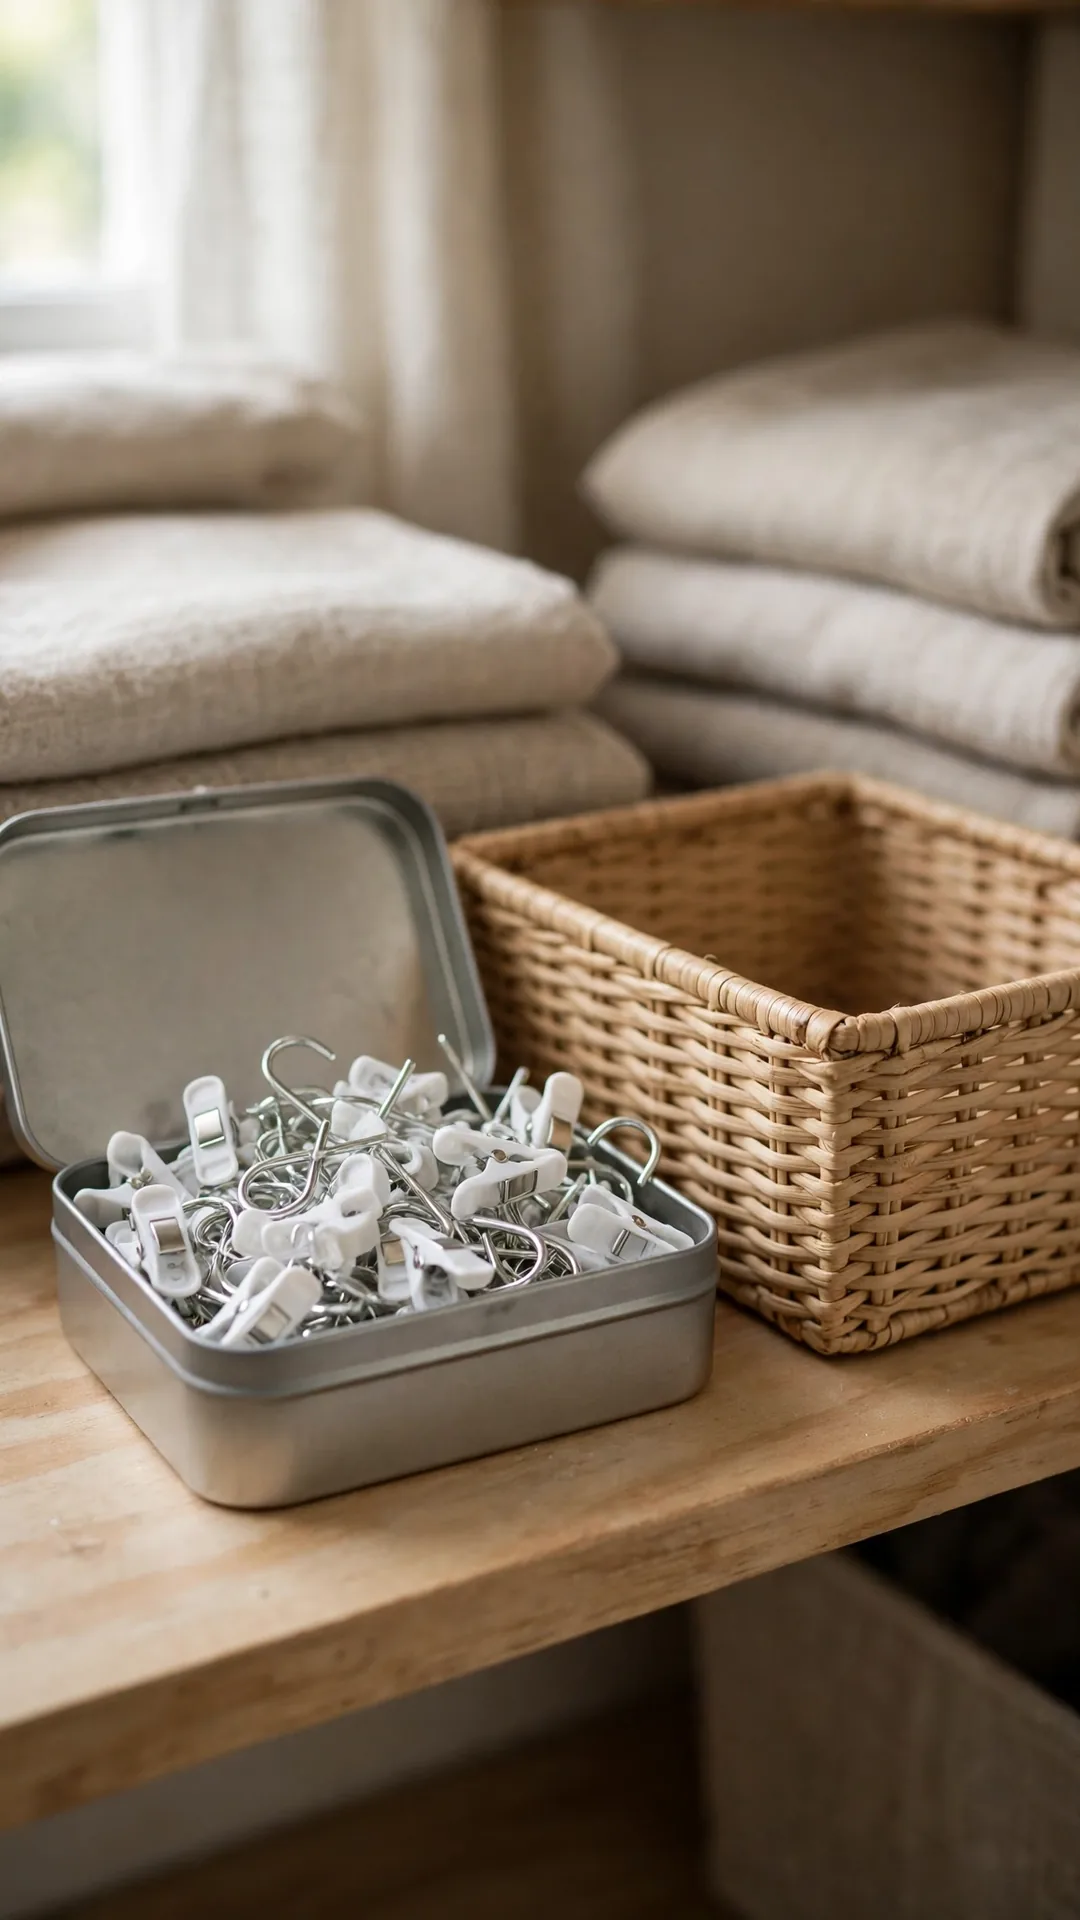
Tiny clips and hooks sink to the bottom of every bin. A small tin keeps them counted and easy to find. The tin then rides inside the main light bin.
How to do it:
- Use a mint tin or small metal box with a lid.
- Count clips and hooks as you take decor down.
- Drop them straight into the tin, not a pocket.
- Store the tin on top of the light strands.
- Add spare fuses for plug ends in the same tin.
Best for: Gutter clips, spare hooks and tiny parts.
Budget: Free to $5
Quick tip: A magnet strip inside the lid holds stray hooks.
26. Test Every Strand Before You Pack It
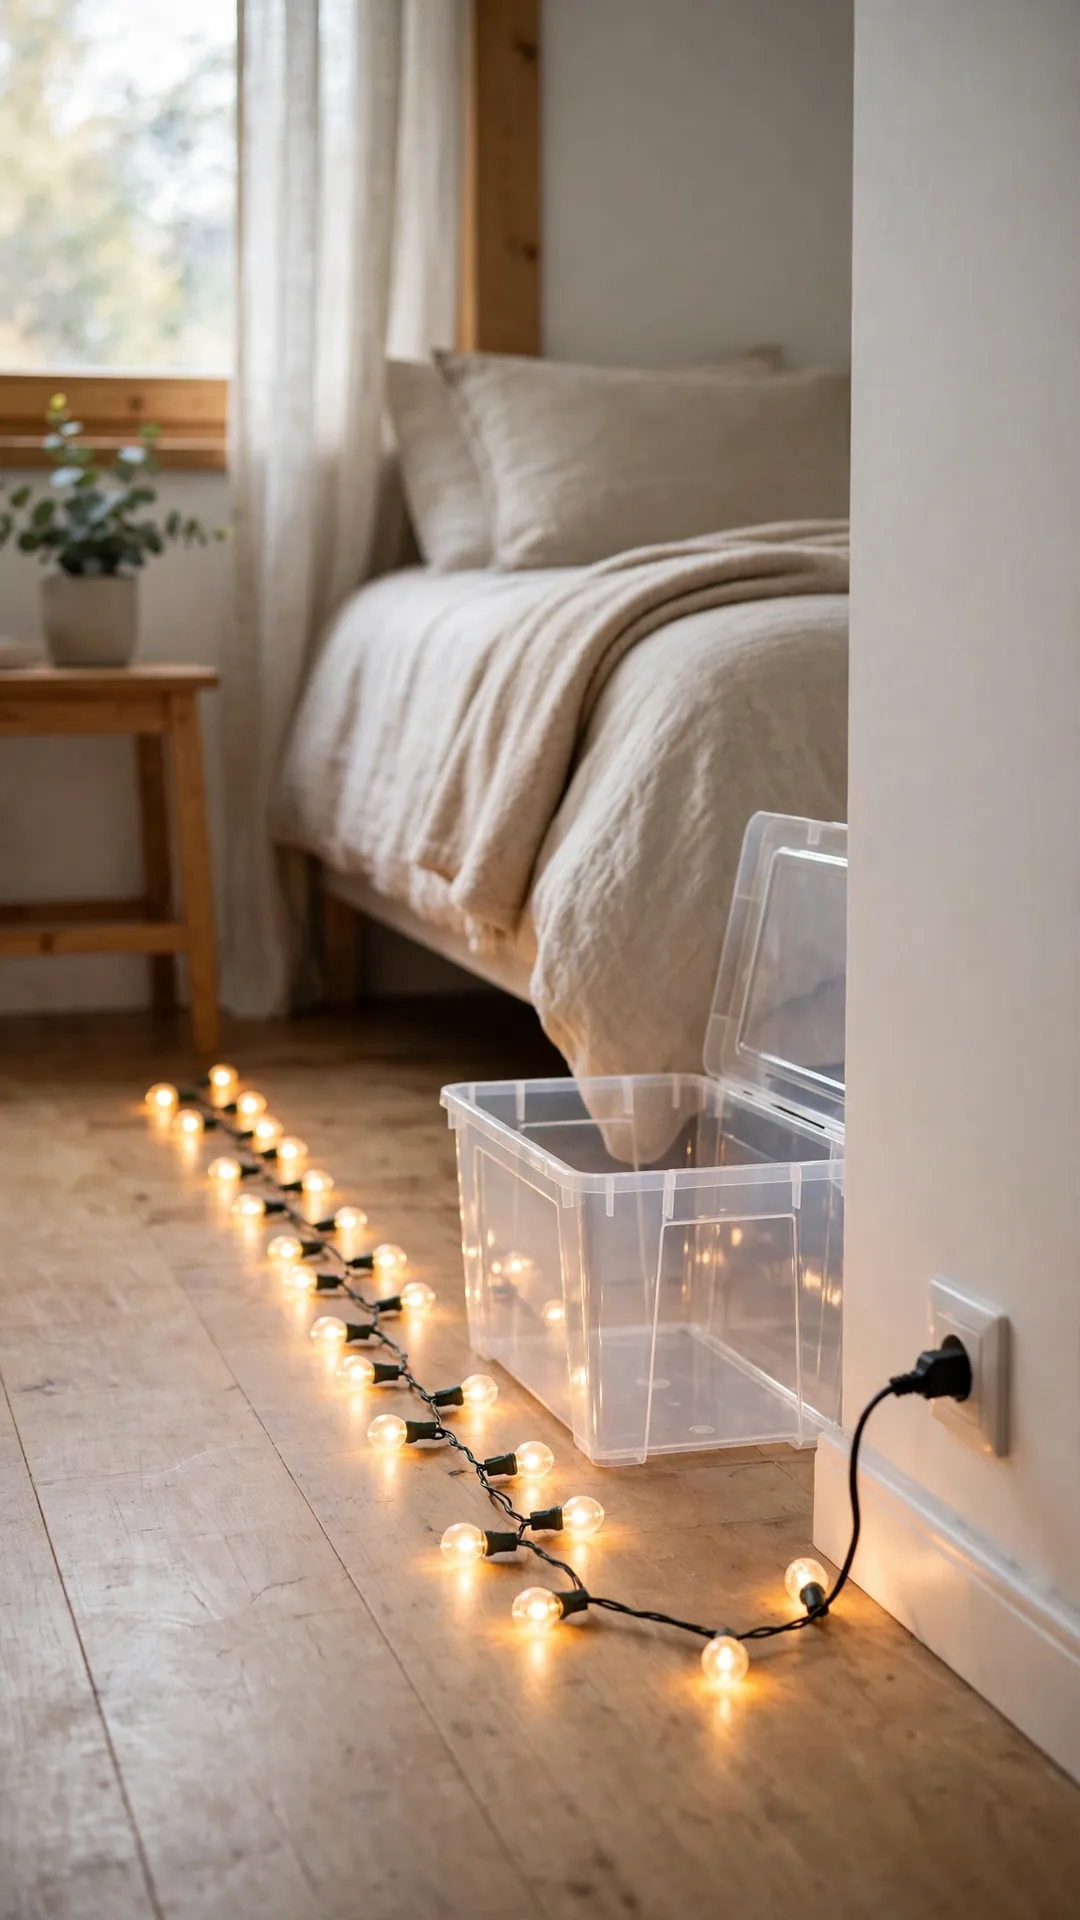
Packing a dead strand wastes space for a full year. A two minute test tells you what still works. You pack only good lights and note the gaps to replace.
How to do it:
- Plug each strand in before you coil it.
- Swap in a spare bulb where one section is dark.
- Mark dead strands and toss or recycle them now.
- Write the working count on your bin photo album.
- Pack tested strands first, spares on top.
Best for: Older strands and mixed hand me down sets.
Budget: Free
Quick tip: Test while the tree is still up and ladders are out.
27. Hang the Wreath on a Hook in the Closet
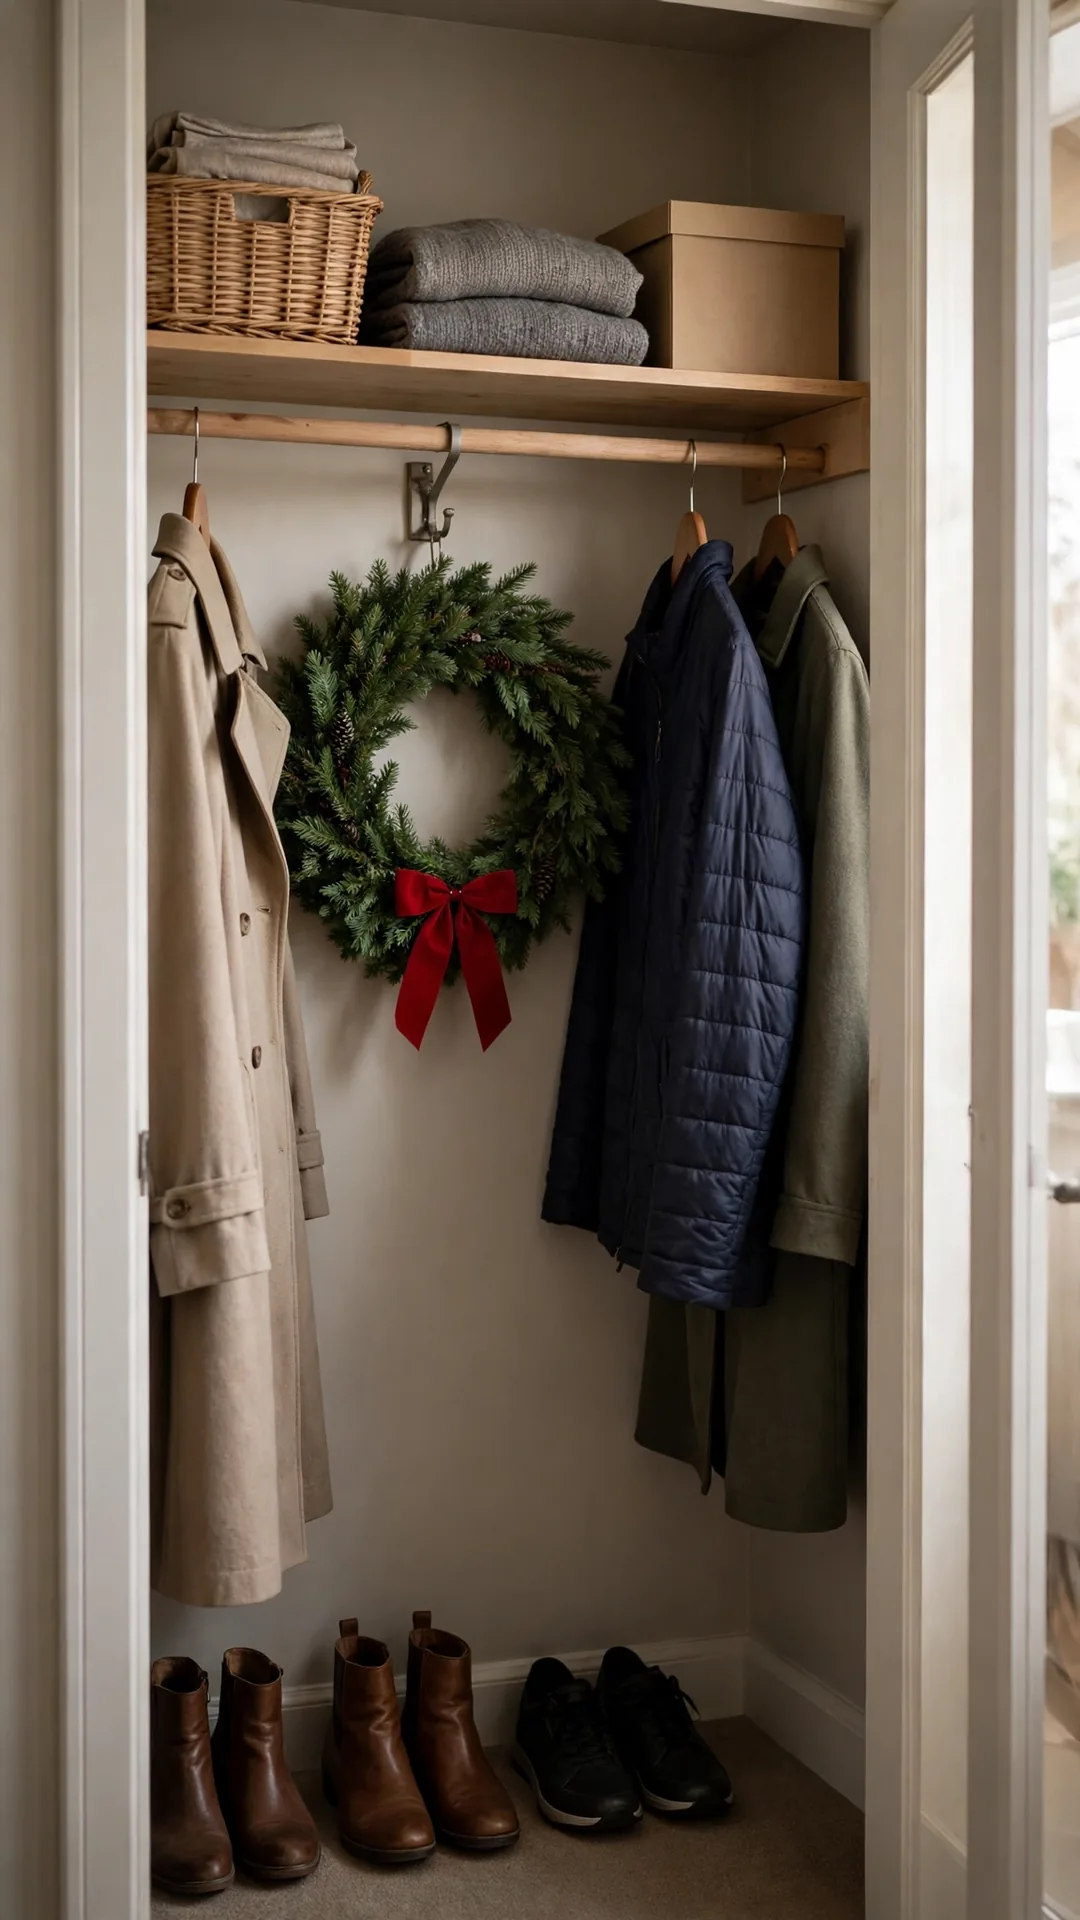
A wreath keeps its shape best when it hangs. One strong hook does the whole job, proof that holiday decoration storage ideas for small spaces can stay simple. The wreath stays round, full and off the floor.
How to do it:
- Fix a hook rated for at least 10 pounds.
- Set the hook about 60 inches high in the closet.
- Hang the wreath by its frame or a loop of ribbon.
- Slip a clean bag over it if dust is a problem.
- Leave a few inches clear on each side.
Best for: One main wreath and a hall closet.
Budget: $5 to $12
Quick tip: Hang it by the frame, never by the greenery.
28. Keep the Wreath in a Round Zippered Case
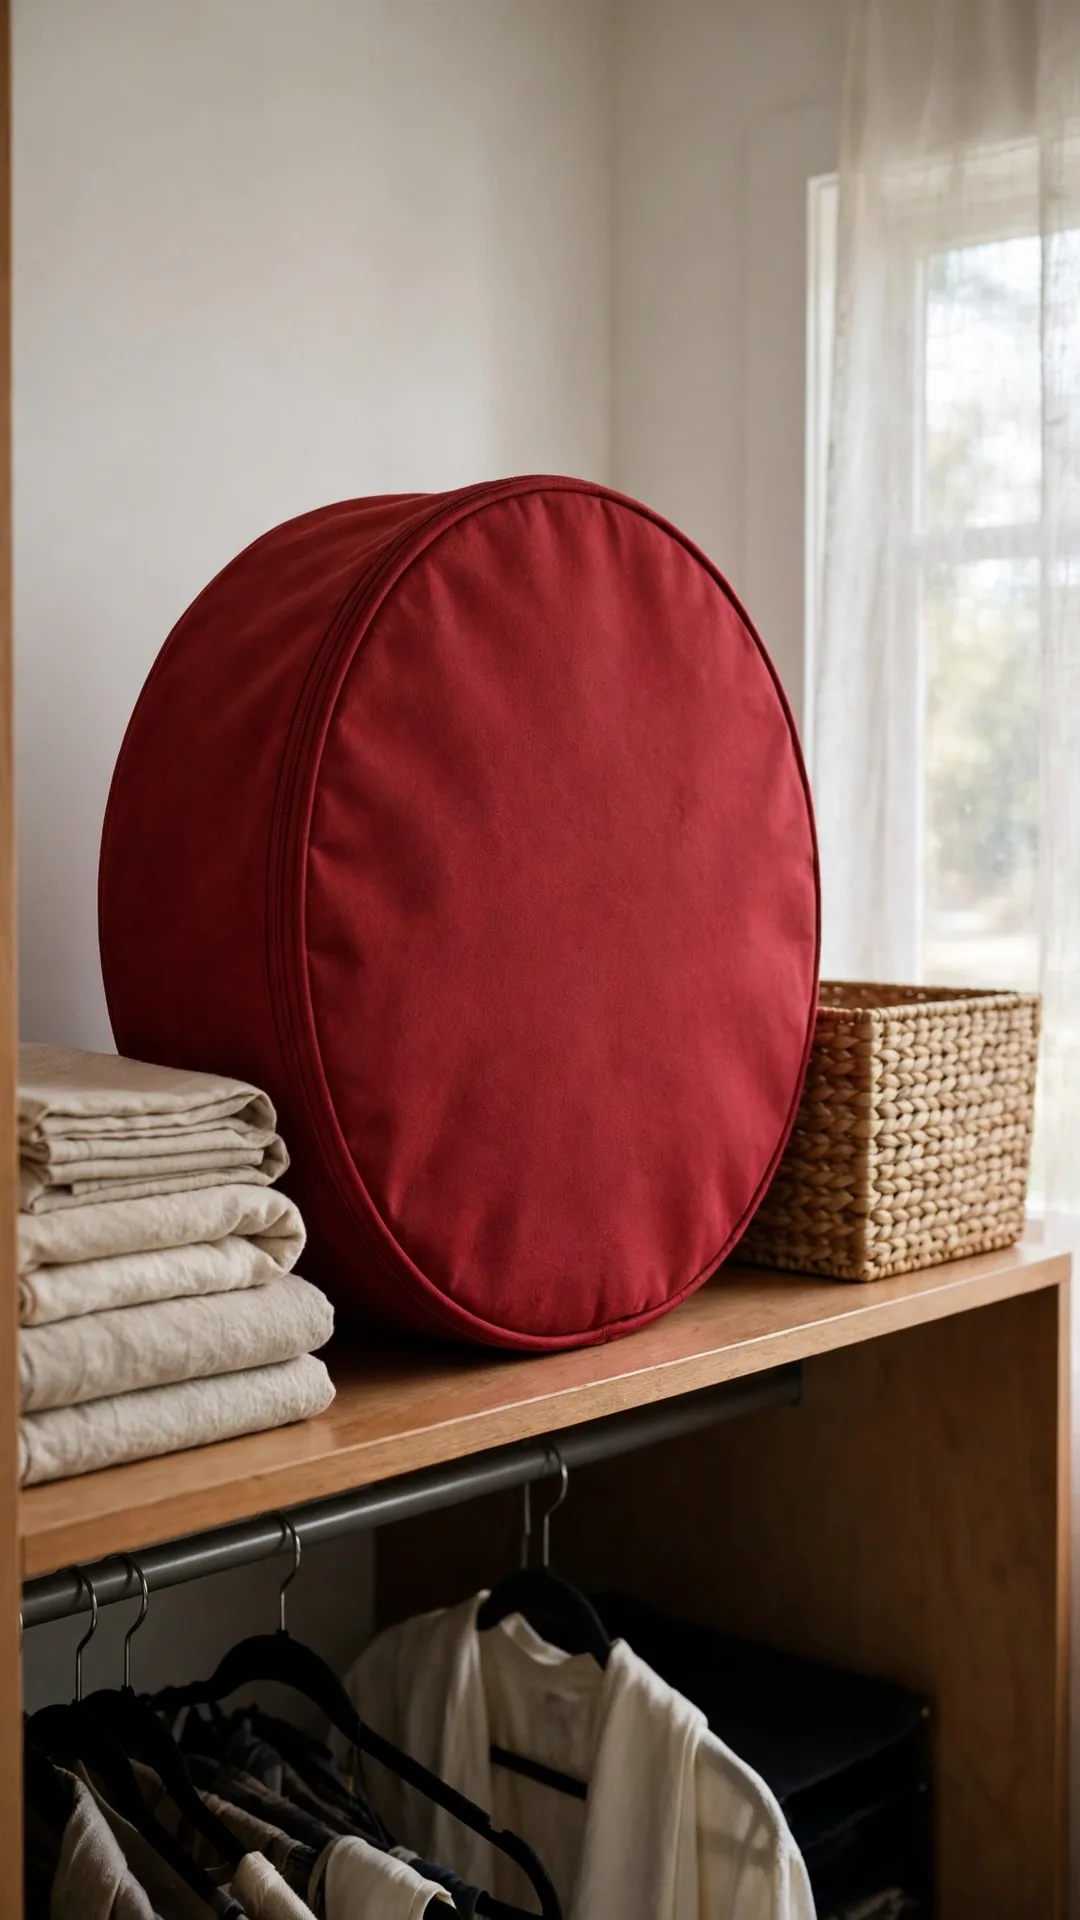
A round case protects a wreath with bows and berries. The zip keeps dust out and the shape holds firm. The case stands upright on a shelf or hangs by its handle.
How to do it:
- Measure your wreath across before you buy a case.
- Pick a case 2 inches wider than the wreath.
- Tuck loose bow tails inside the case first.
- Zip fully and wipe the outside clean.
- Stand the case on a shelf or hang it up.
Best for: Decorated wreaths with glued or wired details.
Budget: $15 to $30
Quick tip: A case one size up stops crushed bow loops.
29. Slip the Wreath over a Hanger in a Bag

A garment bag and a hanger make a wreath cover for pennies. The wreath hangs flat against the closet wall. Smart holiday decoration storage ideas for small spaces often hide in the laundry basket.
How to do it:
- Slide a clean garment bag over a sturdy hanger.
- Poke the hook through the top seam of the bag.
- Hang the wreath on the hanger frame inside.
- Zip or tie the bag closed below the wreath.
- Hang it flat at the end of the closet rod.
Best for: Plain wreaths and tight budgets.
Budget: $3 to $8
Quick tip: Use a breathable cloth bag for real greenery scents.
30. Store the Wreath Flat in an Under-Bed Box
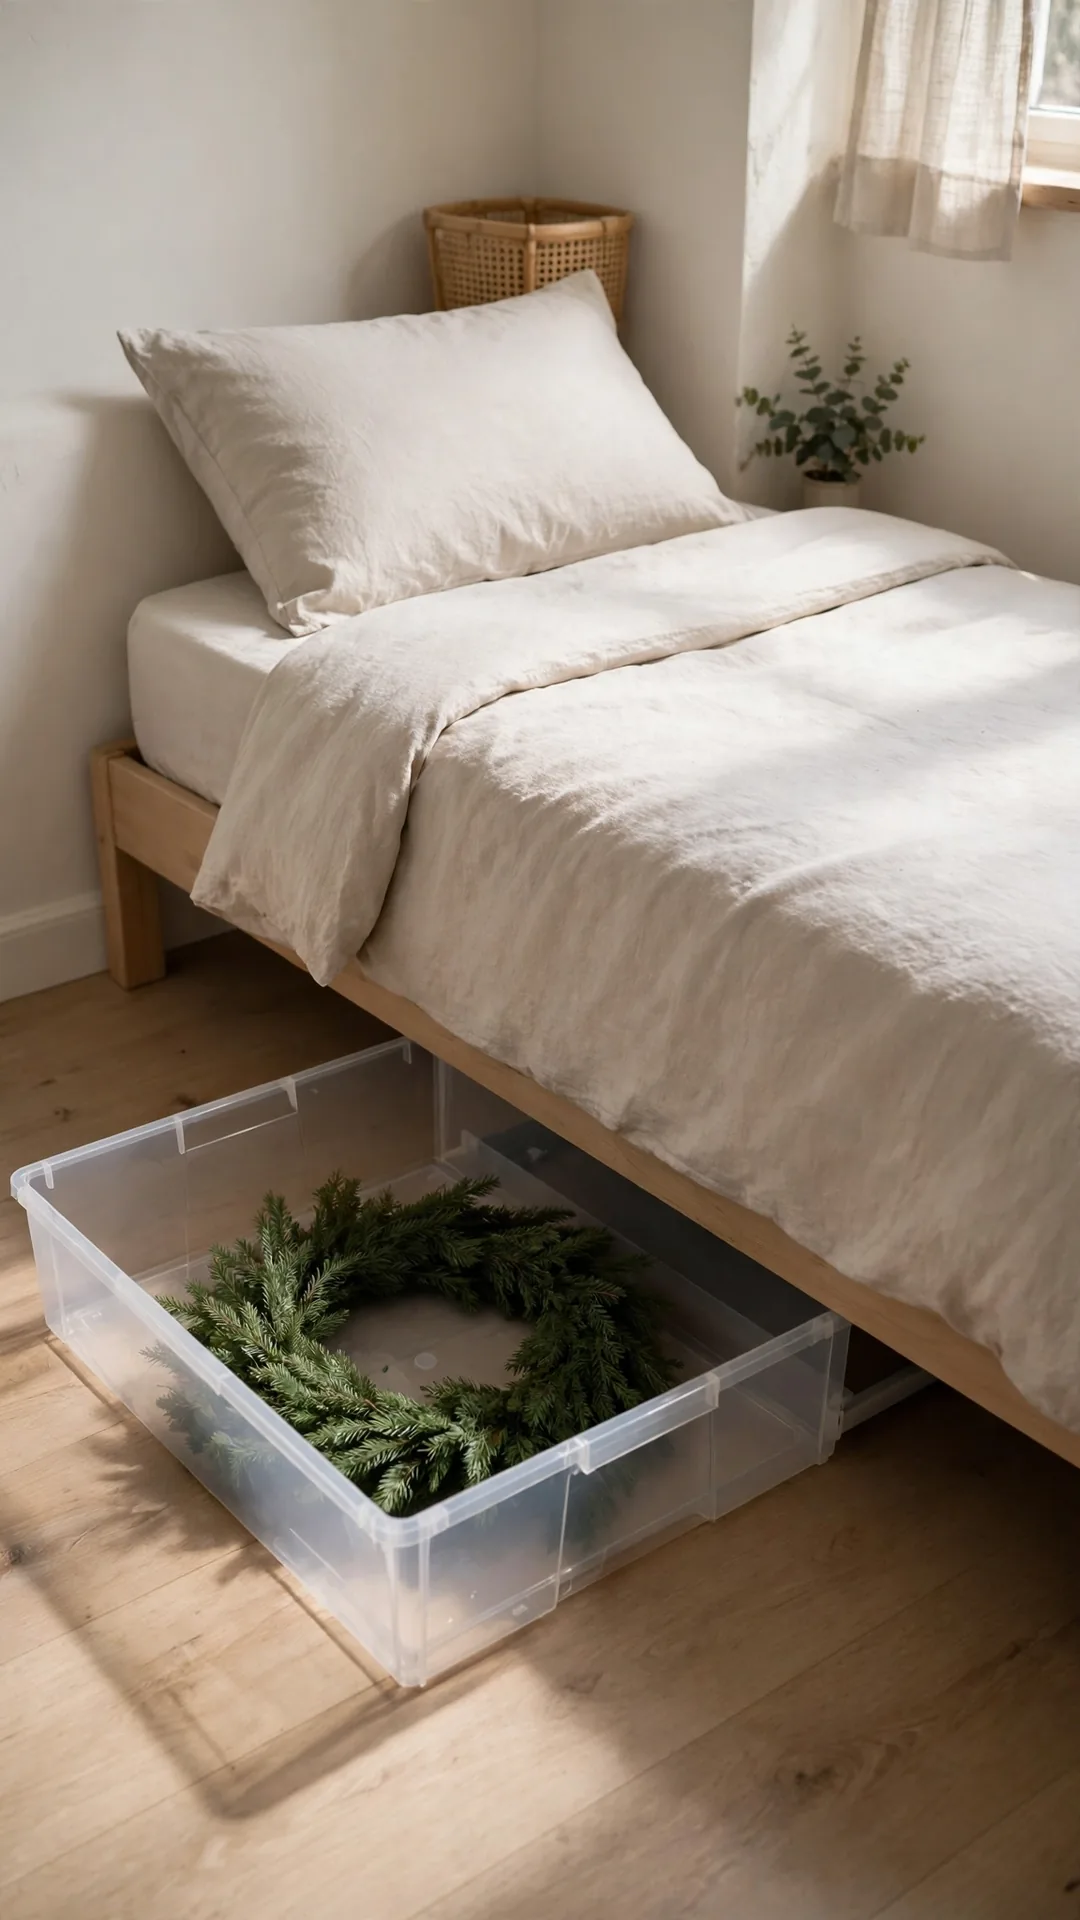
A flat wreath fits a low under-bed box with room to spare. The box keeps it dust free and out of closet traffic. This spot suits a second wreath you swap mid season.
How to do it:
- Pick a box about 24 inches wide and 6 inches tall.
- Lay the wreath flat with the bow facing up.
- Add one sheet of tissue over delicate parts.
- Slide the box fully under the bed frame.
- Keep the box away from heat vents on the floor.
Best for: A spare wreath in a bedroom with no closet room.
Budget: $10 to $20
Quick tip: Flat storage suits plain wreaths better than full ones.
31. Stand the Tree in a Tall Bag in a Corner
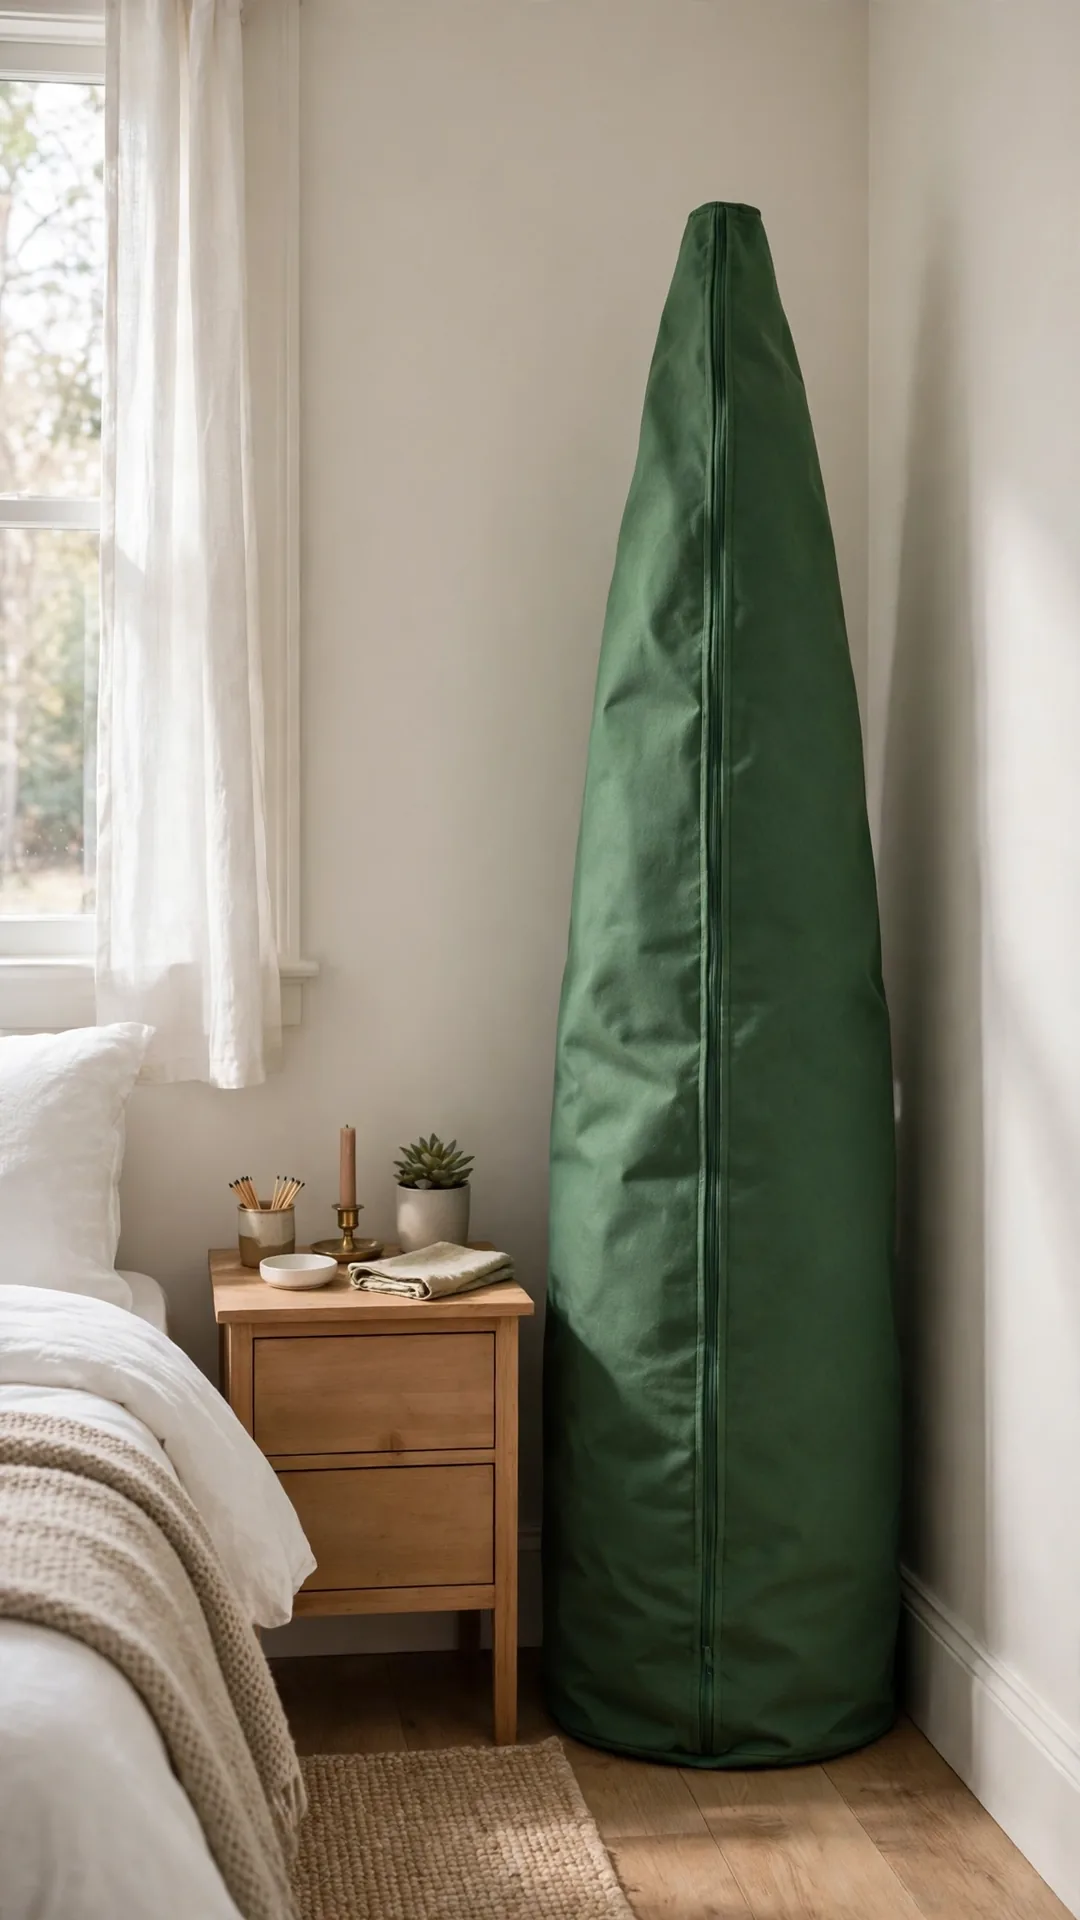
A tall tree bag turns a corner into tree storage. The tree stands upright, so branches keep their shape. It suits homes with no closet deep enough for a tree box.
How to do it:
- Compress each section gently before it goes in.
- Slide the bag up over the folded tree.
- Zip or tie the bag closed at the top.
- Stand it in a corner behind a door or curtain.
- Keep the corner dry and away from direct sun.
Best for: Slim trees up to about 6 feet tall.
Budget: $15 to $30
Quick tip: Stand the bag on a mat in case of dust or drips.
32. Lay Tree Sections in a Long Low Bin
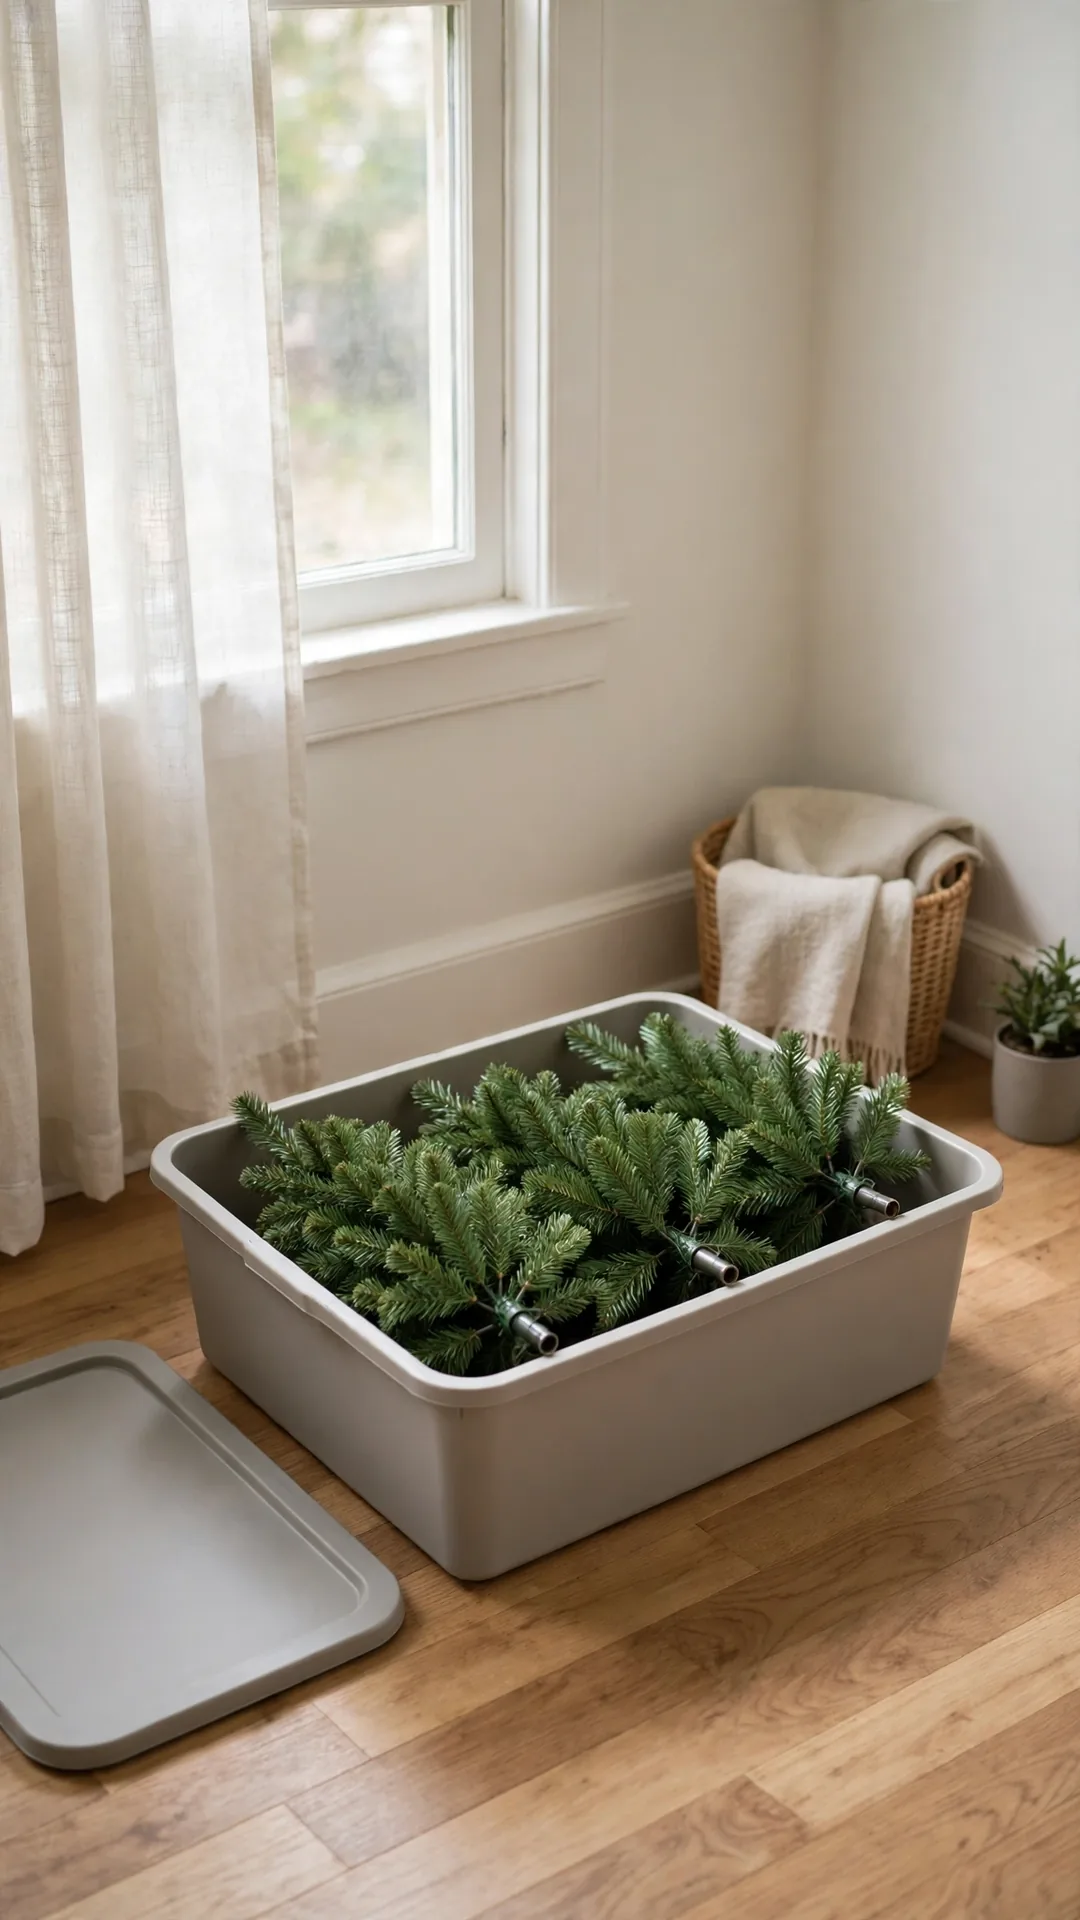
Section trees pack flatter than most people expect. A long, low bin holds all three sections in one layer each. The bin then slides under a guest bed or a sofa.
How to do it:
- Tie each section with soft straps or old belts.
- Lay the widest section on the bin base.
- Add the middle and top sections beside it.
- Tuck the center pole along one long edge.
- Close the lid and slide the bin out of sight.
Best for: Three piece trees in homes with under-bed room.
Budget: $18 to $35
Quick tip: Tie sections before lifting, so branches stay compressed.
33. Keep the Stand and Skirt Together in One Tote
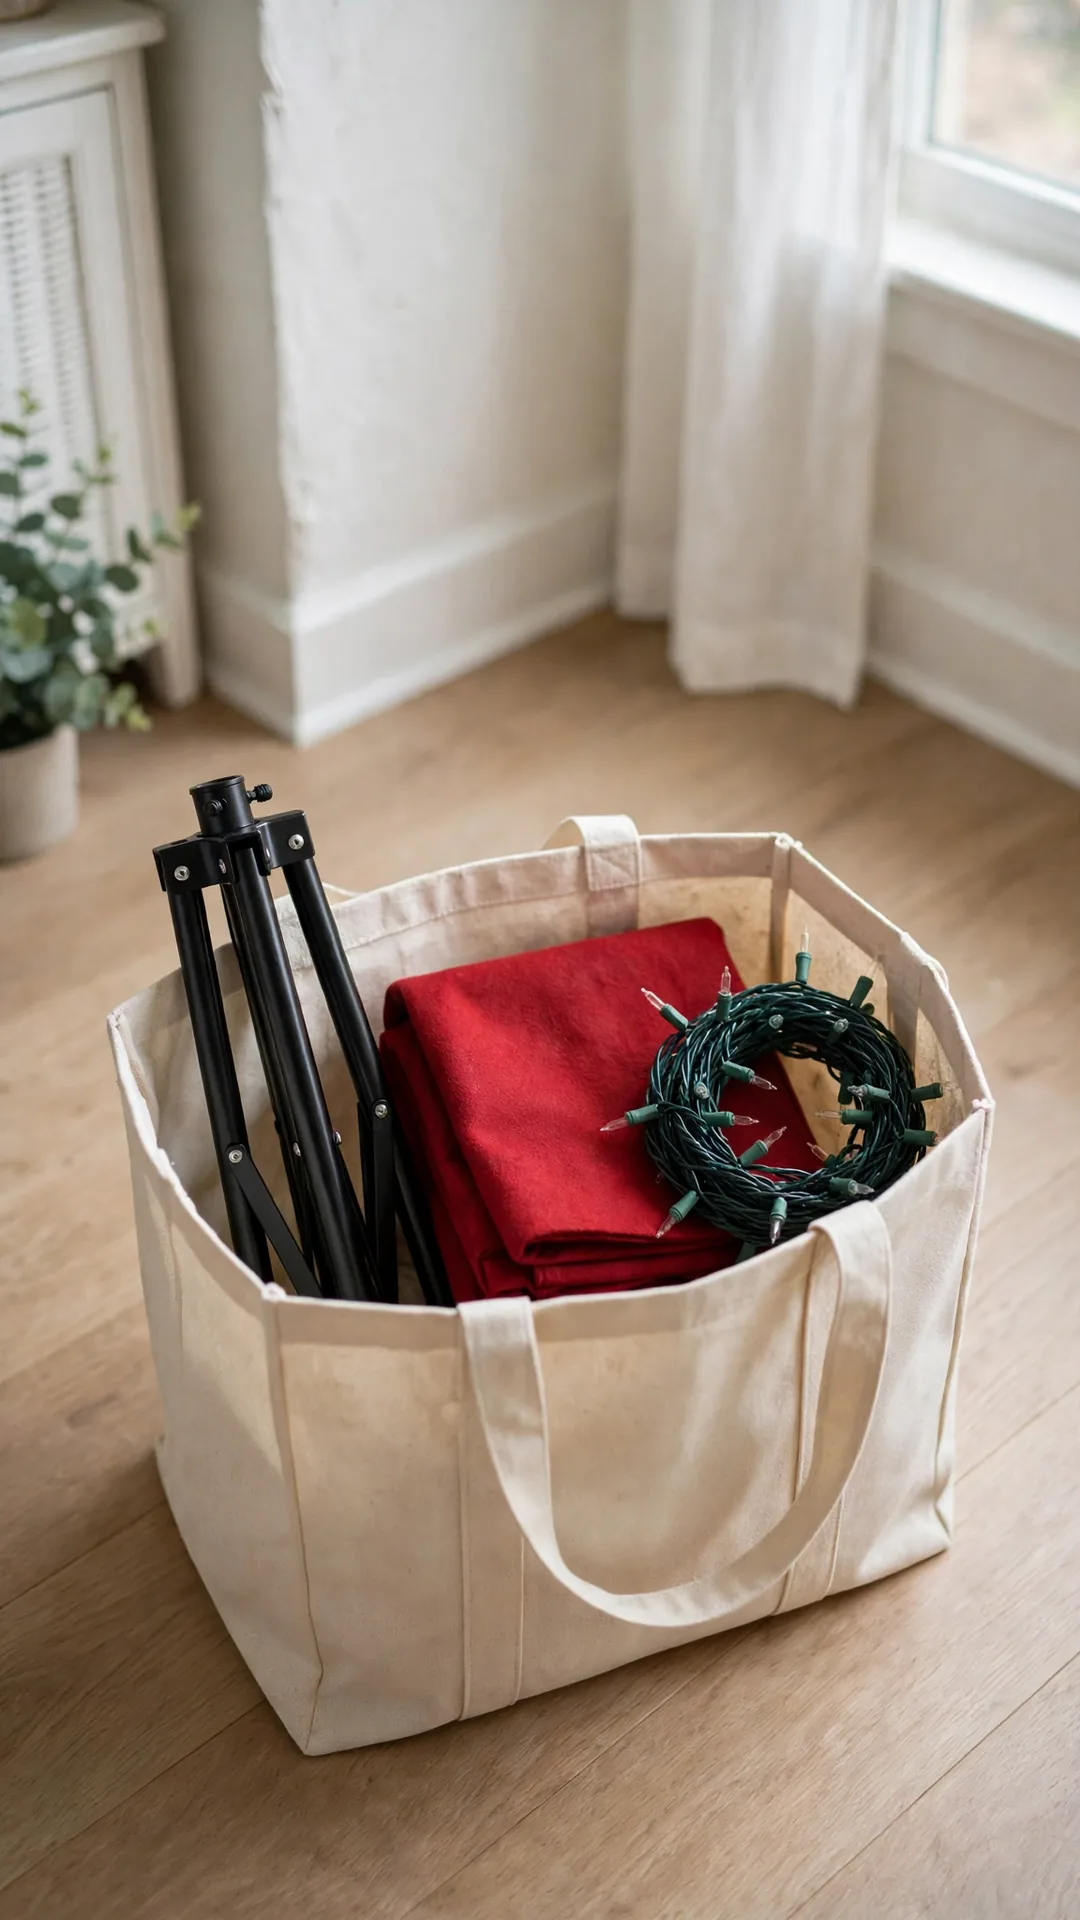
Tree parts scatter fast, so group them, a rule behind solid holiday decoration storage ideas for small spaces. One tote for the stand, skirt and pole screws ends the hunt. Label free totes work, since the tote always opens at setup.
How to do it:
- Fold the skirt flat on the tote base.
- Set the stand and its screws in a zip bag.
- Lay the bag on top of the skirt.
- Add the remote or foot switch for the lights.
- Store the tote beside the tree bag or bin.
Best for: Anyone who loses stand screws every year.
Budget: $8 to $18
Quick tip: Tape one spare screw set inside the tote lid.
34. Hang Mini Wreaths on a Tension Rod

Mini wreaths crush when they share a bin with heavy decor. A tension rod inside the closet gives each one air. They hang in a row and keep their bows neat.
How to do it:
- Fit a tension rod across a closet nook or cabinet.
- Loop a short ribbon through each mini wreath.
- Tie the ribbons along the rod, spaced apart.
- Keep the rod high so clothes hang below it.
- Check the rod tension once mid year.
Best for: Kitchen and window mini wreaths, four or more.
Budget: $8 to $15
Quick tip: Ribbon loops also make next year hanging instant.
35. Claim the Top Closet Shelf for Holiday Bins
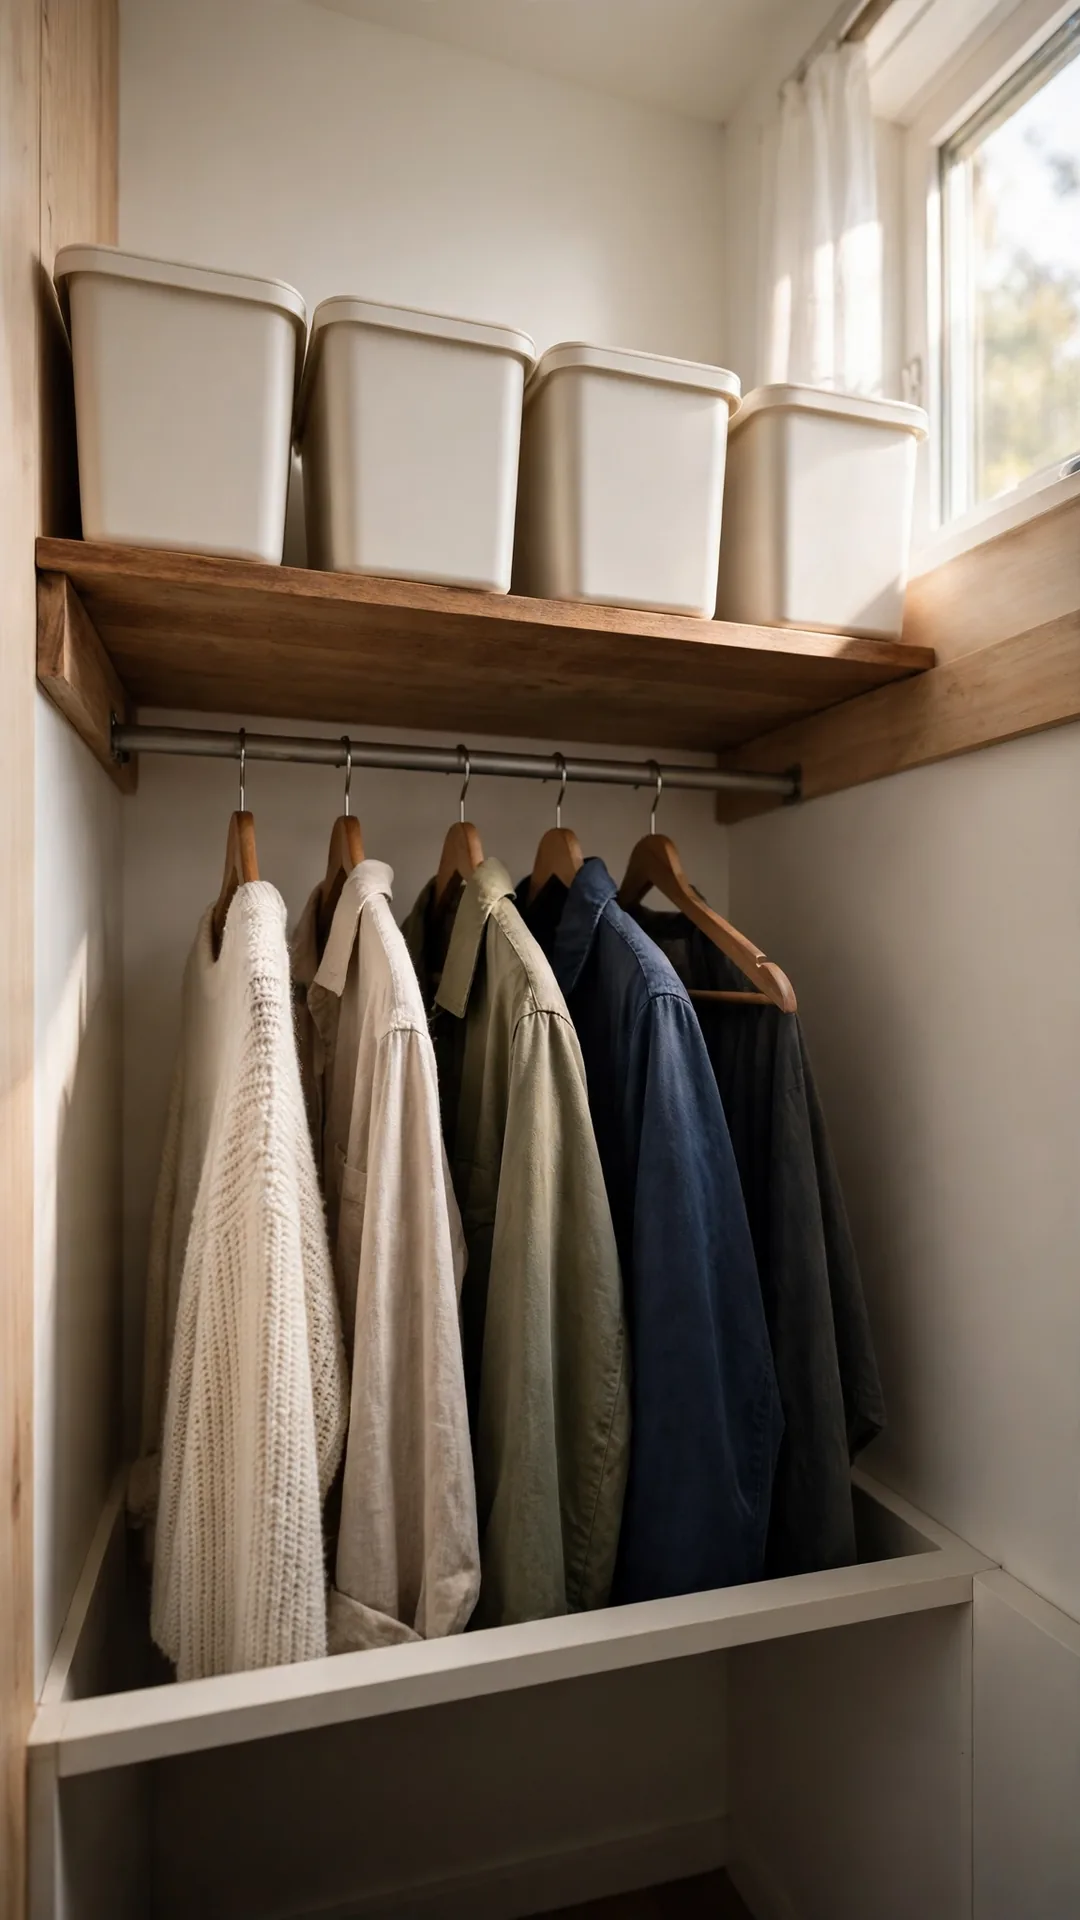
The top closet shelf is prime land for once a year items. Holiday bins belong where daily clothes never reach. The full system in these small apartment storage ideas starts with that same high shelf.
How to do it:
- Clear the top shelf of anything you use monthly.
- Measure the shelf depth before buying bins.
- Use two or three matching bins that fill the width.
- Put the heaviest bin at the bottom of your reach.
- Keep a small step stool in the same closet.
Best for: Coat closets and bedroom closets with high shelves.
Budget: $15 to $40
Quick tip: Matching bins stack and slide better than mixed sizes.
36. Stack Matching Bins Three High at Most

Tall stacks lean, crack lids and bury the bottom bin. Three high is the safe limit for most plastic bins. Matching sizes keep the stack steady all year.
How to do it:
- Put the heaviest bin on the floor first.
- Stack the same size bins directly above it.
- Stop at three bins, even if space remains.
- Keep fragile decor in the top bin only.
- Leave the stack where a wall supports one side.
Best for: Closet corners and garage free walls.
Budget: $20 to $45 for three bins
Quick tip: Lids crack from weight, so glass never goes low.
37. Use the Closet Floor Corner for One Big Tote

One big tote on the floor beats five small boxes. It holds bulky, light pieces like garland and bows, exactly what holiday decoration storage ideas for small spaces need most. The corner spot keeps it out of the daily shoe zone.
How to do it:
- Pick a tote about 30 quarts with a snap lid.
- Place it in the least used closet corner.
- Fill it with light, bulky items first.
- Set shoes and daily gear on the other side.
- Keep the lid clear so it opens without a shuffle.
Best for: Bulky light decor in a shared coat closet.
Budget: $10 to $20
Quick tip: Light items only, since floor totes get stacked on.
38. Add a Shelf Riser to Double One Shelf
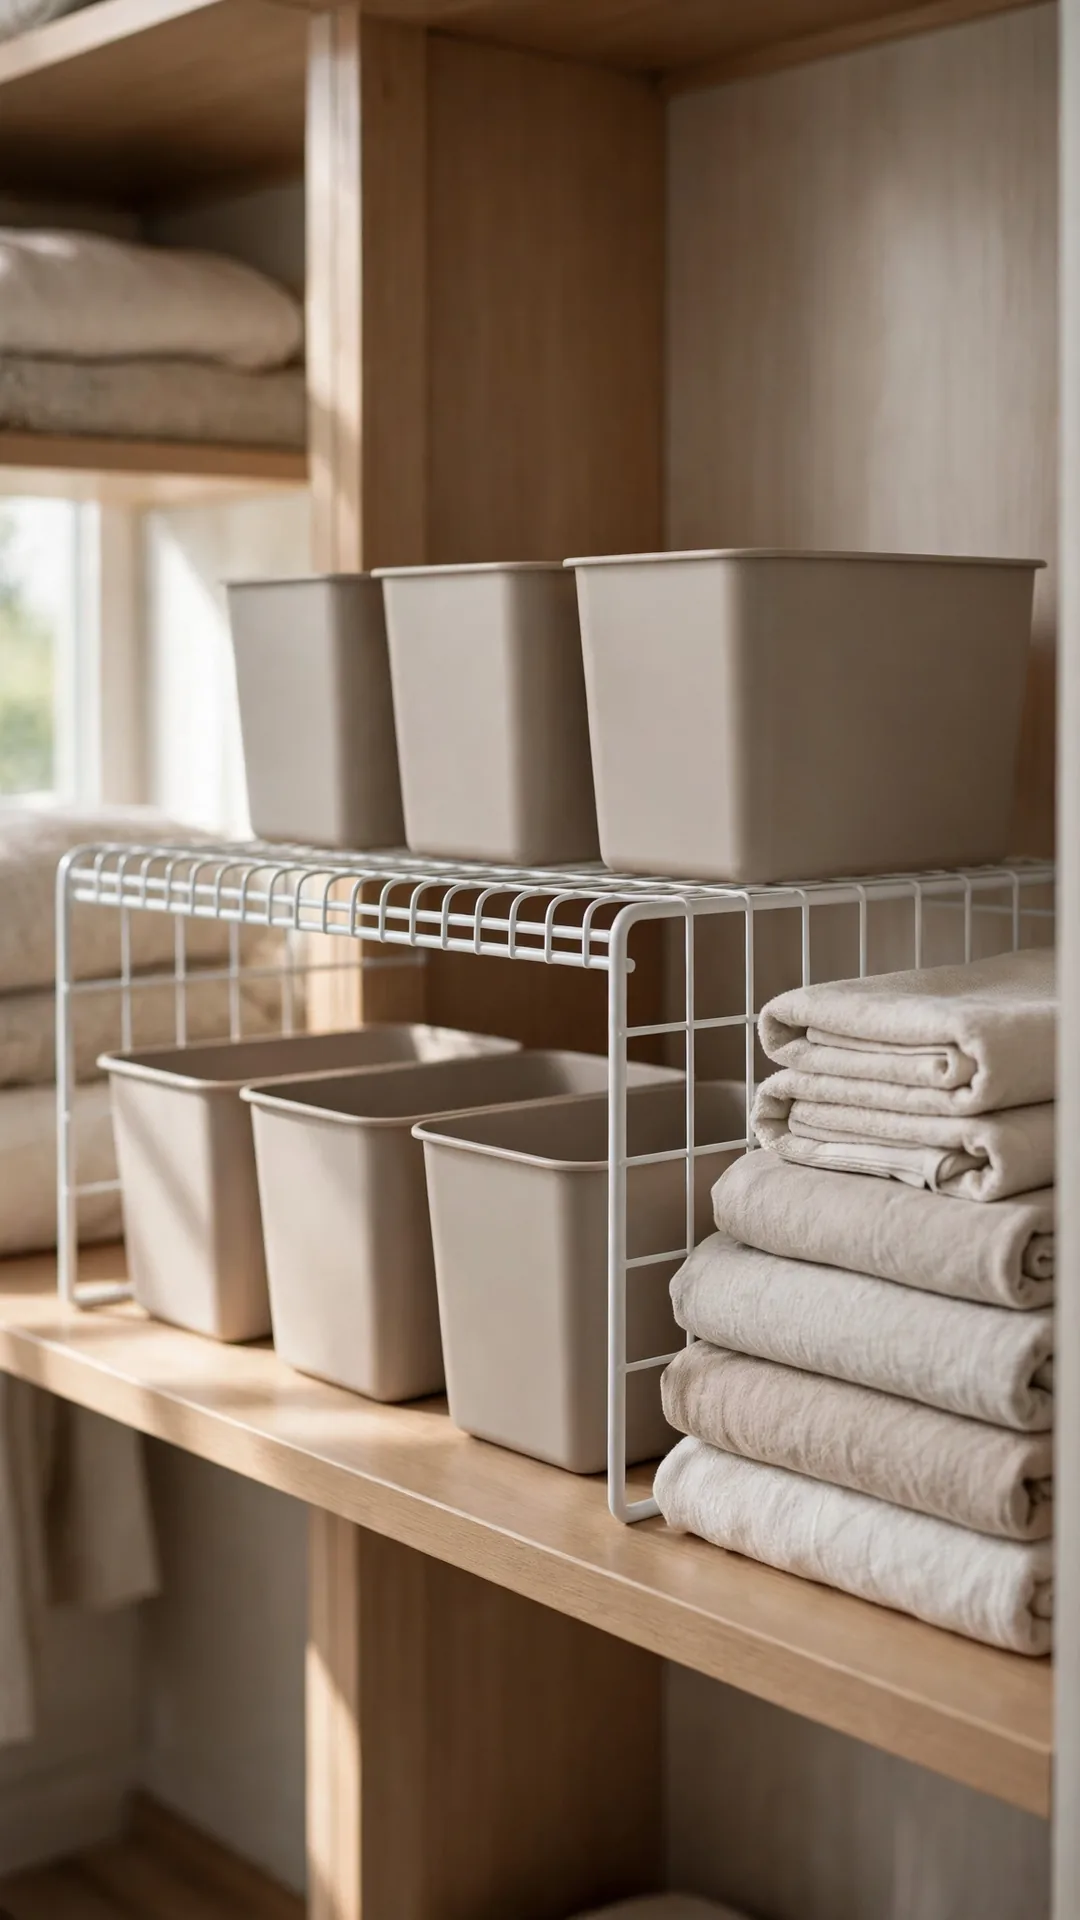
A wire riser turns one shelf into two levels. Small bins and boxes slide under and over it. You gain a full row without touching a drill.
How to do it:
- Measure shelf width and pick a riser 2 inches narrower.
- Set flat boxes and ornament trays underneath it.
- Place light bins and jars on the riser top.
- Keep the front edge clear for easy pulls.
- Load heavy items on the shelf, not the riser.
Best for: One deep closet shelf with wasted height.
Budget: $10 to $22
Quick tip: Risers work best with small bins, not big totes.
39. Slide Slim Bins into the Linen Closet Gap
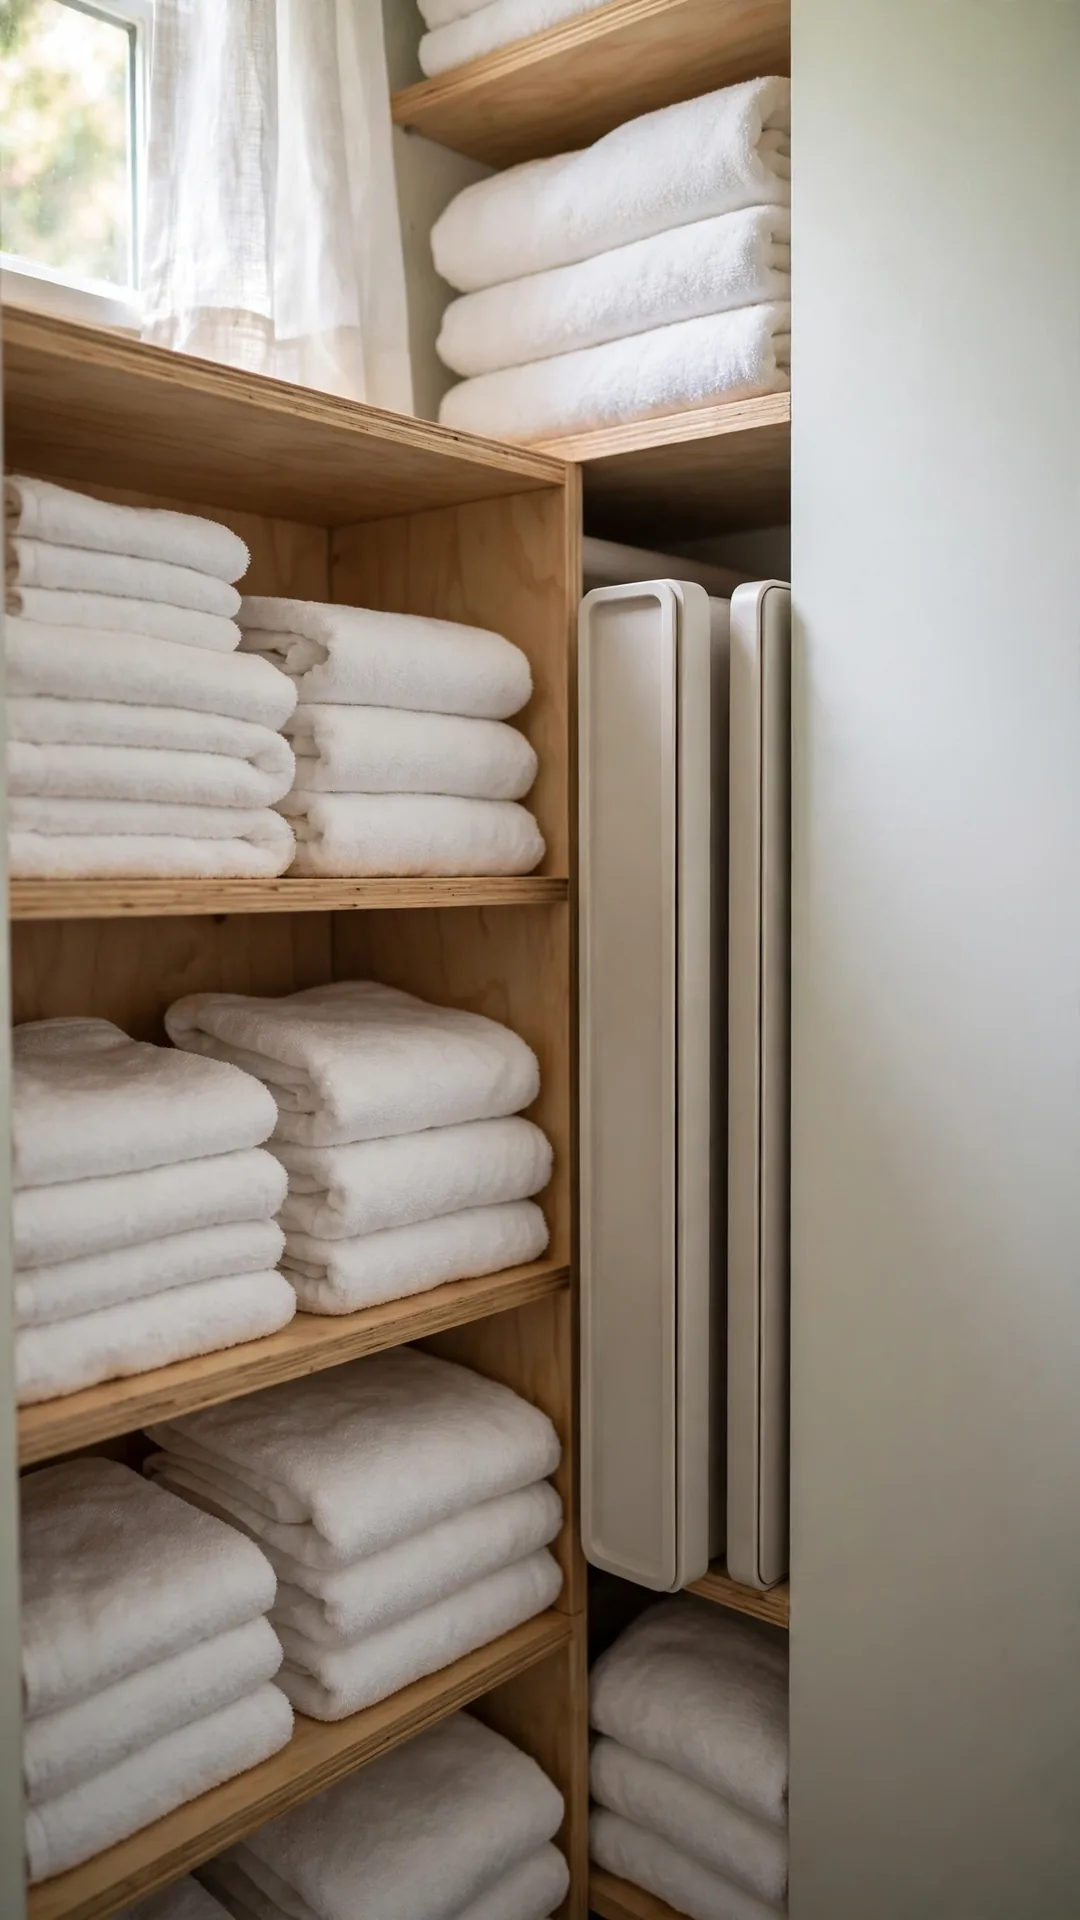
Many linen closets hide a slim gap beside the towel stacks. Flat bins slide into that gap like books. It suits flat decor like placemats, signs and wreath hangers.
How to do it:
- Measure the gap width before you shop.
- Pick bins about 4 to 5 inches thick.
- Pack flat items only, standing on edge.
- Slide bins in with the opening facing out.
- Leave towels room to breathe on their side.
Best for: Flat holiday decor and spare hangers.
Budget: $8 to $18
Quick tip: Store flat items on edge, never stacked flat and buried.
40. Store Tabletop Trees on a High Hall Shelf

Small tabletop trees fit their own boxes on a high shelf. The hall shelf above head height stays empty in most homes. Two or three boxed trees line up neatly there.
How to do it:
- Keep each tree in its retail box or a snug bin.
- Wrap the tree in a bag first to hold shed needles.
- Set boxes on the highest hall or closet shelf.
- Keep one tree per box so branches stay full.
- Note the spot in your bin photo album.
Best for: Mini trees for desks, entries and kids rooms.
Budget: Free to $12
Quick tip: A bag inside the box keeps loose needles contained.
41. Keep Small Decor in a Kitchen Cabinet Cubby
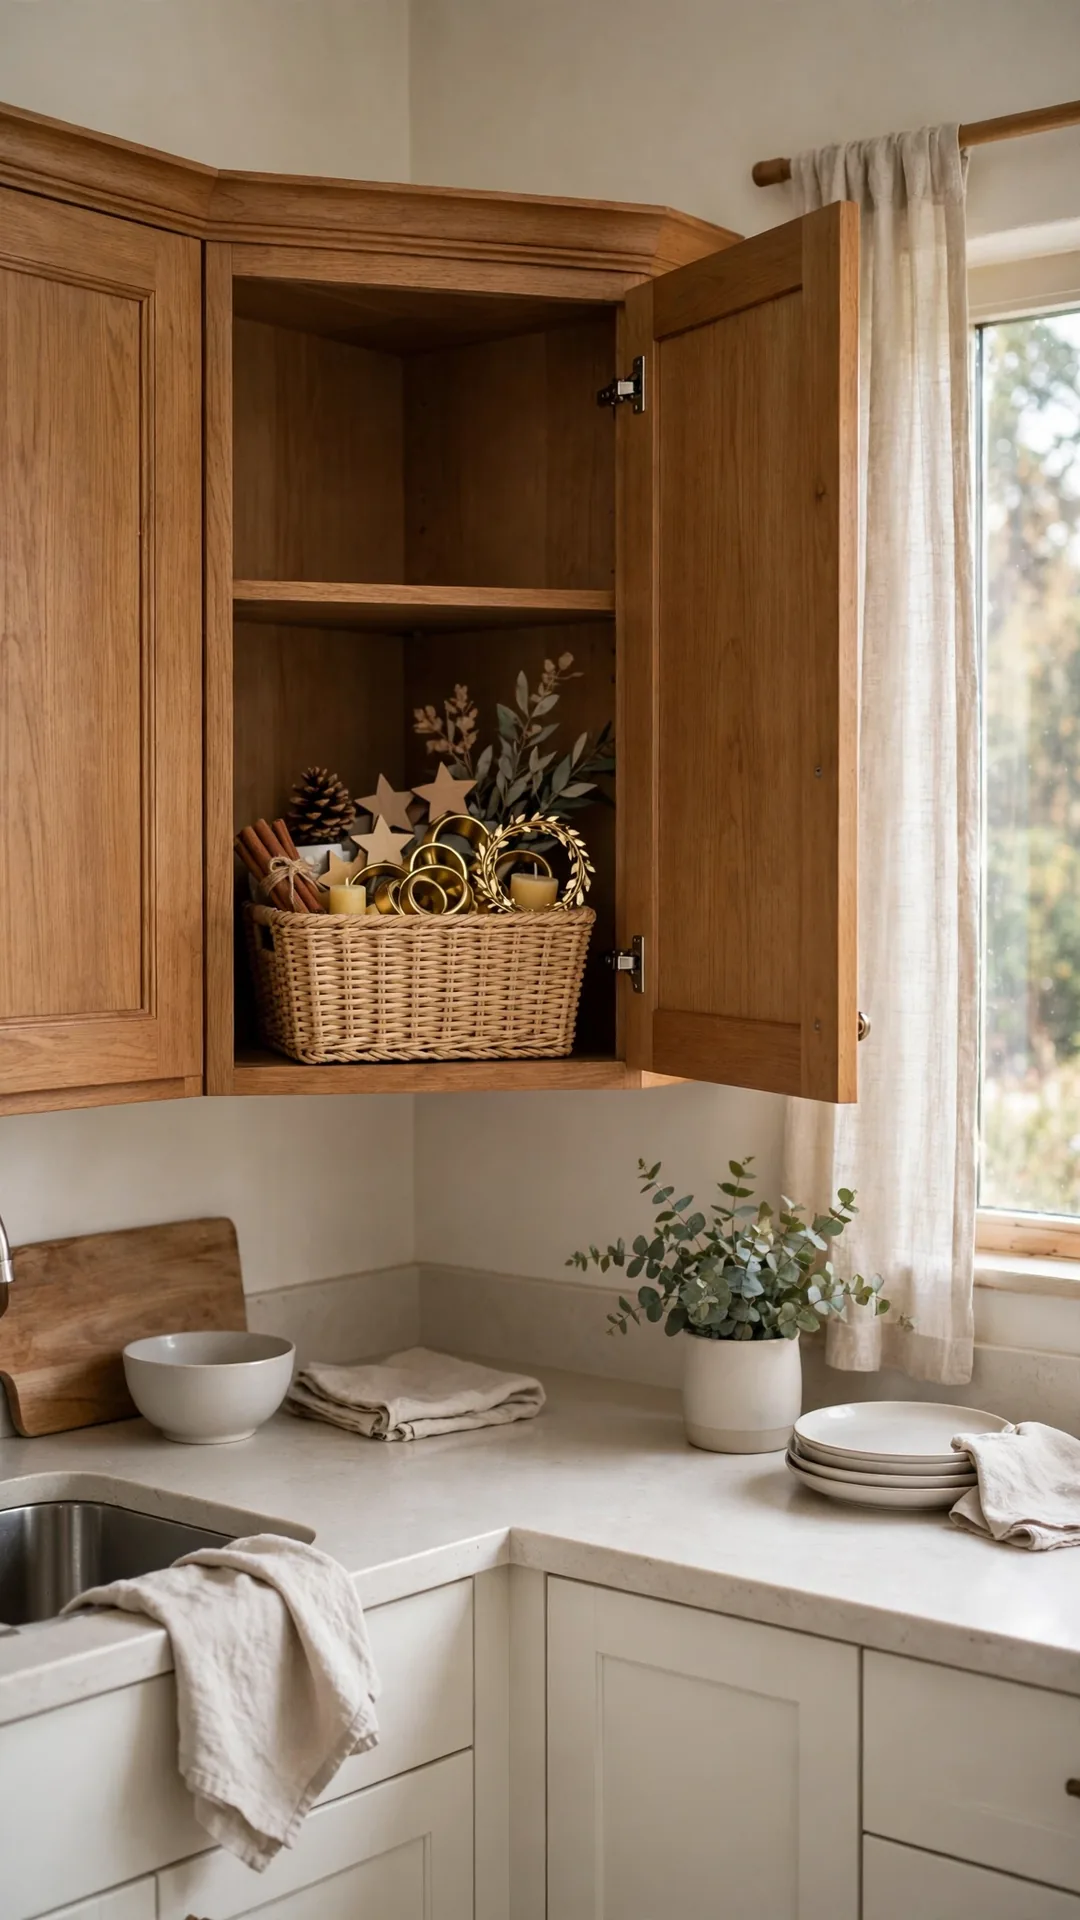
One cabinet cubby can hold the small seasonal pieces, a neat fit for holiday decoration storage ideas for small spaces. Advent items and candle rings stay together near the table. Corner cabinets hide deep space, and these small kitchen corner storage ideas use that depth well.
How to do it:
- Clear one cubby or half shelf in a corner cabinet.
- Use a small open bin that slides out easily.
- Group Advent and candle items in the one bin.
- Keep food items on a different shelf entirely.
- Wipe the cubby before the bin goes back in January.
Best for: Small seasonal pieces used in the kitchen.
Budget: $5 to $12
Quick tip: One sliding bin beats loose items in a deep corner.
42. Use Clear Stackable Drawers for Small Decor
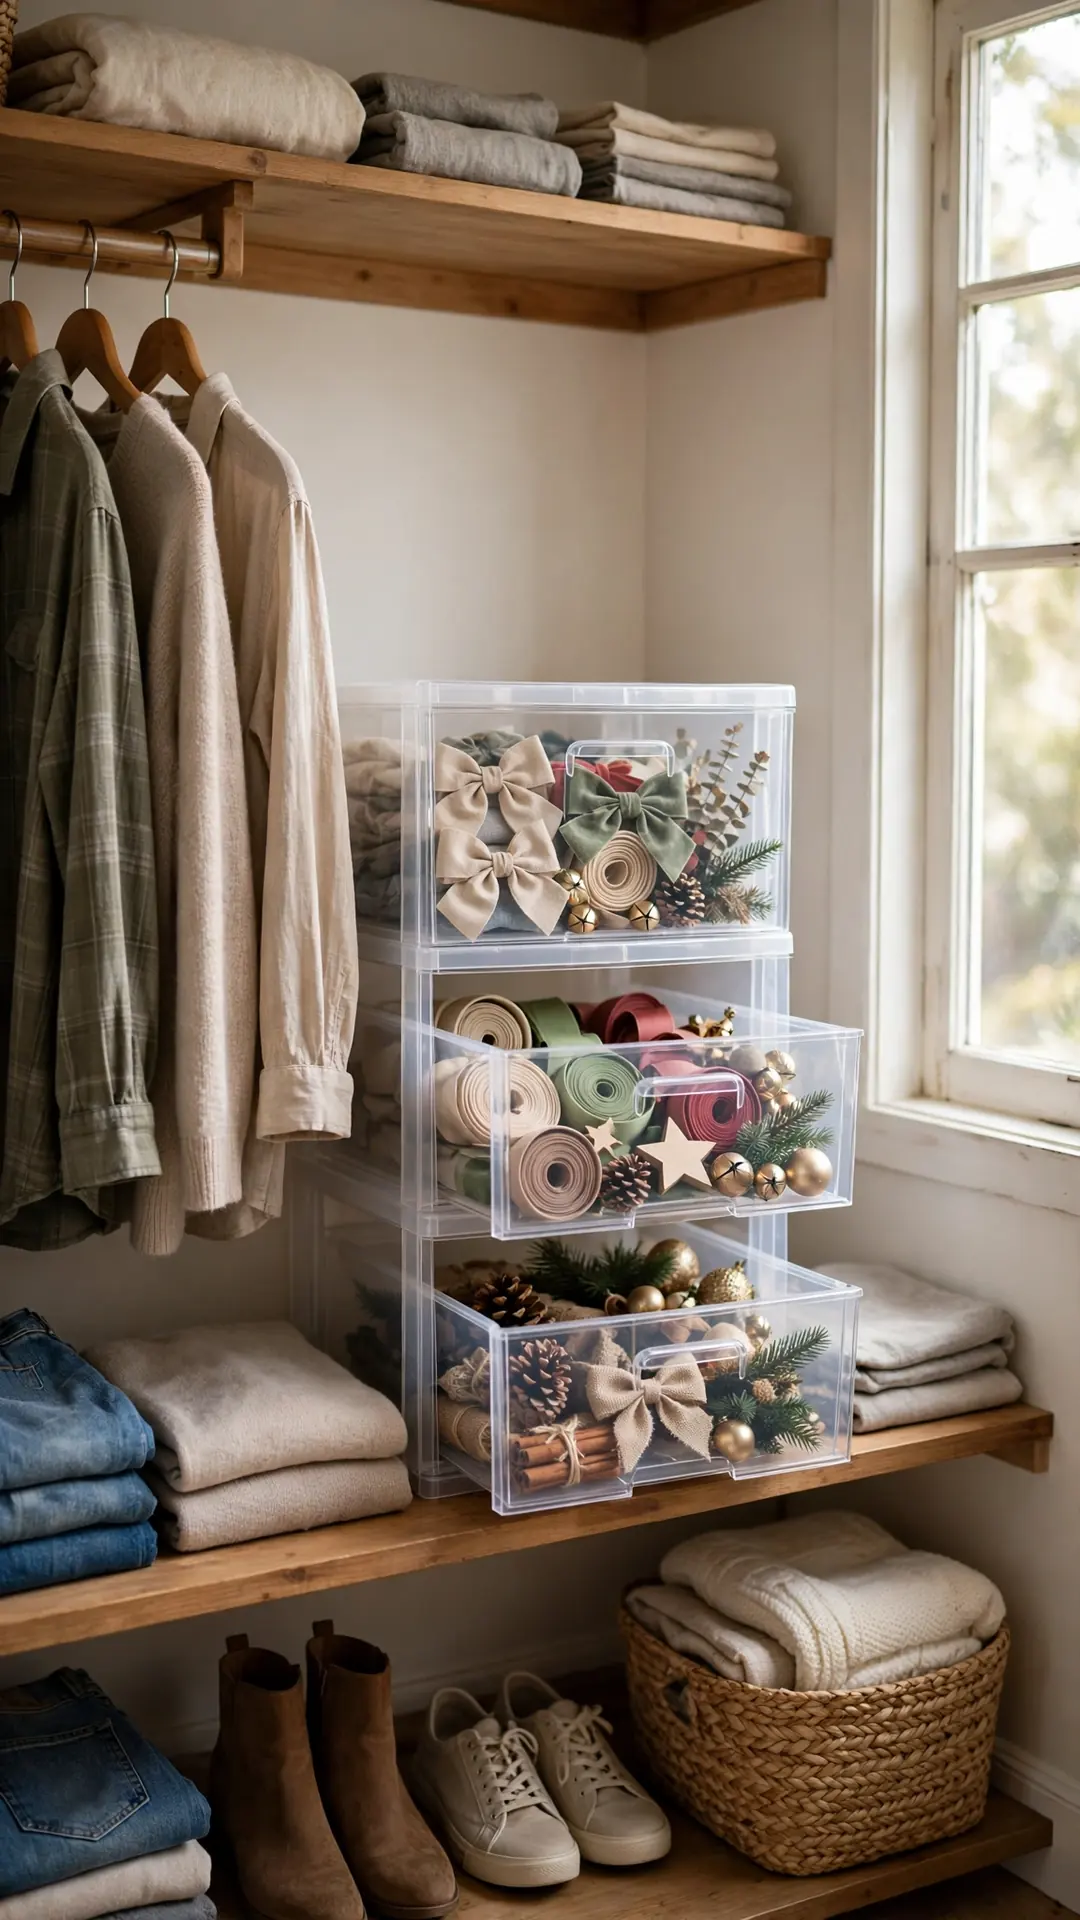
A small drawer unit sorts decor by type at a glance. Bows in one drawer, hooks and clips in another. The unit stacks on a shelf and moves as one piece.
How to do it:
- Pick a three drawer unit about 12 inches tall.
- Sort small decor into the drawers by job.
- Keep crushable bows in the top drawer alone.
- Set the unit on a closet shelf or dresser top.
- Leave one drawer for new buys during the season.
Best for: Craft style decor, bows and small extras.
Budget: $12 to $25
Quick tip: Clear drawers remove the need for any labels.
43. Slide Flat Bins Under the Bed

The space under your bed fits two or three flat bins. Low bins suit garlands, flat signs and spare linens. These proven small bedroom storage ideas treat that gap as real storage.
How to do it:
- Measure the clearance under your bed frame first.
- Pick bins about 6 inches tall with flat lids.
- Pack flat and soft items, not heavy glass.
- Slide bins in from the side you use least.
- Keep one bin spot free for guest season swaps.
Best for: Flat decor in bedrooms with no closet space.
Budget: $10 to $22 per bin
Quick tip: Bins with wheels roll out fast on hard floors.
44. Fill the Gap Behind the Sofa with a Slim Bin
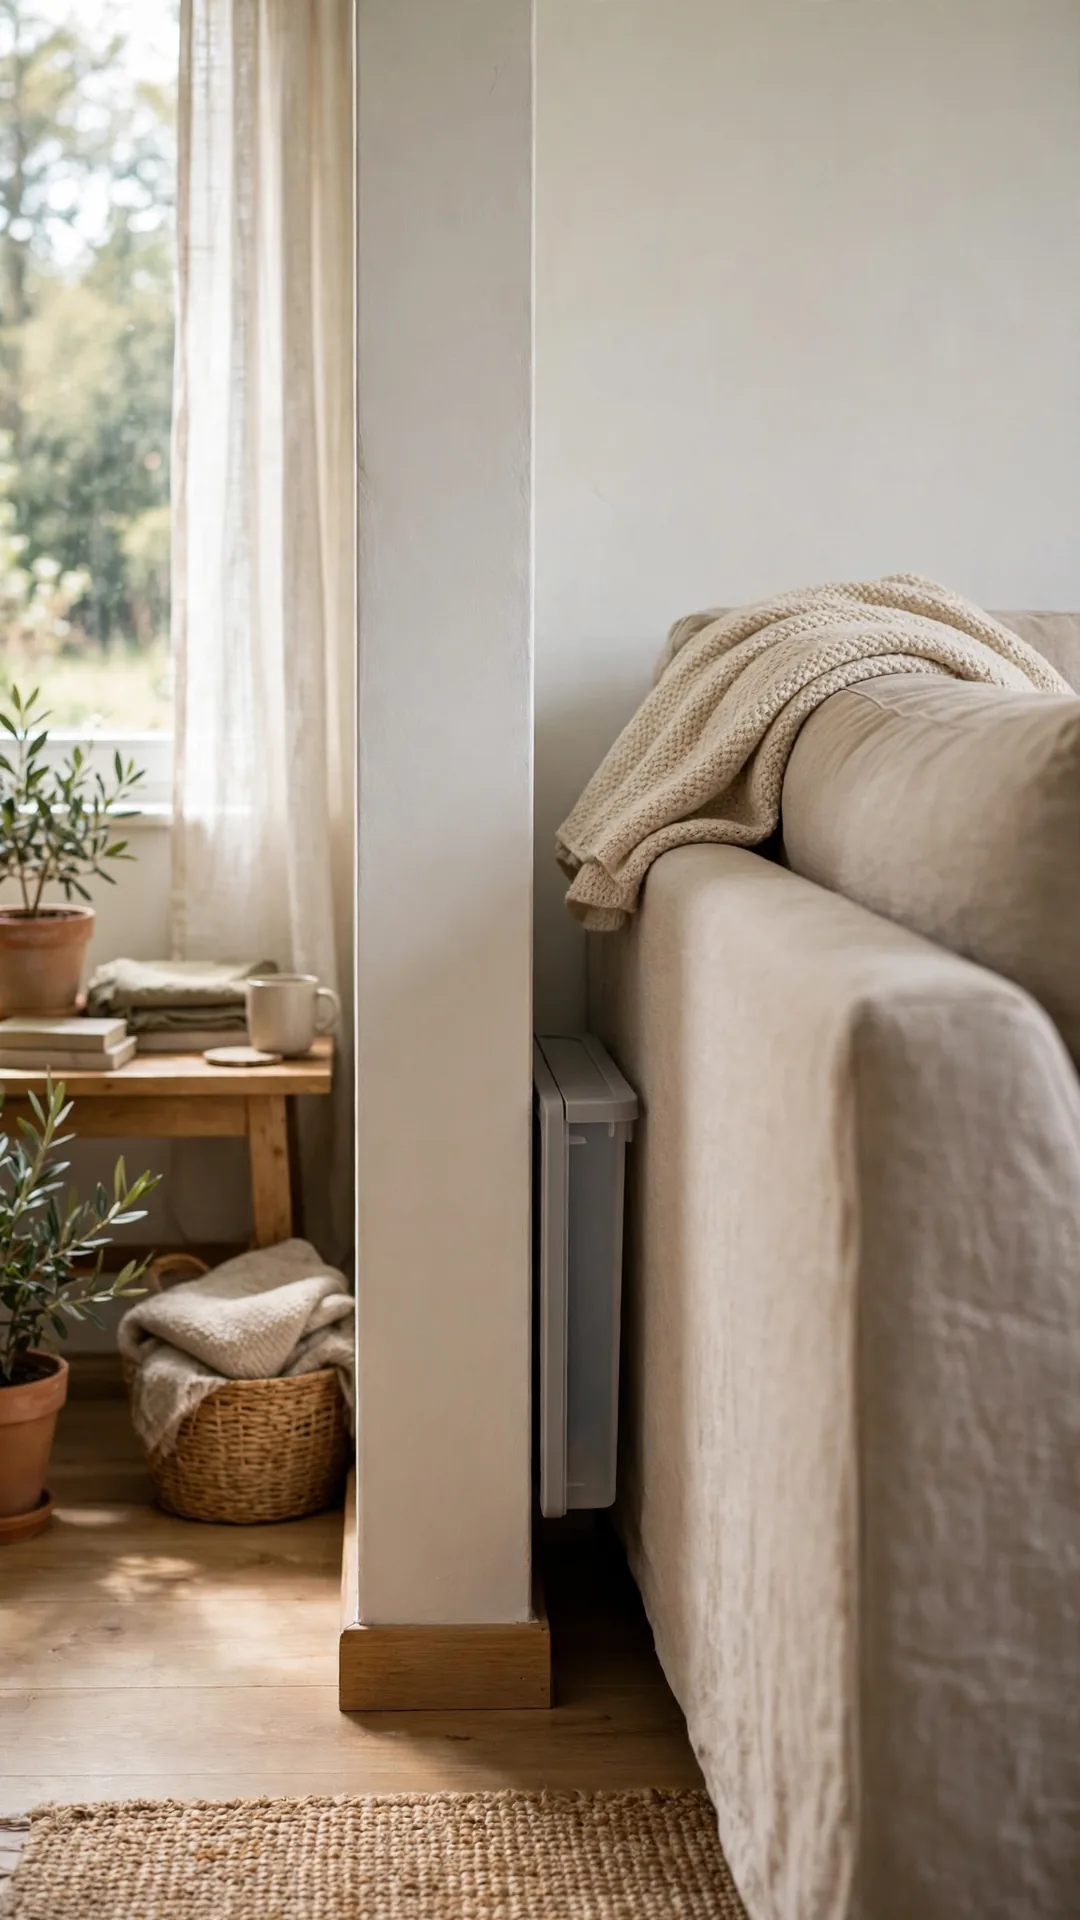
Many sofas sit a few inches off the wall. That slim gap fits a flat bin of garland or lights. Plain holiday decoration storage ideas for small spaces claim gaps like this one.
How to do it:
- Measure the gap between sofa back and wall.
- Pick a bin no wider than the gap minus 1 inch.
- Pack light items like garland and fabric decor.
- Slide the bin in behind the center of the sofa.
- Note the spot in your photo album, it hides well.
Best for: Living room decor in a one room layout.
Budget: $8 to $18
Quick tip: Only use this gap for light, flat items.
45. Store Decor Inside an Empty Suitcase
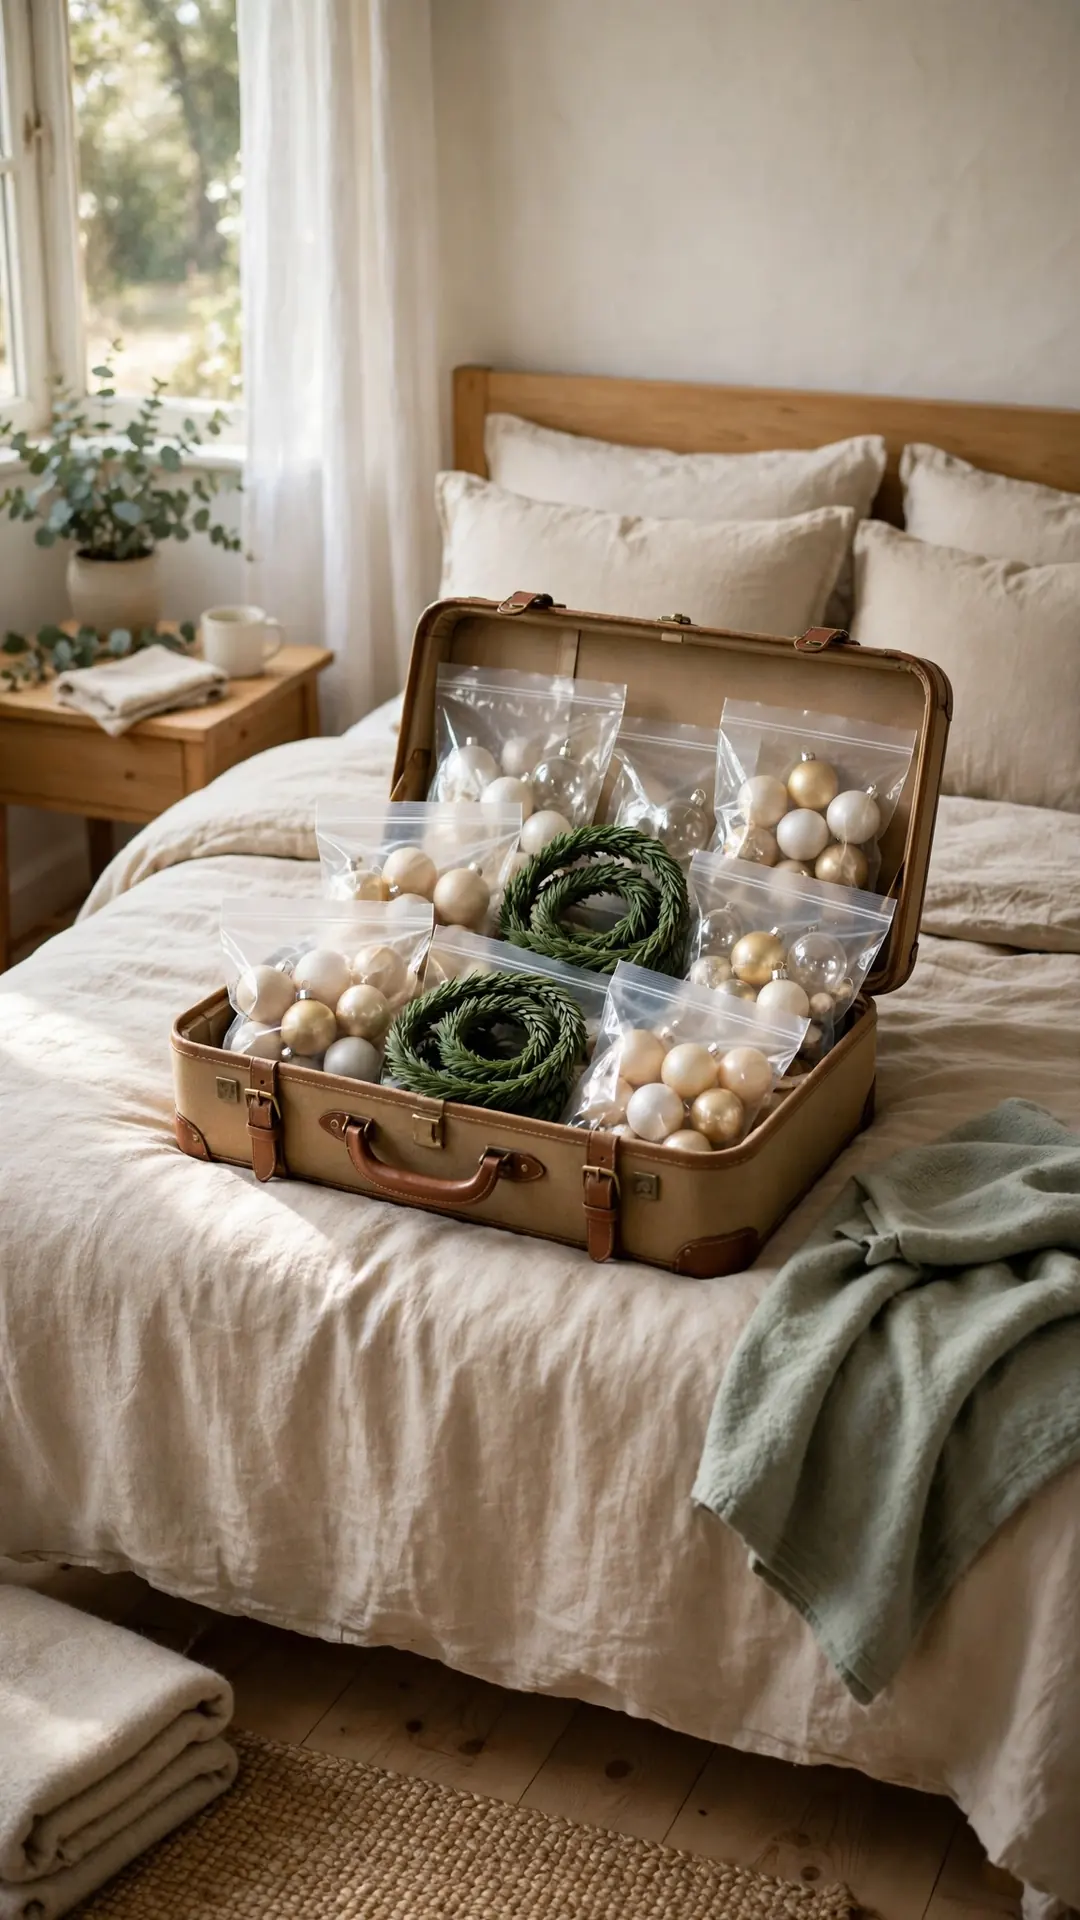
An empty suitcase is a storage box you already own. Its soft sides suit bags of ornaments and garland. It then stores itself in a closet or under a bed.
How to do it:
- Line the suitcase with a clean sheet or bag.
- Pack zip bags of ornaments in the base.
- Coil garland around the edges as padding.
- Keep glass in a hard box inside the suitcase.
- Close it and store it like normal luggage.
Best for: Spare luggage and soft to medium decor.
Budget: Free
Quick tip: A hard shell case protects better than a soft one.
46. Tuck Decor into a Storage Ottoman

A storage ottoman hides a full set of living room decor. Wrapped pieces sit inside while the lid works as a footrest. The decor stays in the room where you use it.
How to do it:
- Wrap each piece in tissue or a thin cloth.
- Set heavy items on the ottoman base.
- Lay soft decor across the top layer.
- Keep the total load light enough to move.
- Leave room so the lid closes fully flat.
Best for: Living room decor in studio apartments.
Budget: Free if you own the ottoman
Quick tip: Keep one room of decor per ottoman, no mixing.
47. Line a Bench Chest with Holiday Linens
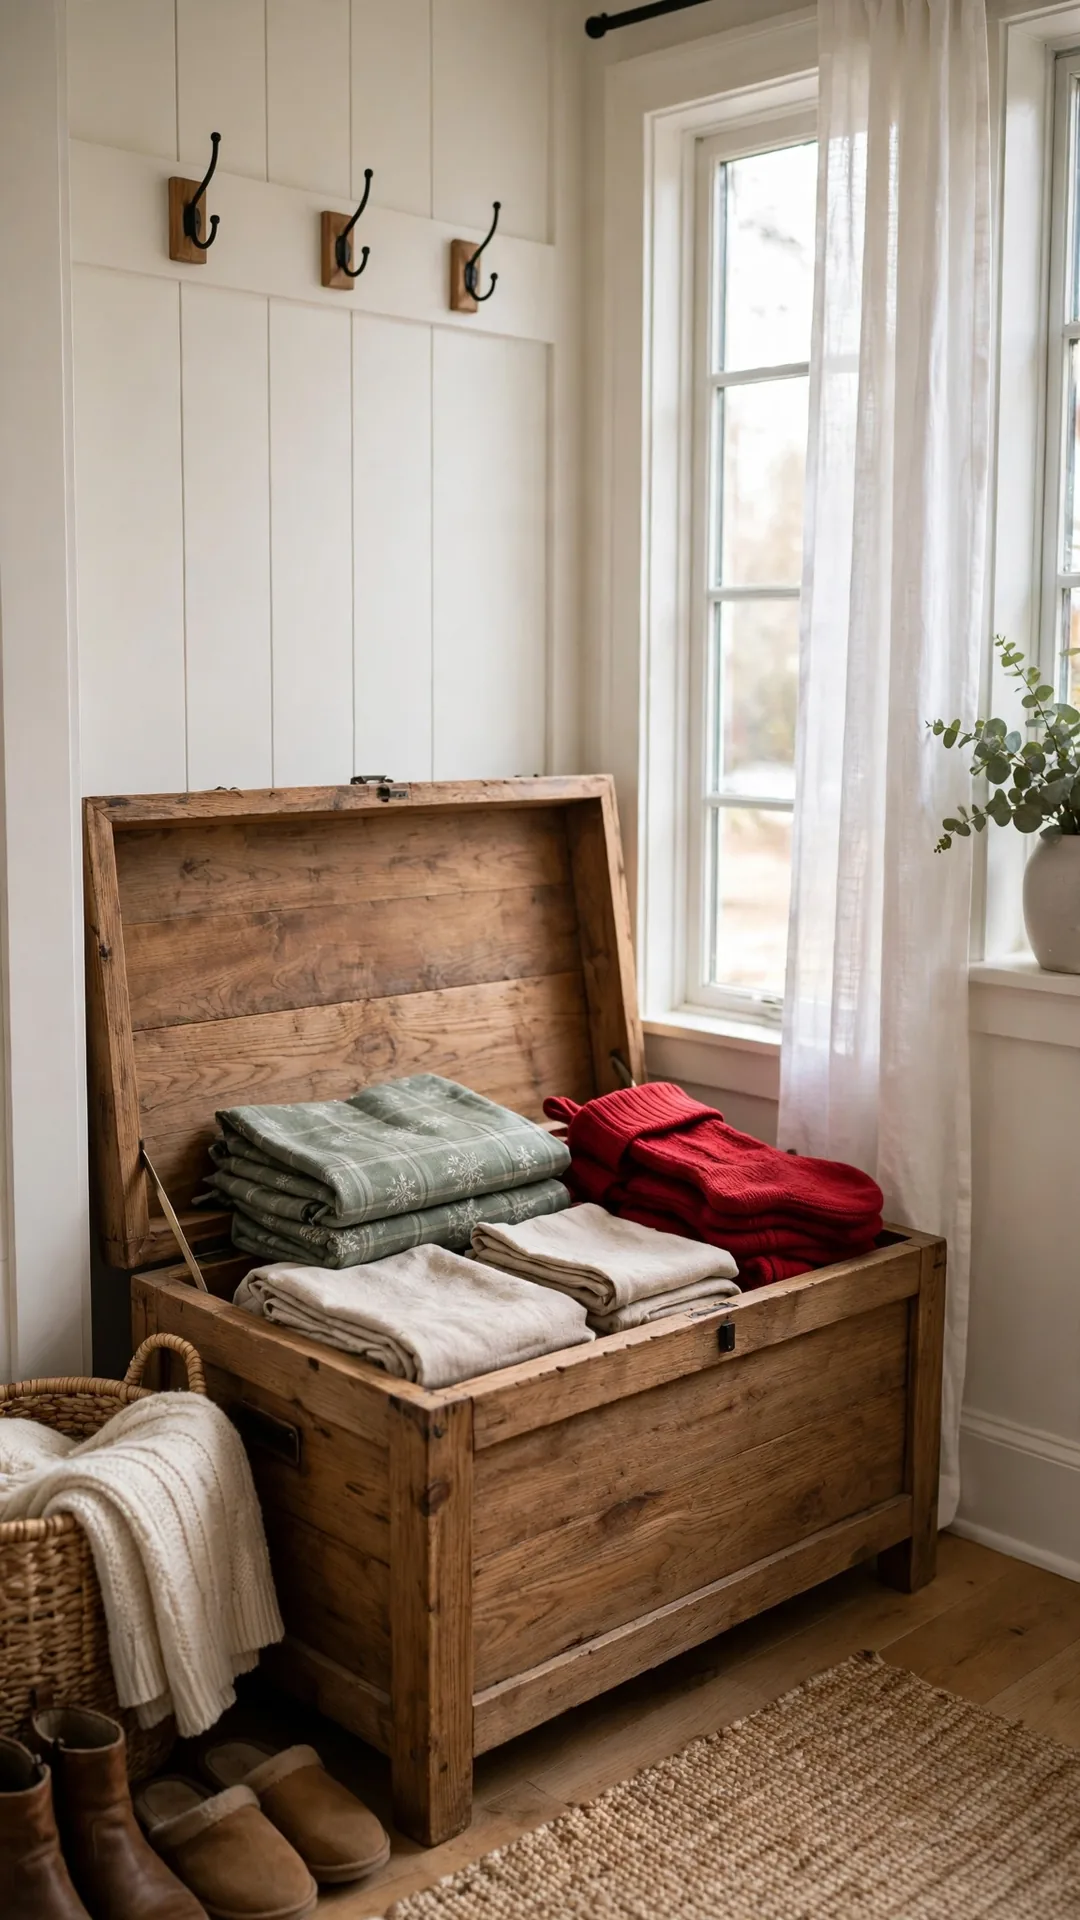
An entry bench chest swallows holiday linens with room left over. Flat folding linens suit holiday decoration storage ideas for small spaces very well. A liner keeps them clean against the wood.
How to do it:
- Line the chest with a clean cotton sheet.
- Fold linens flat and stack by size.
- Add stockings and small fabric pieces on top.
- Tuck one cedar block in a corner for freshness.
- Close the lid gently so hinges stay sound.
Best for: Entry benches and window seat chests.
Budget: Free to $10
Quick tip: Wash linens before packing, so stains never set.
48. Use the Gap on Top of the Wardrobe

The flat top of a wardrobe holds one long, low bin. It suits light decor you touch once a year. A matching bin color keeps the look calm.
How to do it:
- Measure the wardrobe top depth and ceiling gap.
- Pick a low bin that fits under the ceiling line.
- Pack light items like garland and empty boxes.
- Push the bin back so it sits out of sight lines.
- Use a step stool and lift with two hands.
Best for: Light decor in bedrooms with tall wardrobes.
Budget: $10 to $20
Quick tip: Never store glass up high, since lifts can slip.
49. Hang Flat Signs on Over-Door Hooks
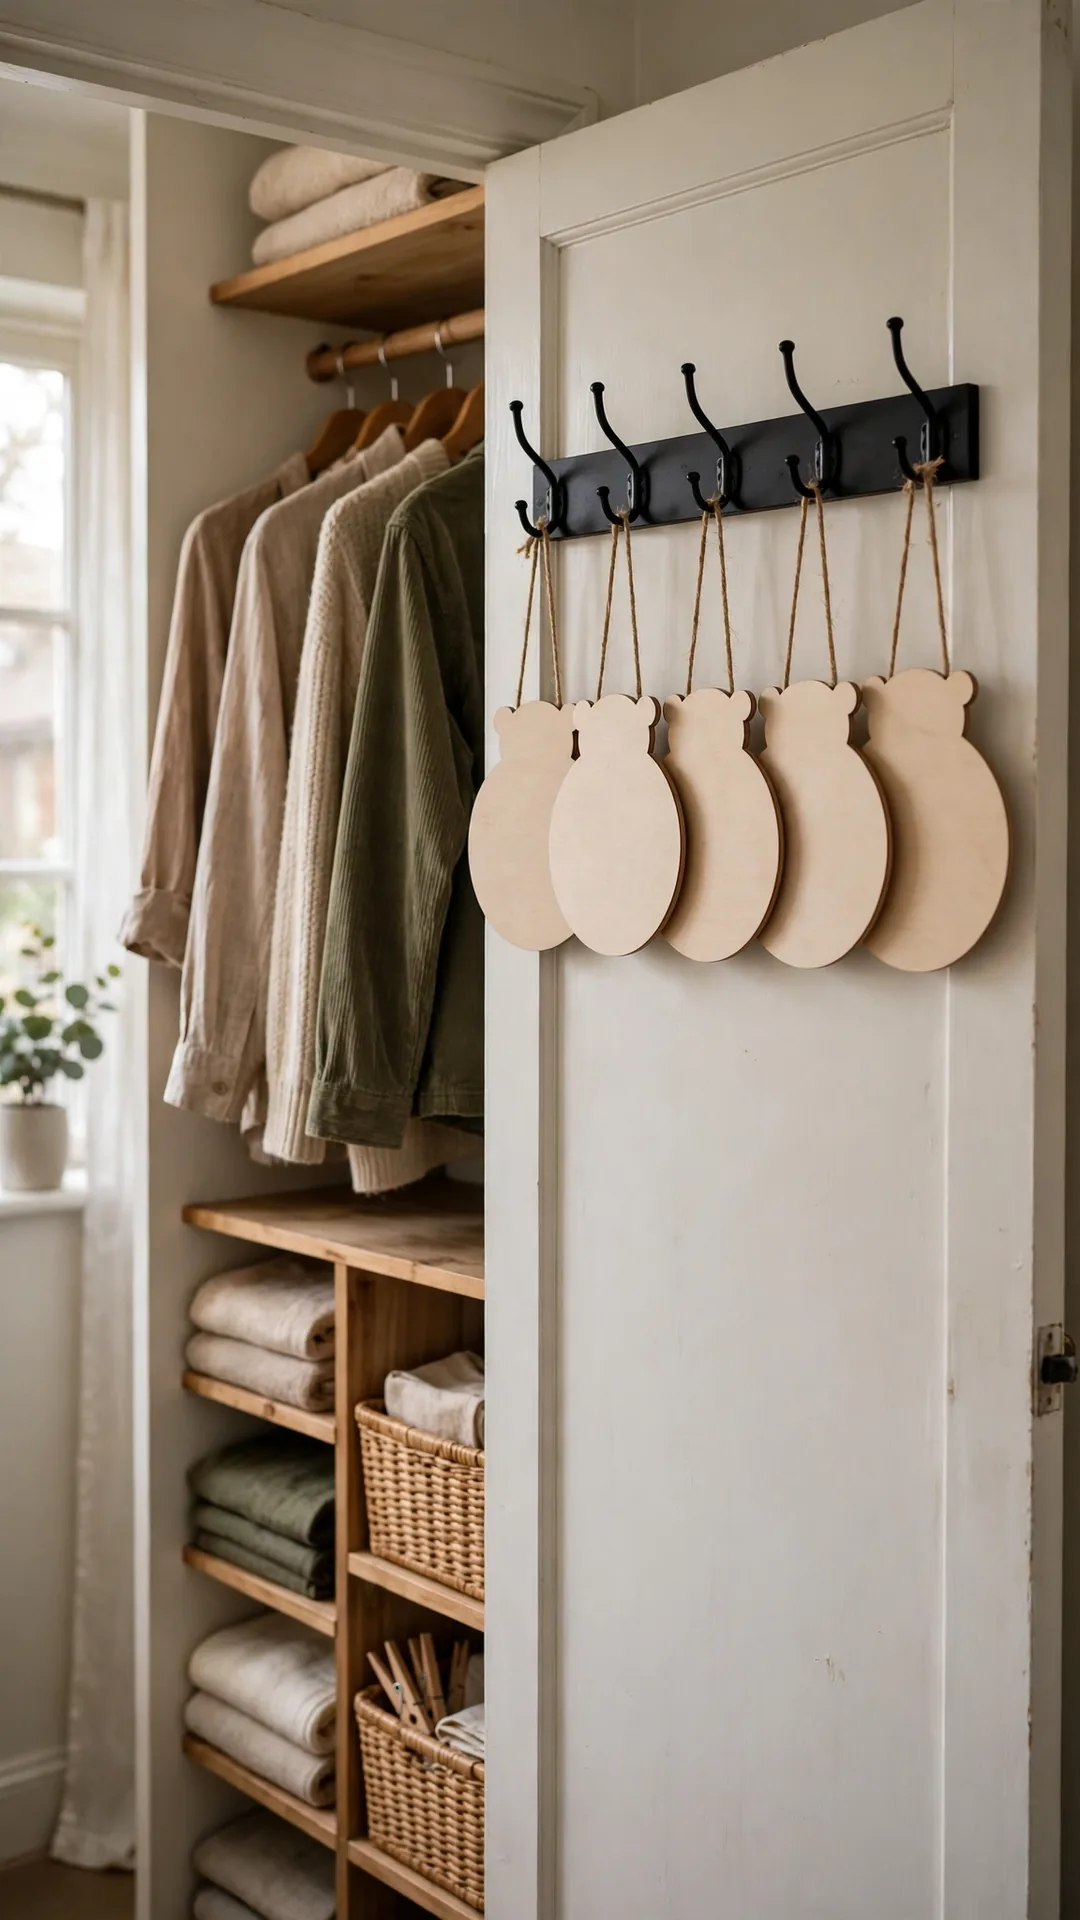
Flat signs and plaques store best hanging, not stacked. Over-door hooks inside a closet door hold them by their hangers. Nothing leans, chips or sticks together.
How to do it:
- Fit two or three over-door hooks on a closet door.
- Hang each sign by its wire or ribbon loop.
- Space signs so painted faces never touch.
- Add felt pads where signs meet the door.
- Keep the heaviest sign on the lowest hook.
Best for: Wooden signs, plaques and flat wall decor.
Budget: $6 to $14
Quick tip: Felt pads stop both noise and paint rub.
50. Fit a Narrow Shelf Above the Closet Door
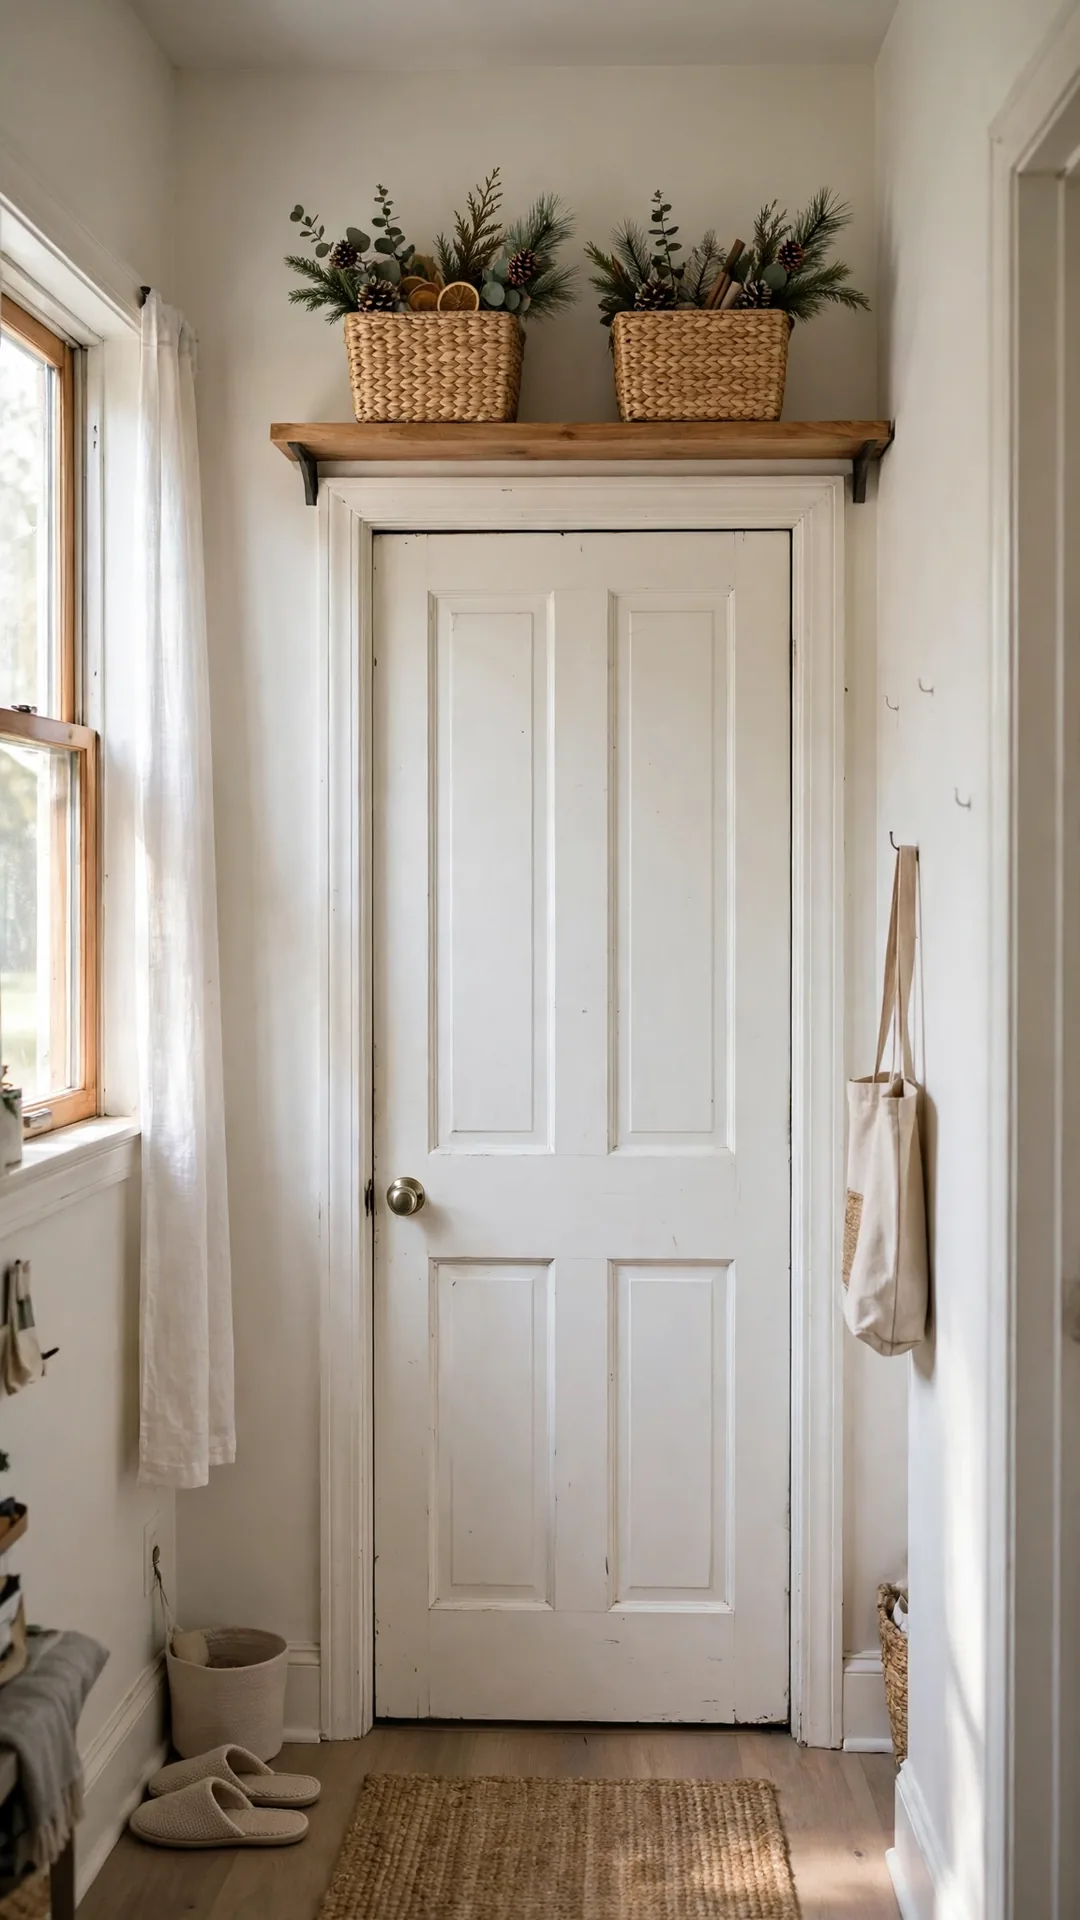
The strip above a closet door fits one narrow shelf. It holds small bins of light decor all year. Simple holiday decoration storage ideas for small spaces use every strip like this.
How to do it:
- Measure the gap between door frame and ceiling.
- Fit a shelf about 8 inches deep on two brackets.
- Set two small bins of light decor on it.
- Keep total weight modest on a high shelf.
- Reach it with a step stool, never a chair.
Best for: Small bins of light decor and spare bows.
Budget: $15 to $35
Quick tip: Store only light items where you lift overhead.
51. Mount a Small Rail for Hanging Decor Bags
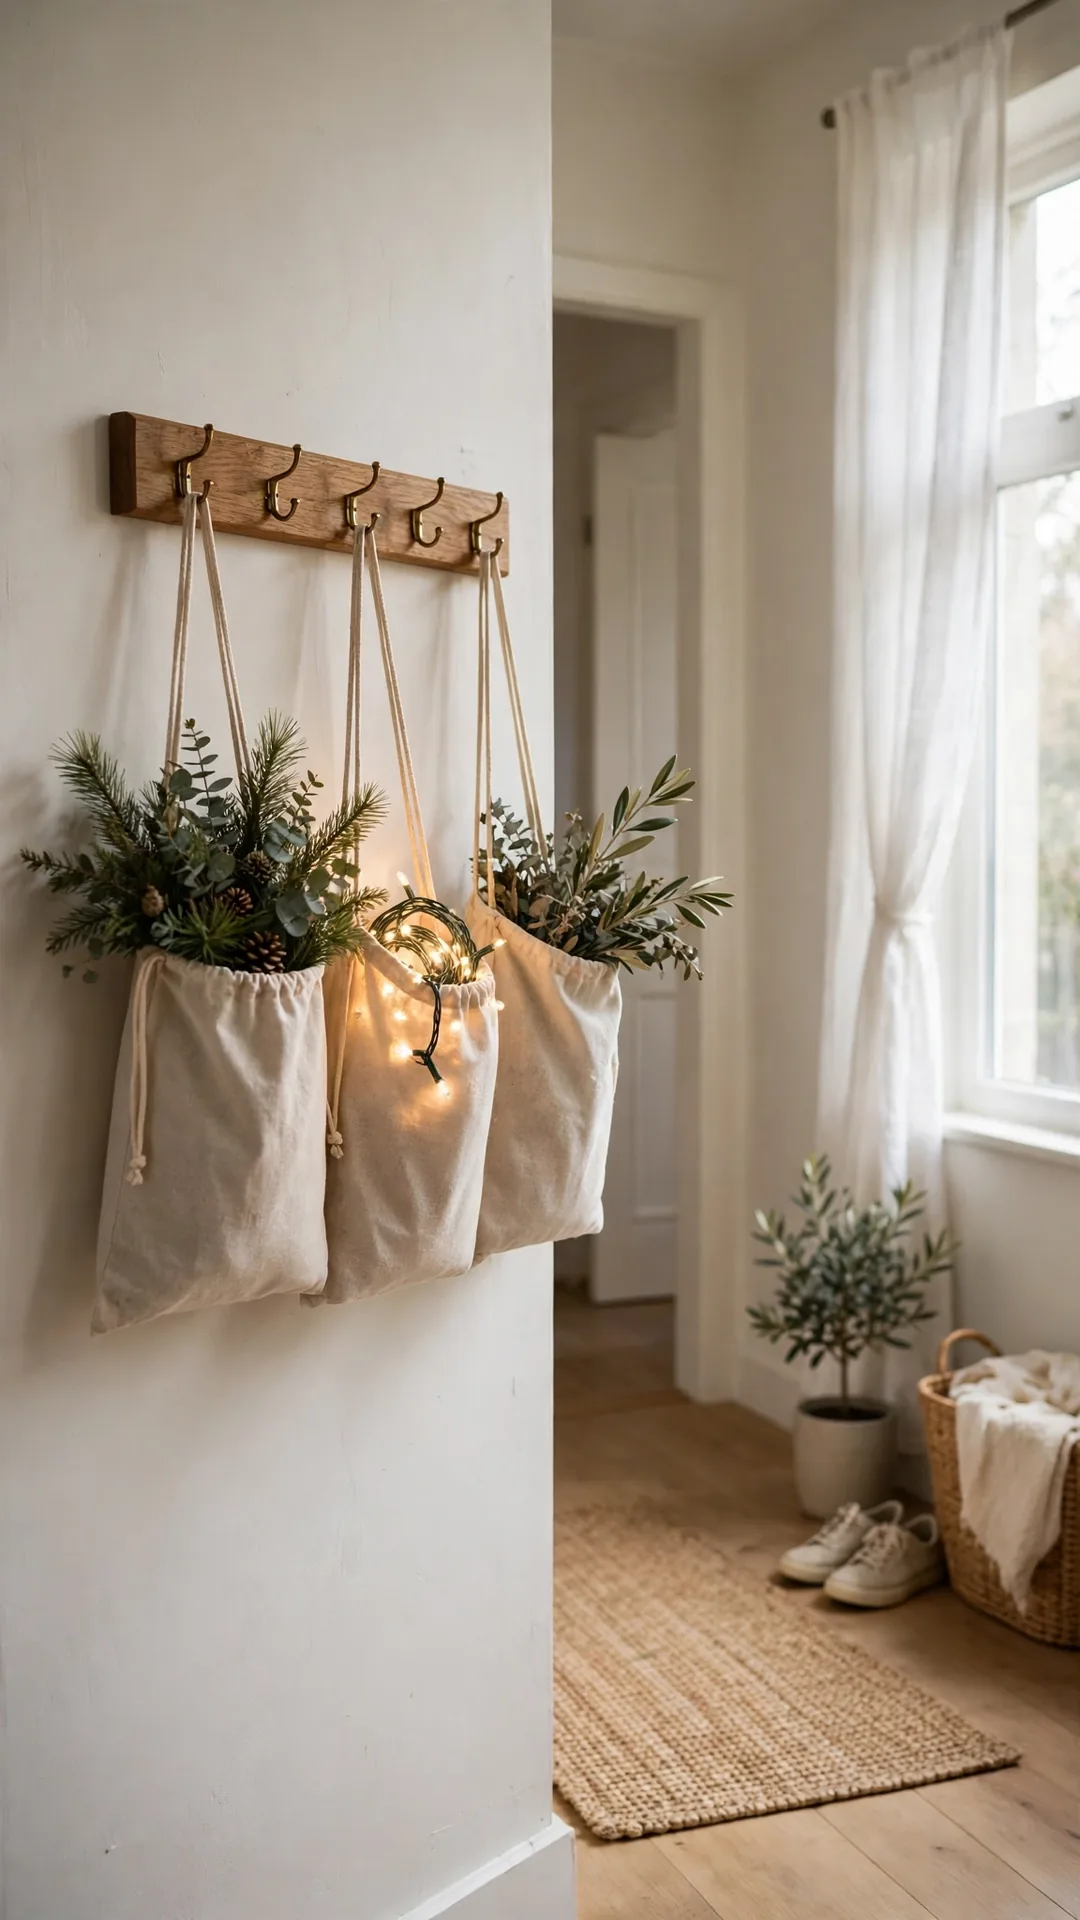
A short rail with hooks holds bags of garland and lights. The bags hang flat against a hallway or closet wall. The same hanging system powers these bag storage ideas for a small space in other rooms.
How to do it:
- Fix a rail about 24 inches long into studs.
- Use cloth drawstring bags for soft decor.
- Hang one bag per hook so bags stay flat.
- Keep the rail inside a closet or utility nook.
- Leave one hook free for in season swaps.
Best for: Soft decor bags on a spare wall strip.
Budget: $12 to $28
Quick tip: Drawstring bags beat open totes for hanging storage.
52. Keep Outdoor Decor in a Lidded Deck Box
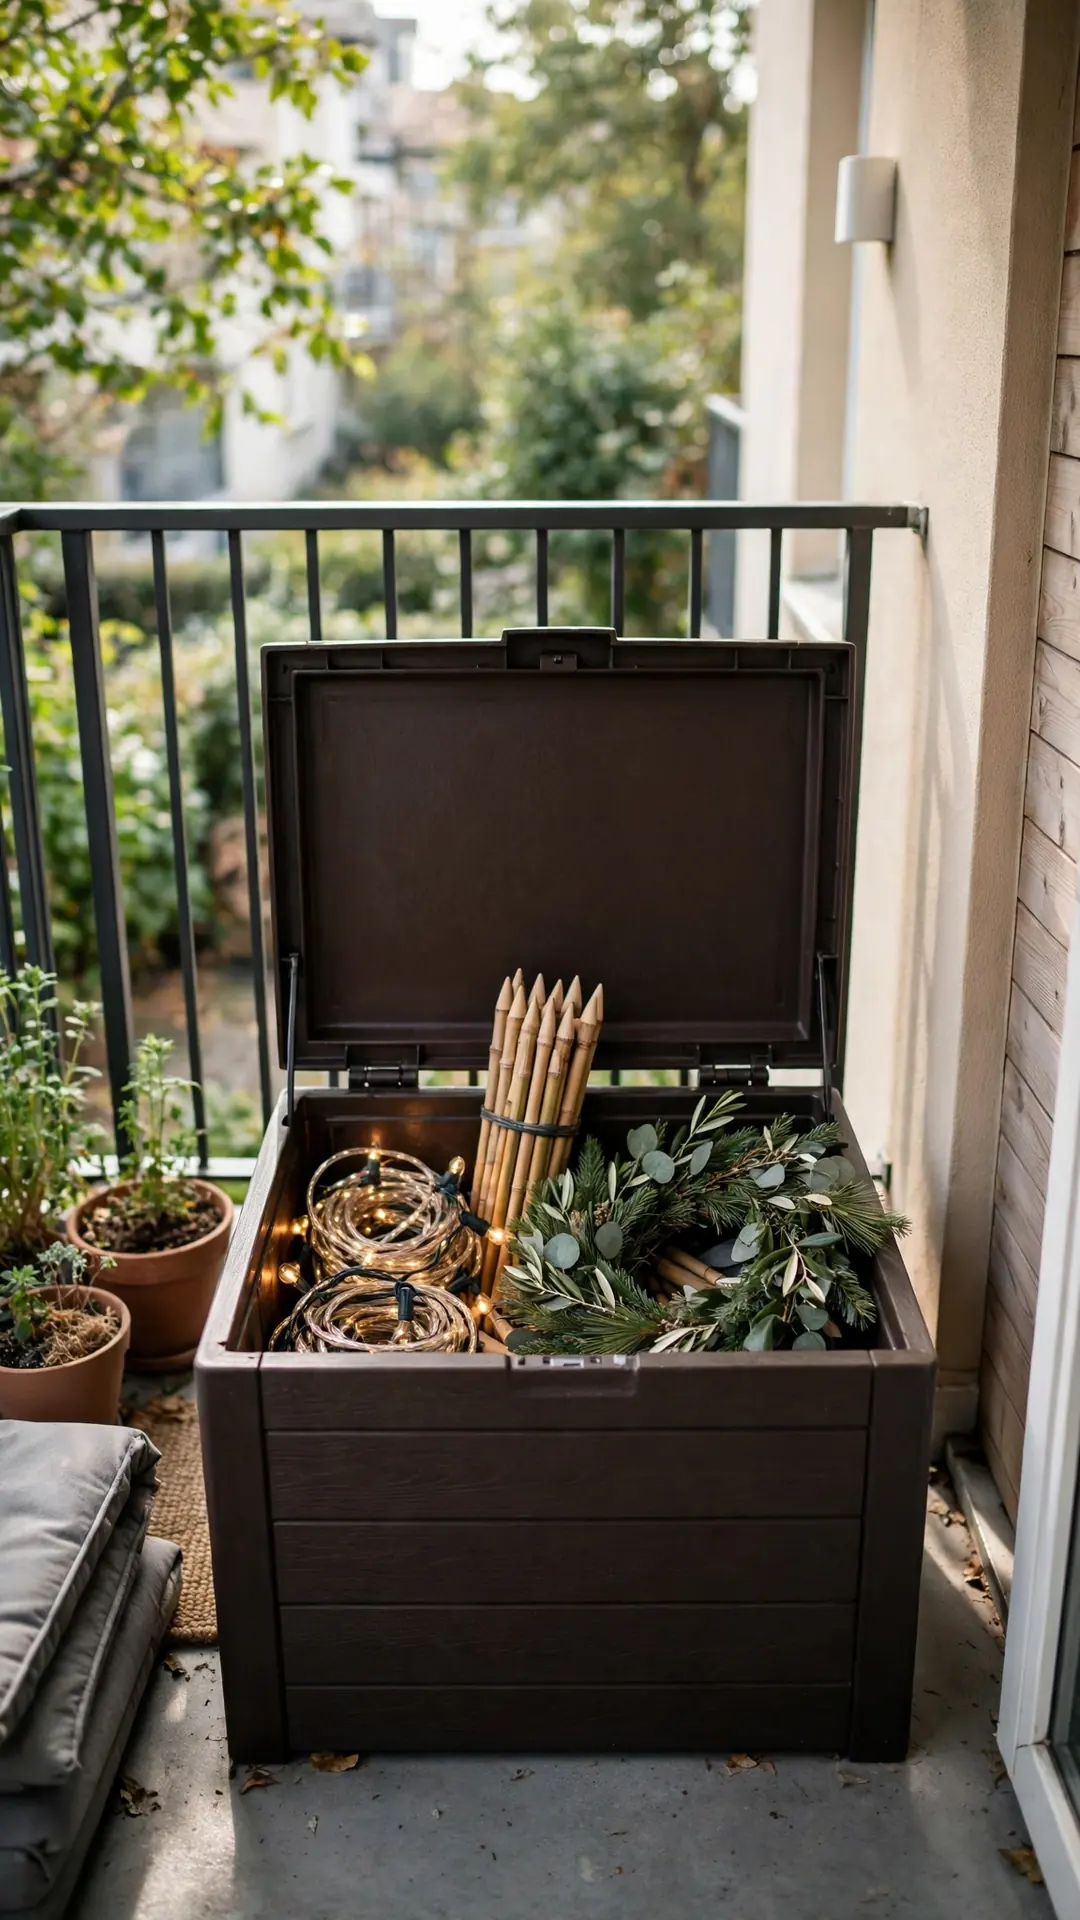
Outdoor decor should live near the door it decorates. A small deck box on a balcony or porch holds it all. The lid keeps rain off lights and stakes.
How to do it:
- Pick a box sized to your balcony corner.
- Coil outdoor strands loosely inside first.
- Add stakes and clips in one small bag.
- Stand the outdoor wreath on top if it fits.
- Wipe items dry before they go back in January.
Best for: Balcony and porch decor in apartments.
Budget: $30 to $70
Quick tip: Dry storage matters more than size for outdoor lights.
53. Put One Pretty Basket on Top of a Bookcase
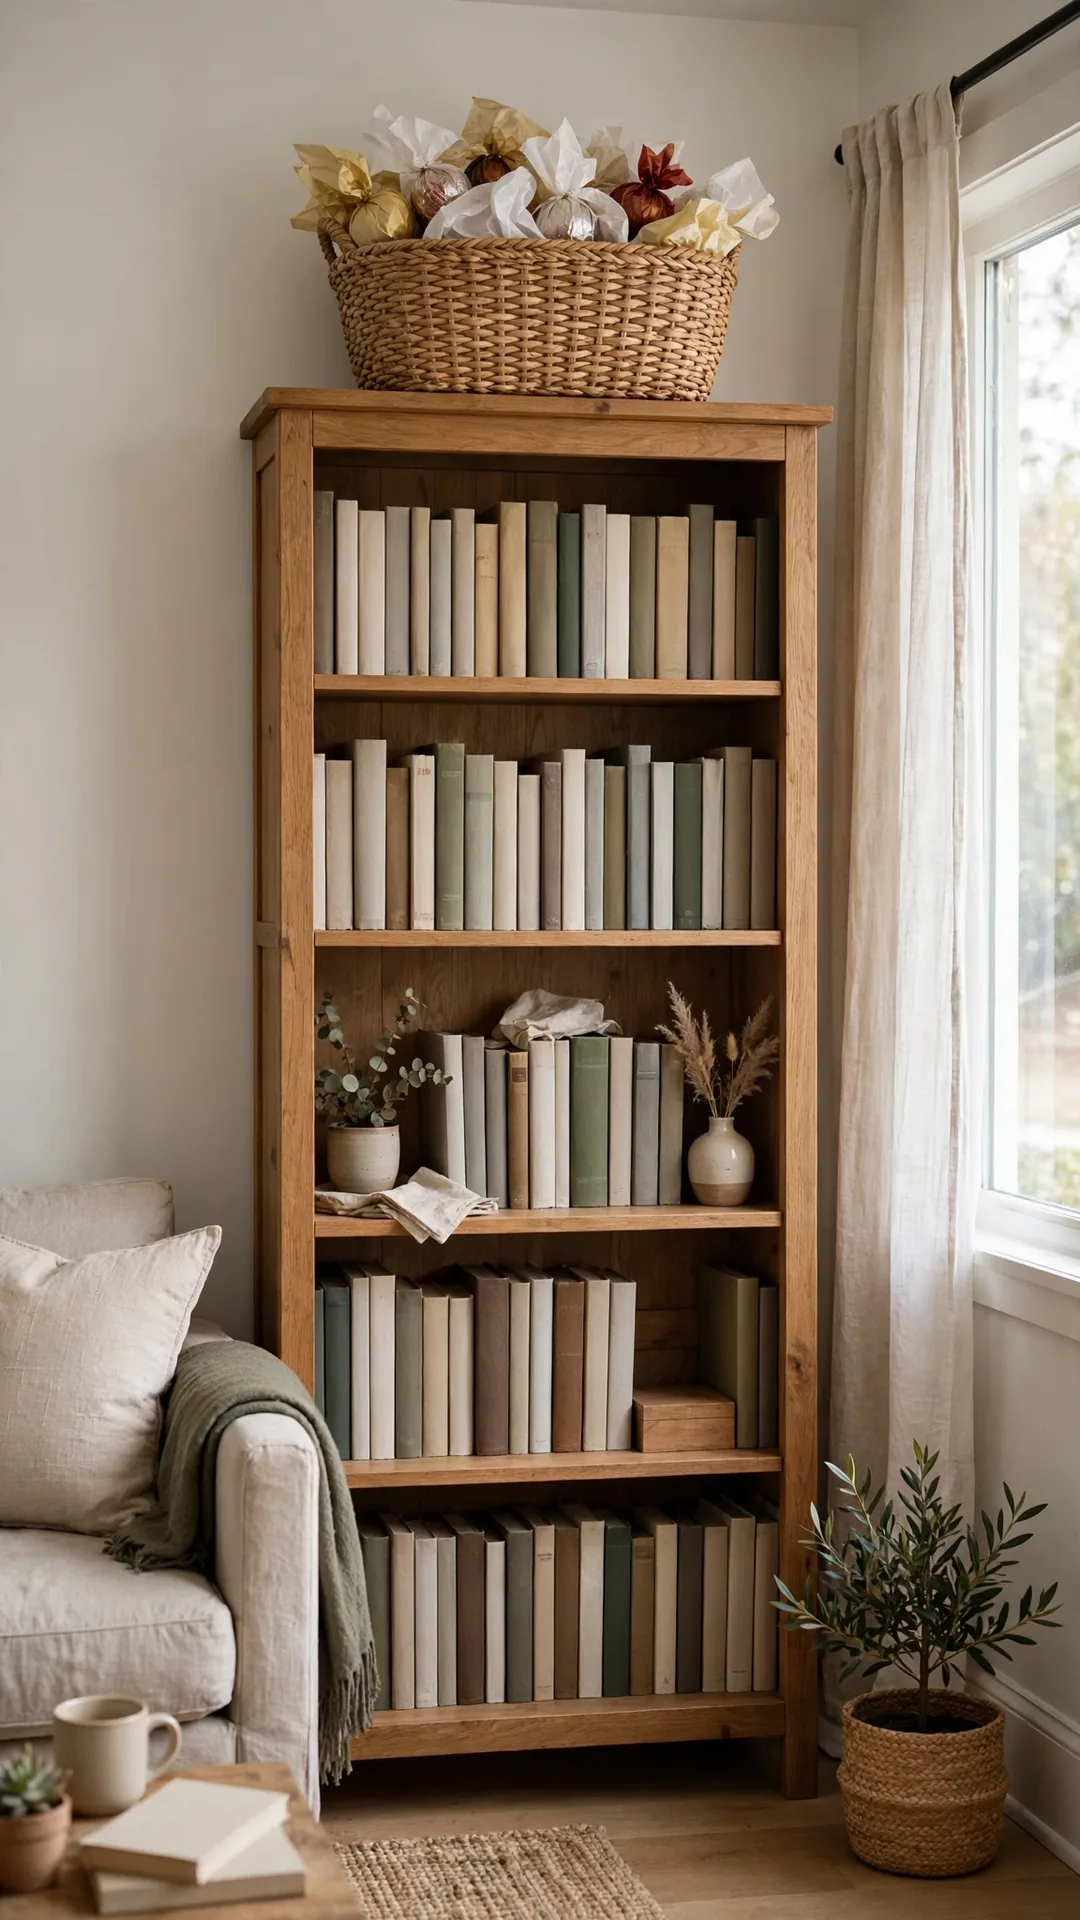
The top of a bookcase fits one good looking basket. It holds wrapped ornaments where guests never notice them. Holiday decoration storage ideas for small spaces can look like decor, not clutter.
How to do it:
- Pick a lidded basket that matches the room.
- Wrap ornaments and pack them in one layer rows.
- Keep the load light, since you lift it overhead.
- Set the basket back from the front edge.
- Dust the top monthly so the basket stays fresh.
Best for: One basket of light ornaments in living rooms.
Budget: $15 to $30
Quick tip: A lid matters, since open baskets collect dust fast.
54. Hang Light Reels on Pegs in a Utility Closet
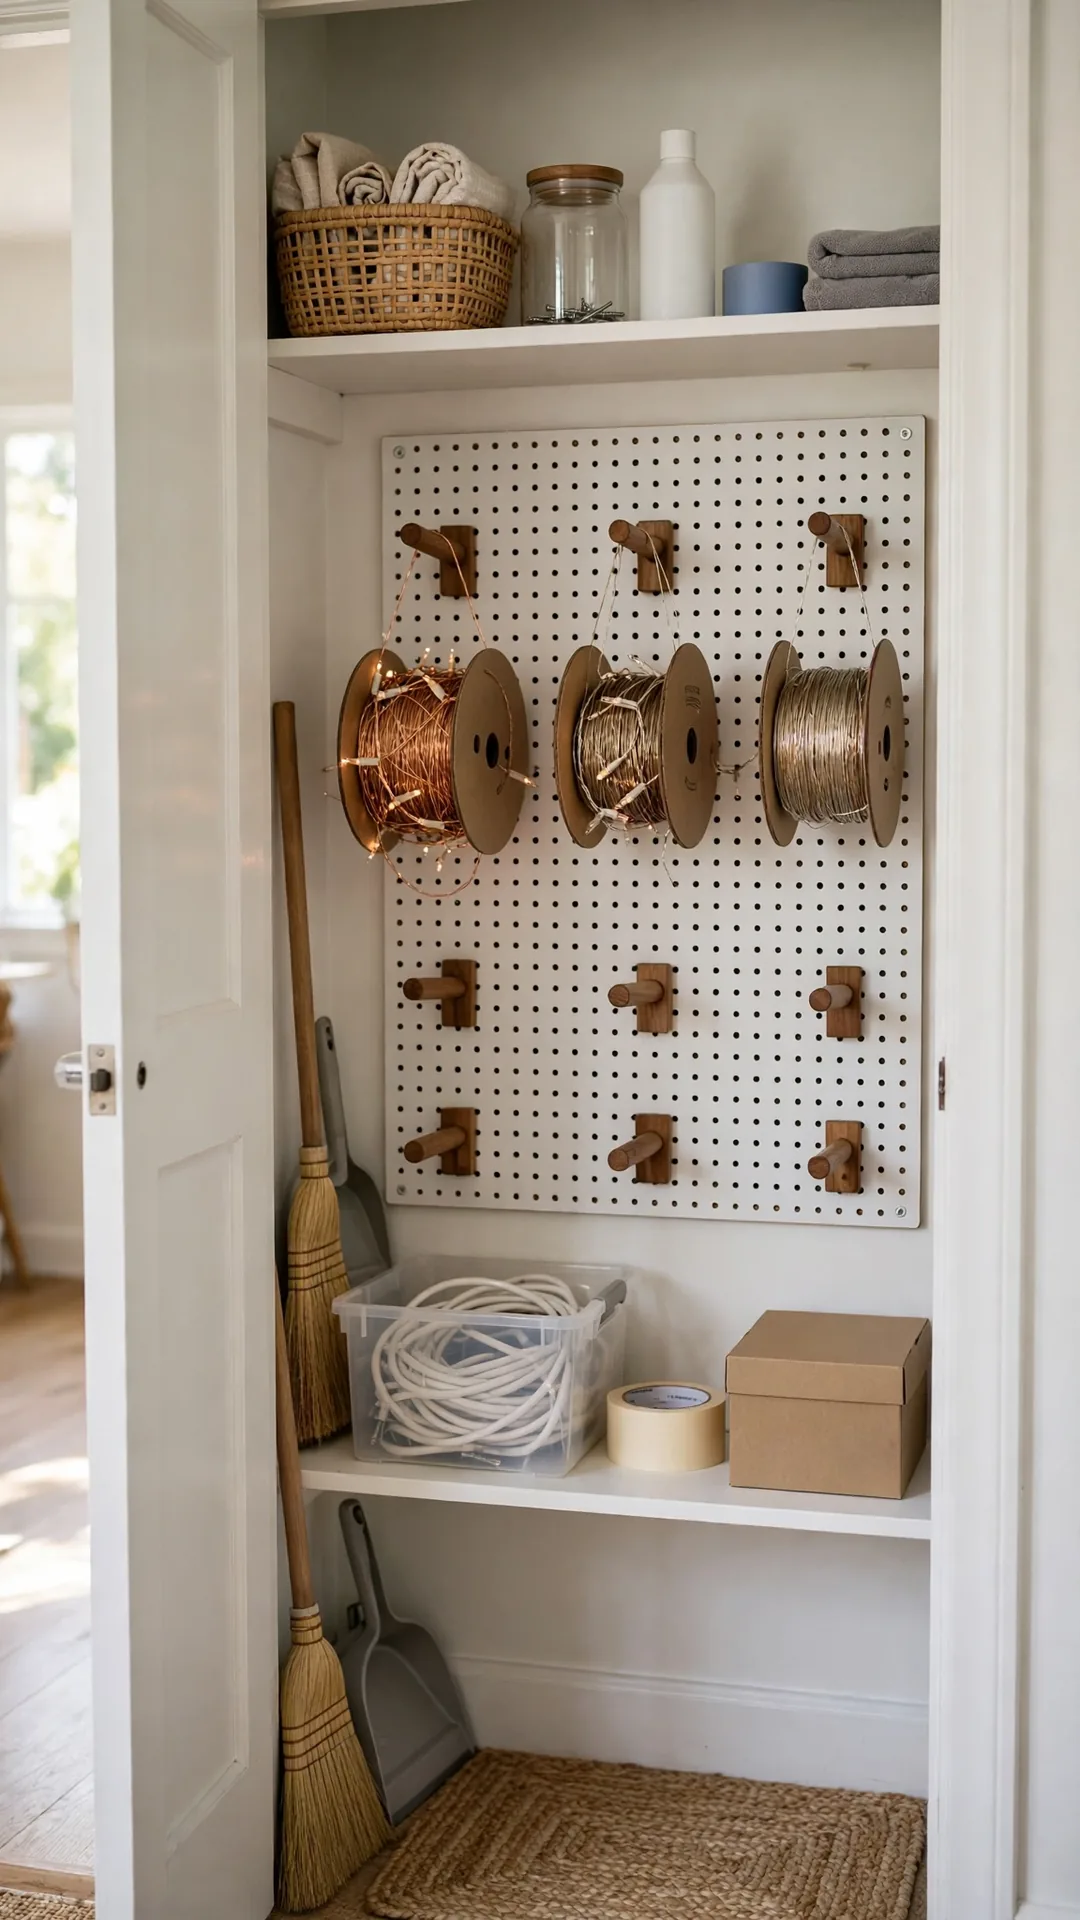
A pegboard gives light reels and cords a fixed home. Each reel hangs on its own peg, ready to grab. The board uses wall space that buckets waste.
How to do it:
- Mount a small pegboard inside the utility closet.
- Use long pegs rated for a few pounds each.
- Hang one wound reel or cord loop per peg.
- Keep spare bulbs and clips in a peg bin.
- Leave the lowest row for outdoor cords.
Best for: Homes with a utility or laundry closet.
Budget: $15 to $35
Quick tip: Long pegs hold two light reels side by side.
55. Label Every Bin on Two Sides
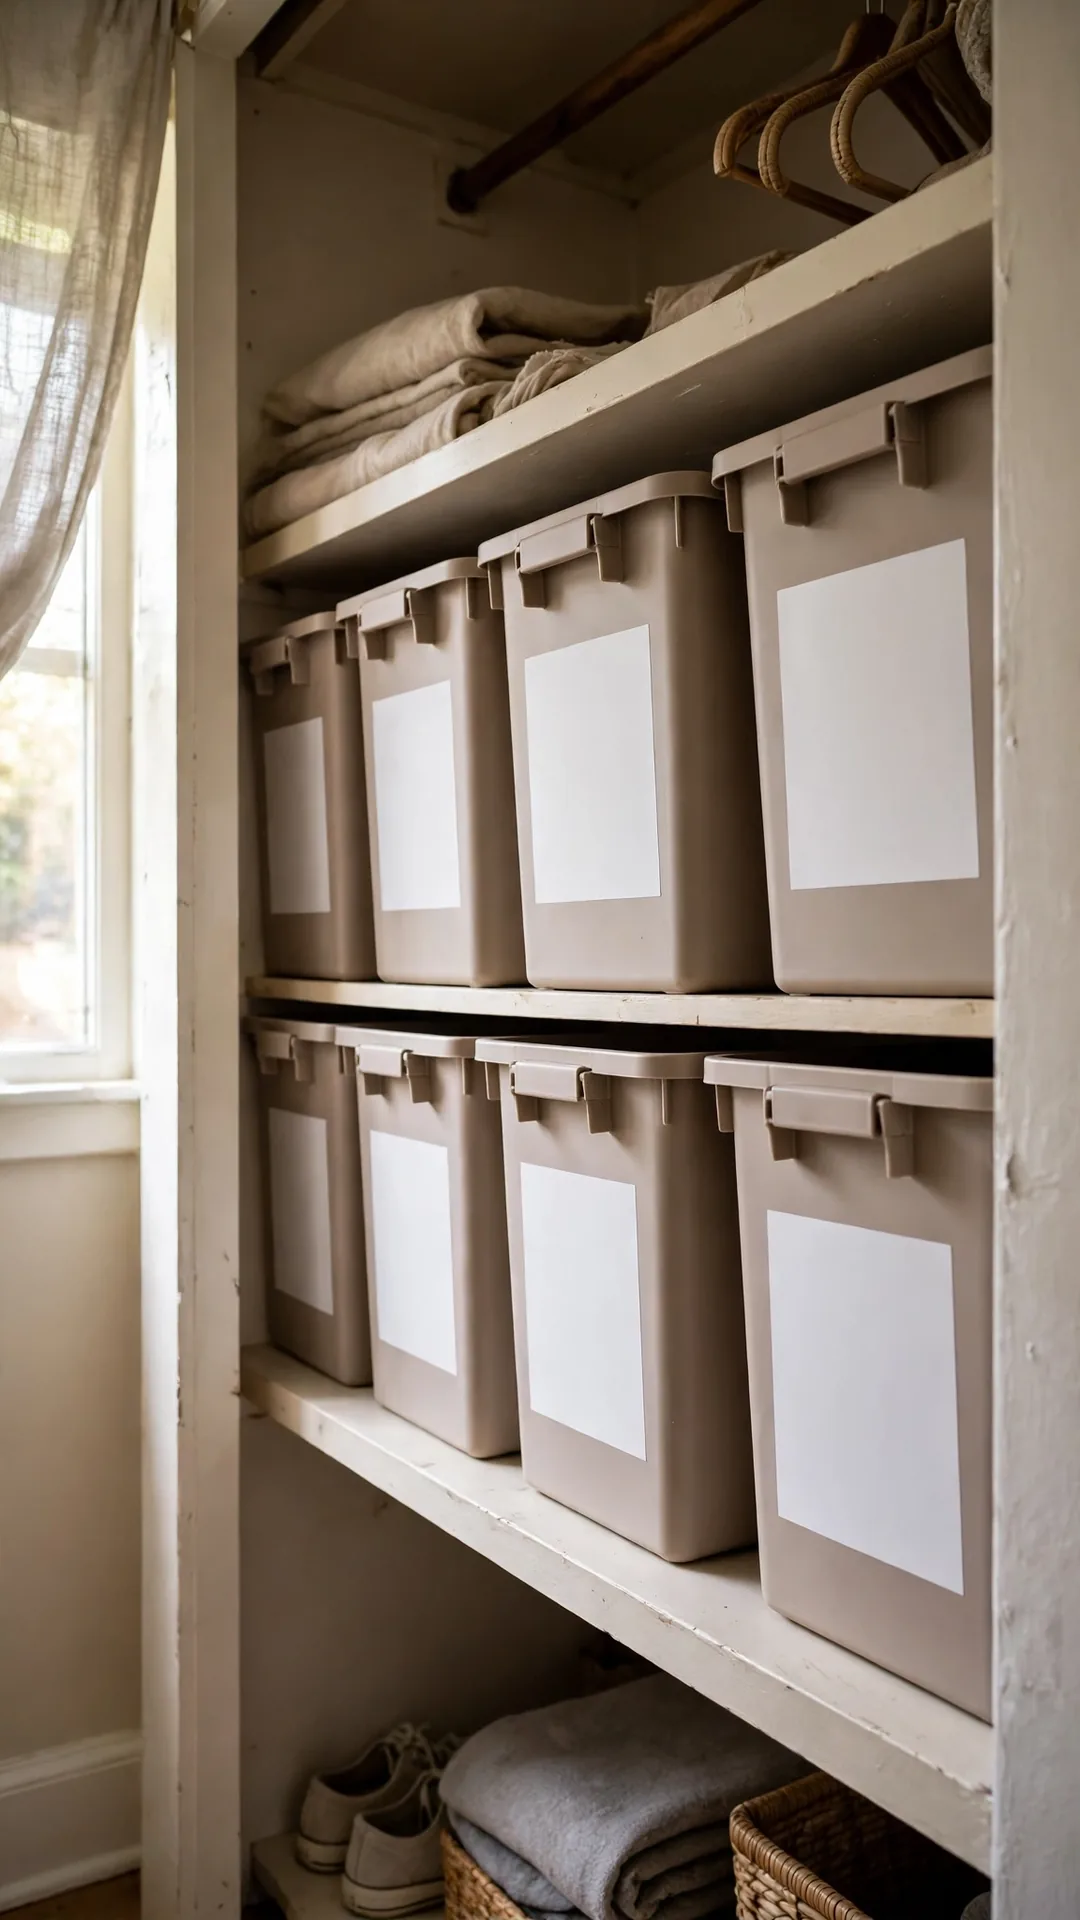
Labels on two sides end the spin and guess routine. You read the bin from the front or the side. The Houzz advice to keep holiday decorations organized and safe starts with this kind of clear system.
How to do it:
- Use large plain labels or wide painter tape.
- Write the holiday and the main contents on each.
- Stick one label on the front, one on a side.
- Face labels out when you stack the bins.
- Update labels the day you repack, not later.
Best for: Stacked bins in closets, garages and lofts.
Budget: $3 to $8
Quick tip: Big plain words read faster than neat small lists.
56. Keep One Small Bin for Broken and Spare Pieces
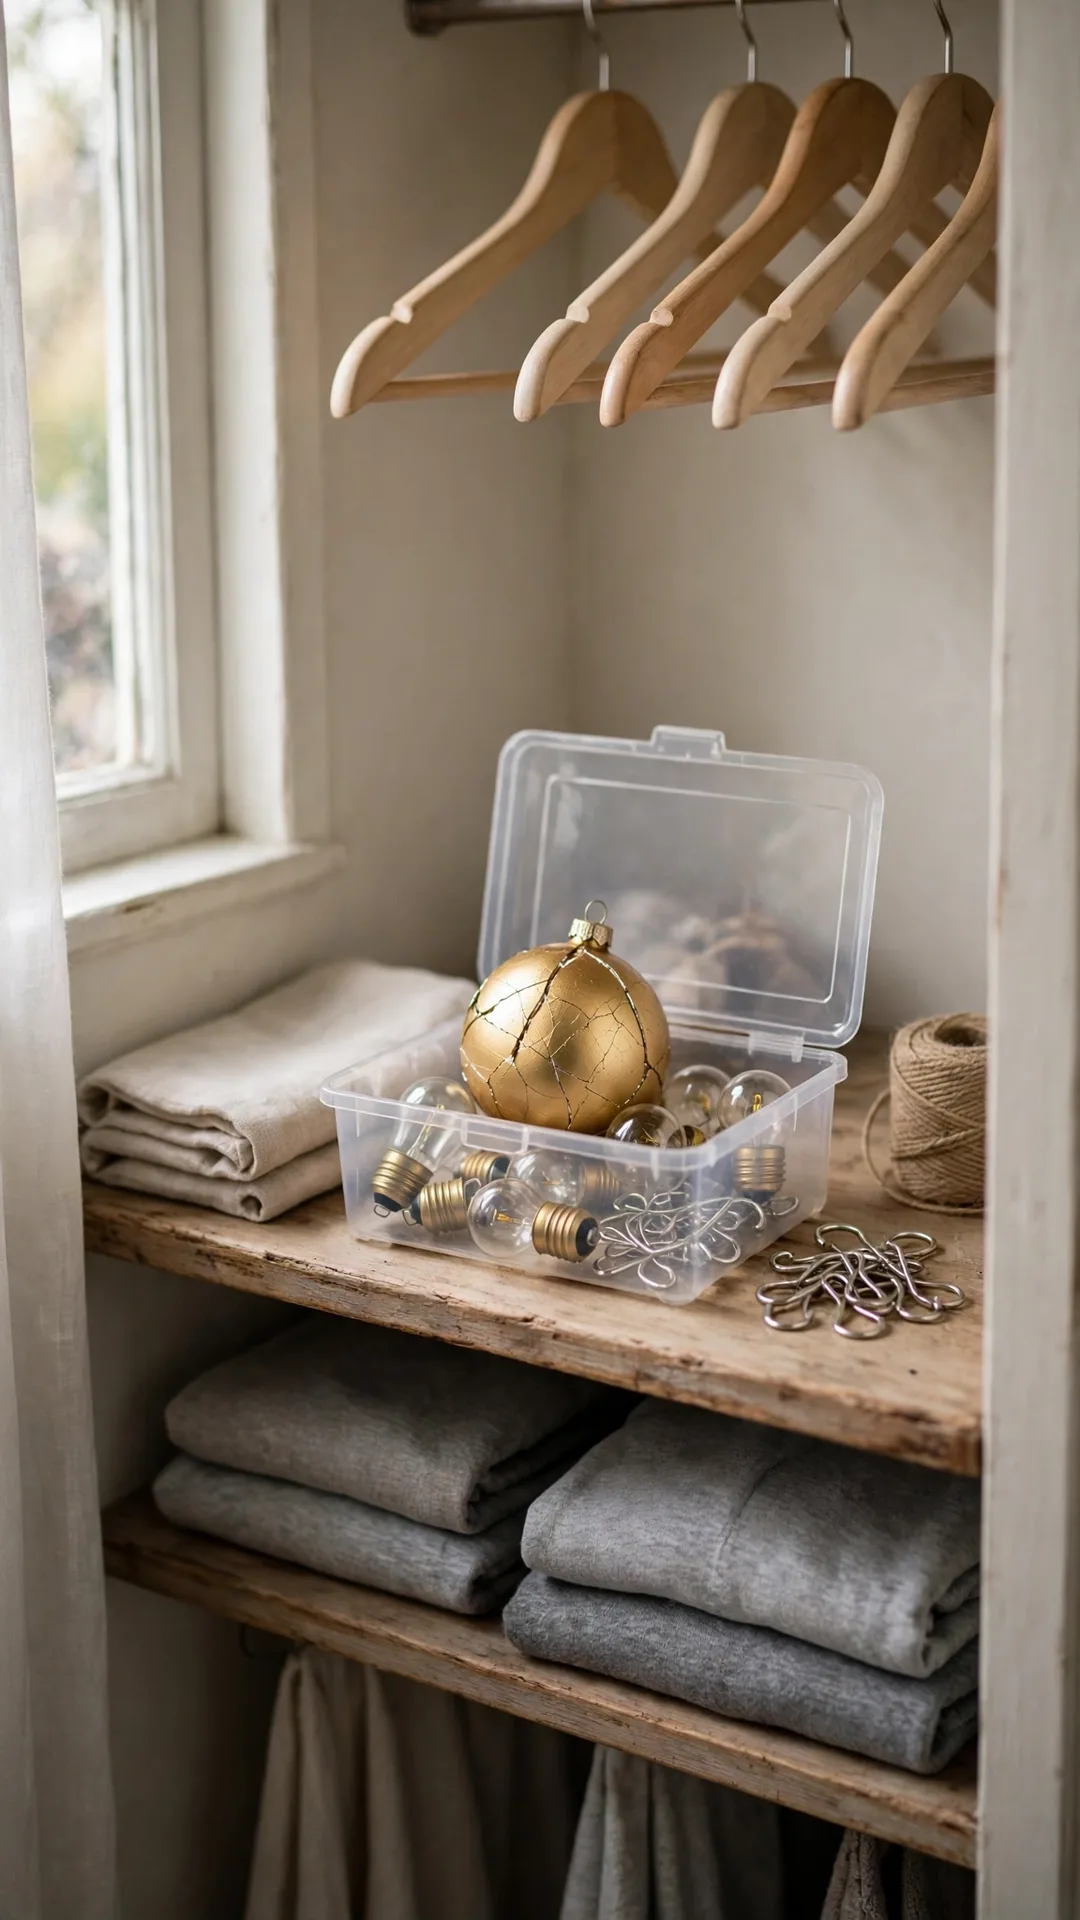
Broken pieces and spares deserve one small home of their own. Loose bulbs and hooks stop migrating into every other box. Honest holiday decoration storage ideas for small spaces plan for breakage too.
How to do it:
- Pick a small bin or box about shoebox size.
- Add spare bulbs, hooks and one glue tube.
- Wrap broken pieces you plan to repair.
- Toss true junk now, not next December.
- Keep the bin on top of the main stack.
Best for: Spares, repairs and almost new pieces.
Budget: Free to $6
Quick tip: Decide repairs by spring, or let the piece go.
57. Swap Seasons in the Same Set of Bins
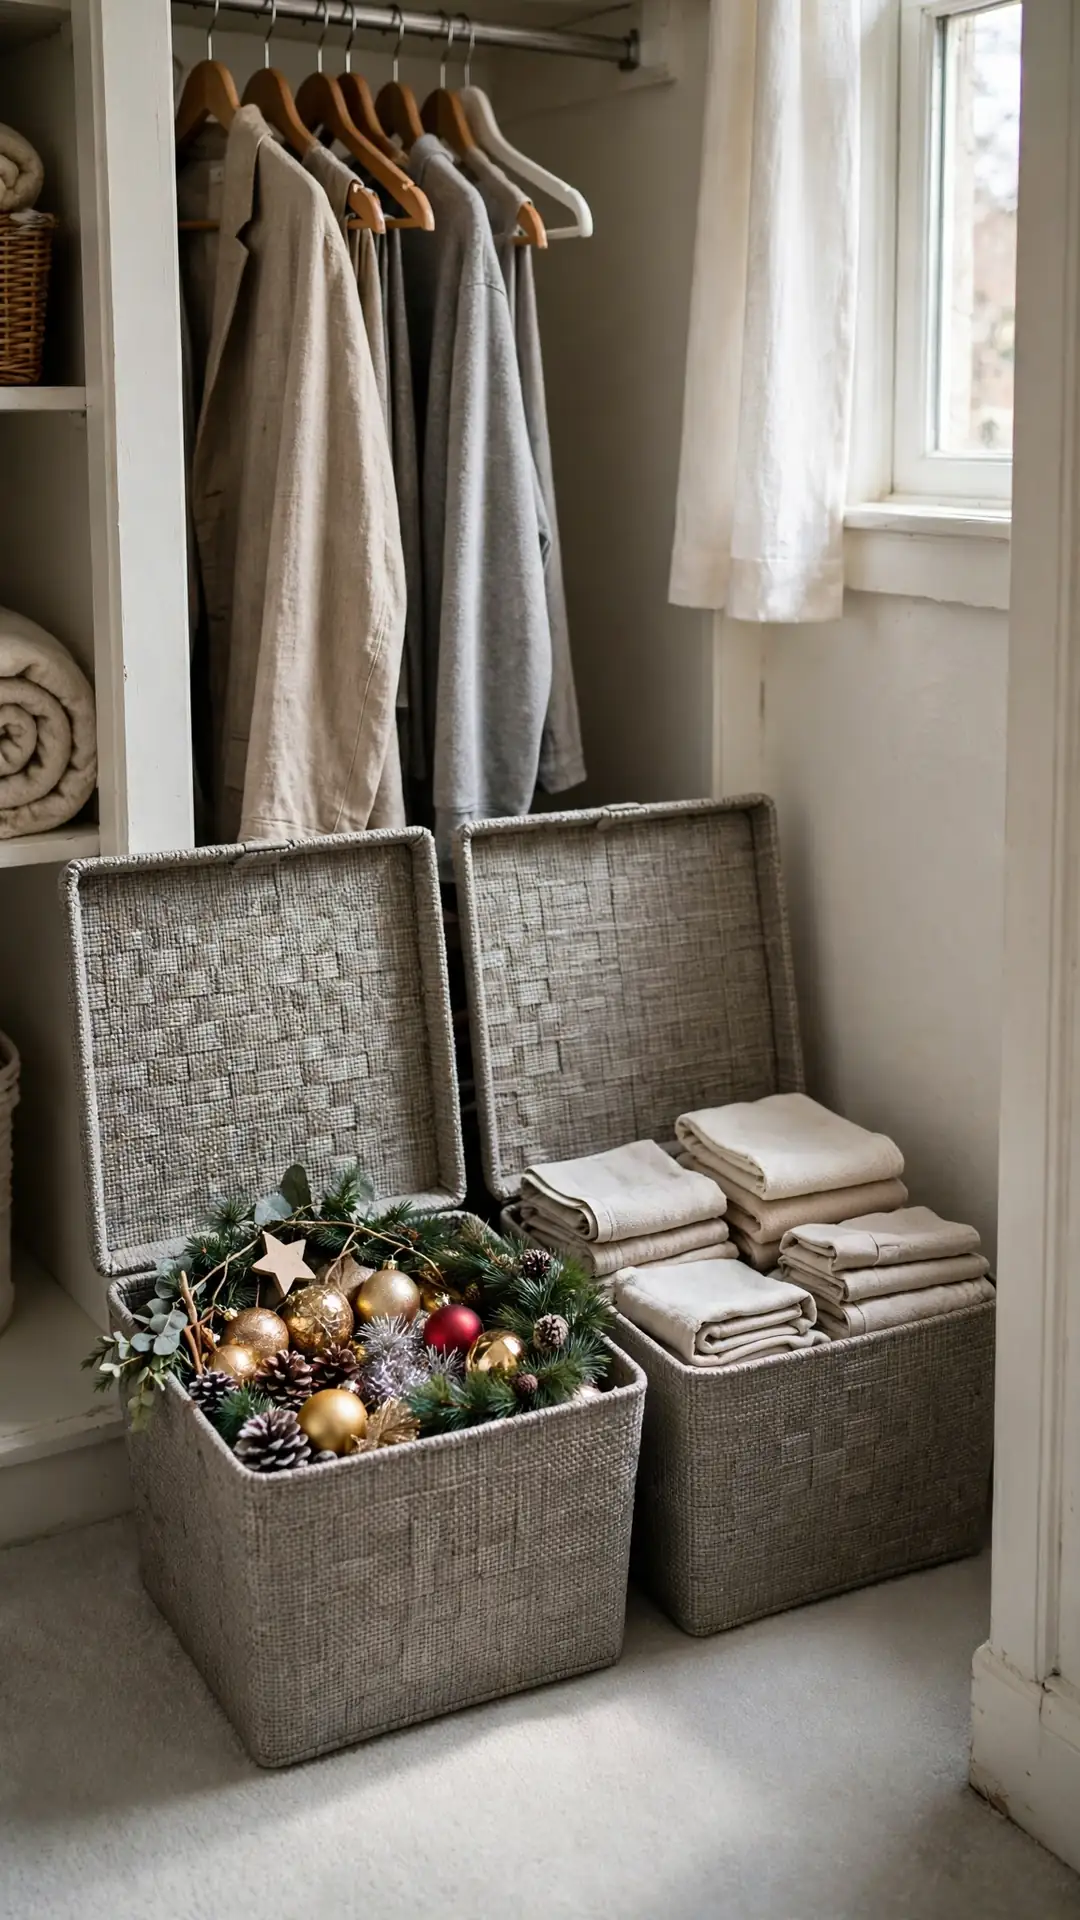
One set of bins can rotate with the seasons. Holiday decor goes in as everyday summer items come out. The bins never grow, so your storage never grows either.
How to do it:
- Pick bins that fit your shelf or closet exactly.
- In January, swap decor in and warm weather gear out.
- Keep one bin per season zone in the home.
- Wash bins quickly between swaps if they held outdoor gear.
- Store the off season set in the least handy spot.
Best for: Studios with one fixed storage shelf.
Budget: Free if you own the bins
Quick tip: A fixed bin count is a built in space limit.
58. Store Batteries and Scented Items Apart
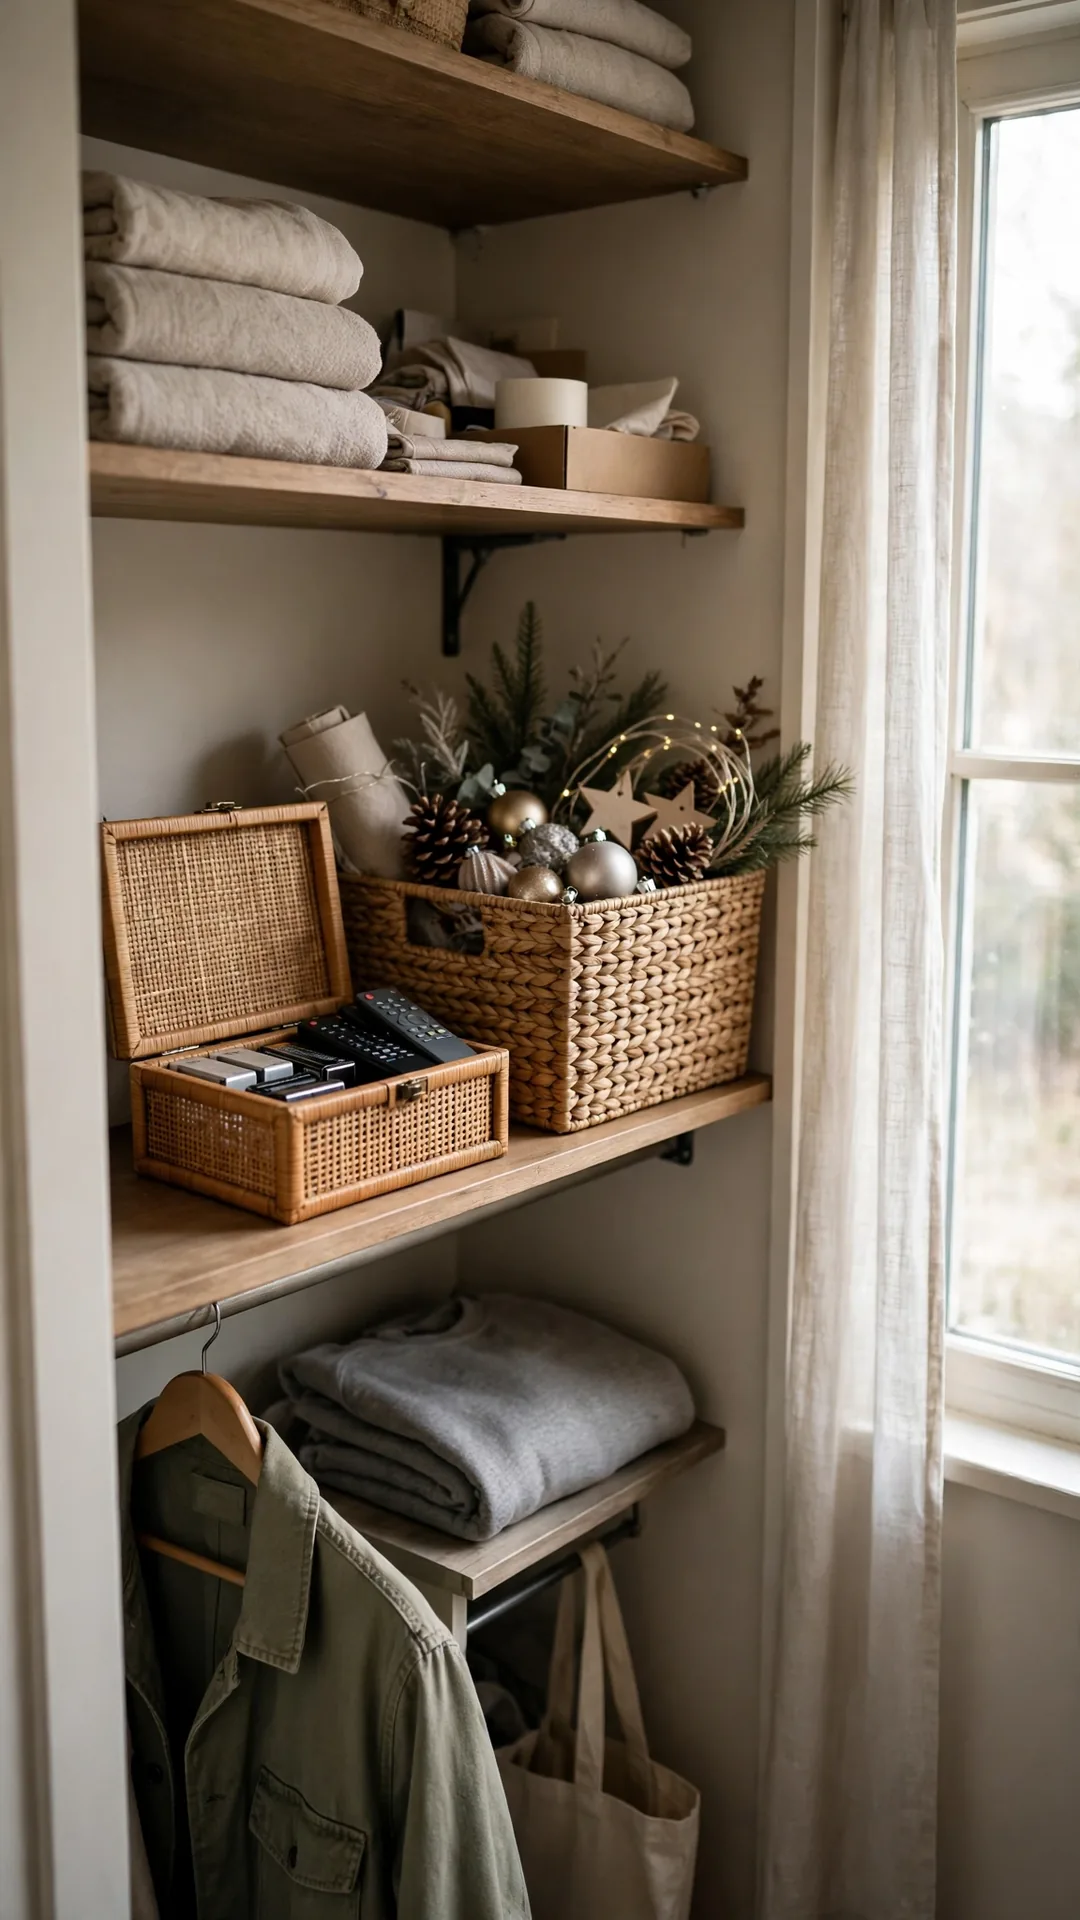
Batteries leak and scented items perfume everything near them. One small apart box keeps both away from fabric, a quiet star among holiday decoration storage ideas for small spaces. Take batteries out of decor before you pack it away.
How to do it:
- Remove batteries from every light and figure.
- Store loose batteries in one small lidded box.
- Bag scented pinecones and candles on their own.
- Keep the box on a shelf, away from heat.
- Check stored batteries once a year for leaks.
Best for: Battery decor, remotes and scented pieces.
Budget: $3 to $8
Quick tip: Batteries out now means no corroded contacts later.
59. Follow a One-In, One-Out Rule for New Decor
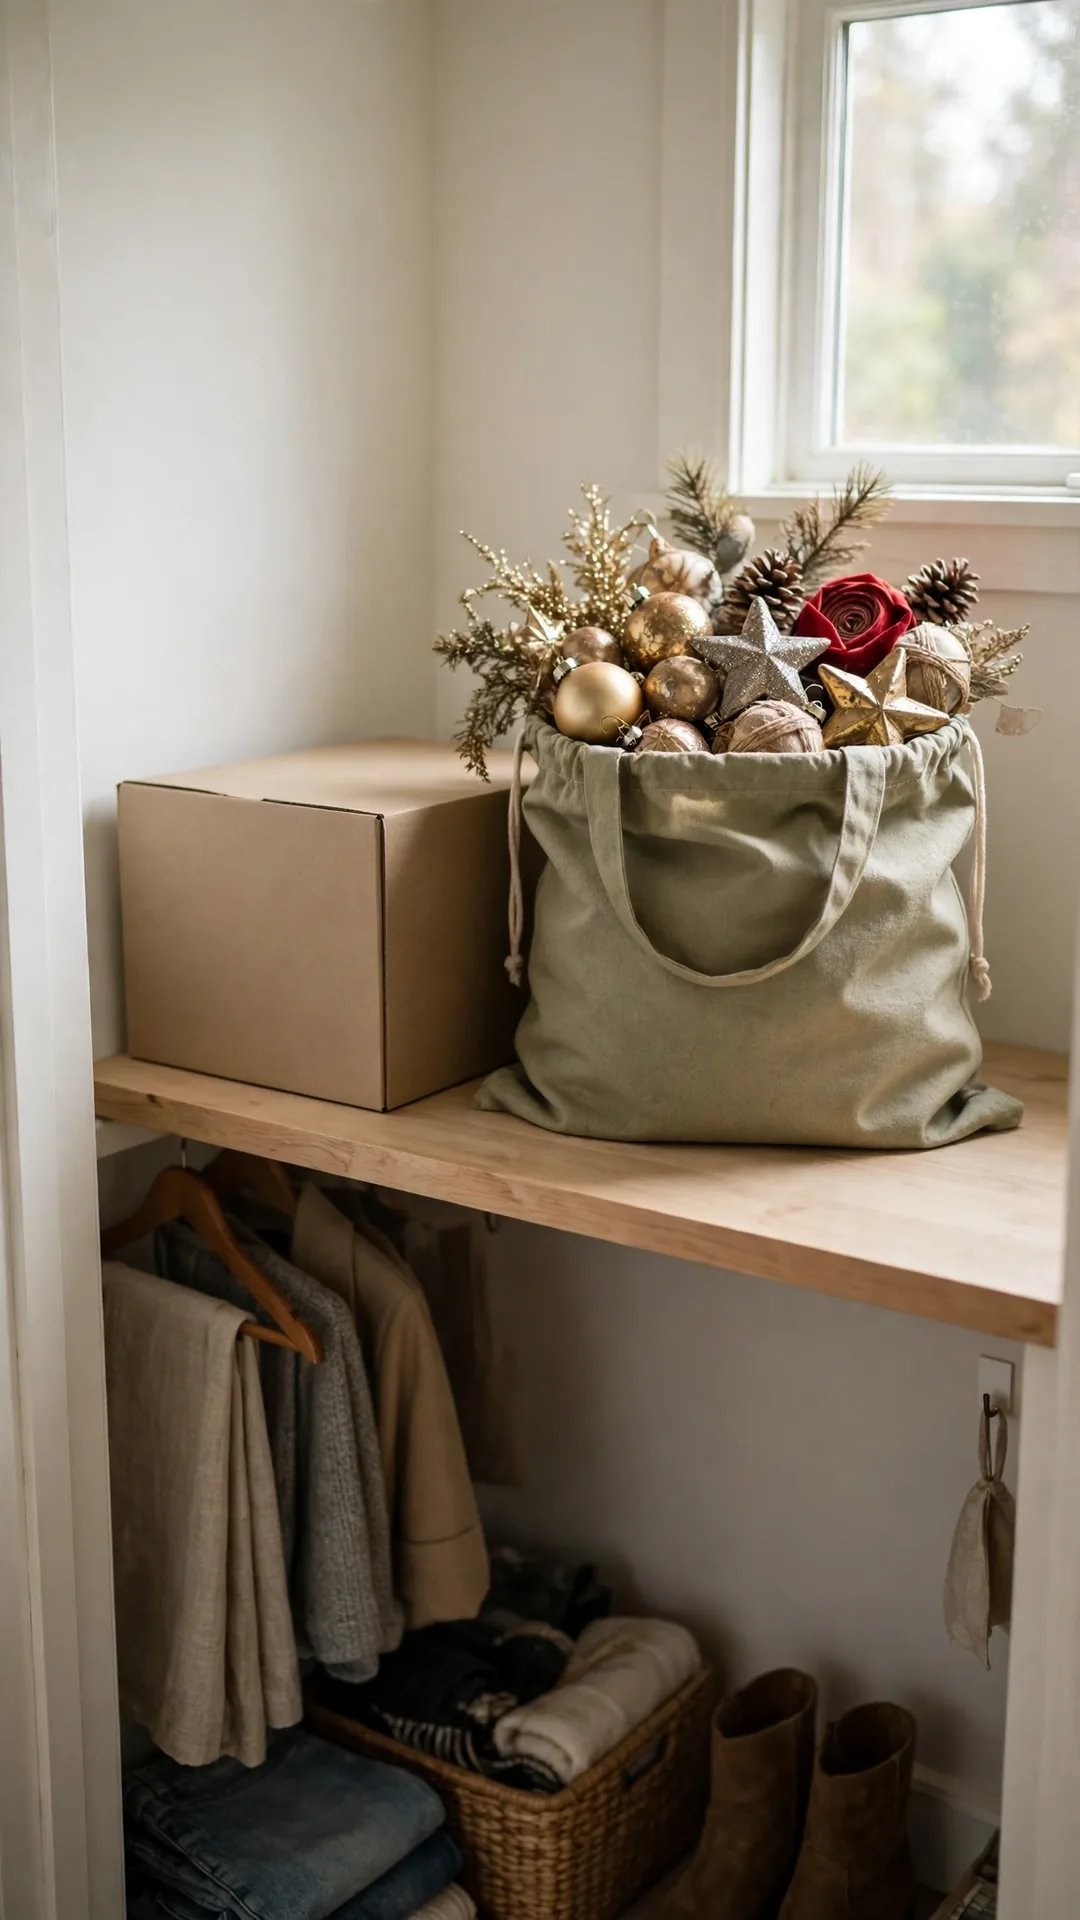
Small homes stay calm when decor volume stays fixed. Each new piece sends one old piece out. Your bins stay the same size year after year.
How to do it:
- Set your bin count and treat it as final.
- When a new piece arrives, pick one to donate.
- Choose the piece you skipped hanging this year.
- Drop donations off before you pack up in January.
- Photograph keepsakes you love but cannot store.
Best for: Collectors in small homes and growing families.
Budget: Free
Quick tip: Decide the outgoing piece while you still shop.
Start With One Bin This Weekend
You do not need a storage unit or a spare room. Pick one bin, one shelf or one door from these holiday decoration storage ideas for small spaces. Set it up today and enjoy the clear floor. Save this post or pin your favorite idea, so next January feels calm.

- 55 Brilliant Small Dining Room Storage Ideas to Try Now - November 14, 2026
- 59 Holiday Decoration Storage Ideas for Small Spaces - November 14, 2026
- 52 Smart Small Mudroom Laundry Room Combo Ideas to Copy Now - November 14, 2026