
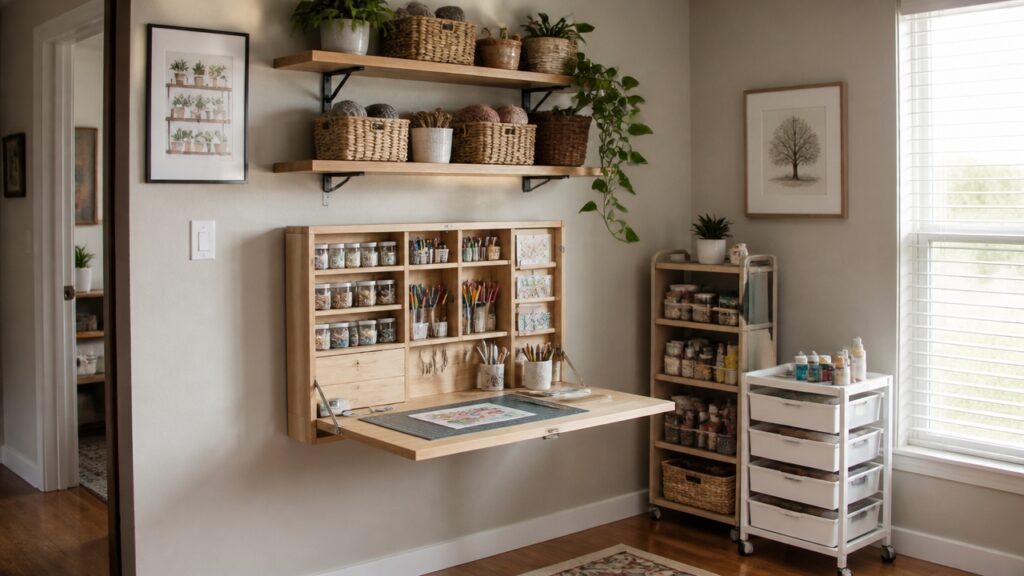
In a corner of your home, be it a patched-together attic or a cramped closet, crafting an organized haven requires a subtle dance of joinery, smart storage, and aesthetic restraint that echoes the design philosophies of Miles Redd and Sarah Richardson, who champion balancing function with delightful visual mise-en-scène; with each bijoux container, modular piece, and colorway, perhaps a muted “Hale Navy” Benjamin Moore hue or a crisp, natural oak finish, you’re constructing more than just cabinets but a cocoon where creativity can flourish amidst purposeful containment, inviting a closer look at how strategic decisions, yet, perhaps, the next step, can ultimately reveal a small space’s true potential, and your own.
Assess Your Small Craft Space Before Organizing
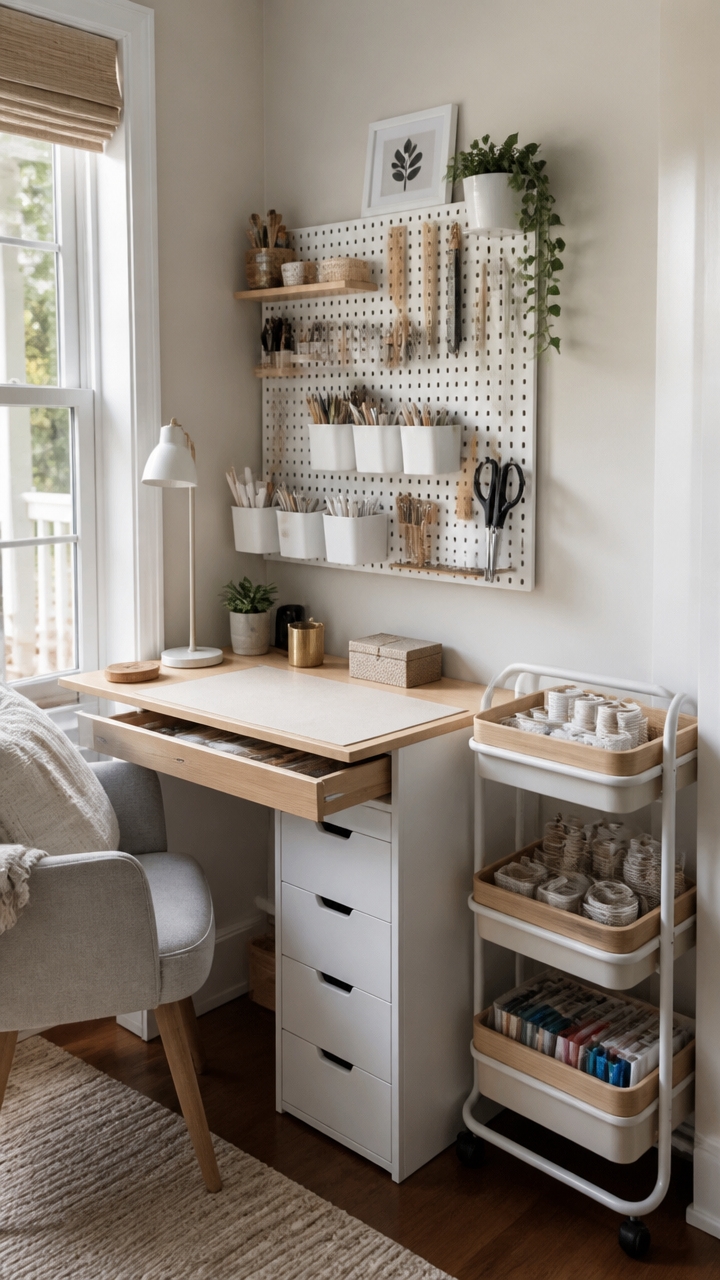
Before diving into organizing your craft space, take a step back to evaluate the area thoroughly. Start by identifying any empty or underutilized sections that could serve as extra storage. Measure these spaces to determine what size and type of storage solutions, such as shelves, bins, or craft carts, will fit comfortably without overcrowding the room. Clear out any clutter or unnecessary items first; this will give you a better view of what supplies you truly need to store and streamline your workspace. Pay attention to how you move around in the space, organizing tools and materials in a way that considers traffic flow will make your craft time more efficient and enjoyable. Additionally, make a list of your most-used supplies versus those you rarely access. Prioritize placing frequently used items close at hand for easy access, while storing less-used materials in out-of-the-way areas. Incorporating space-saving strategies can help maximize every inch of your small craft area, making it more functional and less cluttered. This initial assessment sets the foundation for a functional, organized craft space tailored to your needs.
Declutter First to Maximize Storage Efficiency
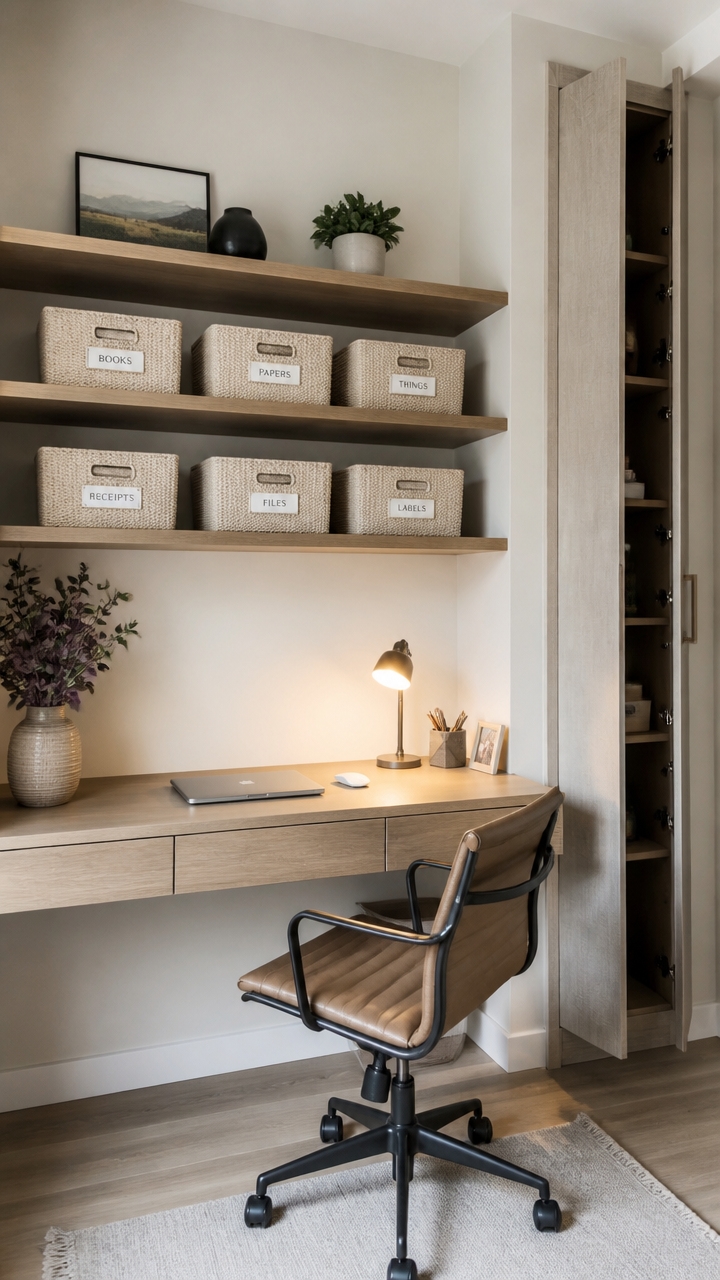
Before investing in storage solutions or reorganizing your craft space, start with a thorough decluttering process. Sorting your supplies into categories such as Keep, Donate, Garbage, and Maybe allows you to identify what is truly useful and necessary. Dispose of broken, unused, or duplicate items, and consider re-homing items that belong in other areas of your home, like the garage or basement. This not only clears valuable space but also makes it easier to see what you have and avoid buying duplicates. Regularly maintaining this process helps prevent clutter from building up again, ensuring your workspace remains functional, inviting, and streamlined. A decluttered area enhances accessibility and maximizes your storage options, making crafting more enjoyable and less frustrating. Incorporating space-saving strategies inspired by small bathroom ideas can also help optimize your craft storage.
Rearrange Furniture and Layout for Better Functionality
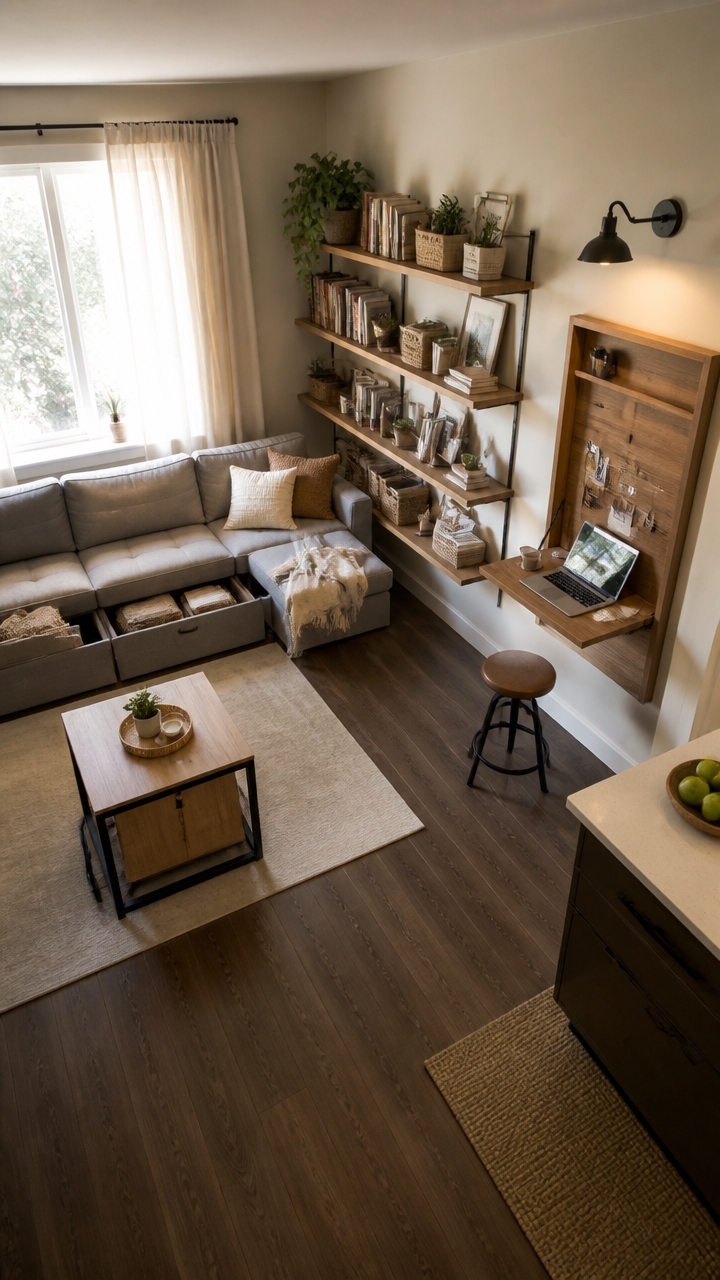
Rearranging furniture and layout for better functionality can dramatically enhance a small craft room’s usability. Start by moving shelves and desks to different locations within the space, experimenting with various arrangements to find the most efficient setup. To plan effectively, use masking tape on the floor to outline potential furniture positions, and sticky notes to label items and storage zones. This approach allows you to visualize different configurations without making permanent changes, saving time and effort. Considering space-saving strategies can help optimize every inch of your small craft space. Mapping out the room before moving furniture helps identify underutilized areas and reveals the best placement for your work surfaces, tools, and storage. Consider positioning larger storage units along walls to maximize open space, and avoid bulky furniture that can make the room feel cramped. Removing unnecessary or oversized pieces creates a more open, accessible environment that encourages creativity. For a highly functional layout, create a “kitchen-style” work zone with a central island or table for cutting, assembly, or workspace, surrounded by perimeter shelves and cabinets for storage. This configuration streamlines workflow, keeps everything within reach, and makes the small space feel organized and inviting. Remember, flexibility is key, so don’t hesitate to shift things around until you find the layout that best suits your craft needs.
Identify Creative Unlikely Areas for Craft Storage
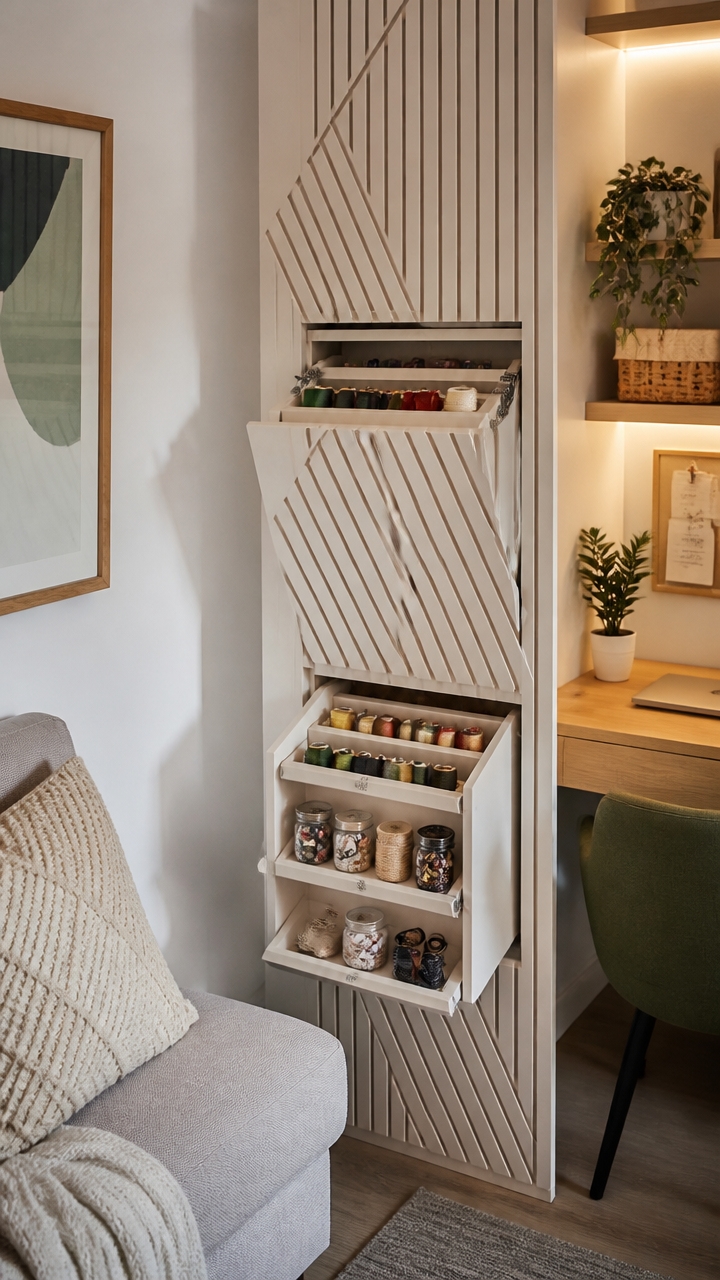
Transforming small or unconventional spaces into functional craft storage can make a significant difference in keeping your supplies organized and accessible. Look beyond traditional storage areas and consider the often-overlooked nooks and crannies in your home. For instance, attic spaces can be converted into efficient craft rooms by installing sturdy shelving along the walls and adding adequate lighting to brighten the area. This not only makes use of an otherwise wasted space but also creates a dedicated zone for your projects. Incorporating space-saving strategies can further maximize these unusual spots, ensuring every inch is utilized effectively.
Small corners of closets or under-stair areas can be optimized with custom-built shelving or cabinetry designed specifically for your crafting needs. These space-maximizing solutions can snugly fit into tight spots, turning awkward areas into highly functional storage spots. Another clever idea is to utilize the tops of door frames or window sills, lightweight supplies like spools, jars, or small containers can be stacked here without cluttering your main work surfaces.
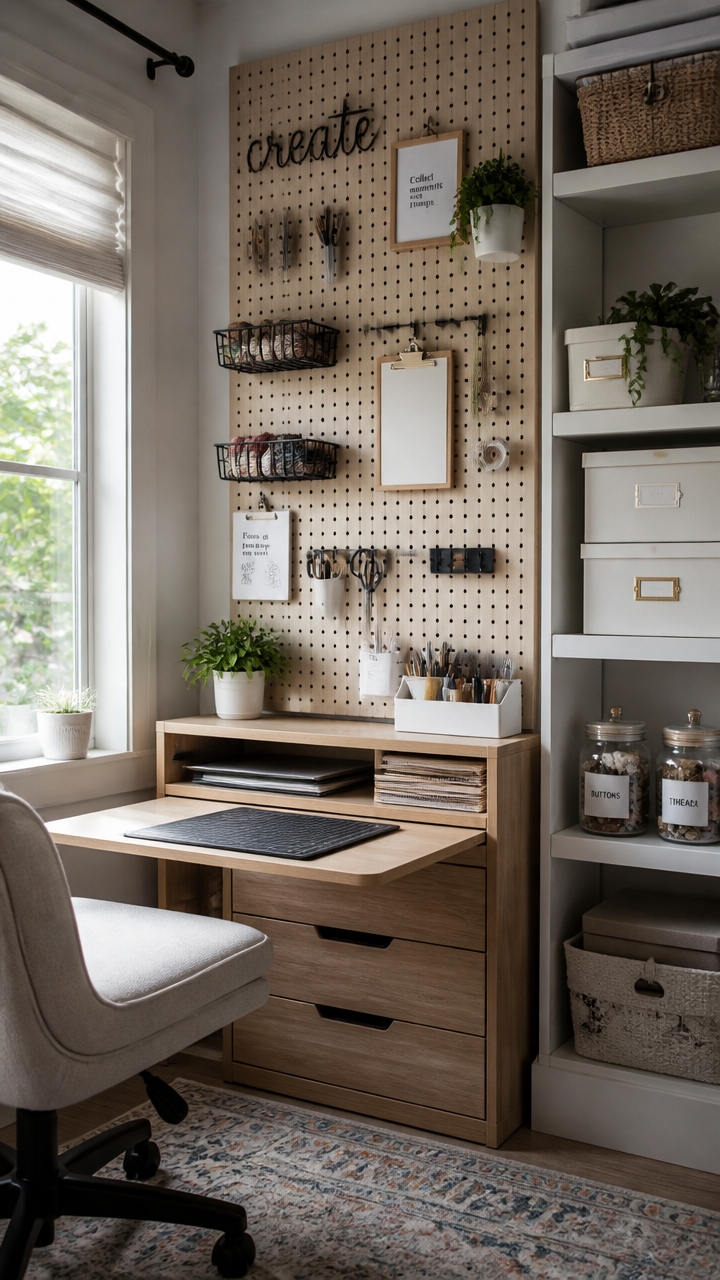
Alcoves or niches are perfect for creating mini craft stations. Mount pegboards, hooks, and stackable bins inside these small spaces to keep supplies organized and within easy reach. Similarly, you can utilize the backs of closet doors by hanging organizers, pockets, or hooks to store ribbons, tools, and embellishments. These hidden storage options keep your craft area tidy and free of clutter while maximizing every inch of your home.
Exploring and repurposing unlikely spaces makes your crafting area more organized and inspiring, all without sacrificing valuable living space.
Transform Attics, Basements, or Closets Into Craft Rooms
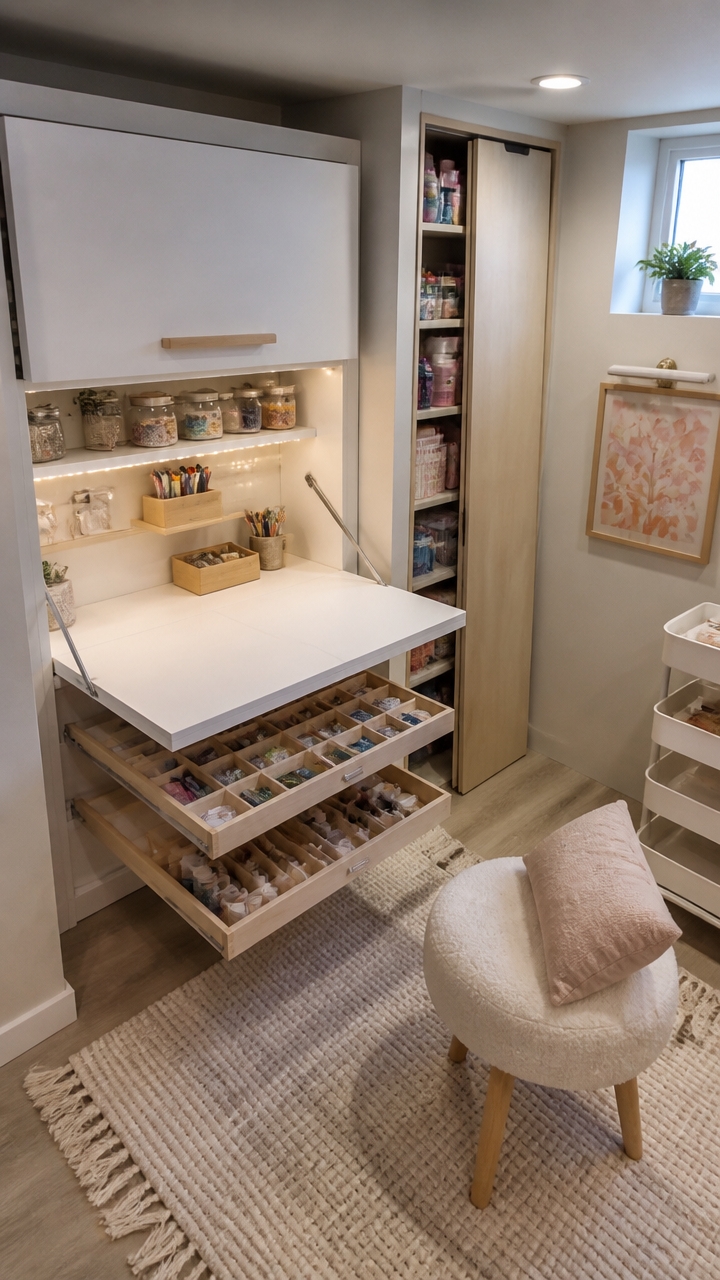
Transforming attics, basements, or closets into functional craft spaces is a fantastic way to maximize every inch of your home. These often-overlooked areas can become organized, inspiring zones with the right updates. Converting an unfinished attic into a craft room involves installing proper flooring, insulation, and lighting, creating a comfortable space that can handle your creative projects year-round. Basements can be turned into efficient craft areas by waterproofing to protect your supplies and adding strategic shelving to keep everything neat and accessible. Small closets, typically limited in space, can be repurposed as cozy craft nooks by integrating custom shelves, pegboards for hanging tools, and stackable bins to utilize vertical storage fully. Creative renovations like removing non-load-bearing walls or installing fold-away work tables can further optimize these tight areas, offering versatility without sacrificing floor space. Additionally, clever use of under-stair storage can hide craft supplies while maintaining an uncluttered room. Proper storage solutions are essential for keeping supplies organized and easily reachable in small craft spaces. These transformations not only keep your craft supplies organized but also inspire creativity by turning small, underutilized spaces into dedicated, functional zones.
Choose the Best Clear and Opaque Storage Bins for Your Supplies
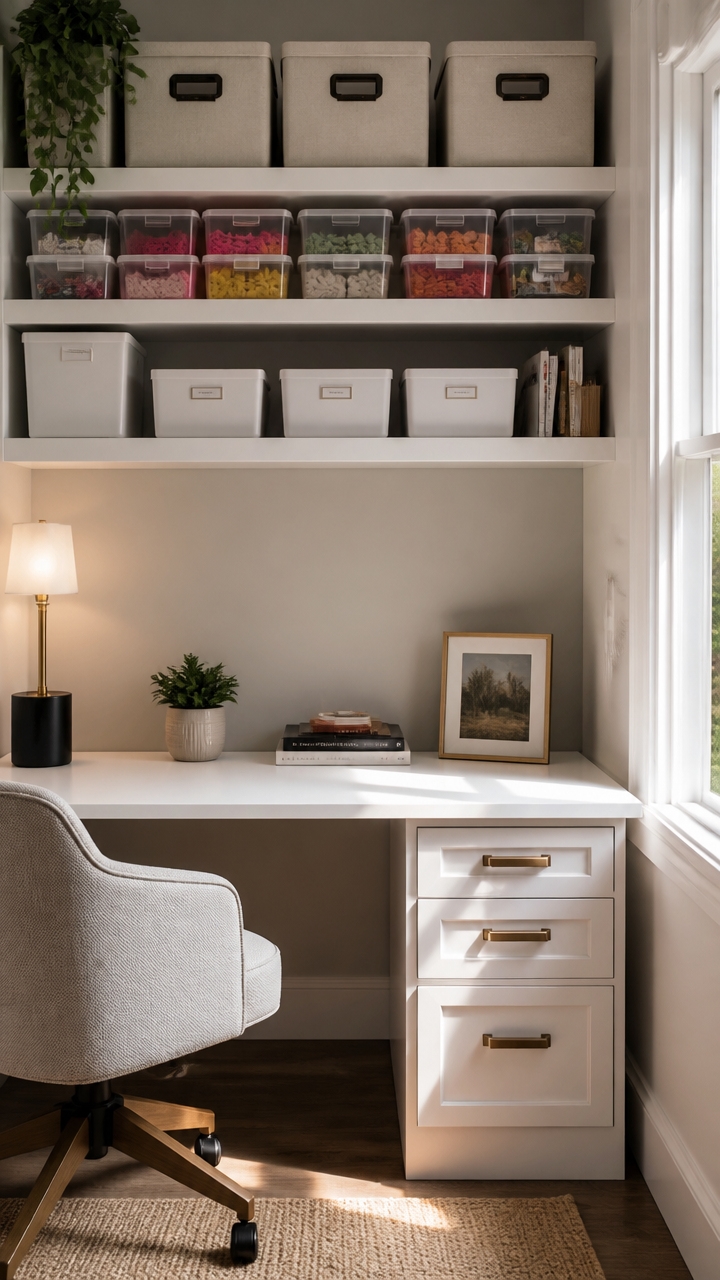
Selecting the right storage bins is essential for maintaining an organized and functional craft space. Clear bins are perfect for materials you frequently use or want to quickly identify, as their transparency provides instant visibility of contents. Acrylic or plastic clear bins are durable, lightweight, and allow you to see exactly what’s inside without opening them, saving time during projects.
Opaque bins, on the other hand, are ideal for hiding clutter and creating a sleek, tidy appearance. They work well for supplies that are less often used or less visually appealing, helping to keep your workspace looking clean and minimal. Choosing opaque containers in neutral tones, like white or black, can complement your decor and reduce visual distraction.
When combining both types, consider placing clear bins at eye level for easy access and quick identification, while storing opaque bins on higher shelves or in less visible areas. Pay attention to size and stackability to maximize vertical space, look for bins that fit your storage area without overcrowding and can be securely stacked to keep everything stable and accessible. Properly selecting and arranging your clear and opaque storage bins makes your craft space more organized, efficient, and enjoyable to work in.
Group Supplies by Category for Faster Crafting
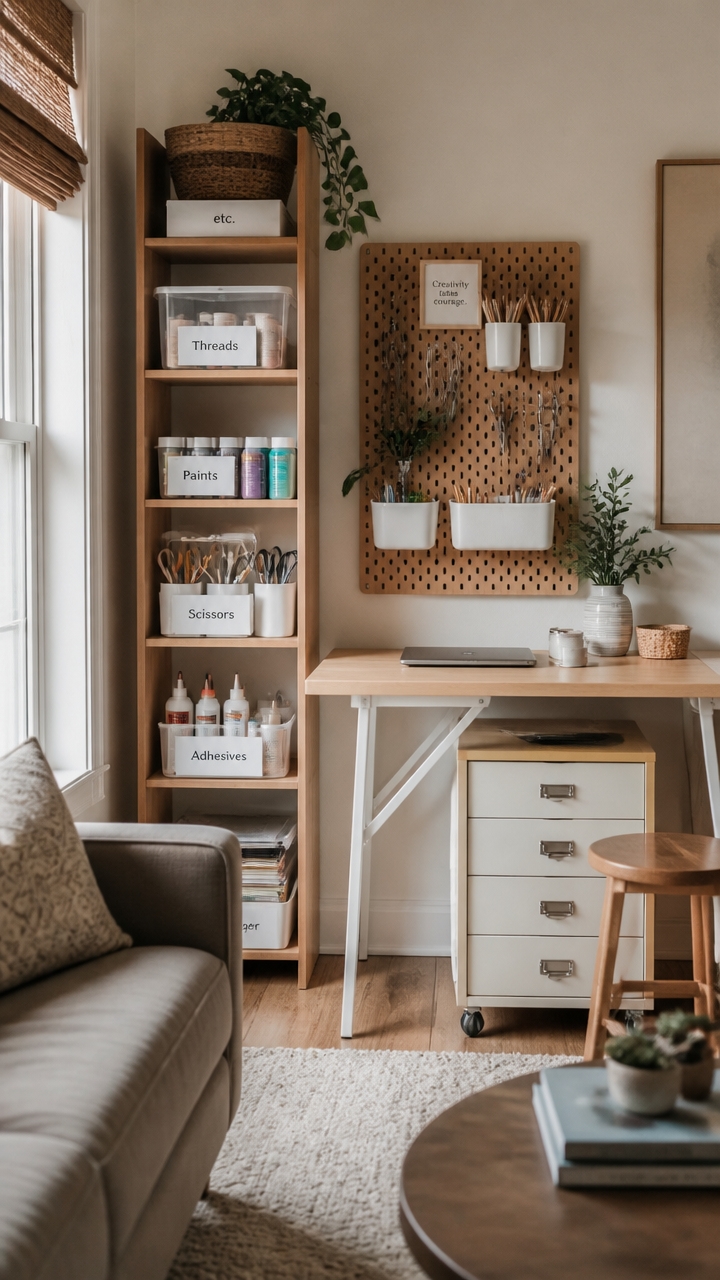
Grouping supplies by category speeds up your crafting process and keeps your space tidy. Use clear containers or small bins to separate paints, ribbons, stickers, and other supplies. Label each container clearly with words or colors to make grabbing what you need quick and easy. Arranging similar items together not only cuts down on time searching but also minimizes clutter, making your workspace more inviting and inspiring. Consider using stackable drawers or divided trays to maximize space and keep everything visible at a glance. Regularly reassess your categories to confirm your organization system continues to serve your evolving craft projects effectively.
Use Vertical Space With Shelves, Pegboards, and Wall Storage
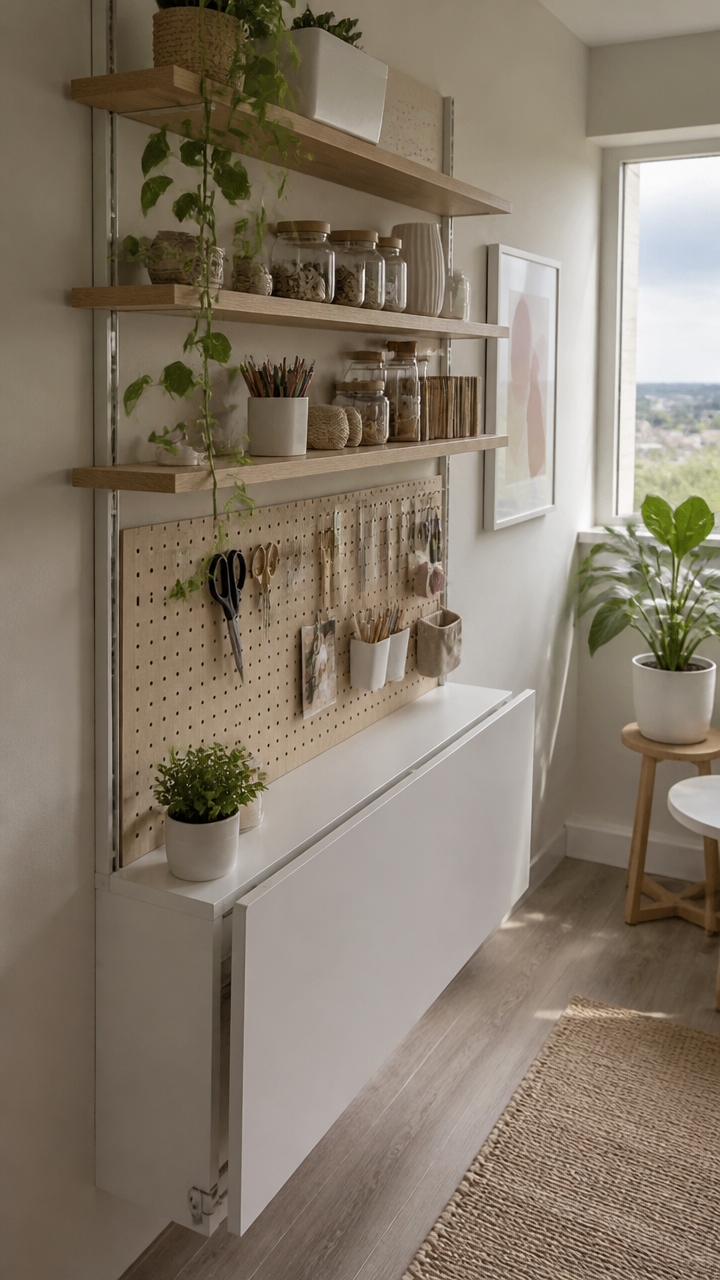
Maximizing vertical space is key to keeping a small craft area organized and functional. Installing wall-mounted shelves provides accessible storage for frequently used supplies, keeping your tabletops clear and clutter-free. Open shelves allow you to see everything at a glance, making it easier to find what you need quickly. Pegboards are versatile and customizable; hanging hooks and holders on them can store tools, scissors, ribbons, and stamps neatly in designated spots. Their adjustable nature means you can tailor the layout as your collection grows or changes. Wall-mounted racks or baskets are excellent for smaller items like buttons, beads, or washi tape, keeping them grouped and within easy reach. Combining these strategies not only provides ample storage but also utilizes often-underused vertical space, making your craft room feel larger and more organized. Proper placement, preferably above work surfaces or in corners, maximizes efficiency and keeps your crafting area tidy and inspiring.
Incorporate Small Cabinets and Stackable Drawers to Save Space
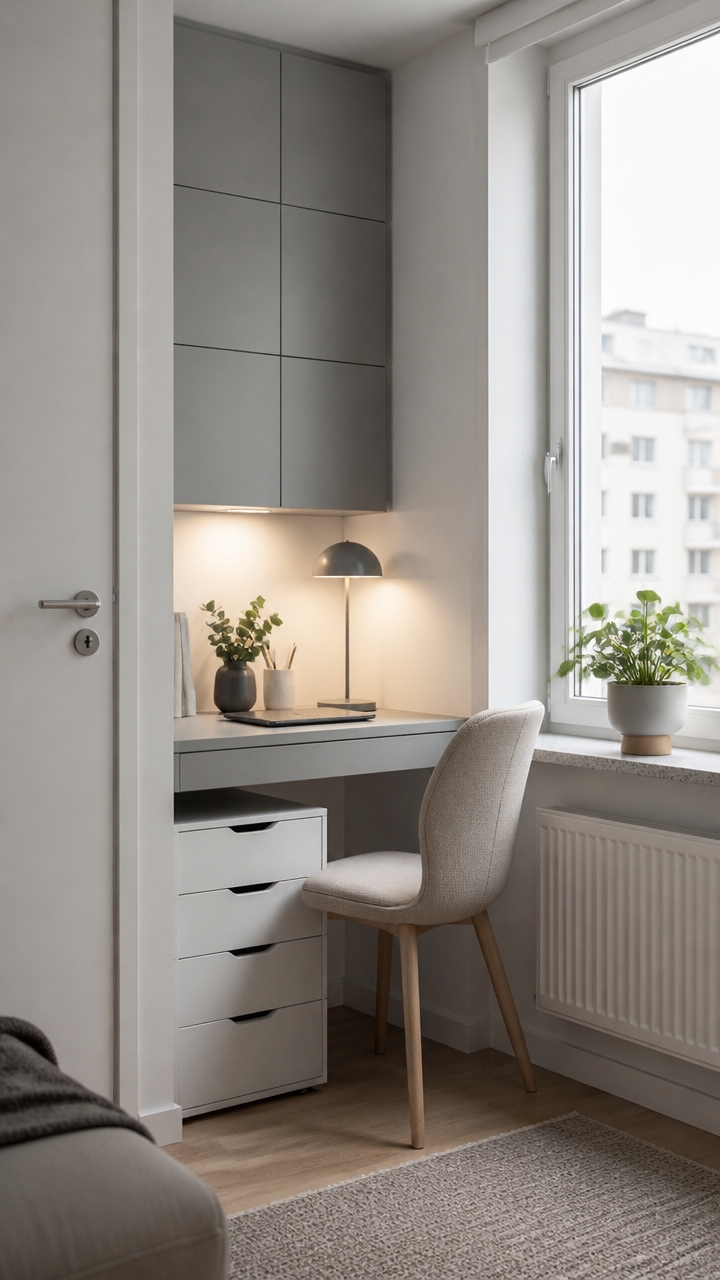
Incorporating small cabinets with stackable drawers is an effective way to maximize vertical storage in compact craft spaces. These cabinets can be placed on countertops or integrated into existing shelving units, providing a dedicated area for organizing supplies. The stackable drawers allow you to categorize items such as paints, beads, fabric scraps, or tools, making it easy to locate what you need quickly. Their modular design also means you can add or remove drawers depending on your storage needs, adapting to different projects. Opt for clear or acrylic drawers to keep contents visible without opening multiple compartments, saving time and reducing clutter. Choosing compact cabinets with adjustable or removable trays further enhances flexibility, letting you customize storage for various supplies. When placing these cabinets, verify they fit snugly into tight corners or beneath work surfaces to optimize every inch of your small craft space.
Organize Vinyl Rolls and Small Items With Labeled Acrylic Bins
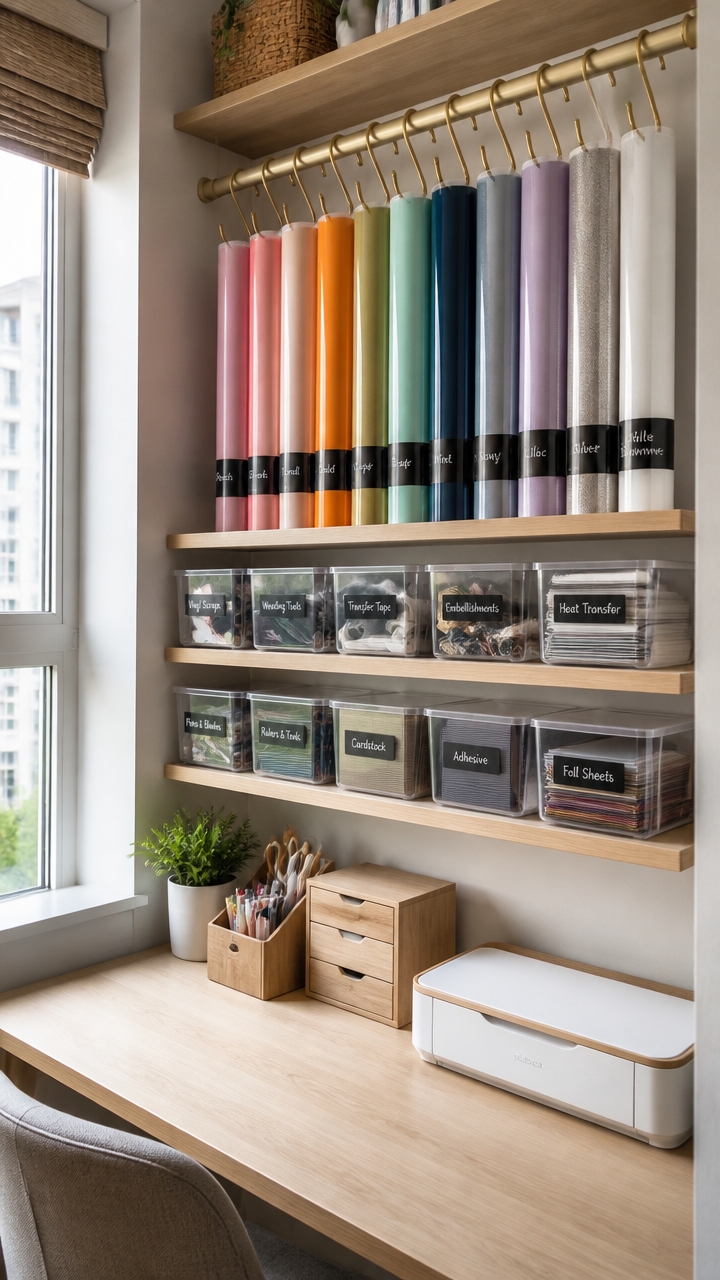
Using large, clear acrylic bins to store vinyl rolls creates a tidy, easily accessible system in your craft space. Divide the bins by type and color, such as “Matte Colors,” “Patterned,” or “Specialty Vinyl”, to streamline your workflow and simplify logo-and-color selection. Label each bin clearly to prevent misplacement and to help you quickly identify what you need. The transparency of acrylic allows you to monitor supply levels at a glance, so you can restock before running out and avoid unnecessary delays. Position these bins on open shelves or inside cabinets to maximize vertical storage space, keeping your crafting area organized and clutter-free. Small items like stickers, embellishments, and tiny tools can also be grouped in labeled acrylic containers nearby, maintaining a cohesive, visually clean workspace that’s both functional and inspiring.
Set Up Dedicated Zones for Different Craft Projects
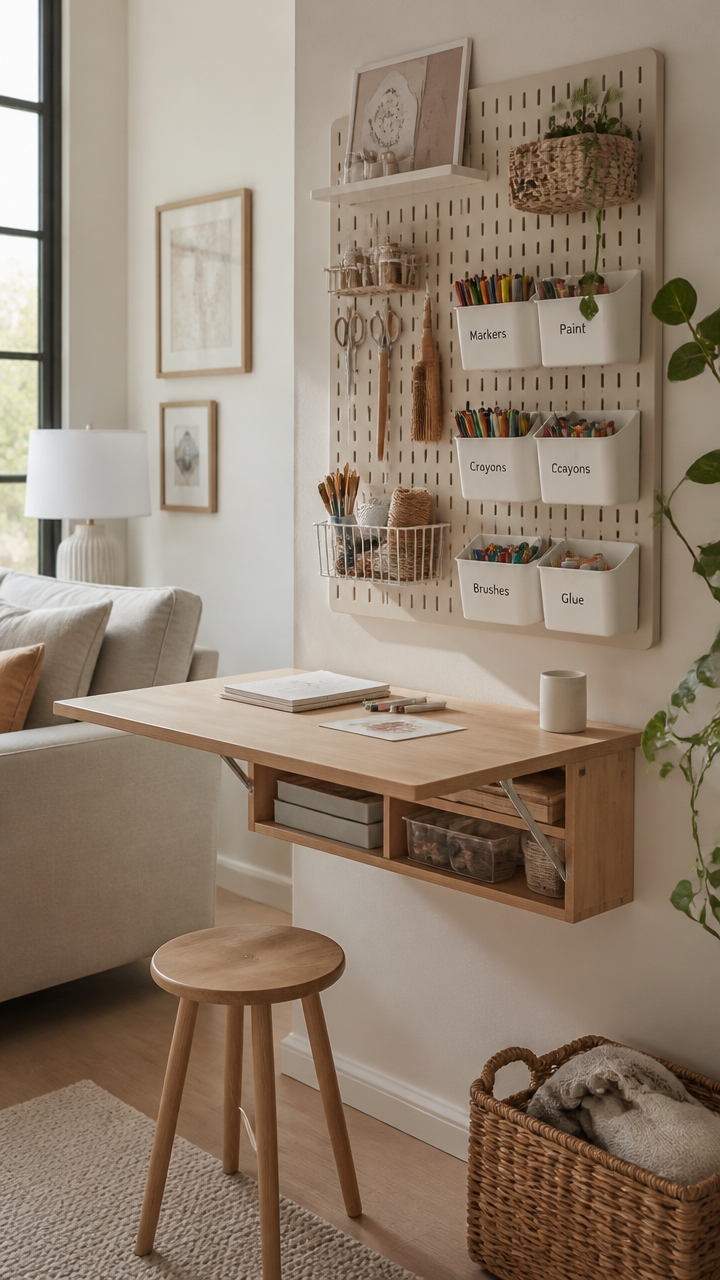
Setting up dedicated zones for different craft projects is a highly effective way to organize a small craft space. By creating specific areas for activities like cutting, gluing, and assembling, you can streamline your workflow and reduce clutter. These zones should be equipped with tailored storage solutions such as small shelving units, cubbies, and labeled bins to keep supplies accessible and organized. Using clear labels and color-coded containers within each zone allows for quick identification of materials, saving you time and effort when switching between projects. Strategic placement of these stations can also help maintain a clean workspace, prevent cross-contamination of supplies, and foster focused creativity. Concentrating each craft activity in its designated area makes your entire space more efficient, inspiring, and enjoyable to work in.
Make Creative Hacks Using Everyday Items for Storage
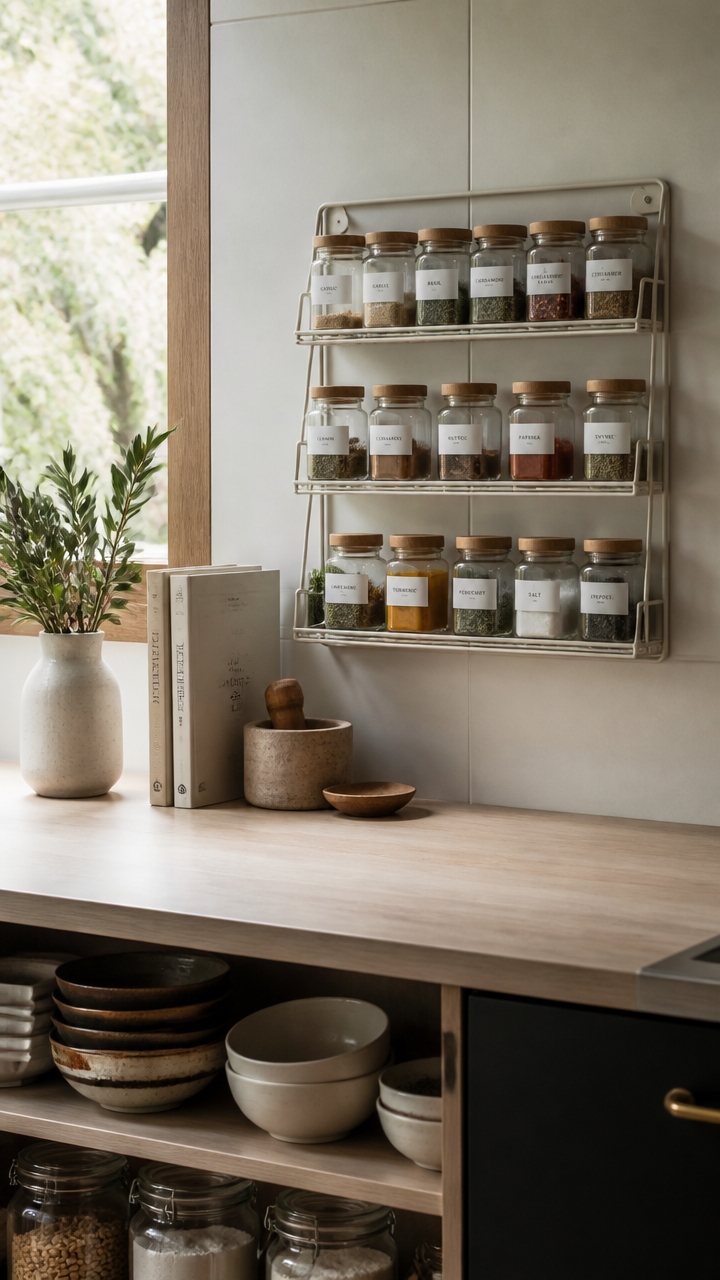
Repurposing everyday household items can be a game-changer in organizing a small craft space. Empty jars and cans are versatile containers that can store small embellishments like buttons, beads, or glitter. By stacking or lining these containers, you create easily accessible storage while utilizing items you already have. For instance, clear jars allow you to see contents at a glance, helping you quickly find what you need without rummaging through drawers. Placing these on a shelf or a designated craft corner keeps your supplies tidy and within reach, making your workspace more efficient.
Muffin tins and cupcake liners are perfect for compartmentalized storage. They keep tiny supplies like rhinestones, brads, or sequins separated and visible, preventing items from mixing together. Set the muffin tin on a shelf or desk surface, and fill each cup with a different small item. When not in use, you can cover the tin with a cloth to keep dust out, or even stack multiple tins to save space. These simple, inexpensive tools turn cluttered craft surfaces into organized workstations.
Cardboard toilet paper or paper towel rolls can be transformed into cord and ribbon organizers. Cut a slit in each roll and thread the end of cords or ribbons through to prevent them from tangling. Mount these rolls vertically on a wall or store them in a bin or drawer, with the slits facing outward. This DIY solution keeps your cords and ribbons neat and easy to find, especially in small spaces where space-saving is key. Plus, using recycled materials adds an eco-friendly touch to your organization system.
Using a spice rack or small plastic baskets offers clear and accessible storage for paints, markers, and fabric clips. Spice racks are often compact and can be mounted on the wall or placed on a shelf, making supplies visible and organized in layers. Small plastic baskets can be labeled and stored in a drawer or on a shelf, keeping supplies contained yet easy to locate. These solutions maximize vertical and horizontal space while maintaining a tidy, clutter-free craft area.
A vintage silverware or jewelry tray provides a stylish way to corral small tools and supplies. Place it on your craft desk or shelf, filling it with scissors, glue sticks, or tiny embellishments. Its decorative appearance adds charm to your space while serving as practical storage. Using these trays can bring a touch of elegance to your organization, turning everyday items into functional decor. Ideal for small spaces, this method keeps your tools within arm’s reach and your workspace visually appealing.
Install Over-the-Door Organizers and Hanging Baskets
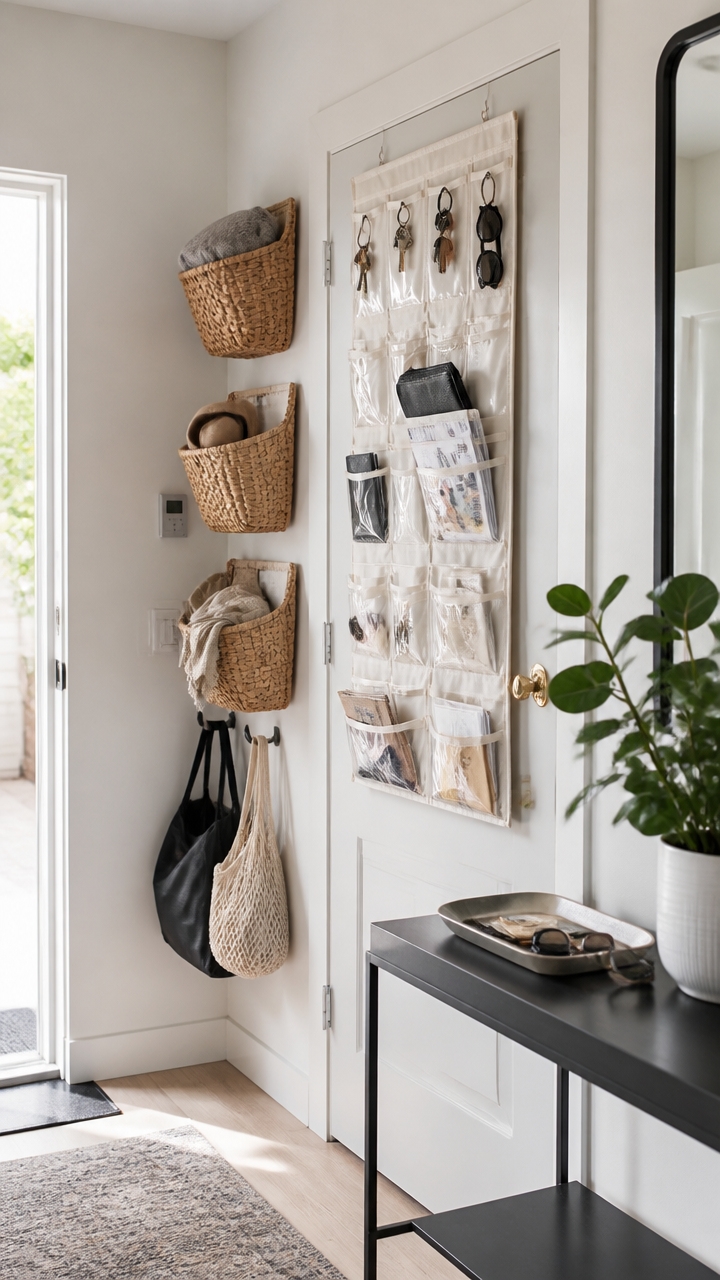
Installing over-the-door organizers and hanging baskets is a smart way to maximize vertical storage in a compact craft room. These solutions hang directly on the door frame or behind the door, making use of often overlooked space and keeping your supplies within easy reach. Over-the-door racks can hold a variety of small items like ribbons, wrapping paper, or tools, while hanging baskets are ideal for storing scissors, paintbrushes, and embellishments.
Because these organizers sit behind or on the door, they help declutter countertops and free up valuable surface area, especially beneficial in small craft rooms with limited wall or shelf space. Clear, labeled baskets or pockets can be added to facilitate quick identification of supplies, maintaining a neat and organized look. When choosing organizers, consider proportion and material to make sure they fit your door and match your craft space’s style. Placing frequently used items in these hanging storage solutions makes your workflow more efficient and reduces the time spent searching for materials, making your crafting experience smoother and more enjoyable.
Label Everything Clearly for Easy Access and Less Clutter
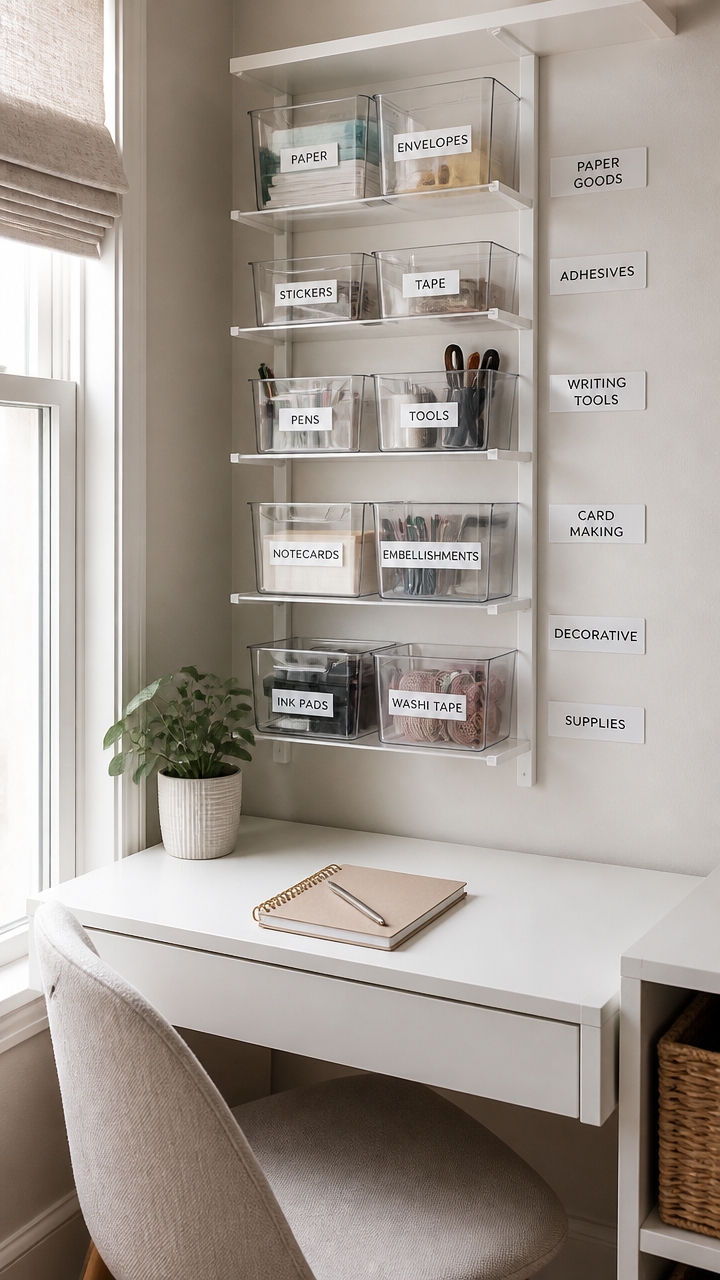
Using clear, waterproof labels on all your craft storage containers is essential for maintaining an organized space. Labels ensure that you can quickly identify contents at a glance, reducing the time spent searching and increasing your craft time. Applying labels to boxes, jars, and drawers helps keep everything visible and accessible, even if supplies move around. Incorporate labeled categories such as “Paints,” “Ribbon,” and “Stickers” to further streamline your process, making it easy to find what you need for each project. To avoid committing immediately, use painter’s tape and a permanent marker for temporary labels, you can test different arrangements before finalizing your labeling system. Consistency is key, so choose a style, such as color-coded or printed labels, and stick with it across all storage solutions. Regularly updating labels to reflect new supplies or reorganized categories keeps your space clear and functional, guaranteeing that your supplies are always easy to locate and your workspace remains clutter-free.
Use Rotating or Rolling Cabinets for Flexible Storage
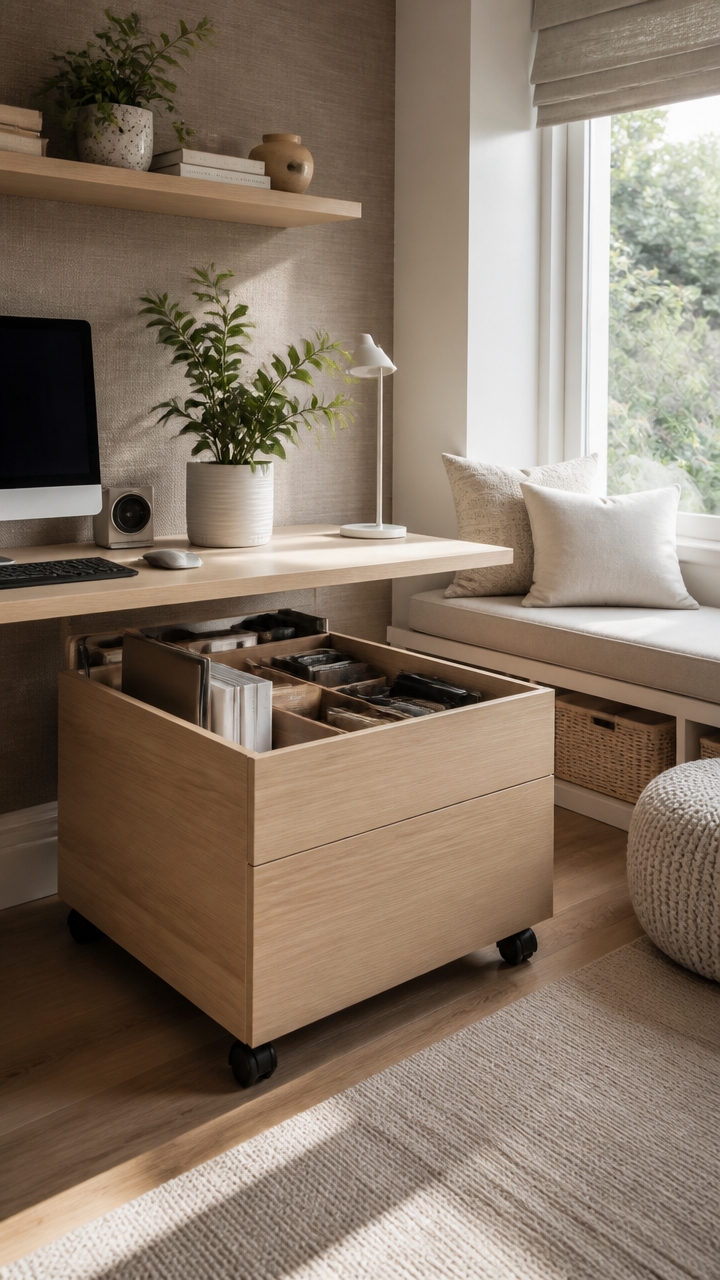
Rolling cabinets with lockable wheels offer a versatile solution for small craft rooms, allowing you to adapt your space to changing project needs. These mobile units can be easily moved to different areas, creating flexible storage options that optimize your available space. Multi-drawer rolling units are especially effective, as they maximize vertical space while providing quick access to supplies and tools. Cabinets equipped with pull-out trays or adjustable shelves further enhance customization, letting you tailor the storage to your specific materials. By positioning rolling cabinets to create designated zones for different crafts, you can improve workflow and reduce clutter. Additionally, they can be tucked into tight corners or even used as room dividers, making the most of limited space without sacrificing functionality. Lockable wheels guarantee stability when needed, so your supplies stay secure during use or transit.
Optimize Small Spaces With Multi-Functional Storage Furniture
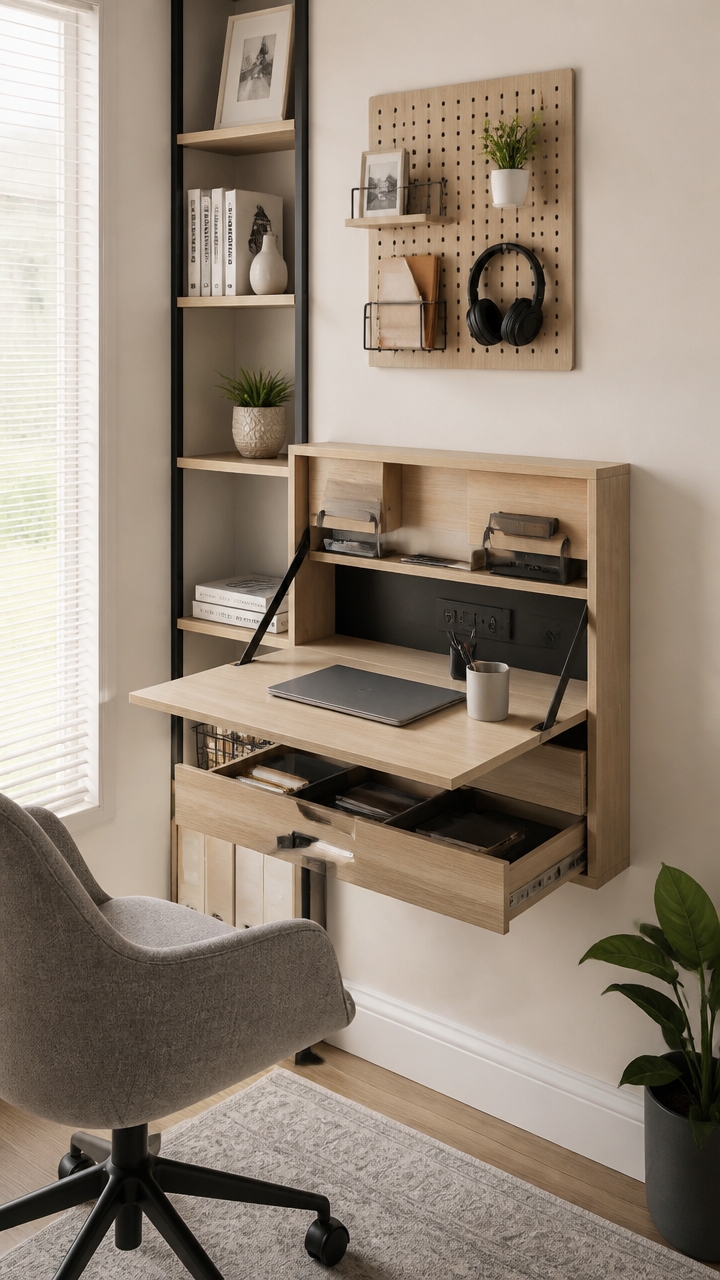
In a compact craft room, every square inch counts. Incorporating multi-functional furniture such as storage ottomans or fold-out desks allows you to maximize your available space without sacrificing functionality. A storage ottoman can serve as seating, a footrest, and a hidden storage compartment for supplies like fabric, yarn, or tools. Its versatility helps keep clutter out of sight, freeing up more workspace. Fold-out desks are another excellent option, seamlessly transforming from a wall-mounted surface into a dedicated crafting area when needed. These desks often include built-in shelves or drawers, providing a convenient place to organize materials while eliminating the need for additional furniture. When selecting multi-purpose pieces, consider proportions to fit your space comfortably and materials that match your decor style. Using furniture with hidden compartments or pull-out storage further enhances organization by concealing supplies and maintaining a tidy appearance. Overall, integrating multi-functional storage furniture into your craft space ensures an efficient, clutter-free environment that adapts to your needs.
Use Cost-Effective Storage Solutions From Dollar Stores and Thrift Shops
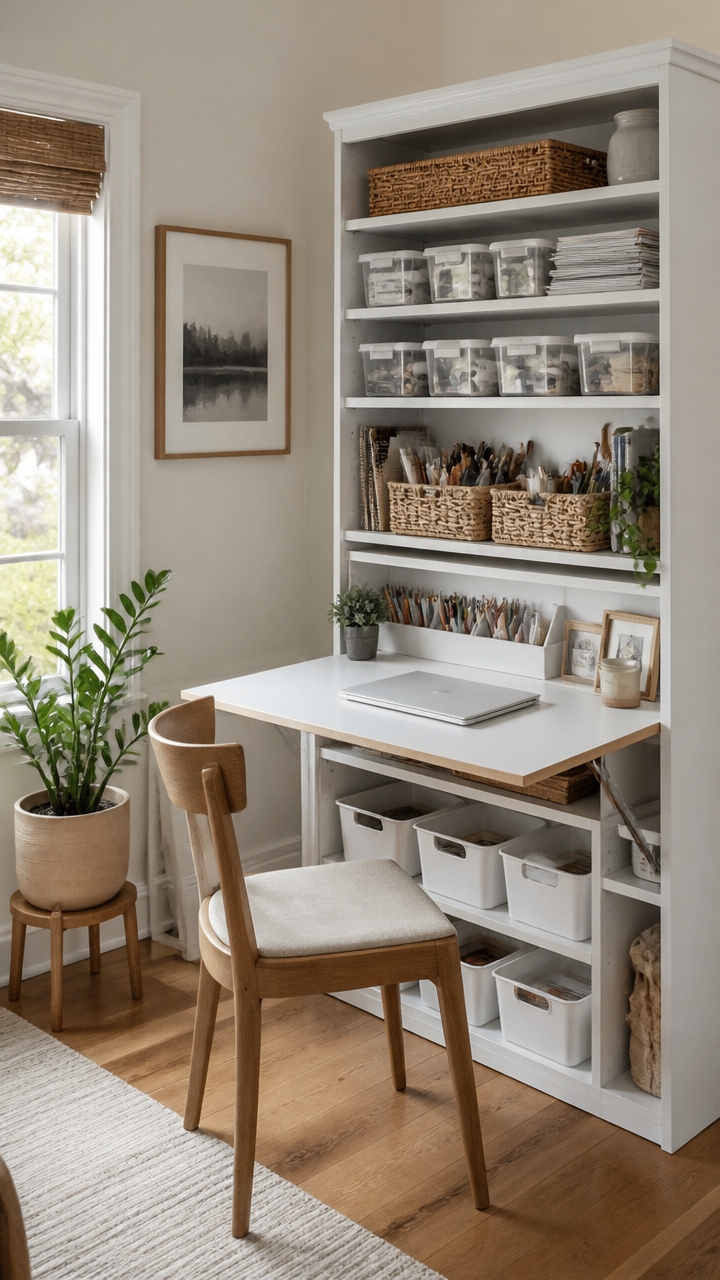
Maximizing storage on a budget is achievable by exploring dollar stores and thrift shops for affordable, versatile options. Plastic bins, baskets, and trays from dollar stores are perfect for grouping craft supplies like beads, paints, and fabric scraps. These containers come in various sizes and can be stacked or nested for efficient use of vertical space. Drawer dividers and portable caddy organizers from dollar stores help keep small items sorted and within arm’s reach, especially in limited spaces or on worktables.
Thrift shops are treasure troves for repurposable items that can serve as unique storage solutions. Glass jars and vintage tins are excellent for storing buttons, ribbons, or smaller embellishments while adding character to your craft area. Small cabinets or shelving units found secondhand can be painted or decorated to match your decor, offering both storage and a personalized touch.
Create a Workflow-Friendly Craft Area for Smooth Projects
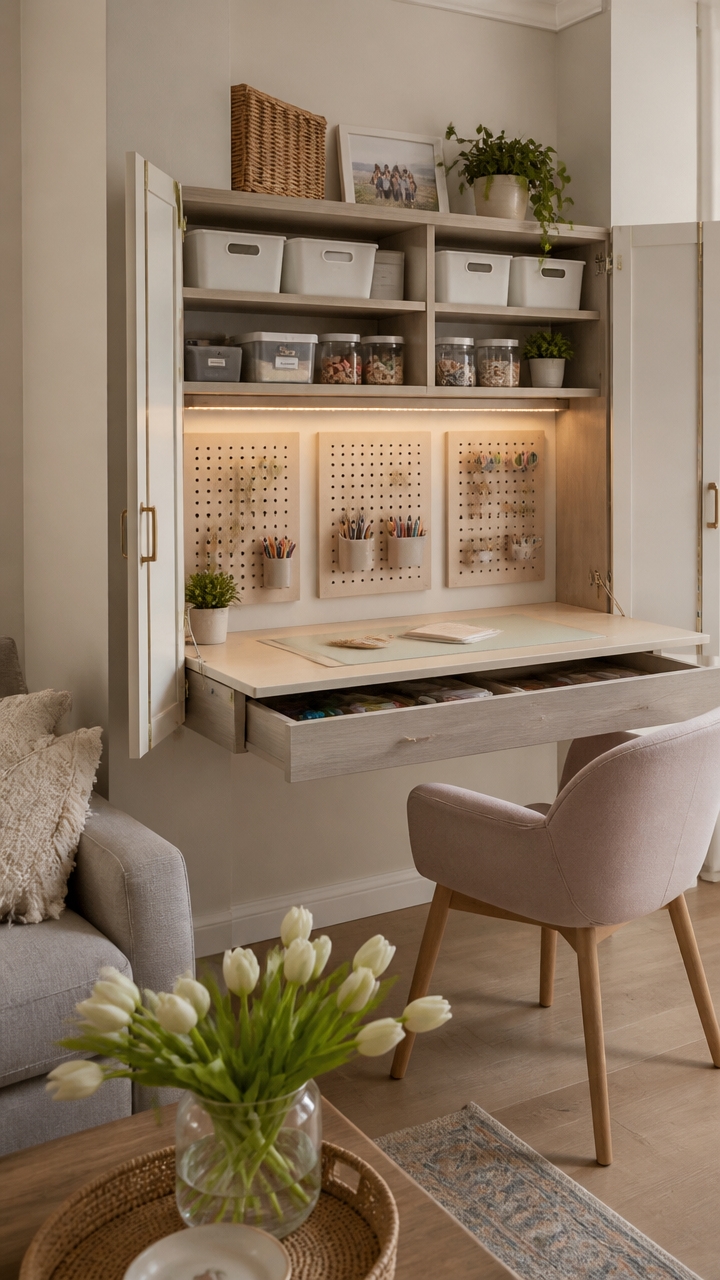
Designating separate zones for cutting, assembling, and finishing projects helps create a logical flow that makes crafting more efficient. Start by positioning your cutting station near a window or good lighting to guarantee precise work. Once your materials are cut, move them seamlessly to the assembly area, which should be close enough to avoid unnecessary movement but separated enough to avoid clutter overlap. Finish each project in a dedicated space for finishing touches, like painting or embellishing. Using clear partitions or low shelves to delineate each zone helps keep tools and supplies organized within each area, reducing the need to search for items mid-project. Incorporate storage bins labeled with specific tasks or contents near each station to keep everything tidy and accessible. Arranging these zones in a logical progression maximizes workflow, minimizes disruptions, and keeps your craft space functional and inviting.
Design a ‘Projects in Progress’ Zone to Keep Your Crafts Organized
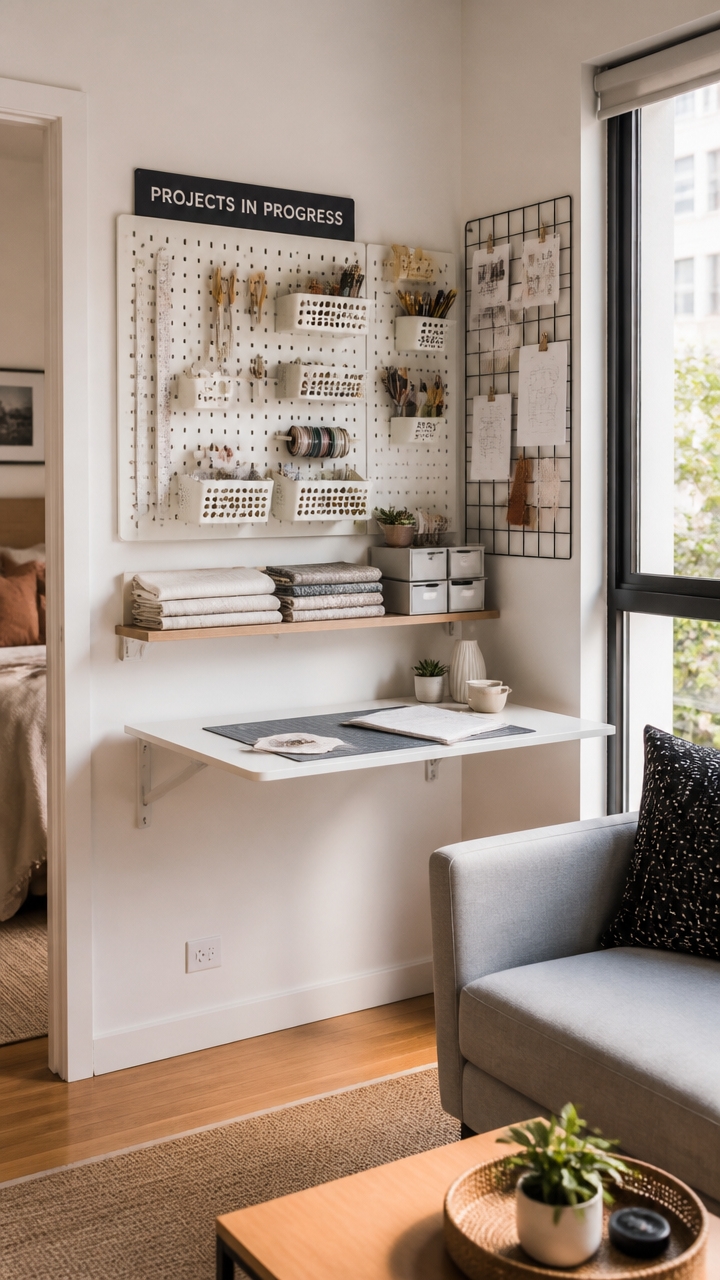
Creating a dedicated “Projects in Progress” area helps keep your workspace tidy and efficient. Set aside a specific spot, such as a shelf, corner of a table, or a small cart, where unfinished projects can be stored together. Use labeled containers, clipboards, or pocket organizers within this zone to track each project’s stage, which prevents mix-ups and helps prioritize your next steps. Incorporate a portable caddy or rolling cart that can move with you around your space, ensuring your ongoing projects stay contained yet accessible. Regularly review this zone to tidy up and assess what needs finishing or resupplying, preventing clutter from piling up. For added organization, use clear bins or drawer inserts to separate different craft types like sewing, painting, or paper crafts, making it quick to grab the right supplies and visually track your progress. This dedicated space simplifies your workflow and encourages consistent progress on your creative projects.
Use Decorative Storage to Turn Clutter Into Wall Art
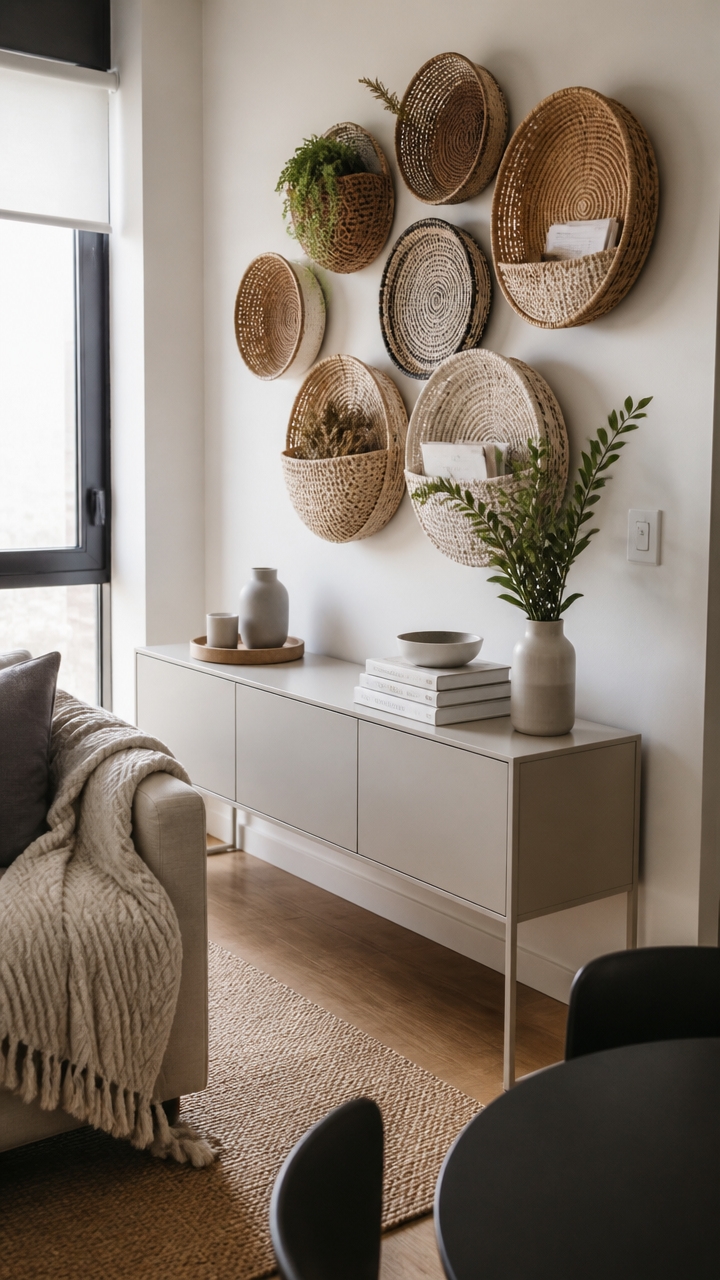
Transforming your craft supplies into stylish wall displays can considerably enhance both organization and aesthetics in a small craft space. Vintage tins, colorful jars, or decorative containers can be mounted directly onto the wall to serve as functional art pieces. For example, repurpose charming tins by attaching brackets or hooks to their sides and hanging them in an eye-catching pattern. These containers provide easy access to supplies like buttons, beads, or ribbons while adding vintage charm to your space.
Woven baskets or decorative bins can be arranged on open shelves, serving dual purposes as attractive decor and practical storage for larger craft tools, fabrics, or papers. Hang smaller wall-mounted containers, such as patterned paper folders or fabric pockets, to organize smaller essentials like scissors, glue sticks, or stickers. These can be secured directly to the wall with adhesive hooks or mounted using simple hardware, keeping your workspace neat and visually appealing.
Decorative shadow boxes or picture frames filled with craft supplies or finished projects make personalized wall art that also keeps materials close at hand. For example, arrange color-coordinated craft items behind glass or within divided compartments of a shadow box, turning your storage into a display that sparks inspiration. By thoughtfully combining function with decorative appeal, wall-mounted storage solutions transform clutter into creative visual interest, maximizing your small space’s style and efficiency.
Maintain Your Organization With Regular Purges and Reassessments
Regularly purging and reassessing your craft space is key to maintaining an organized environment. Set aside time every few months, whether quarterly or biannually, to review your supplies. During these sessions, sort items into categories: keep, donate, or trash. Discard expired or unusable supplies, and donate materials that no longer align with your current projects but are still in good condition. This routine prevents clutter buildup and guarantees you’re always working with relevant, functional supplies. Adjust your storage systems if needed, making them more accessible and efficient based on what you use most. A consistent “keep, donate, trash” approach keeps your craft area feeling fresh, manageable, and inspiring, making it easier to immerse yourself in creative projects without unnecessary distraction.
Simplify Storage With Tips for Sorting and Efficient Use of Space
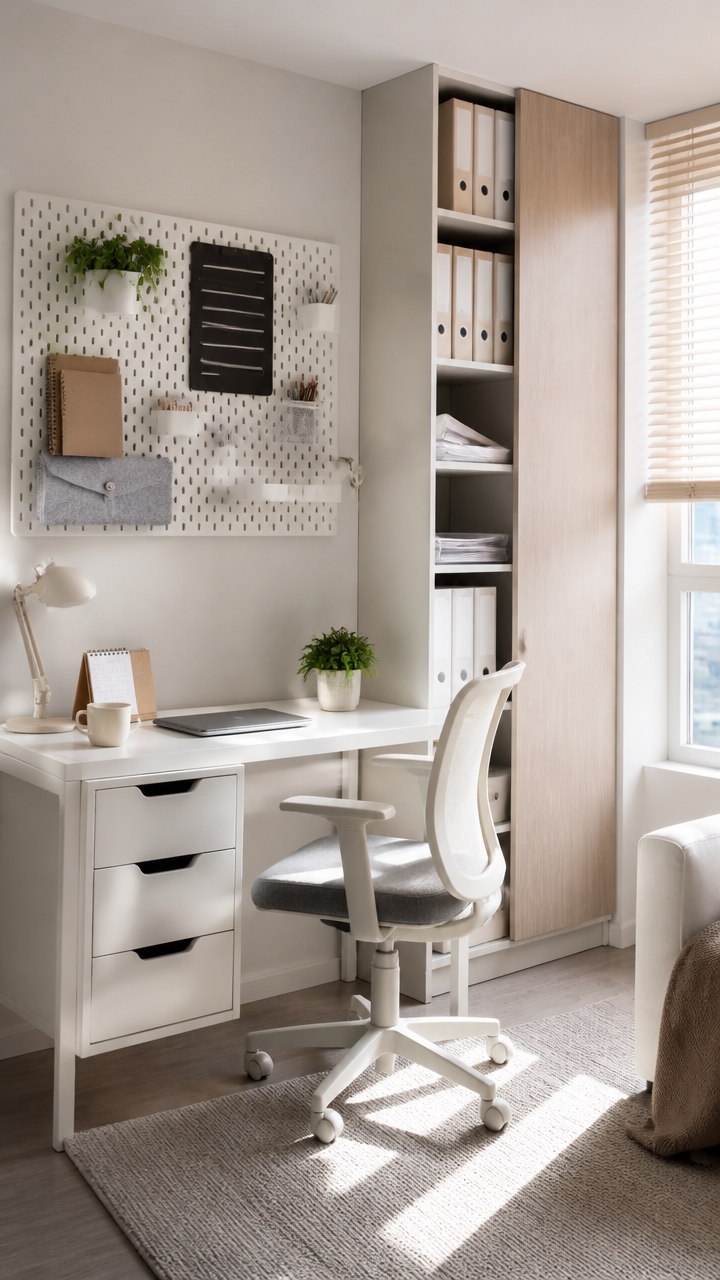
Sorting supplies into categories such as paints, stickers, and tools is essential for maintaining an organized craft space. By grouping similar items together, you create a logical system that makes it easier to find what you need quickly. Use label-makers or adhesive labels on bins and shelves to clearly identify each category, which reduces search time and frustration. Assign specific zones for different types of supplies, like a painting corner or a sticker station, to keep your workspace tidy and efficient. Incorporating vertical storage solutions like wall-mounted bins or tiered shelves maximizes limited space and keeps clutter off your work surfaces. Regularly reviewing and decluttering your supplies by removing unused or bulky items frees up valuable space for essentials, making your craft area more functional and inviting.
Add Personal Touches and Good Lighting to Make Your Craft Space Shine
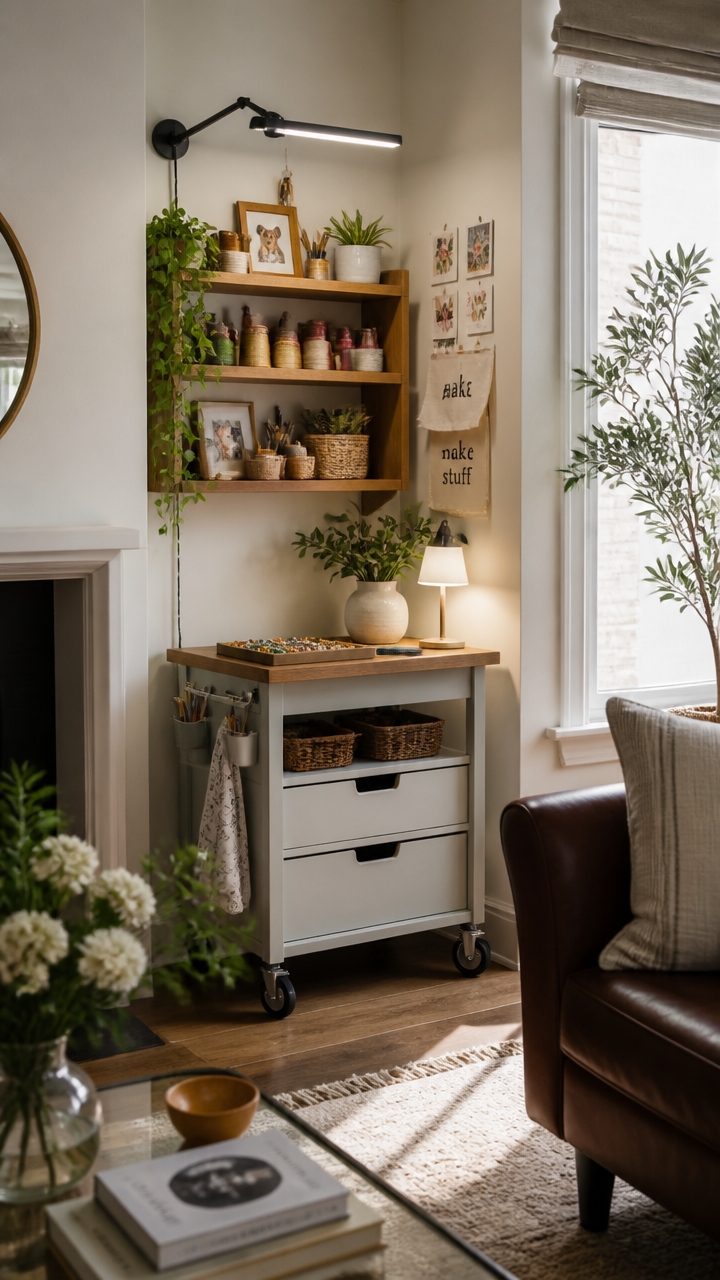
Incorporating personal decor elements such as inspirational artwork or framed photos can transform your craft space into a motivating and inviting environment. Choose pieces that inspire your creativity or bring positive energy, and arrange them where they are easily visible as you work. These personal touches not only make the space feel more welcoming but also encourage you to spend more time dedicating to your crafts.
Good lighting is essential for a productive craft space. Install adjustable LED task lights to provide focused illumination for detailed work, ensuring you can customize brightness levels based on your needs. Natural light streams through windows, creating a lively and energizing atmosphere while helping prevent eye strain. To add warmth and a cozy ambiance, consider decorative lamps or string lights that complement your decor style. Reflective surfaces, like a small mirror or metallic accents, can also help disperse light throughout the space, making it feel larger and more open. Combining personal decor with versatile lighting options creates an inspiring environment perfect for crafting and organizing efficiently.
Final Takeaways
In your cozy craft cocoon, be it a closet, basement, or niche, the potential to transform chaos into a curated atelier is truly boundless; by employing smart joinery, choosing a harmonious colourway inspired by Farrow & Ball’s “Tutin,” and integrating bespoke storage solutions from Container Store, you’ll find that your space evolves into an aesthetic haven where every bijoux and tool finds its rightful place, making tidiness not just a goal but an effortless inevitability.

- 20 Small Sewing Room Ideas Space Saving That Actually Work - September 22, 2026
- 21 Small Space Tv Stand Ideas Designers Swear By - September 22, 2026
- 23 Small Craft Space Ideas For a More Organized Home - September 22, 2026